Creating an OpenCart online store using Terraform
To create an OpenCart online store using Terraform:
If you no longer need the resources you created, delete them.
Get your cloud ready
Sign up for Yandex Cloud and create a billing account:
- Navigate to the management console and log in to Yandex Cloud or create a new account.
- On the Yandex Cloud Billing page, make sure you have a billing account linked and it has the
ACTIVEorTRIAL_ACTIVEstatus. If you do not have a billing account, create one and link a cloud to it.
If you have an active billing account, you can create or select a folder for your infrastructure on the cloud page.
Learn more about clouds and folders here.
Required paid resources
- VM instance: use of computing resources, storage, public IP address, and OS (see Compute Cloud pricing).
- Managed Service for MySQL® cluster if created for DBMS support and maintenance: computing resources allocated to hosts, storage and backup size (see Managed Service for MySQL® pricing).
- Public IP addresses if public access is enabled for cluster hosts (see Virtual Private Cloud pricing).
Create an infrastructure
With Terraform, you can quickly create a cloud infrastructure in Yandex Cloud and manage it using configuration files. These files store the infrastructure description written in HashiCorp Configuration Language (HCL). If you change the configuration files, Terraform automatically detects which part of your configuration is already deployed, and what should be added or removed.
Terraform is distributed under the Business Source License. The Yandex Cloud provider for Terraform is distributed under the MPL-2.0 license.
For more information about the provider resources, see the guides on the Terraform website or its mirror.
To set up your OpenCart online store with Terraform:
-
Install Terraform, get the authentication credentials, and specify the source for installing the Yandex Cloud provider (see Configure your provider, step 1).
-
Prepare your infrastructure description files:
Ready-made configurationCreating files manually-
Clone the repository with configuration files:
git clone https://github.com/yandex-cloud-examples/yc-opencart-store.git -
Navigate to the repository directory. It should now contain the following files:
opencart.tf: New infrastructure configuration.opencart.auto.tfvars: User data file.
-
Create a configuration file folder.
-
In the folder, create:
-
opencart.tfconfiguration file:opencart.tf
# Declaring variables for confidential parameters variable "folder_id" { type = string } variable "vm_user" { type = string } variable "ssh_key_path" { type = string } variable "db_user" { type = string } variable "db_password" { type = string sensitive = true } # Adding other variables locals { network_name = "network-1" subnet_name1 = "subnet-1" subnet_name2 = "subnet-2" sg_db_name = "opencart-sg" sg_vm_name = "opencart-sg-vm" vm_name = "opencart" cluster_name = "opencart" db_name = "db1" } # Configuring a provider terraform { required_providers { yandex = { source = "yandex-cloud/yandex" version = ">= 0.47.0" } } } provider "yandex" { folder_id = var.folder_id } # Creating a cloud network resource "yandex_vpc_network" "network-1" { name = local.network_name } # Creating subnets resource "yandex_vpc_subnet" "subnet-1" { name = local.subnet_name1 zone = "ru-central1-a" network_id = yandex_vpc_network.network-1.id v4_cidr_blocks = ["192.168.1.0/24"] } resource "yandex_vpc_subnet" "subnet-2" { name = local.subnet_name2 zone = "ru-central1-b" network_id = yandex_vpc_network.network-1.id v4_cidr_blocks = ["192.168.2.0/24"] } # Creating security groups resource "yandex_vpc_security_group" "opencart-sg" { name = local.sg_db_name network_id = yandex_vpc_network.network-1.id egress { protocol = "ANY" description = "any" v4_cidr_blocks = ["0.0.0.0/0"] } ingress { protocol = "TCP" description = "ext-https" v4_cidr_blocks = ["0.0.0.0/0"] port = 3306 } } resource "yandex_vpc_security_group" "opencart-sg-vm" { name = local.sg_vm_name network_id = yandex_vpc_network.network-1.id egress { protocol = "ANY" description = "any" v4_cidr_blocks = ["0.0.0.0/0"] from_port = 0 to_port = 65535 } ingress { description = "HTTP" protocol = "TCP" v4_cidr_blocks = ["0.0.0.0/0"] port = 80 } ingress { protocol = "TCP" description = "ssh" v4_cidr_blocks = ["0.0.0.0/0"] port = 22 } ingress { protocol = "TCP" description = "ext-https" v4_cidr_blocks = ["0.0.0.0/0"] port = 443 } } # Specifying a prebuilt VM image resource "yandex_compute_image" "opencart-image" { source_family = "opencart" } # Creating a VM instance resource "yandex_compute_instance" "opencart" { name = "opencart" platform_id = "standard-v3" zone = "ru-central1-a" resources { core_fraction = 20 cores = 2 memory = 4 } boot_disk { initialize_params { image_id = yandex_compute_image.opencart-image.id type = "network-ssd" size = "13" } } network_interface { subnet_id = yandex_vpc_subnet.subnet-1.id security_group_ids = [yandex_vpc_security_group.opencart-sg-vm.id] nat = true } metadata = { user-data = "#cloud-config\nusers:\n - name: ${var.vm_user}\n groups: sudo\n shell: /bin/bash\n sudo: ['ALL=(ALL) NOPASSWD:ALL']\n ssh_authorized_keys:\n - ${file("${var.ssh_key_path}")}" } } # Creating a cluster MySQL® # If you do not need a cluster, delete the code block creating the MySQL® cluster, database, and user resource "yandex_mdb_mysql_cluster" "opencart-mysql" { name = local.cluster_name environment = "PRODUCTION" network_id = yandex_vpc_network.network-1.id version = "8.0" security_group_ids = [yandex_vpc_security_group.opencart-sg.id] resources { resource_preset_id = "s2.micro" disk_type_id = "network-ssd" disk_size = "10" } host { zone = "ru-central1-a" subnet_id = yandex_vpc_subnet.subnet-1.id assign_public_ip = false } host { zone = "ru-central1-b" subnet_id = yandex_vpc_subnet.subnet-2.id assign_public_ip = false } } # Creating a database for MySQL® resource "yandex_mdb_mysql_database" "db1" { cluster_id = yandex_mdb_mysql_cluster.opencart-mysql.id name = local.db_name } # Creating a user for MySQL® resource "yandex_mdb_mysql_user" "user1" { cluster_id = yandex_mdb_mysql_cluster.opencart-mysql.id name = var.db_user password = var.db_password permission { database_name = yandex_mdb_mysql_database.db1.name roles = ["ALL"] } } -
opencart.auto.tfvarsuser data file:opencart.auto.tfvars
folder_id    = "<folder_ID>"
vm_user      = "<VM_user_name>"
ssh_key_path = "<path_to_public_SSH_key>"
db_user      = "<DB_user_name>"
db_password  = "<DB_password>"
-
Learn more about the properties of Terraform resources in the relevant provider guides:
-
-
In the
opencart.auto.tfvarsfile, set the following user-defined properties:folder_id: Folder ID.vm_user: VM user name.ssh_key_path: Path to the public SSH key to authenticate the user on the VM. For more information, see Creating an SSH key pair.db_user: DB username, e.g.,user1.db_password: DB password (8 to 128 characters).
-
Create the resources:
-
In the terminal, navigate to the configuration file directory.
-
Make sure the configuration is correct using this command:
terraform validateIf the configuration is valid, you will get this message:
Success! The configuration is valid. -
Run this command:
terraform planYou will see a list of resources and their properties. No changes will be made at this step. Terraform will show any errors in the configuration.
-
Apply the configuration changes:
terraform apply -
Type
yesand press Enter to confirm the changes.
-
-
Get the public IP address of the VM: you will need it later to configure OpenCart.
Once you created the infrastructure, configure OpenCart.
Configure OpenCart
-
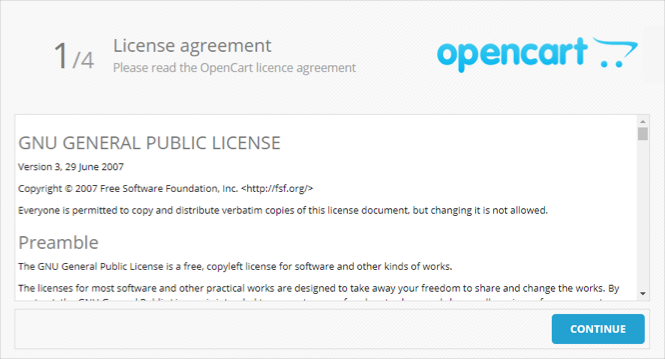
Open the web interface of the OpenCart online store. In the browser, open
http://<VM_public_IP_address>/. The OpenCart settings page opens. -
Read the license and click Continue.
-
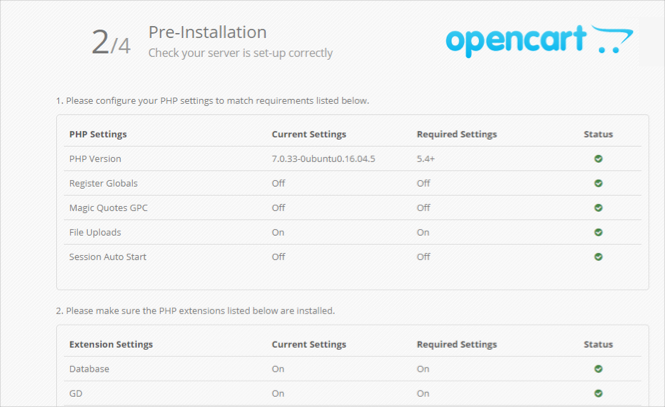
Make sure that all lines with system requirements are marked with green ticks and click Continue.
-
Set up access to the DB:
Local server MySQL®Cluster Managed Service for MySQL®DB connection attributes are generated in a special file when a VM is created:
-
Log in to the created VM via SSH.
-
Switch to
sudo -iadministration mode. -
Open
default_passwords.txtin the admin's home directory:root@opencart:~# cat default_passwords.txt MYSQL_USER=opencart MYSQL_PASS=qDbvN1R6tA6ET MYSQL_ROOT_PASS=5DiVb80l1kXVz MYSQL_DB=opencart -
On the OpenCart setup page, in the DB section, enter the relevant data:
- Username:
MYSQL_USERvariable value. - Database:
MYSQL_DBvariable value. - Password:
MYSQL_PASSvariable value.
Leave the other fields unchanged.
- Username:
If you are using a Managed Service for MySQL® cluster, enter the required cluster attributes:
- Hostname: Enter the fully qualified domain name (FQDN) of the created DB. To find out this name:
- Open the folder page in the management console in a new browser tab.
- Go to the Managed Service for MySQL® section.
- Select the cluster you created in the table.
- Select the Hosts tab in the left menu.
- Hover over the Hostname field (for example,
rc1c-vok617m35g3dj23i) and copy the database's FQDN by clicking .
- Username: Username (
user1in the example). - Database: DB name (
db1in the example). - Password: User password you specified.
Leave the other fields unchanged.
-
-
Enter the administrator's name, password, and current email address. Then click Continue.

-
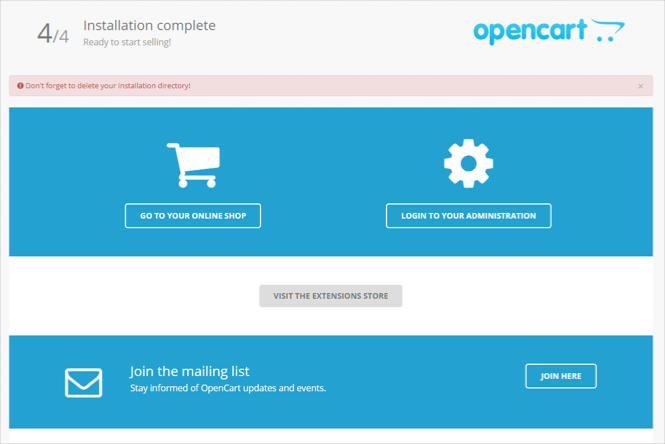
A page will open to notify you that system configuration is complete. To configure the online store, click Login to your administration and enter your admin username and password.
-
When the installation is complete, log in to the VM via SSH and delete the installation files you no longer need:
user@opencart:~$ sudo -i root@opencart:~# rm -rf /var/www/opencart/install/ -
To test the home page, go to
http://<VM_public_IP_address>/. You will see your website home page the way your online store visitors will see it.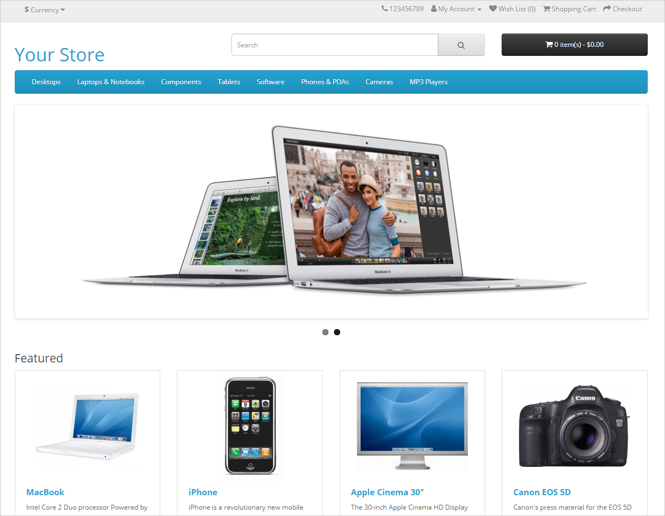
Delete the resources you created
How to delete the resources you created:
-
Open the
opencart.tfconfiguration file and delete your infrastructure description from it. -
Apply the changes:
-
In the terminal, navigate to the configuration file directory.
-
Make sure the configuration is correct using this command:
terraform validateIf the configuration is valid, you will get this message:
Success! The configuration is valid. -
Run this command:
terraform planYou will see a list of resources and their properties. No changes will be made at this step. Terraform will show any errors in the configuration.
-
Apply the configuration changes:
terraform apply -
Type
yesand press Enter to confirm the changes.
-