Row-level security (RLS)

RLS (row-level security) enables you to restrict data access for users or user group within a single dataset. For example, you can introduce data access control for different customers.
Warning
-
When using RLS, restrict access to the connection by using the
Executepermission. This will prevent changes to row access permissions and restrict access to opening the preview window and creating a new dataset based on the connection. -
RLS only supports access control for row values.
-
The RLS limits apply to whole rows, not just the fields used to configure access control.
You can introduce row-level access control either in a dataset or a data source.
Configuring RLS at the dataset level
You can control access to any dataset dimension. Each user or user group can be granted permissions for an unlimited number of measure values.
With RLS, a query to a dataset passes through the following filter:
where dimension in (value_1, value_2 ... value_N)
You can configure access to rows from the interface or set the configuration in JSON format:
-
Open the dataset and go to the Fields tab.
-
For the field you need to configure access to, click or → Access permissions.
-
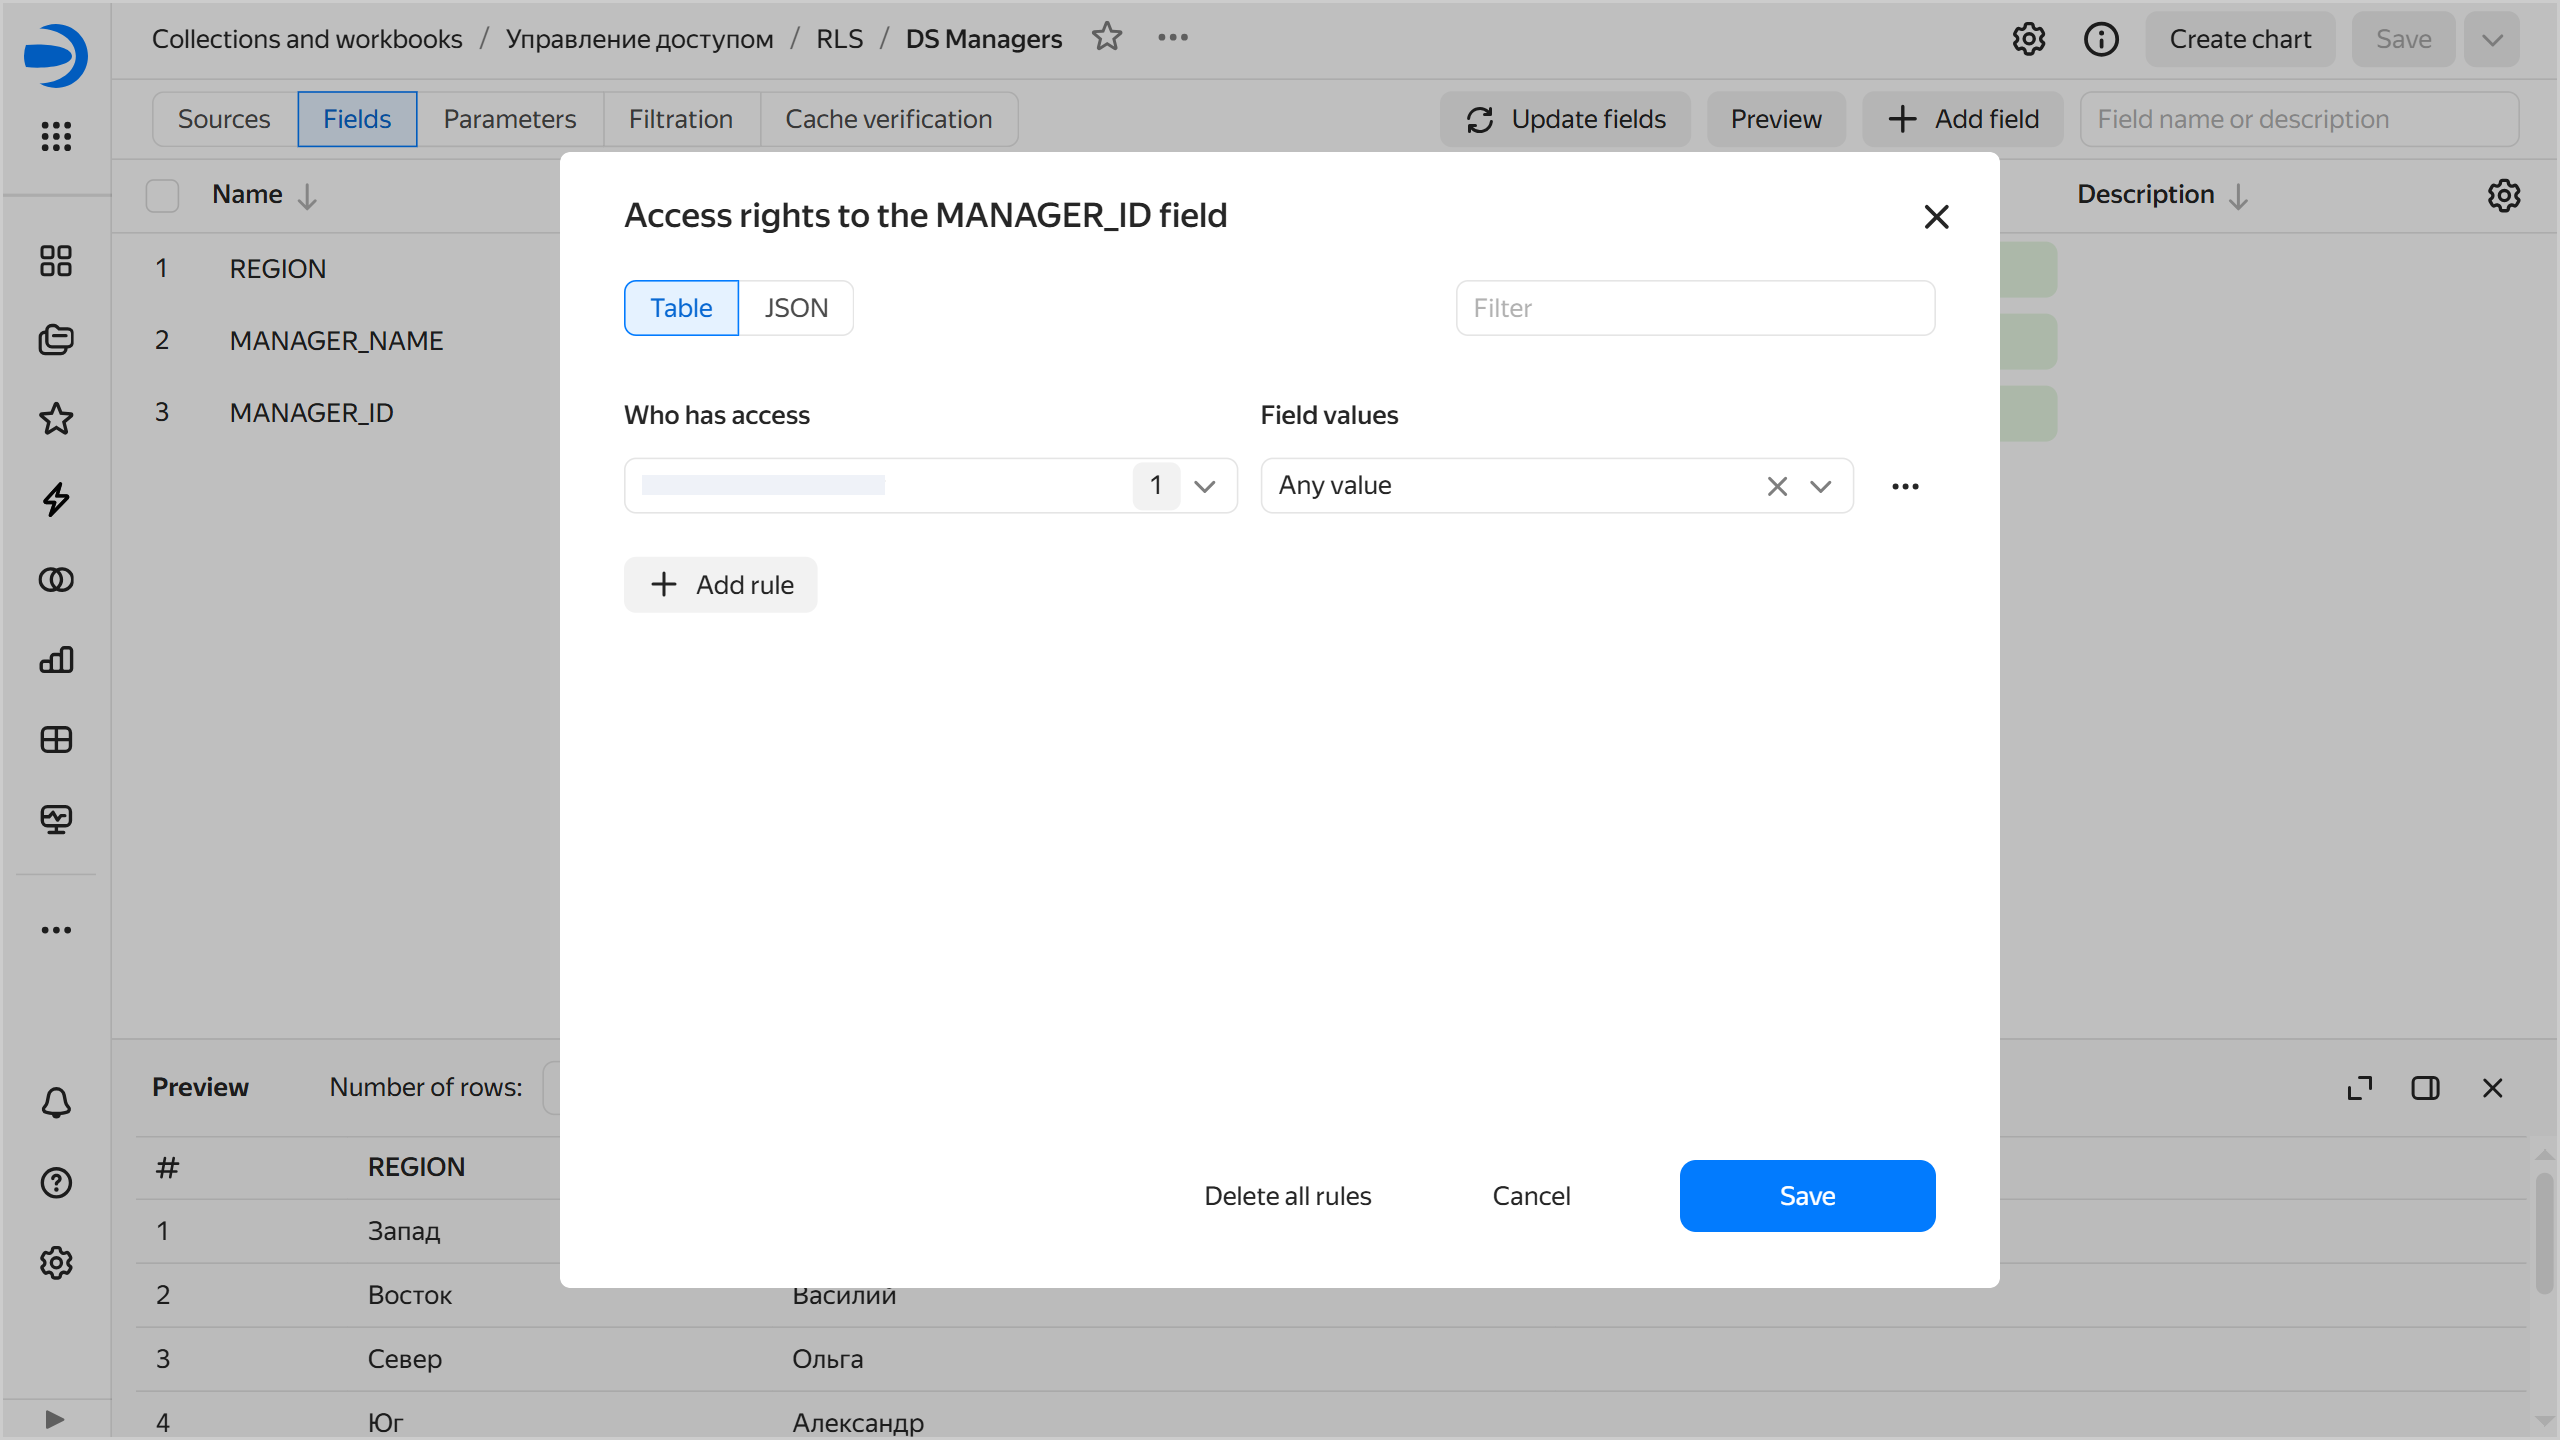
In the window that opens, on the Table tab, click Add rule and specify:
-
Who gets the access:
Users and groups: Grant access to the specified users and groups. You can use search by name, login, or email.All users: Grant access to all users.User IDs: Control access at data source level.
-
Field value. Grant access to all rows with the specified field value.
Configuring RLS
-
-
To add another rule, repeat the previous step.
-
Click Save.
-
Save the dataset.
-
Open the dataset and go to the Fields tab.
-
For the field you need to configure access to, click or → Access permissions.
-
In the window that opens, set the RLS configuration in JSON format on the JSON tab:
[
  {
    "allowed_value": "sp-21",
    "pattern_type": "value",
    "subject": {
      "subject_id": "ssxiy********",
      "subject_name": "user:ssxiy********",
      "subject_type": "user"
    }
  }
]
Where:
-
allowed_value: Grant access to all rows with specified field value. You need to specify the value only ifpattern_typeis set tovalue; otherwise, it takes thenullvalue. -
pattern_type: How to grant the access:value: For the specific field value from theallowed_valuefield.all: For any field values. In this case,allowed_valuemust benull.userid: Control access at data source level.
-
subject: Description of the subject getting the access:-
subject_id: ID of the user or group to grant access to. Specify*ifsubject_typeis set toallor an empty value if it is set touserid. -
subject_name: Name of the user to grant access to. Specify*ifsubject_typeis set toallor theuseridvalue if it is set touserid. -
subject_type: Who will get the access:user: Grant acces to a specific user. In this case, you need to specify the user ID and username insubject_idandsubject_name, respectively.group: Grant access to a user group. In this case, you need to specify the group ID and group name insubject_idandsubject_name, respectively.all: Grant access to all users. In which case you need to specify*insubject_idandsubject_name.userid: Control access at data source level.
-
You can set multiple rules by describing each one in an object with the specified fields.
-
-
Click Save.
-
Save the dataset.
Configuring RLS at the data source level
Configuring RLS at the dataset level requires editing the datatset every time the RLS settings change.
To avoid this, you can move the row-level security logic to the data source side:
-
Add a new field for storing the DataLens user ID to the source data. All requests to the source will be filtered by this field.
Use this link to look up your ID. If you need another user's ID, ask them to open the link and send you the ID.
-
For each source data row, specify the ID of the DataLens user who should get access to this row. If multiple users must have access to the same row, you can move the access control logic to a separate table and join it to the main table at the dataset level.
-
In the dataset, configure access to the field containing user IDs:
InterfaceJSON-
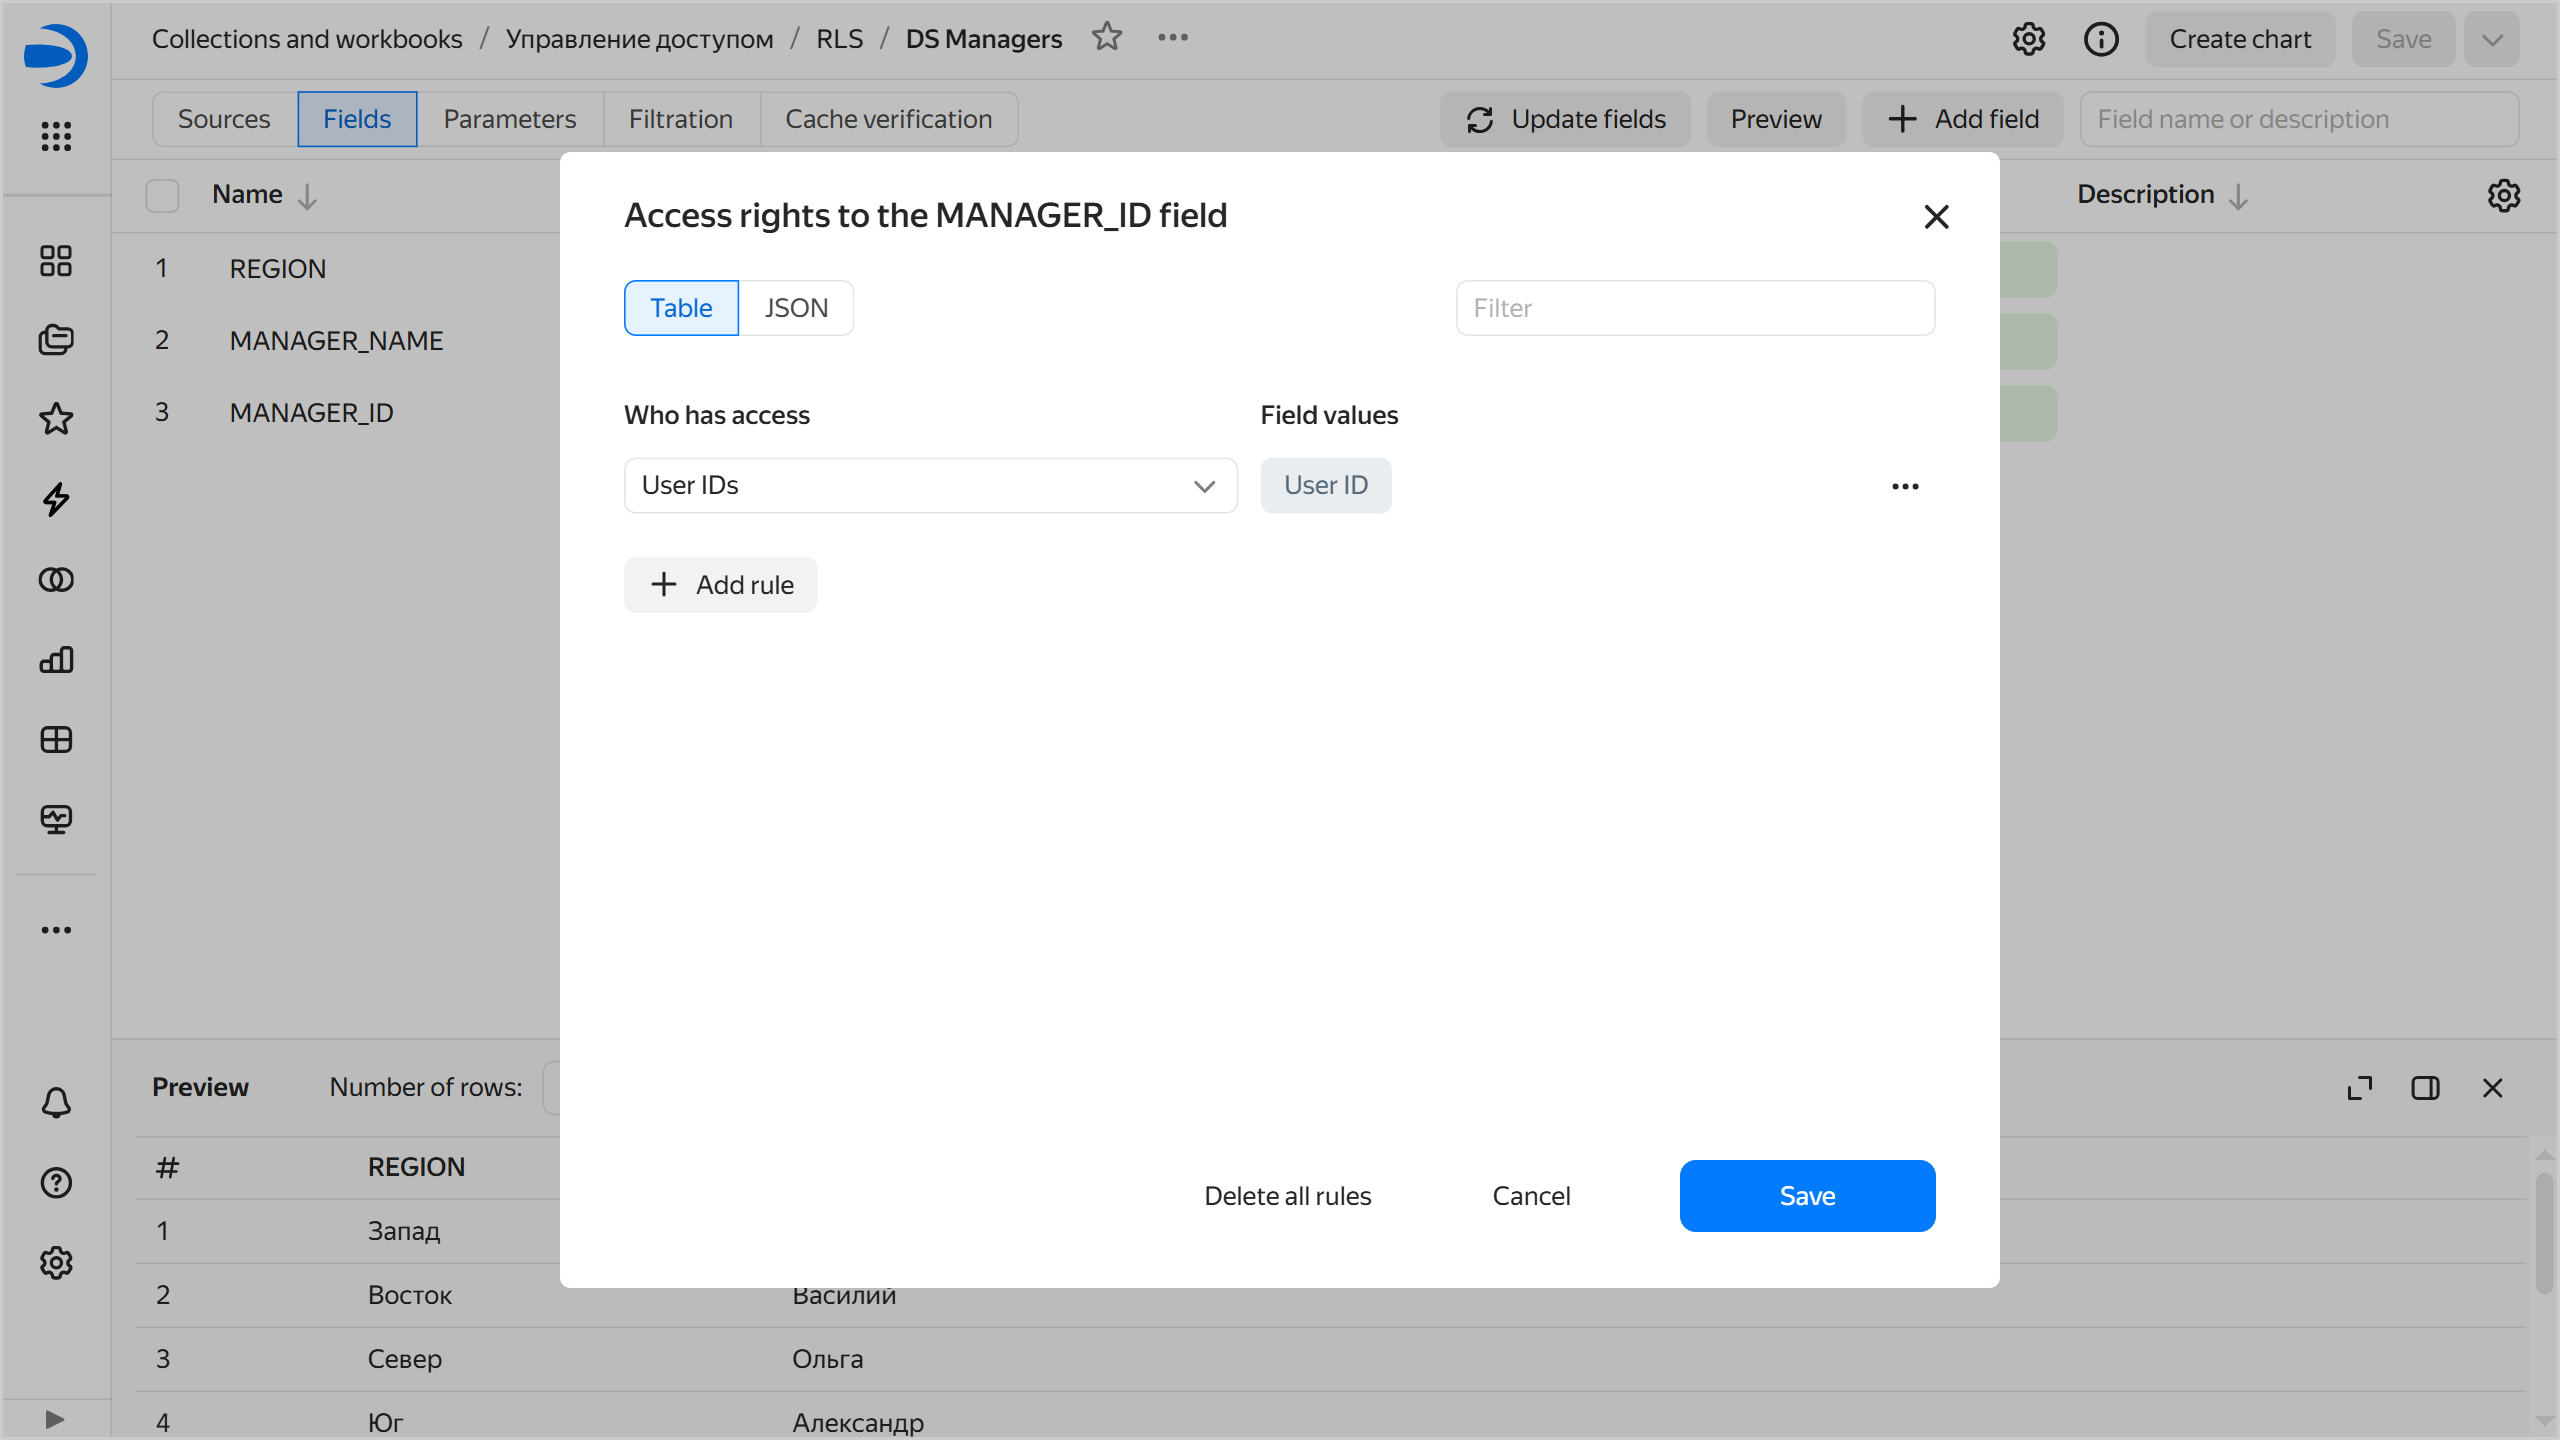
In the RLS settings window, on the Tables tab, click Add rule.
-
Select User IDs for the
Who has accessparameter.Configuring RLS by user ID
-
Click Save.
-
In the RLS configuration window, set the RLS configuration in JSON format on the JSON tab:
[ { "allowed_value": null, "pattern_type": "userid", "subject": { "subject_id": "", "subject_name": "userid", "subject_type": "userid" }, } ] -
Click Save. Access will be granted to users whose IDs are specified in the field.
-
-
Save the dataset.
Note
You can transfer the RLS logic to the source side for sources where the data structure can be changed. In Yandex Metrica and AppMetrica, the data structure is closed, so this method is not available.
How to change permissions to a row in a dataset
To configure access permissions to data rows:
-
Open the dataset.
-
Go to the Fields tab.
-
On the right side of the row, click and select Access permissions.
-
In the window that opens, set the access permissions for the field:
InterfaceJSON-
On the Table tab, click Add rule and specify the users, groups, or
All usersand the field value. For example, to configure user access to all rows with thefirst-companyvalue:- Who has access: Select the user.
- Field values: Enter
first-company.
-
Click Save.
-
On the JSON tab, set the RLS configuration in JSON format. For example, to configure user access to all rows with the
first-companyvalue:[ { "allowed_value": "first-company", "pattern_type": "value", "subject": { "subject_id": "ssxiy********", "subject_name": "user:ssxiy********", "subject_type": "user" } } ] -
Click Save.
-
-
Save the dataset.
-
In the source, add a field with the DataLens user IDs to use for filtering. You can add this field to a new table and join it using the
JOINoperator. -
Add a field with user IDs to the dataset:
- If you added a field to an existing table, go to the Fields tab in the dataset and click Update fields at the top of the screen. The user ID field will appear in the list.
- If you added a field to a new table, join it using the
JOINoperator. To do this, go to the Sources tab in the dataset and drag the new table to the workspace. The table will be automatically linked with the existing table. If required, edit the link between the tables and remove duplicate fields left after the join.
-
Configure field access permissions:
-
In the dataset, go to the Fields tab.
-
Find the field with user IDs. On the right side of the row, click and select Access permissions.
-
In the window that opens, set the access permissions for the field:
InterfaceJSON- In the RLS settings window, on the Tables tab, click Add rule.
- Select User IDs for the
Who has accessparameter. - Click Save. Access will be granted to users whose IDs are specified in the field.
-
In the RLS configuration window, set the RLS configuration in JSON format on the JSON tab:
[ { "allowed_value": null, "pattern_type": "userid", "subject": { "subject_id": "", "subject_name": "userid", "subject_type": "userid" }, } ] -
Click Save. Access will be granted to users whose IDs are specified in the field.
-
-
Save the dataset.
Example
Let's create a dashboard based on sales data by four regions (West, East, North, and South). Regional managers should only have access to their own data, while the company's CEO, to all data.
-
Define DataLens user IDs.
-
In the source, create a table named
MANAGER_ID, where the region is mapped to the user ID. If a single ID is associated with multiple regions, add all unique pairs:REGION MANAGER_NAME MANAGER_ID West Arkady 19287318273912873 East Vassily 92877912837318927 North Olga 02993284928374346 South Dmitry 10836293849237642 West Maxim 71726123712891283 East Maxim 71726123712891283 North Maxim 71726123712891283 South Maxim 71726123712891283 -
Open the dataset and add the new table: on the Sources tab, drag the table to the workspace.
-
Make sure the
JOINis based on theREGIONfield.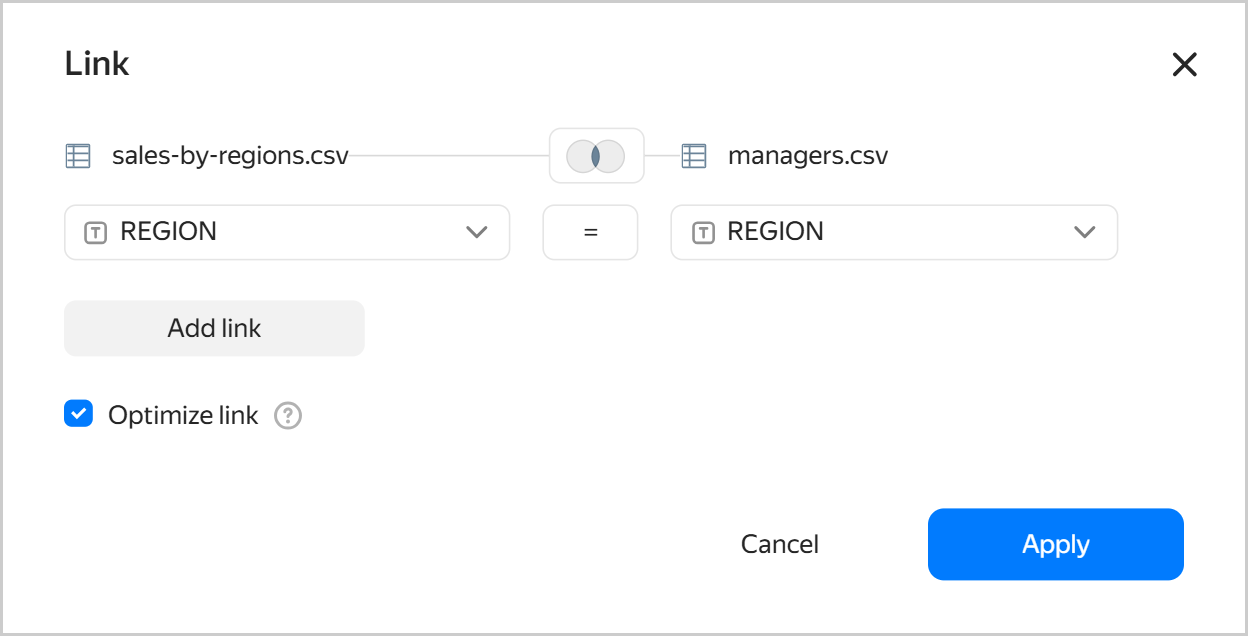
-
Based on the
MANAGER_IDfield, customize RLS.InterfaceJSON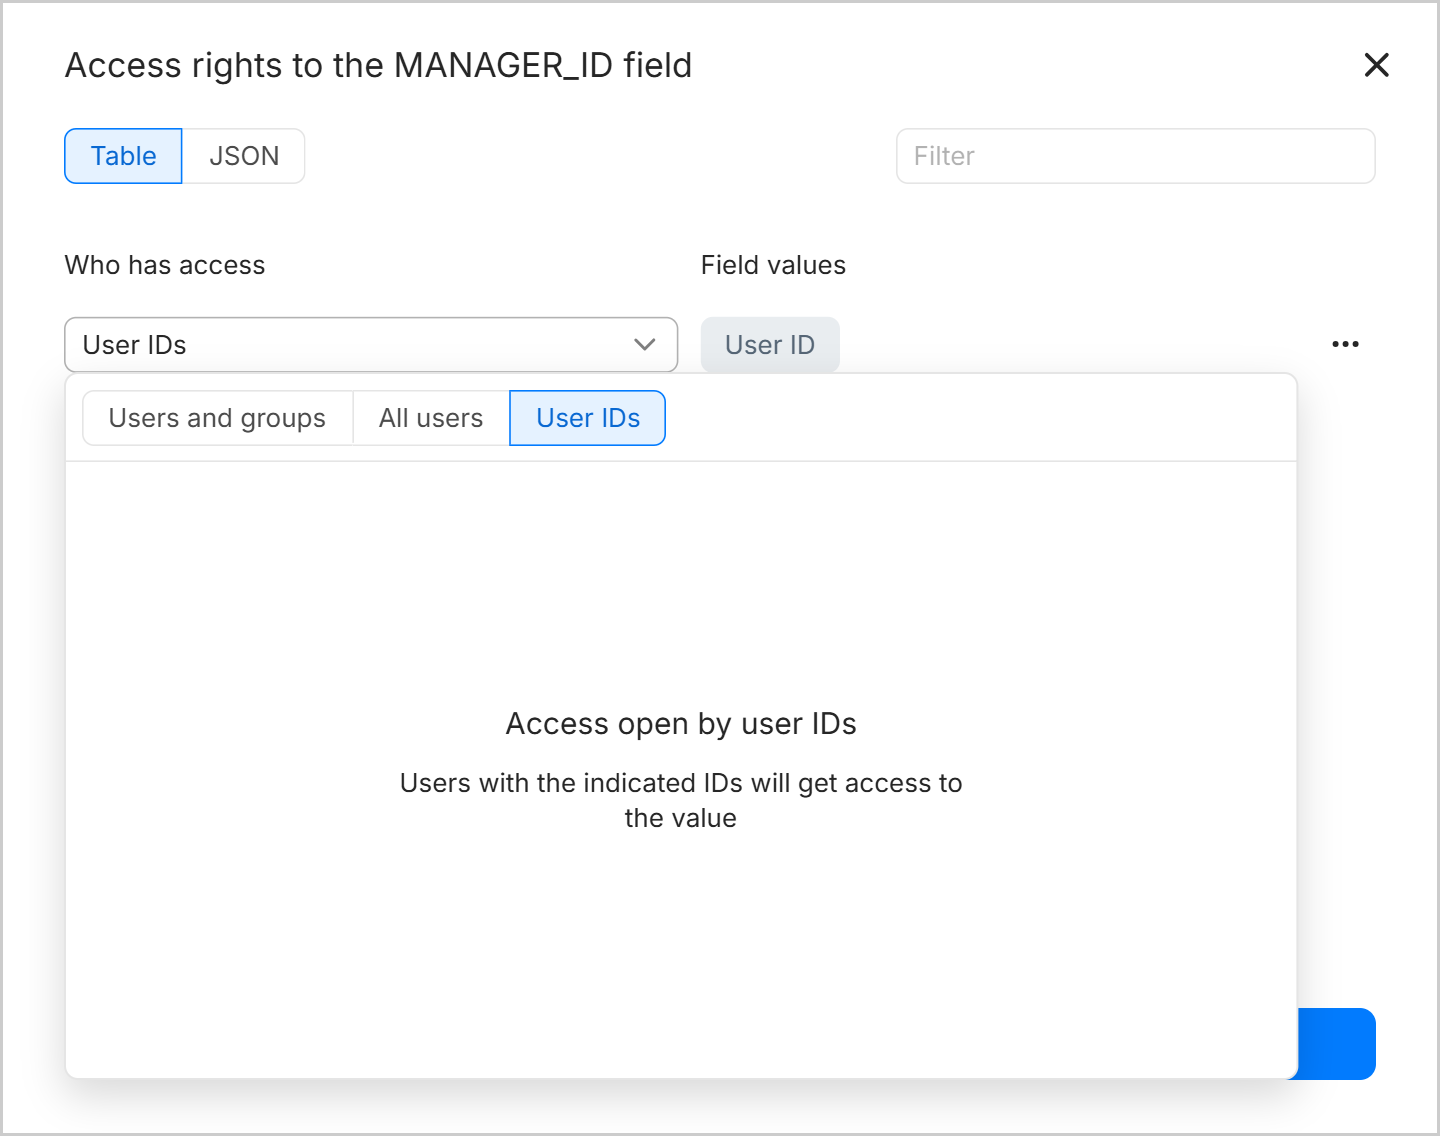
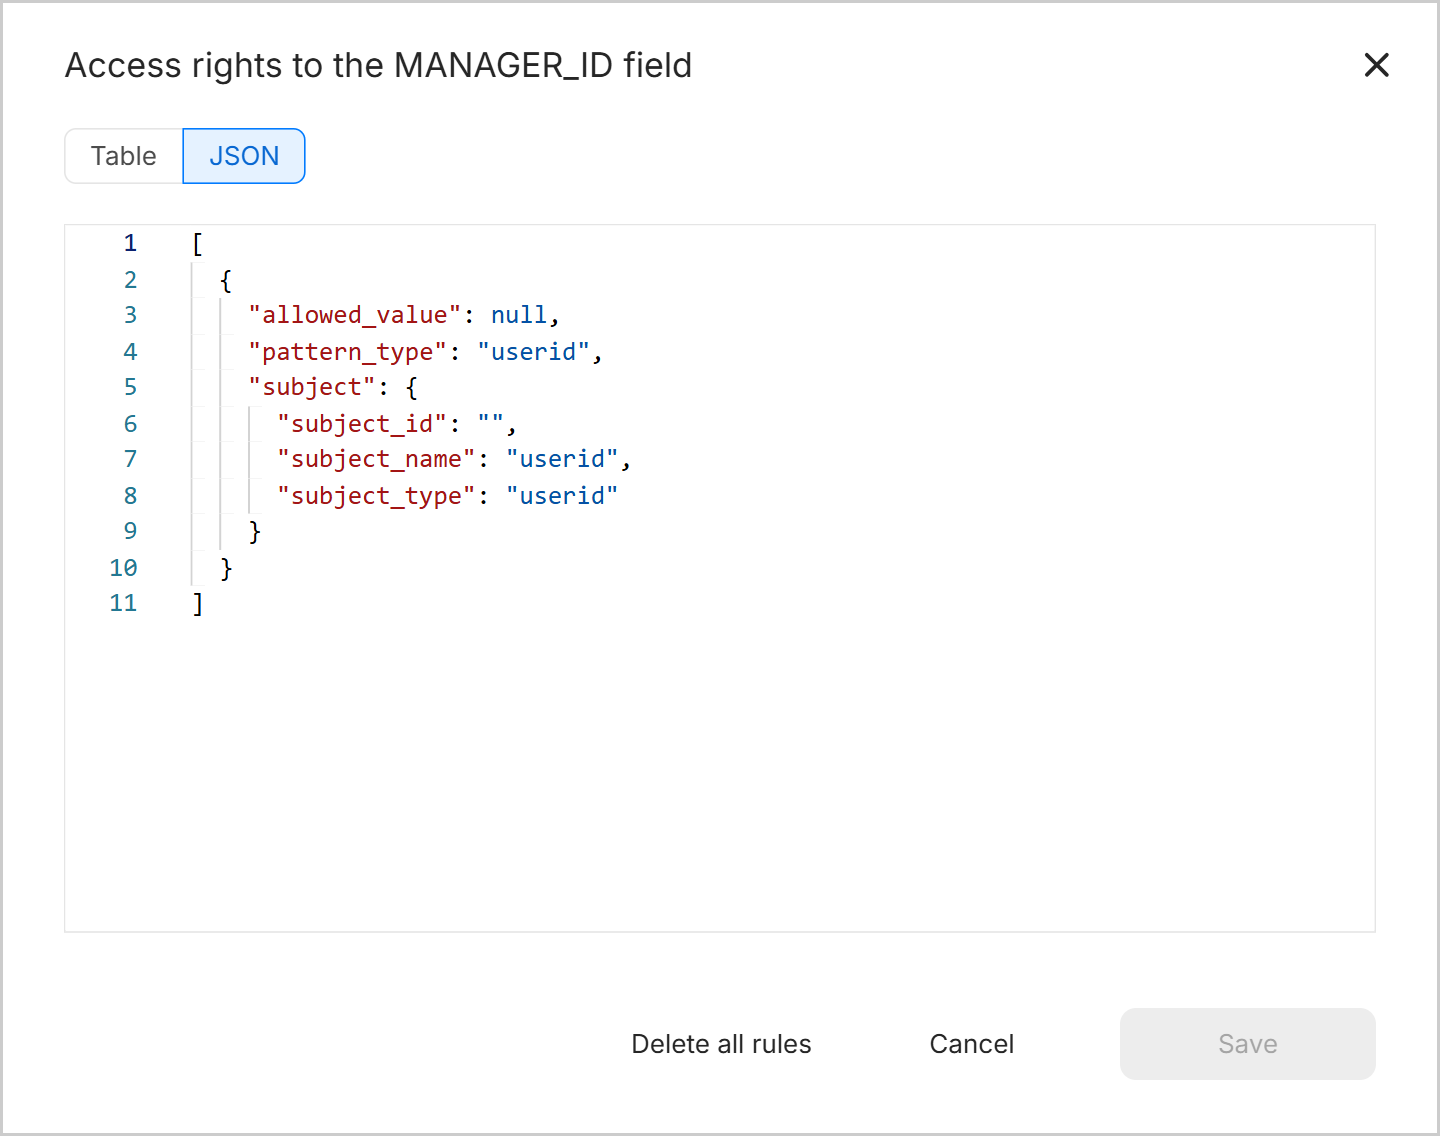
Each user will only see data for regions they have access to.
To change the access permissions, update the data in the source table.