Working with a dataset in Yandex DataLens
In this section, you will learn how to work with a dataset:
- Creating a dataset
- Adding data
- Configuring links
- Creating fields
- Configuring fields
- Performing operations with fields
- Adding parameters
- Adding filters
- Disabling data export
- Configuring access
- Deleting a dataset
Creating a dataset
You can create a new dataset using one of the following methods:
-
Go to the DataLens home page
-
Click Create dataset.
- Go to the page with workbooks and collections
- Open the workbook to create a dataset in.
- In the top-right corner, click Create and select Dataset.
In the left-hand panel, select
Adding data
You can add data to a dataset from tables available in the source or run an SQL query against the source.
Note
You can use SQL queries for database sources only.
-
In the dataset, go to the Sources tab.
-
In the connection panel, click
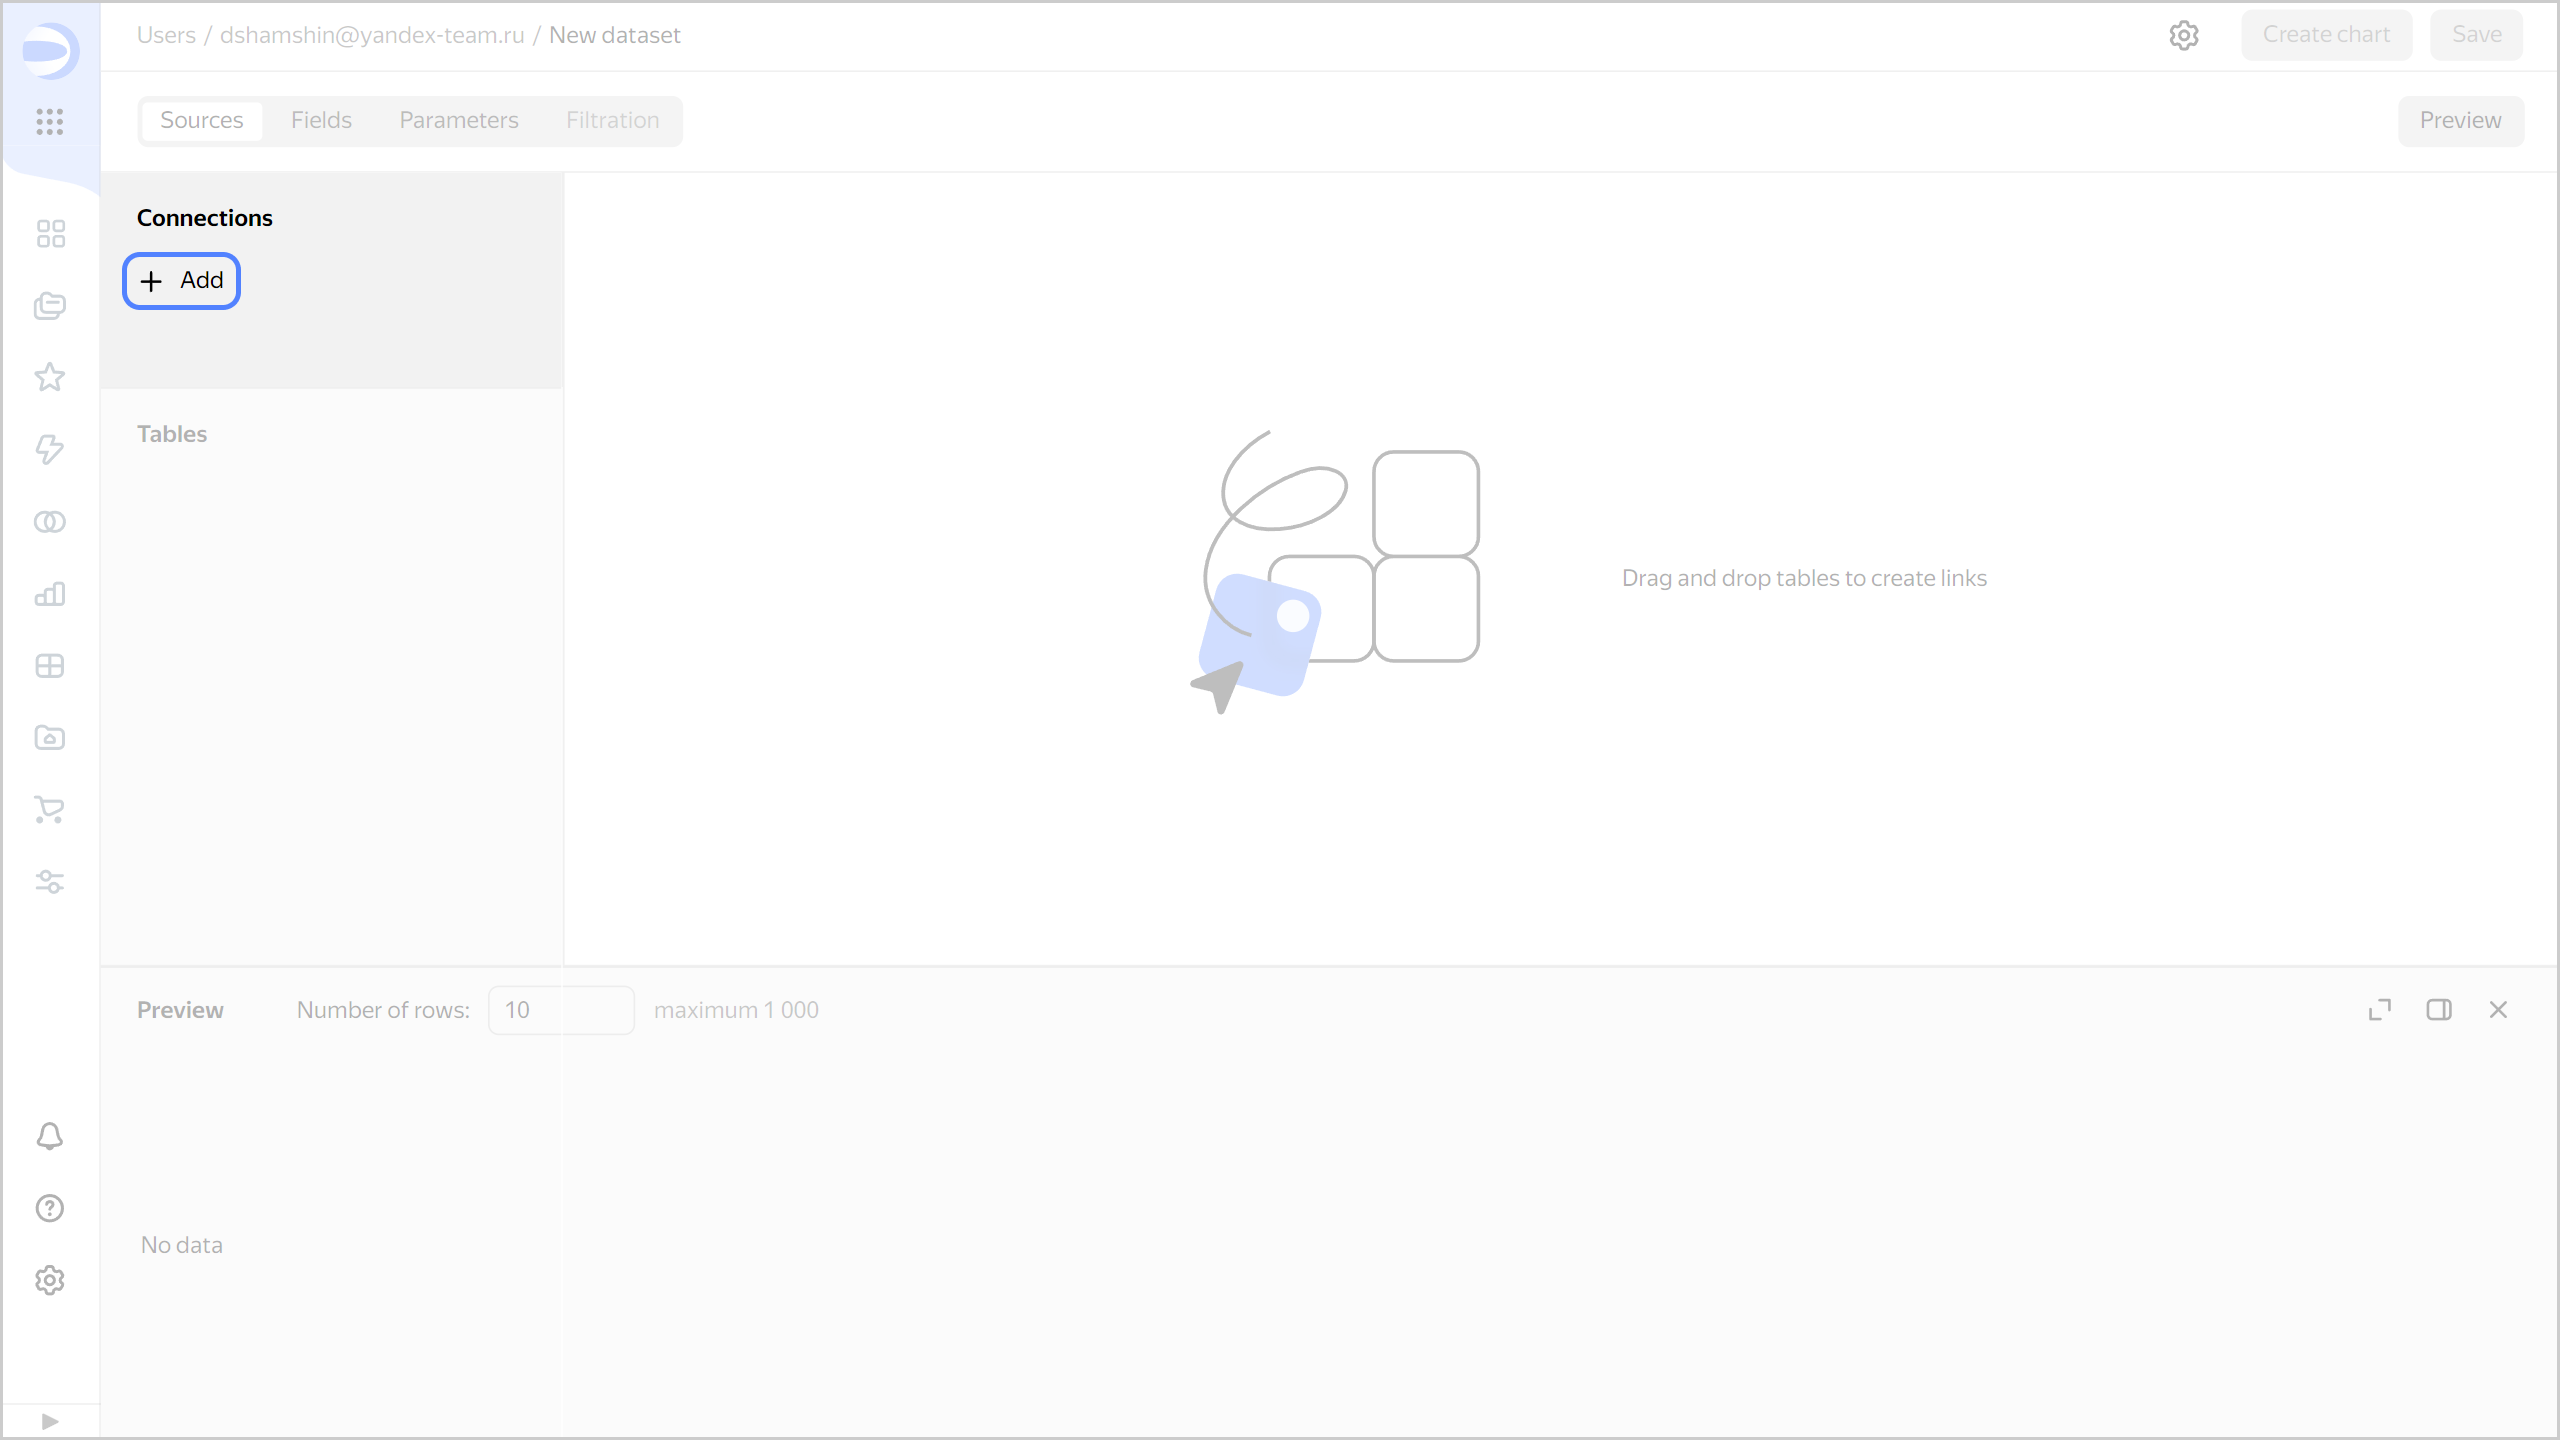
-
Select a data source connection.
-
Add data from the data source:
TableSQL queryDrag the tables you need from the table panel to the workspace. The system will automatically link these tables together based on the first matching field name and data type.
Warning
- The maximum number of tables in a single dataset is 32.
- The maximum number of fields in a single dataset is 1,200.
Note
- To use subqueries as a source, in the connection settings, enable SQL query access level → Allow subqueries in datasets when creating or editing a connection.
- Describing a dataset via a SQL query does not support parameters. However, you can use parameterized queries in QL charts.
-
In the table panel, click
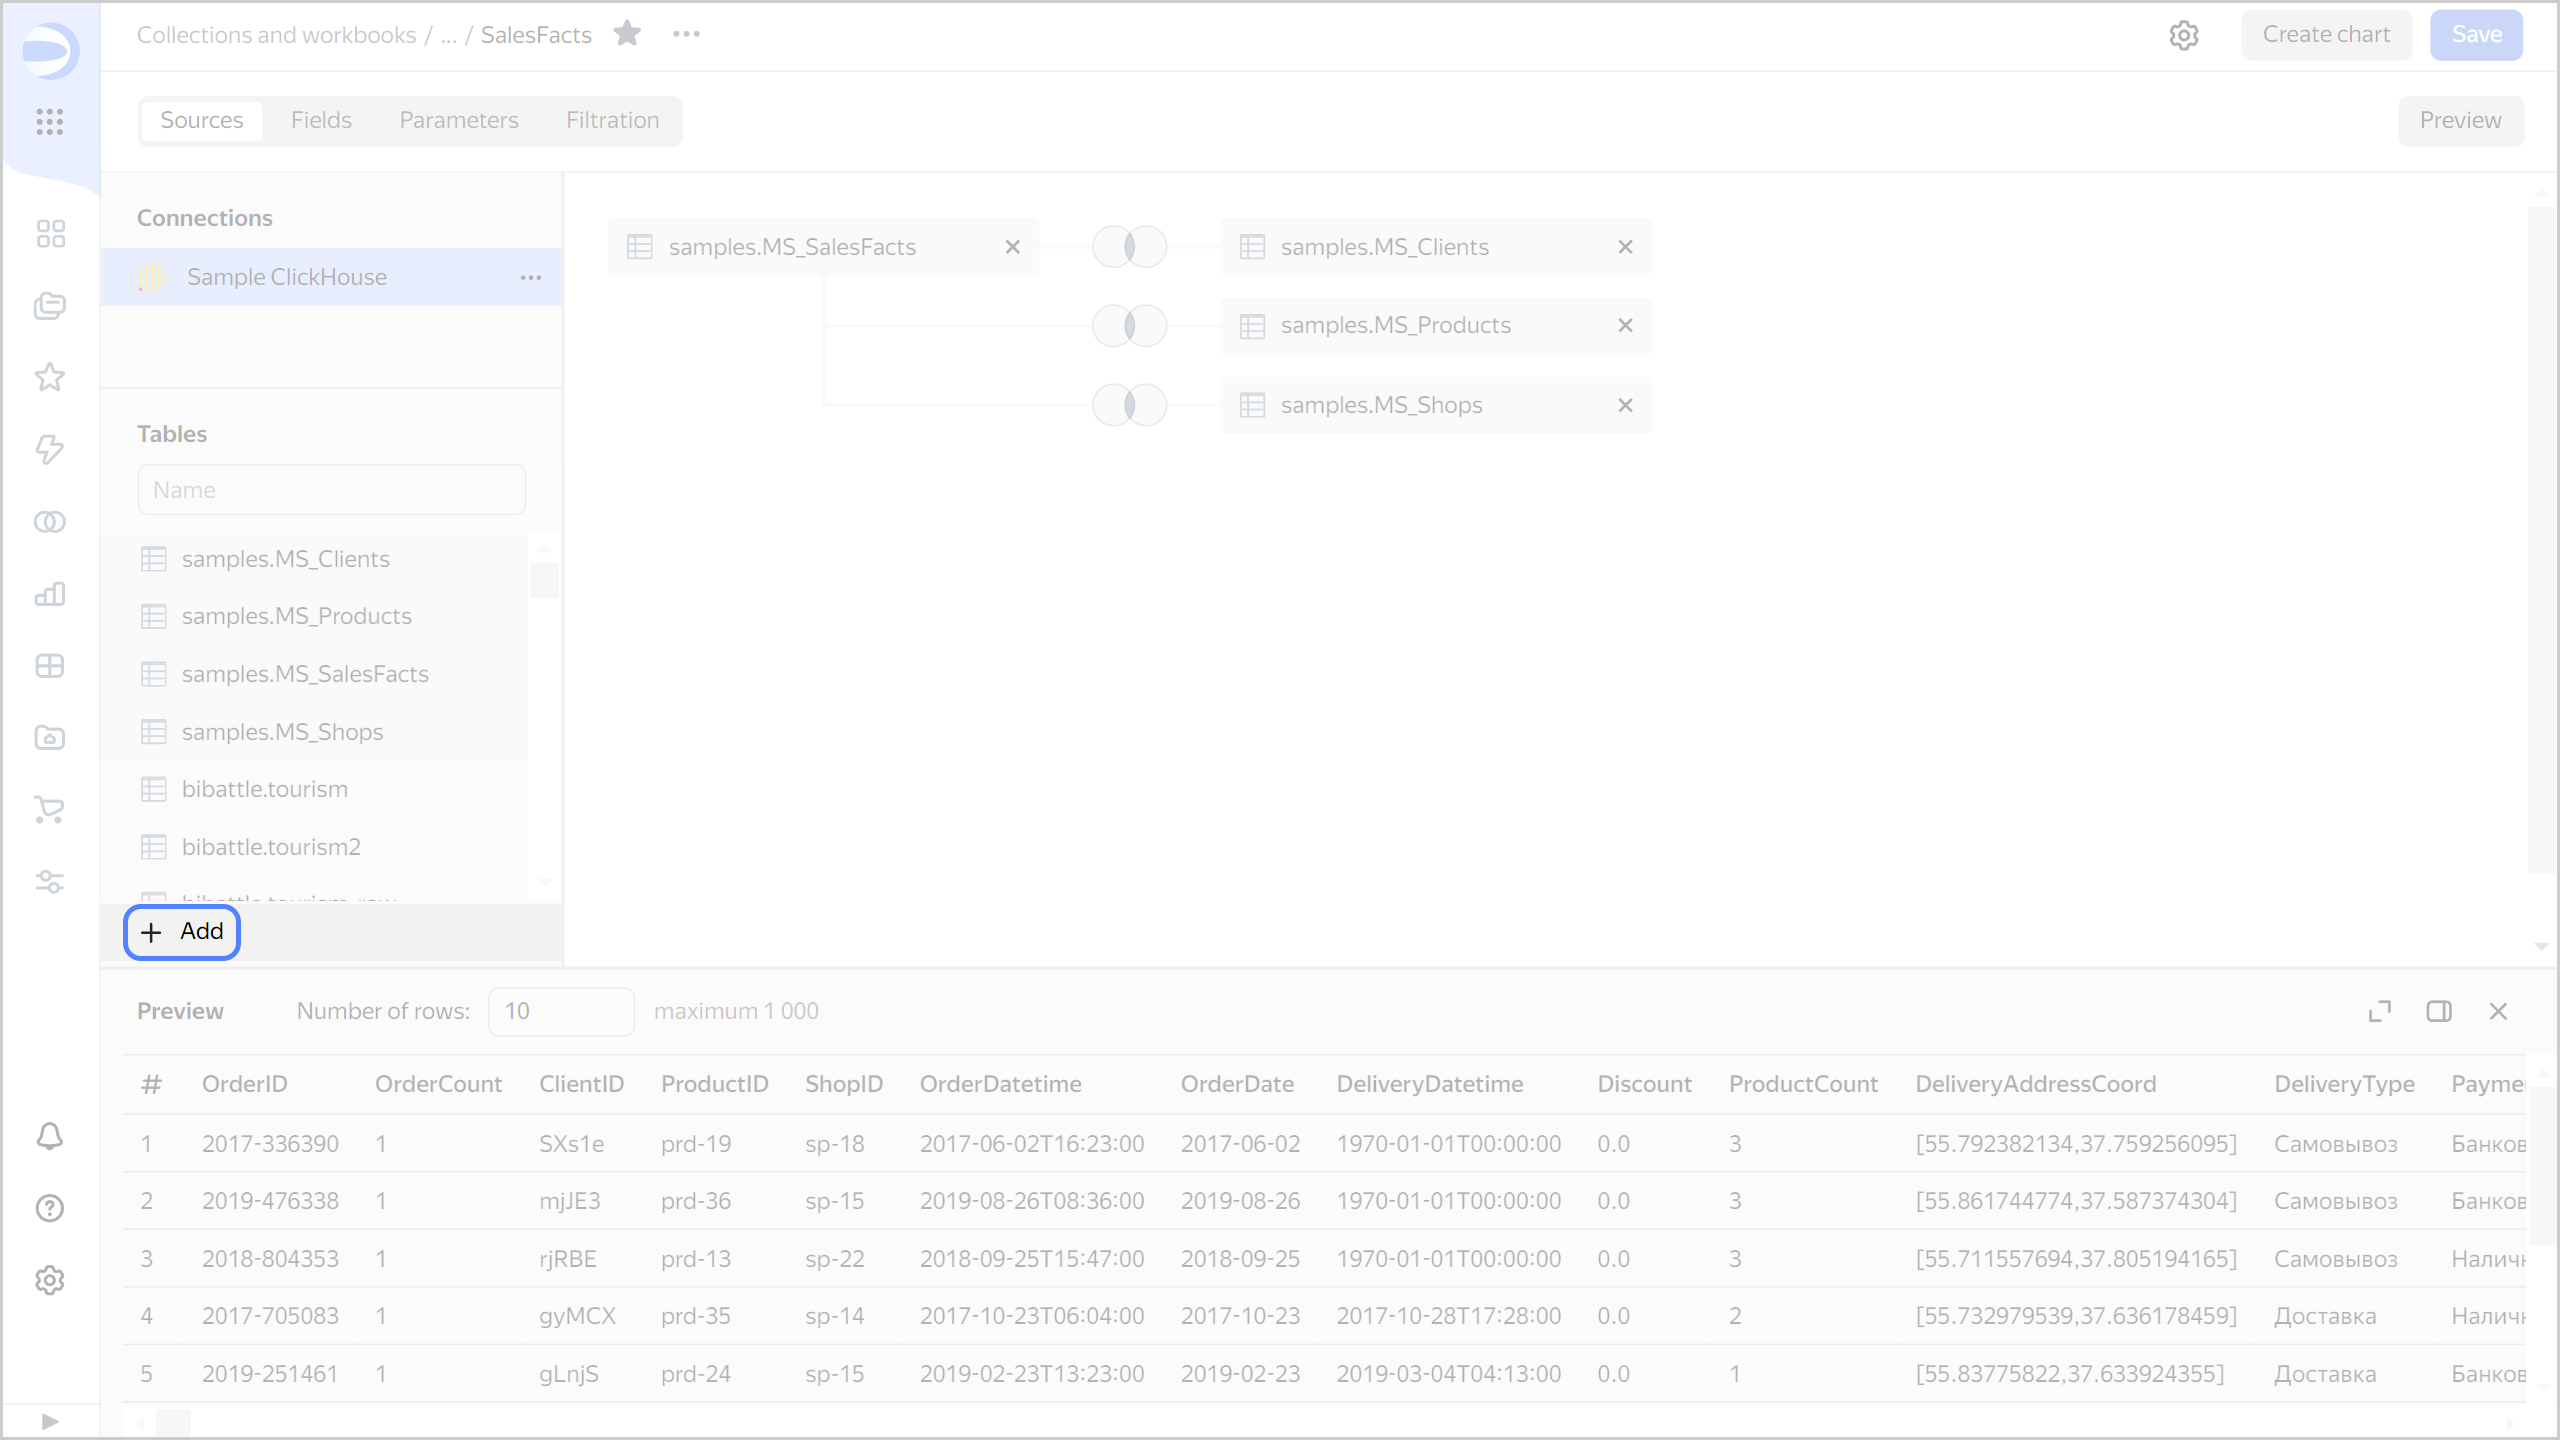
-
Enter a Source name and enter the SQL code in the Subquery field.
-
Click Create.
Example of an SQL query
A SQL query joins data from
samples.MS_SalesFacts,samples.MS_Products, andsamples.MS_Shopsand groups them on theStoreand theProduct typefields. A sales total is computed for each group. At the same time, only sales records from 2019 are taken into consideration:SELECT t3.ShopName AS "Store", t2.ProductCategory AS "Product type", COUNT(t1.OrderID) AS "Number of sales", SUM(t1.Price*t1.ProductCount) AS "Sales total" FROM samples.MS_SalesFacts t1 INNER JOIN samples.MS_Products t2 ON t2.ProductID=t1.ProductID INNER JOIN samples.MS_Shops t3 ON t3.ShopID=t1.ShopID WHERE toYear(t1.OrderDatetime)='2019' -- condition for selecting sales for the specified year (2019) GROUP BY "Store", "Product type" -- group by Store and Product type ORDER BY "Store", "Product Type" -- sort by Store and Product type
Replacing a connection
To replace a connection in a dataset:
-
In the dataset, go to the Sources tab.
-
Delete all the tables from the workspace.
-
In the connection panel, click
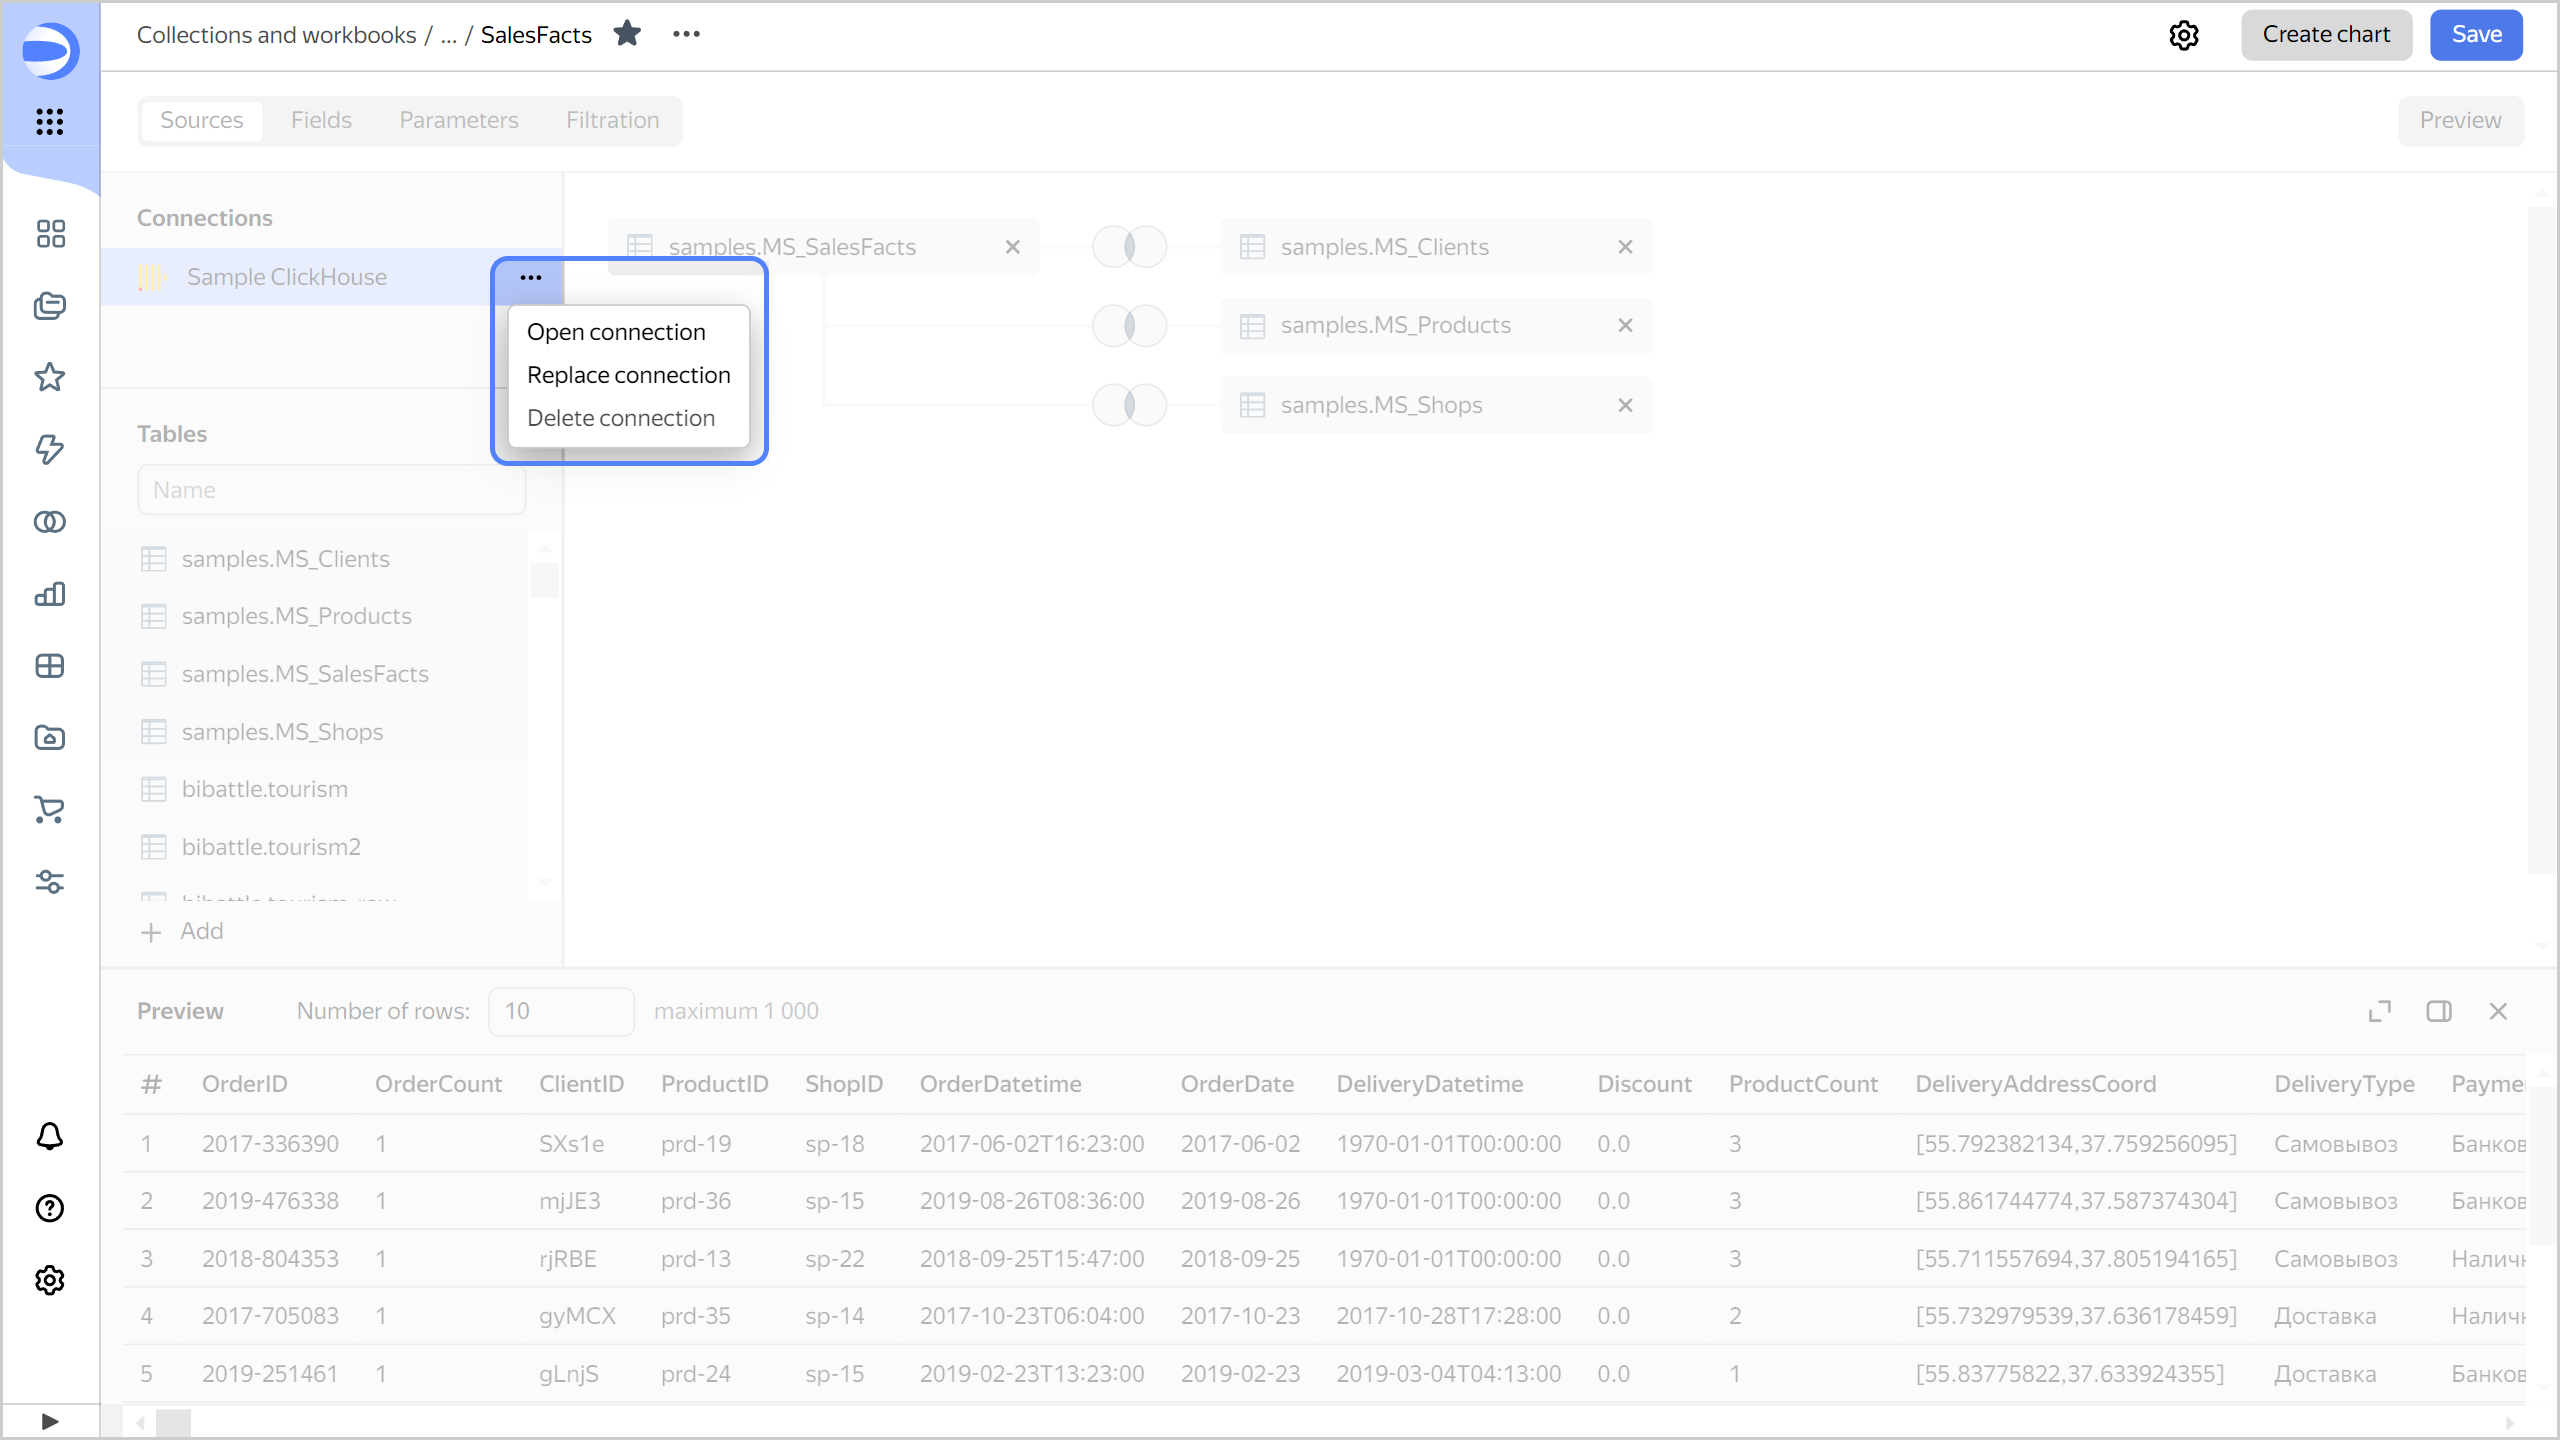
-
Select another connection.
-
Drag to the workspace the tables that will serve as sources of data for the dataset.
-
Edit or delete the calculated fields which use fields not present in the new table.
-
In the top-right corner, click Save.
Note
If the data schema in the source changed, update the dataset fields.
Configuring links
You can join data from source tables.
Note
When you merge data from multiple tables, a dataset will get duplicates of the fields used to create links. You can remove them manually from the list of dataset fields. You can also describe the dataset using an SQL query and exclude duplicate fields from the final set.
-
In the dataset, go to the Sources tab.
-
Click the table link icon.
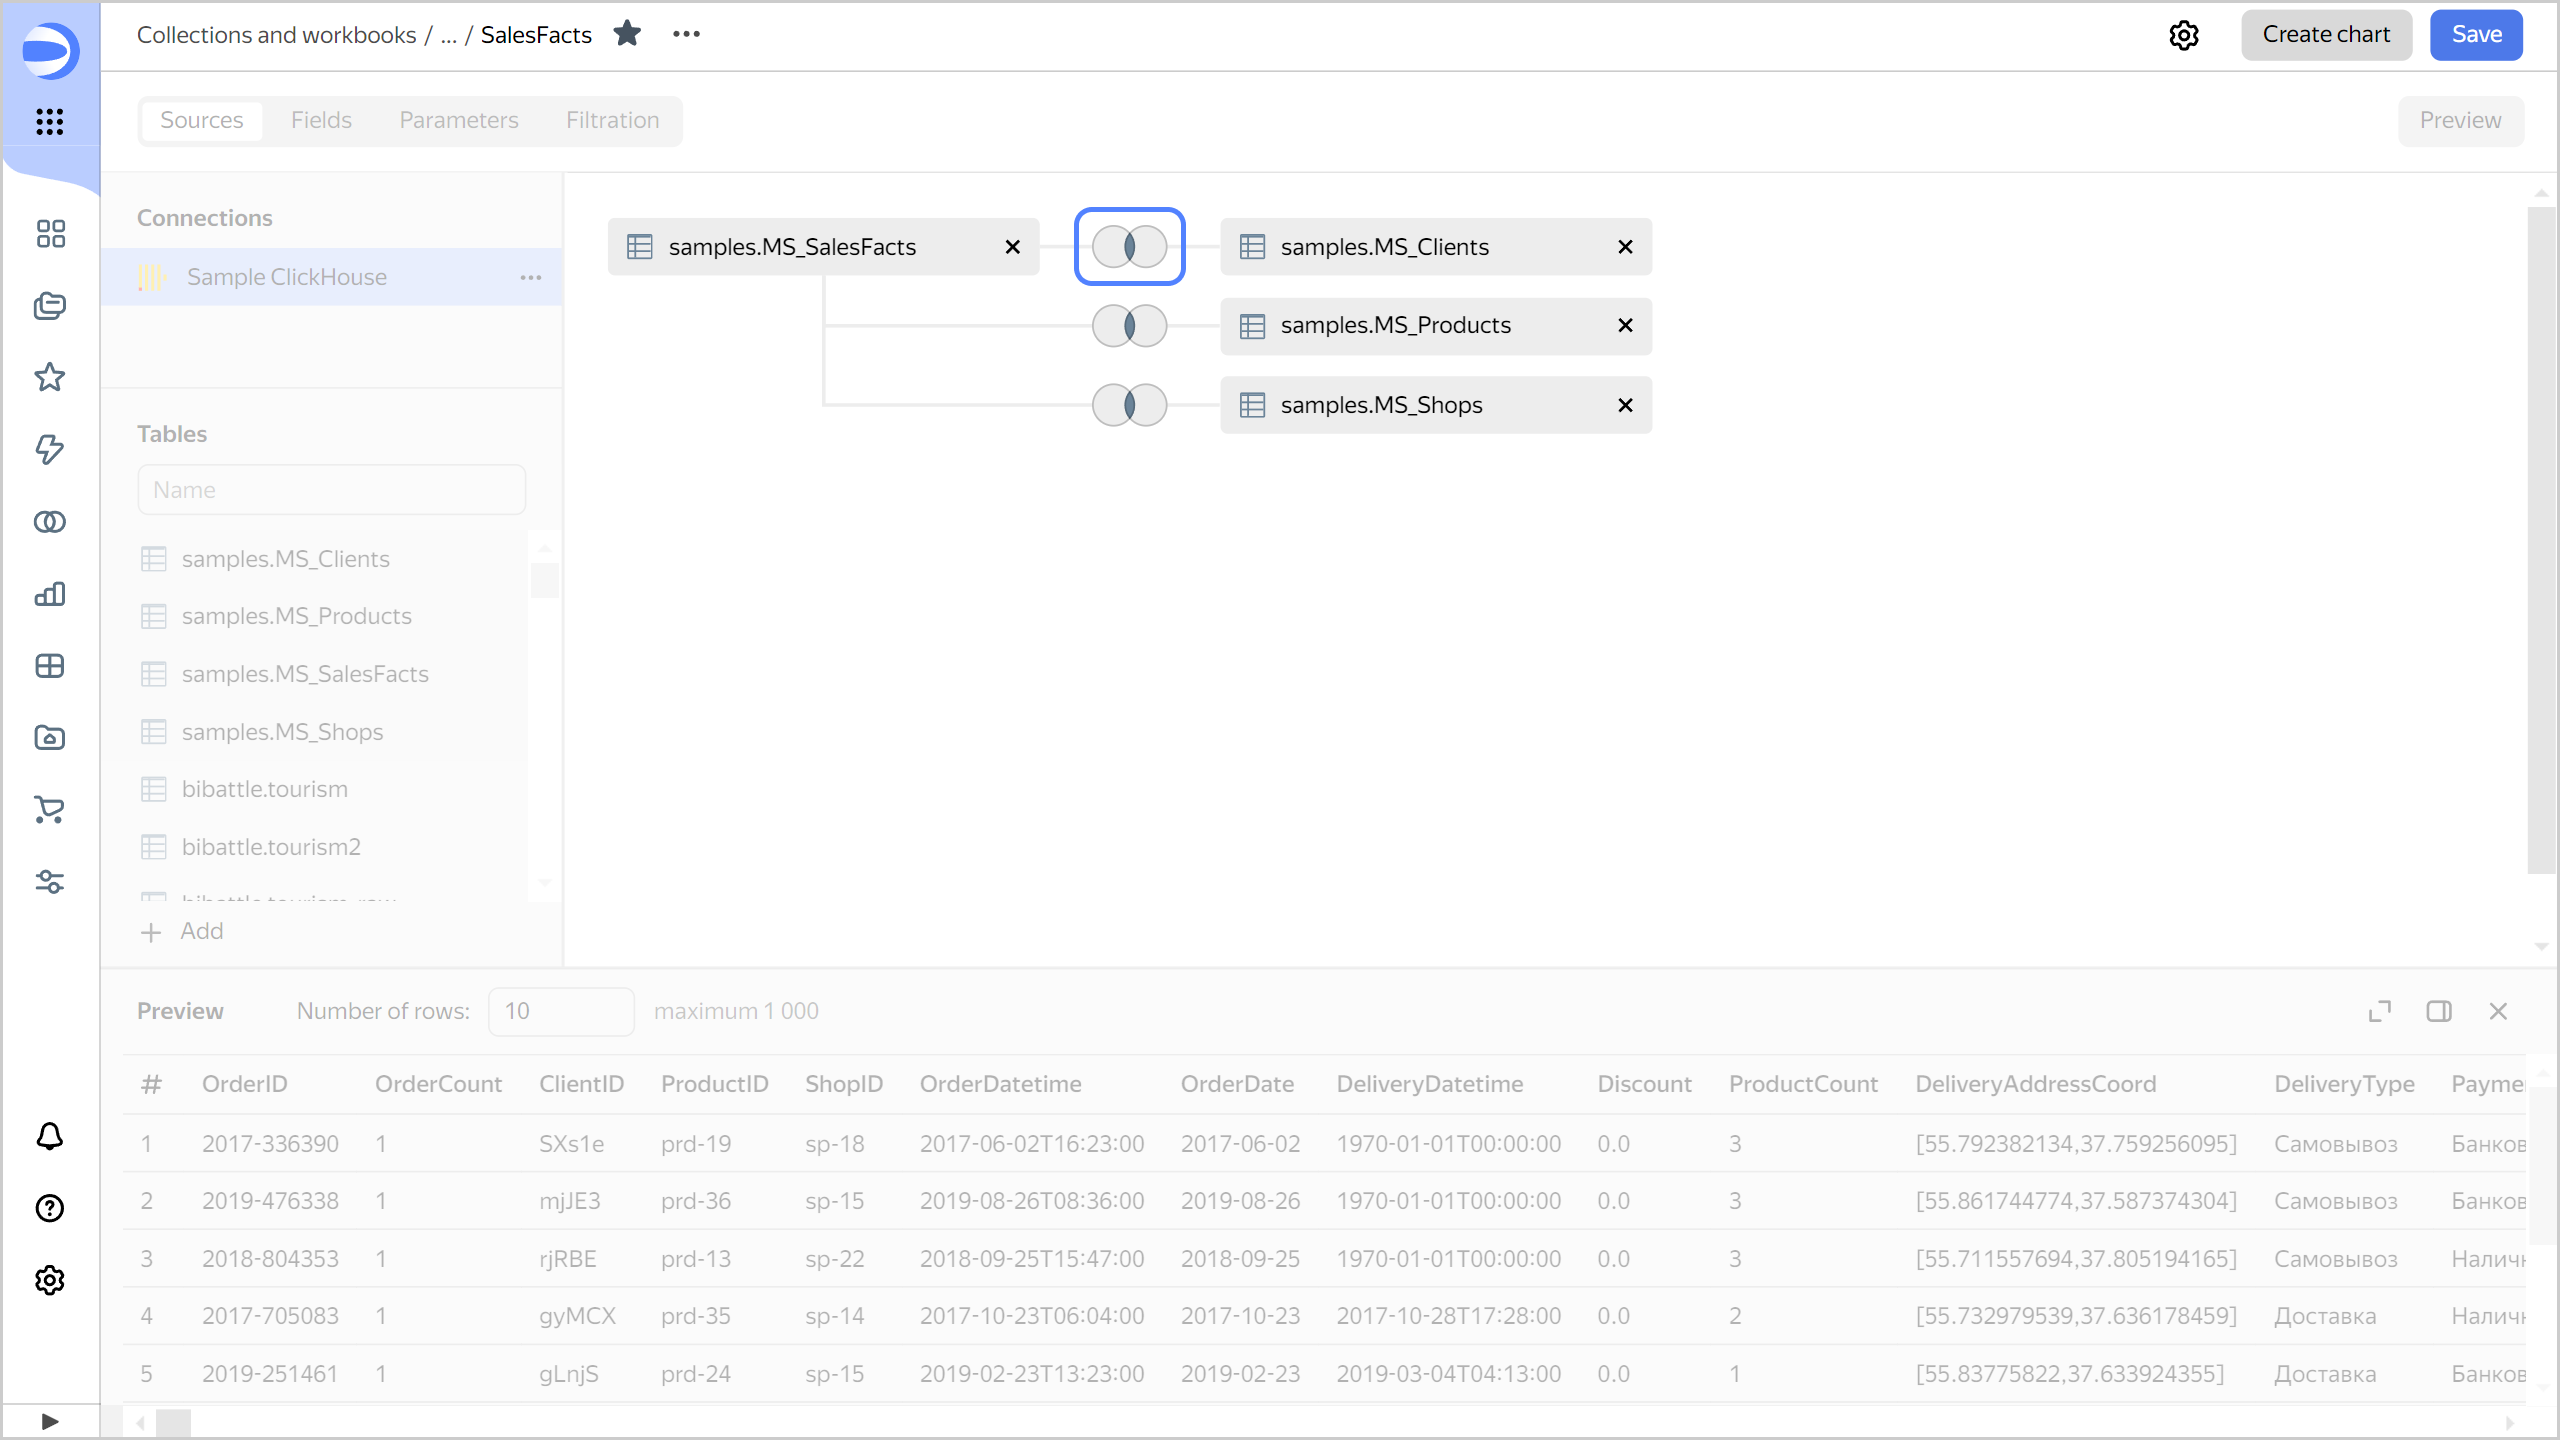
-
Select the link type:
inner,left,right, orfull.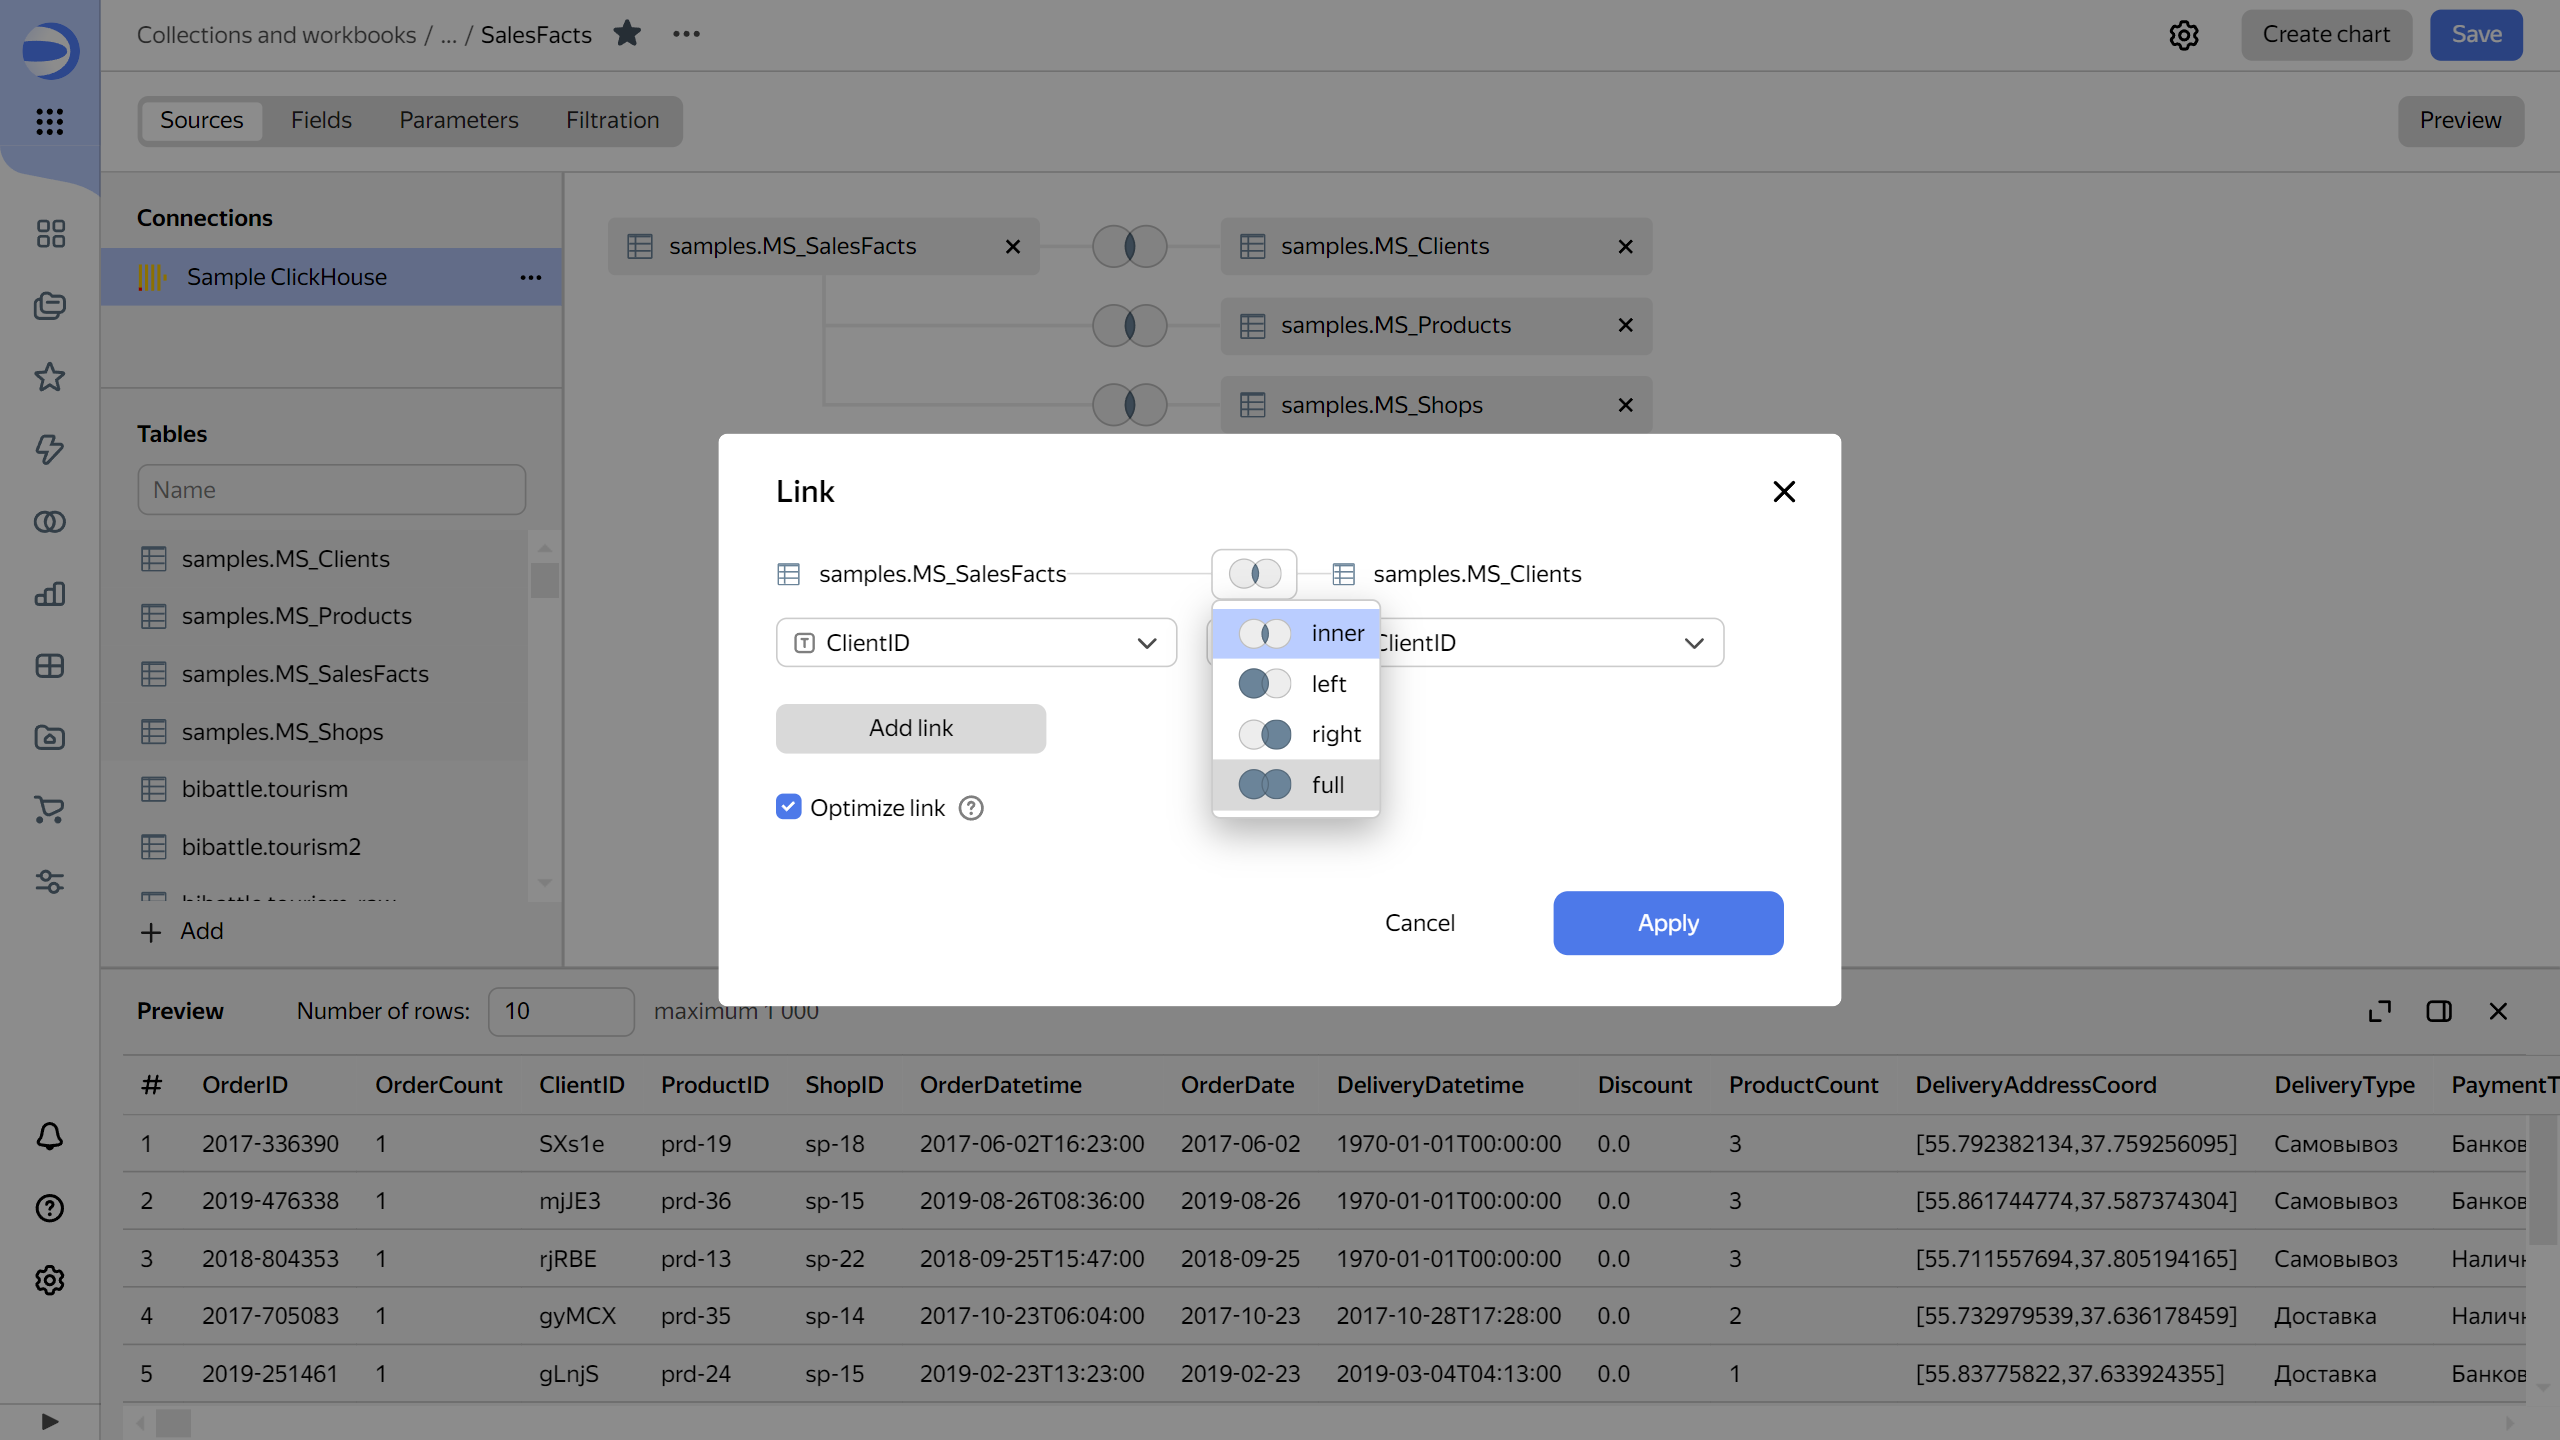
-
Select the fields to join the tables on. You can only link fields with the same data type. DataLens gets information about the field's data type directly from the connection. If you need to join tables by fields with different data types, use one of these options:
-
Convert all the fields to the same data type at the source level.
-
Describe the dataset with an SQL query. Use the CAST or CONVERT
SELECT * FROM lead INNER JOIN user ON lead.assigned_by_id = CONVERT(user.external_id, CHAR)
-
-
If required, link other fields in the tables. To do this, click Add link.
-
Optionally, you can disable the Optimize link option to make the link required. In this case, the
JOINoperation will be performed even if you select fields from a single table. -
Click Apply.
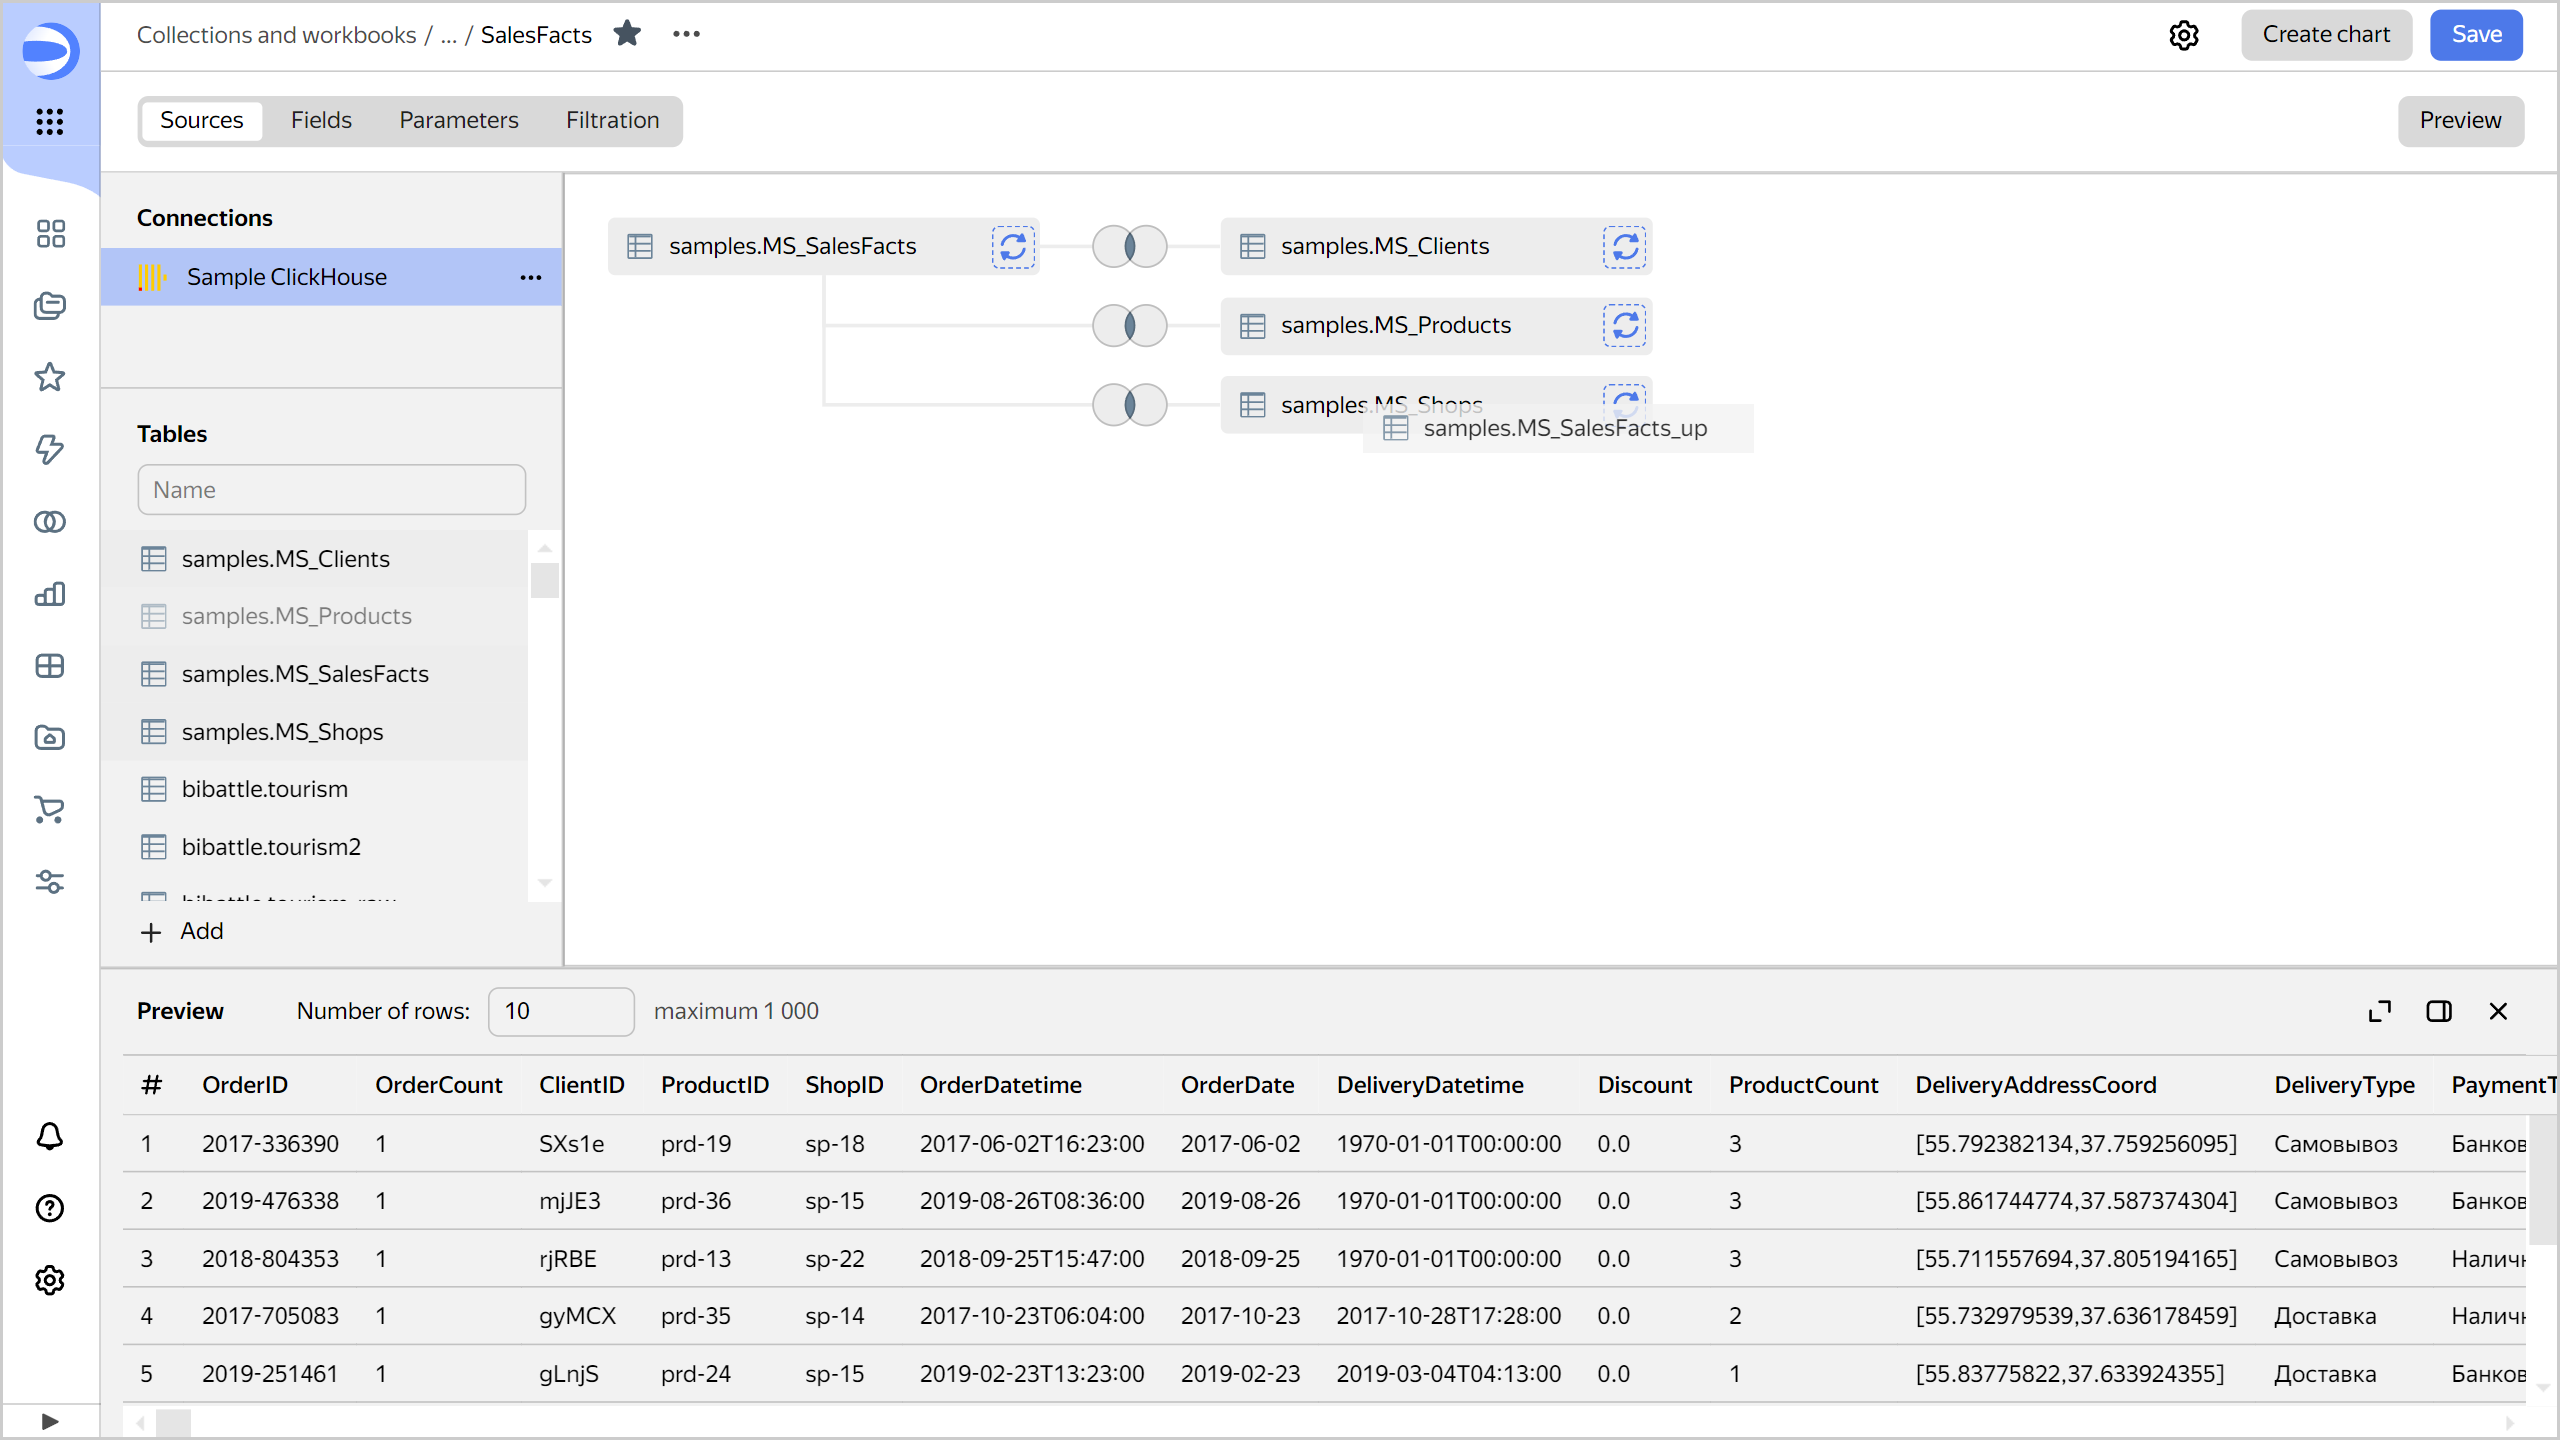
By default, when you add a new table from a data source to the workspace, it is automatically linked to the first table listed there. If required, you can link a new table to a specific table. To do this, hover the new table over a previously added one and release when you see a gray border around the latter. A new link to the specified table is created.
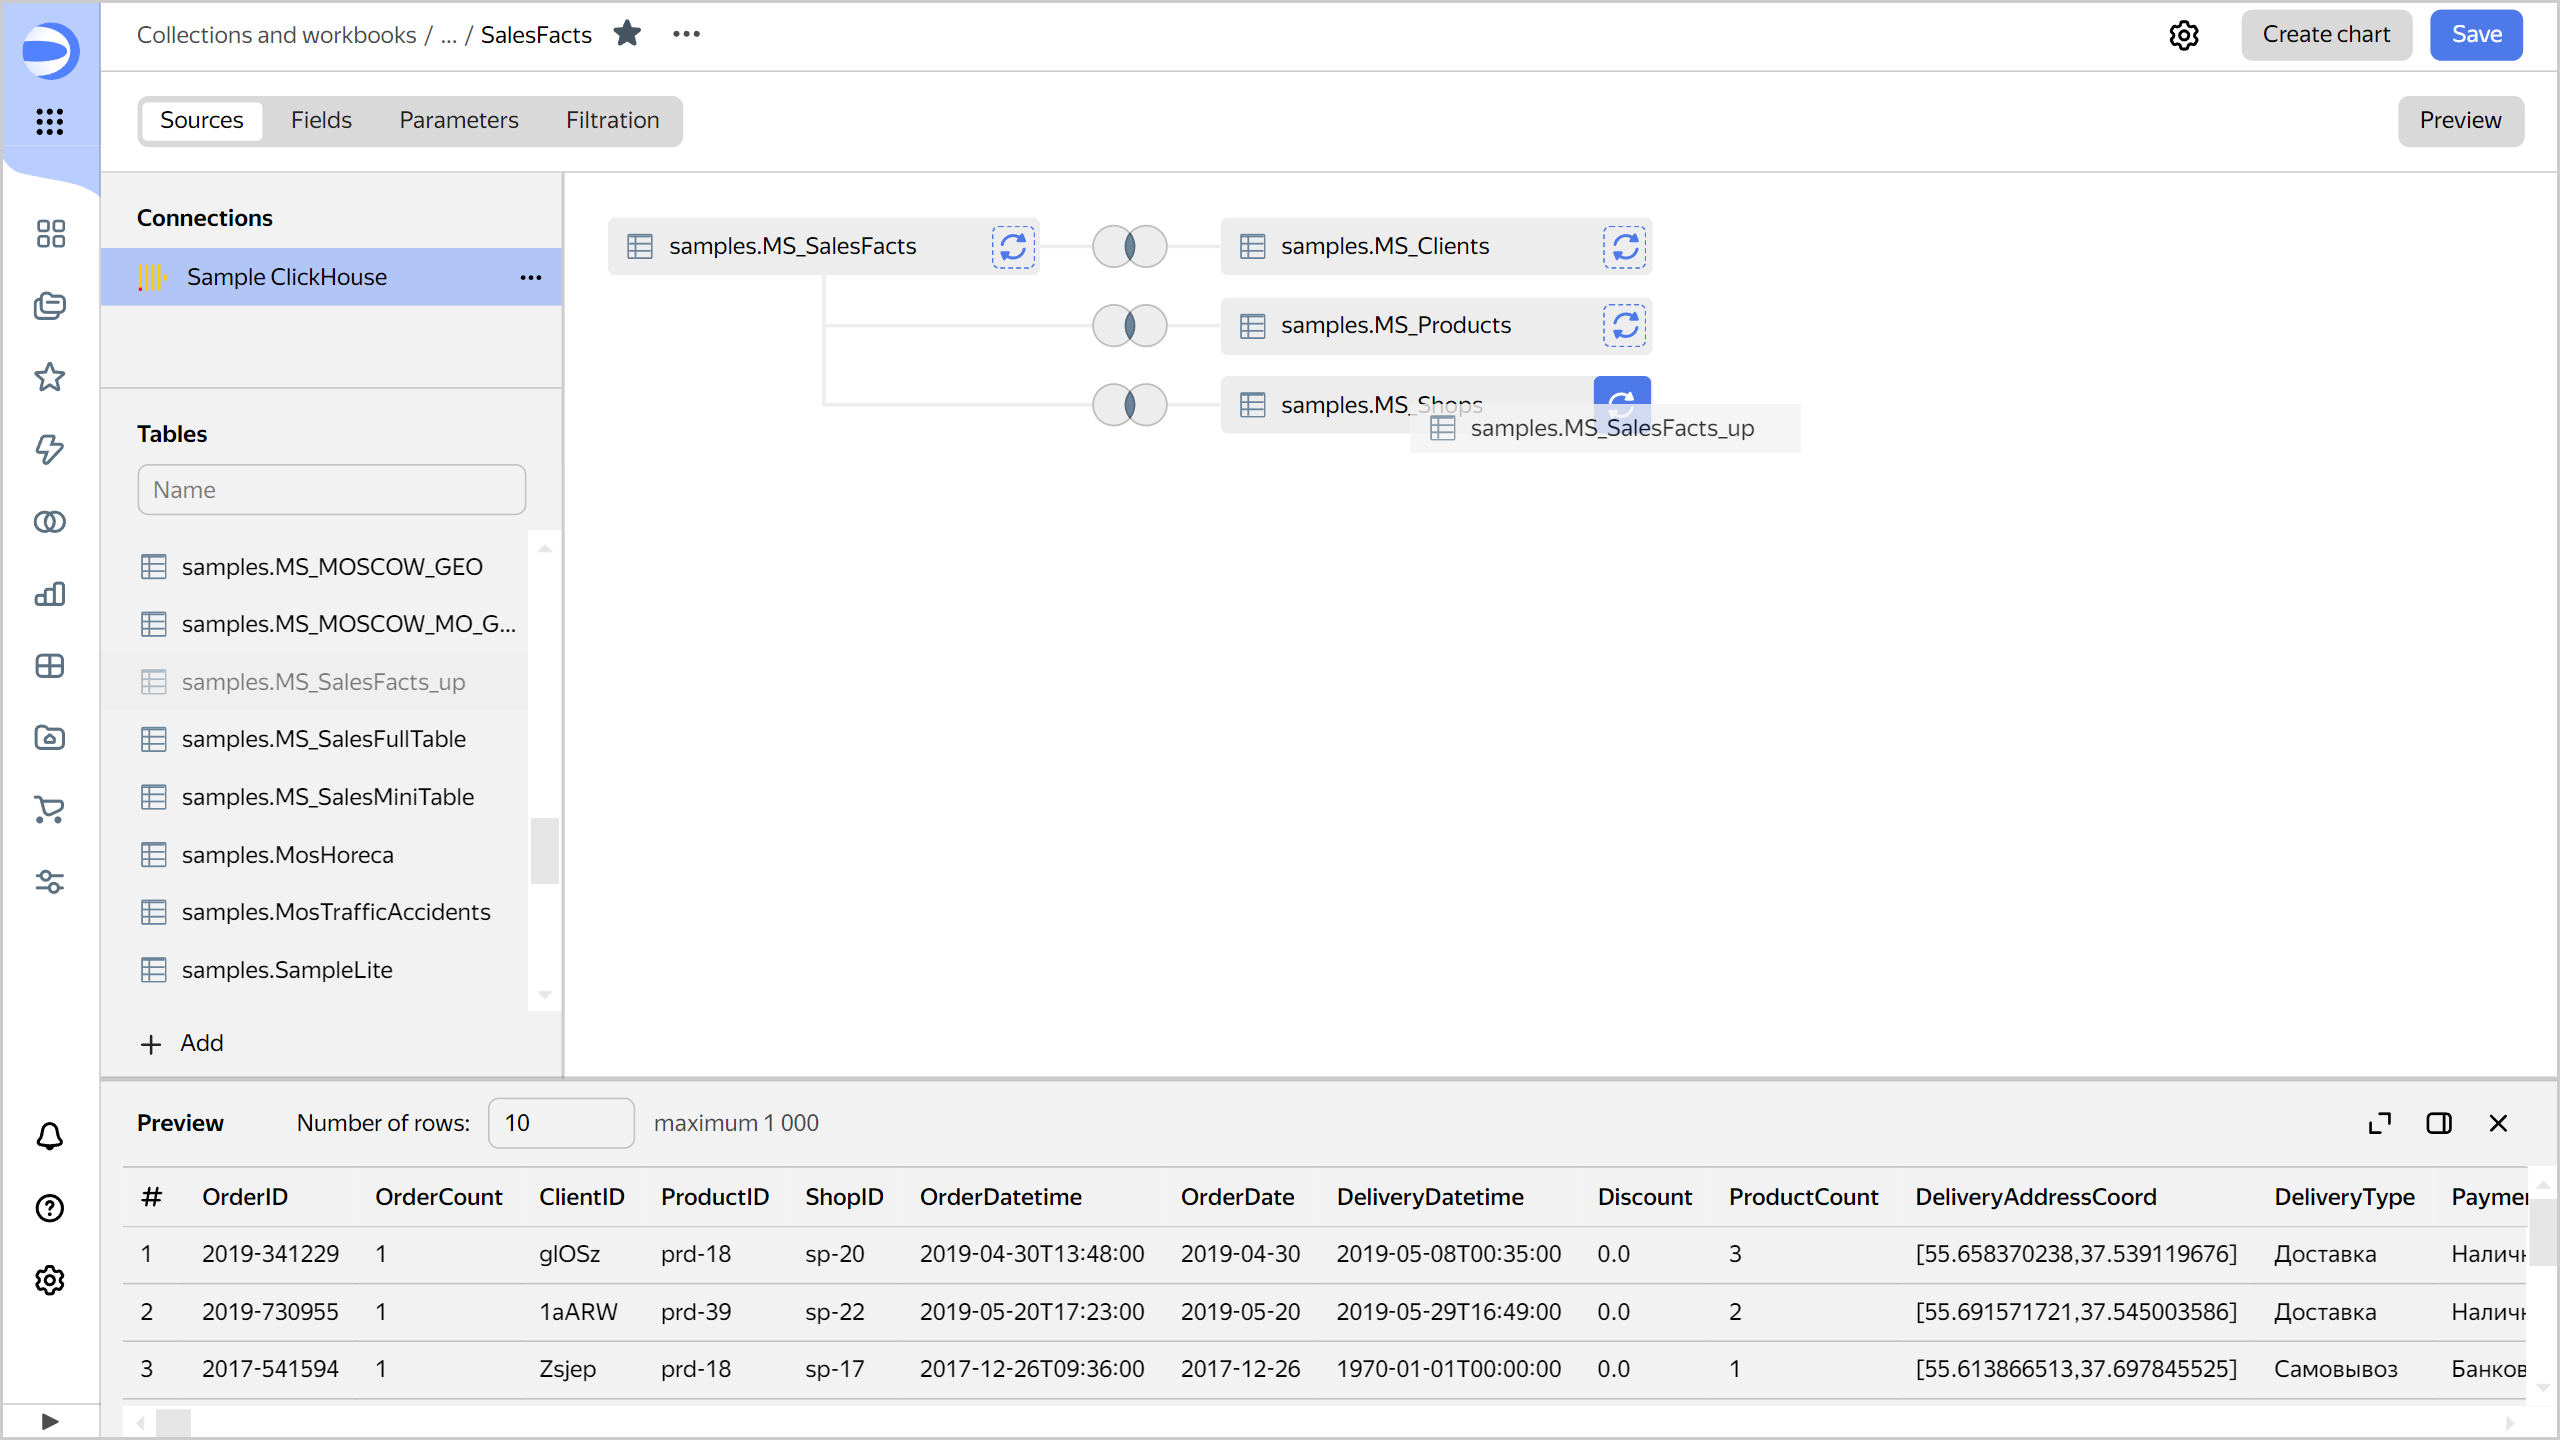
You can replace a previously added table. When dragging a new table, hover it over the icon with circular arrows to the right of the table you are replacing for the icon background to turn blue, then release.
Note
If the updated table retains the same set of fields with the same names, the field IDs in the dataset will not change. In this case, the charts created based on this dataset will not be disturbed. If the updated table's schema has changed, update the dataset fields.
Creating fields
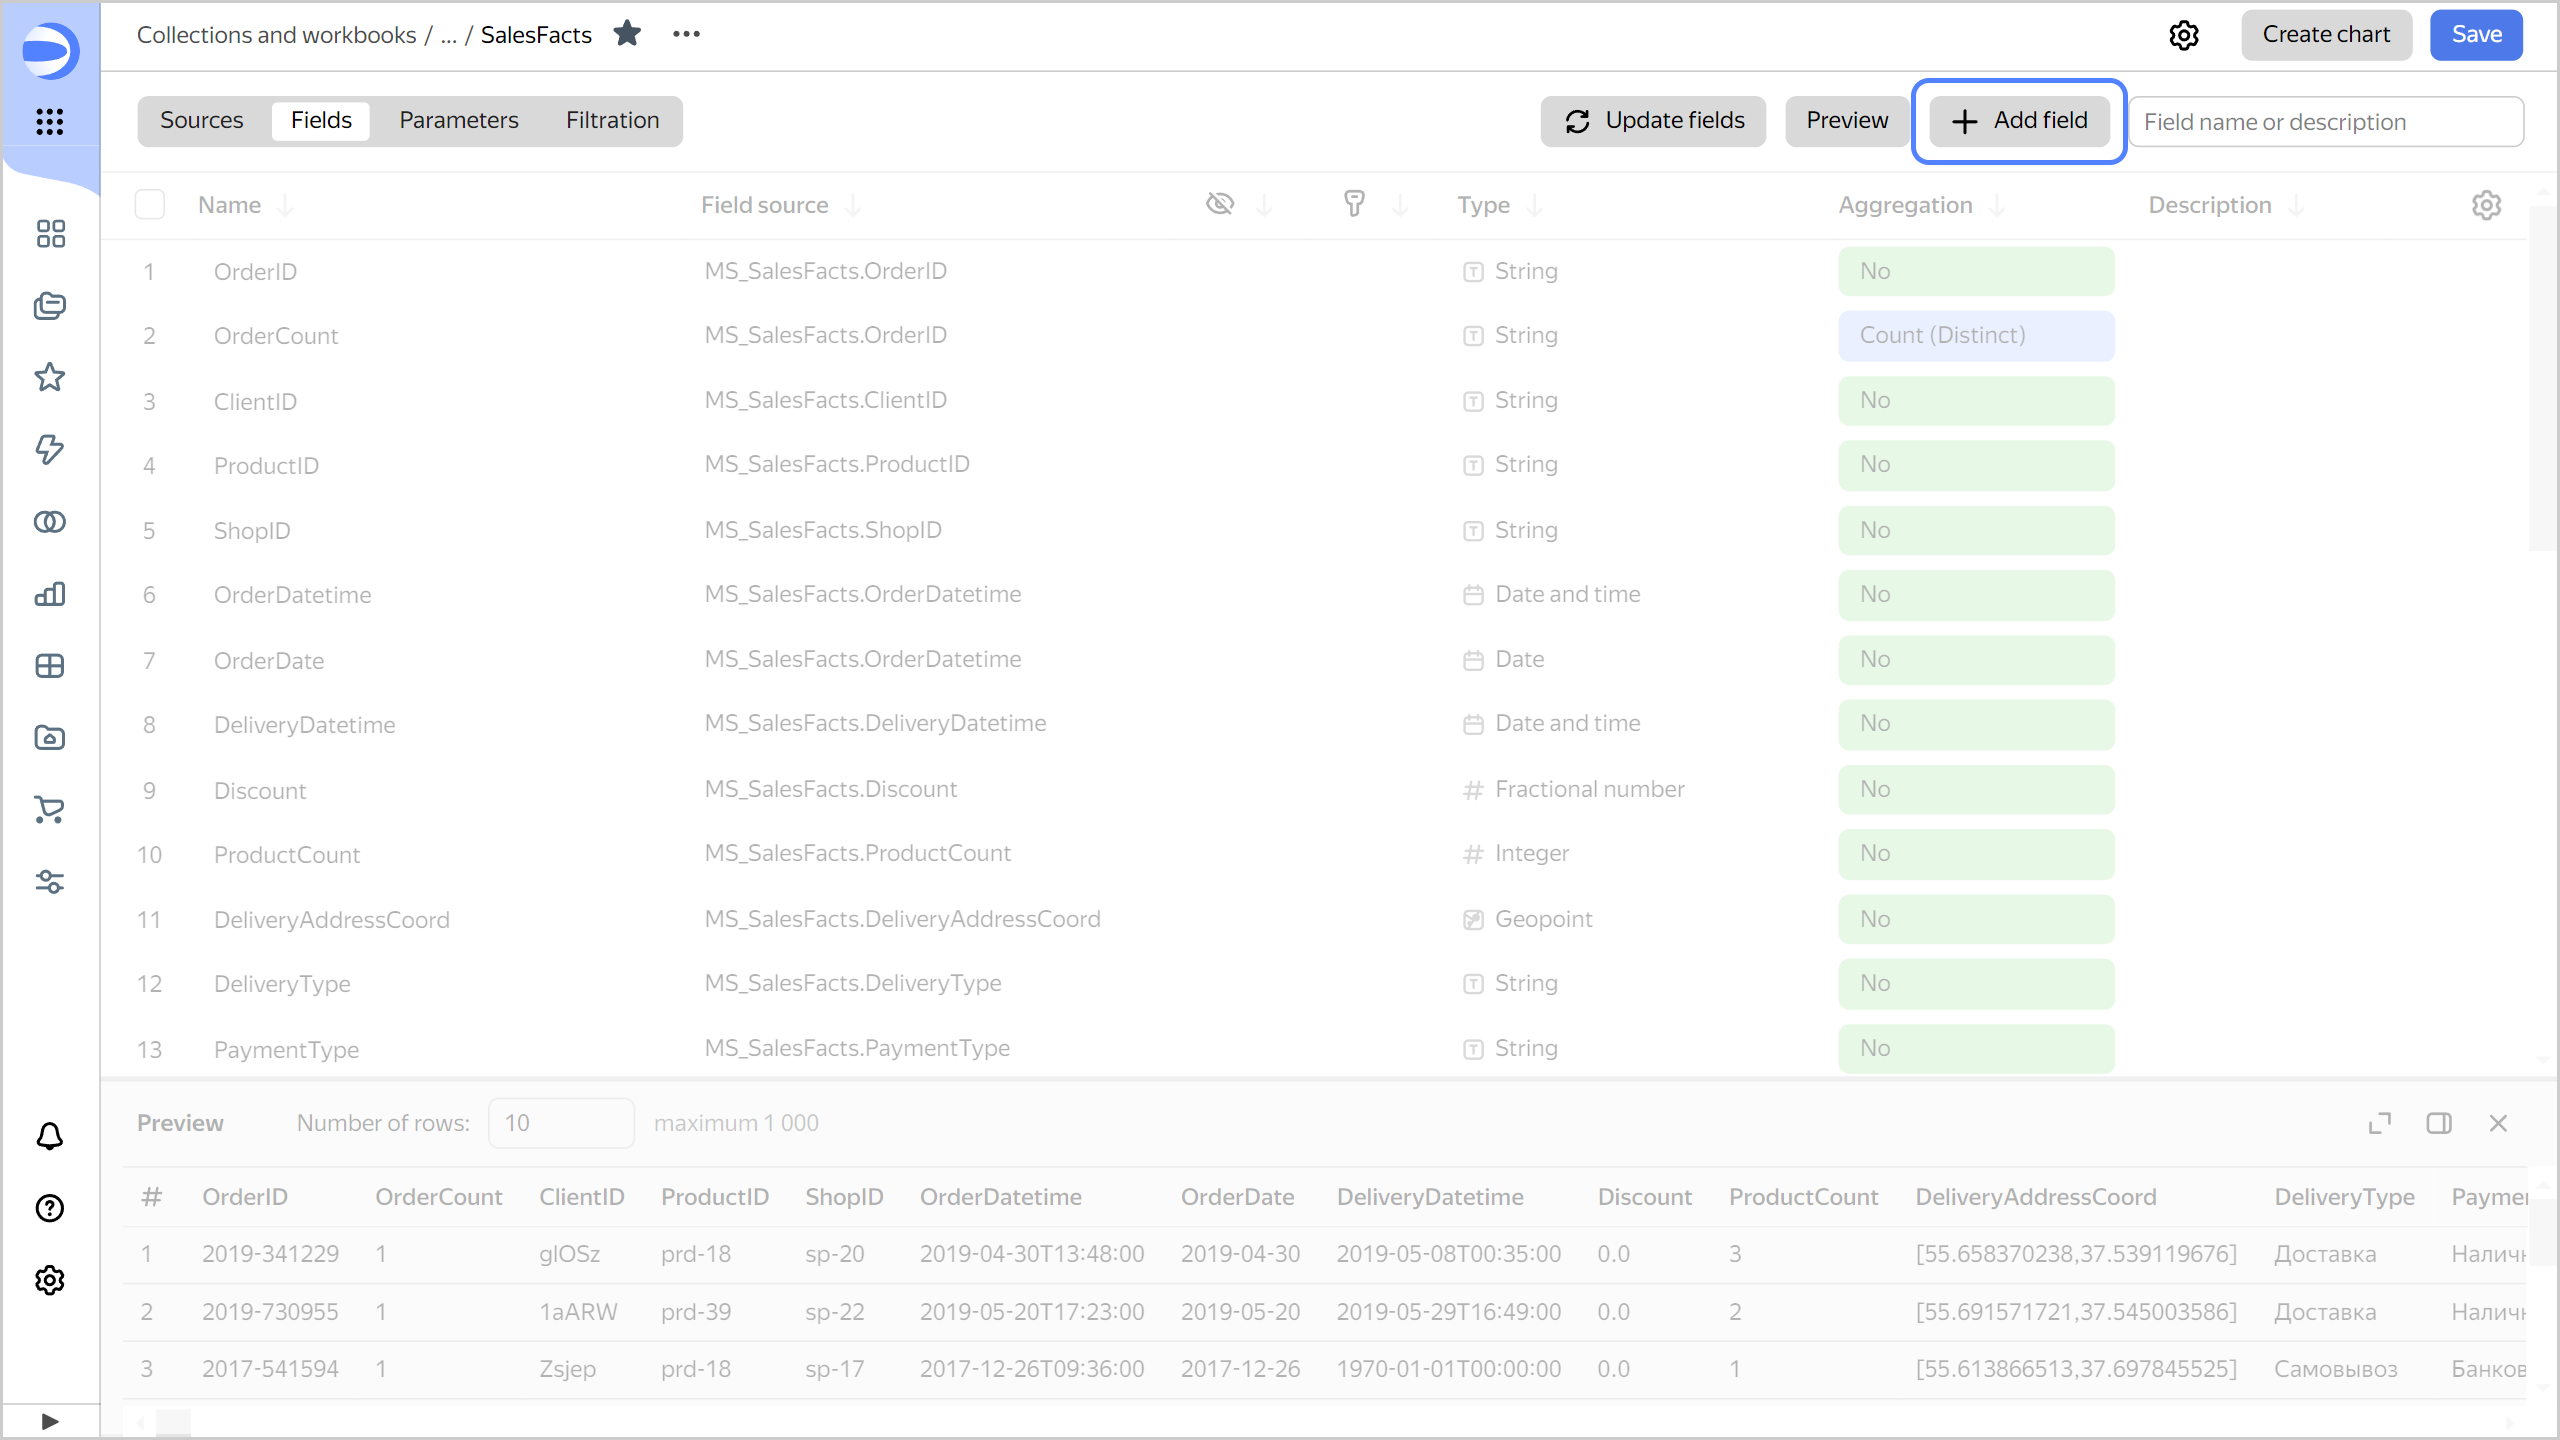
You can add fields to a dataset from data source tables or create calculated fields using formulas.
-
In the dataset, go to the Fields tab.
-
At the top of the screen, click
-
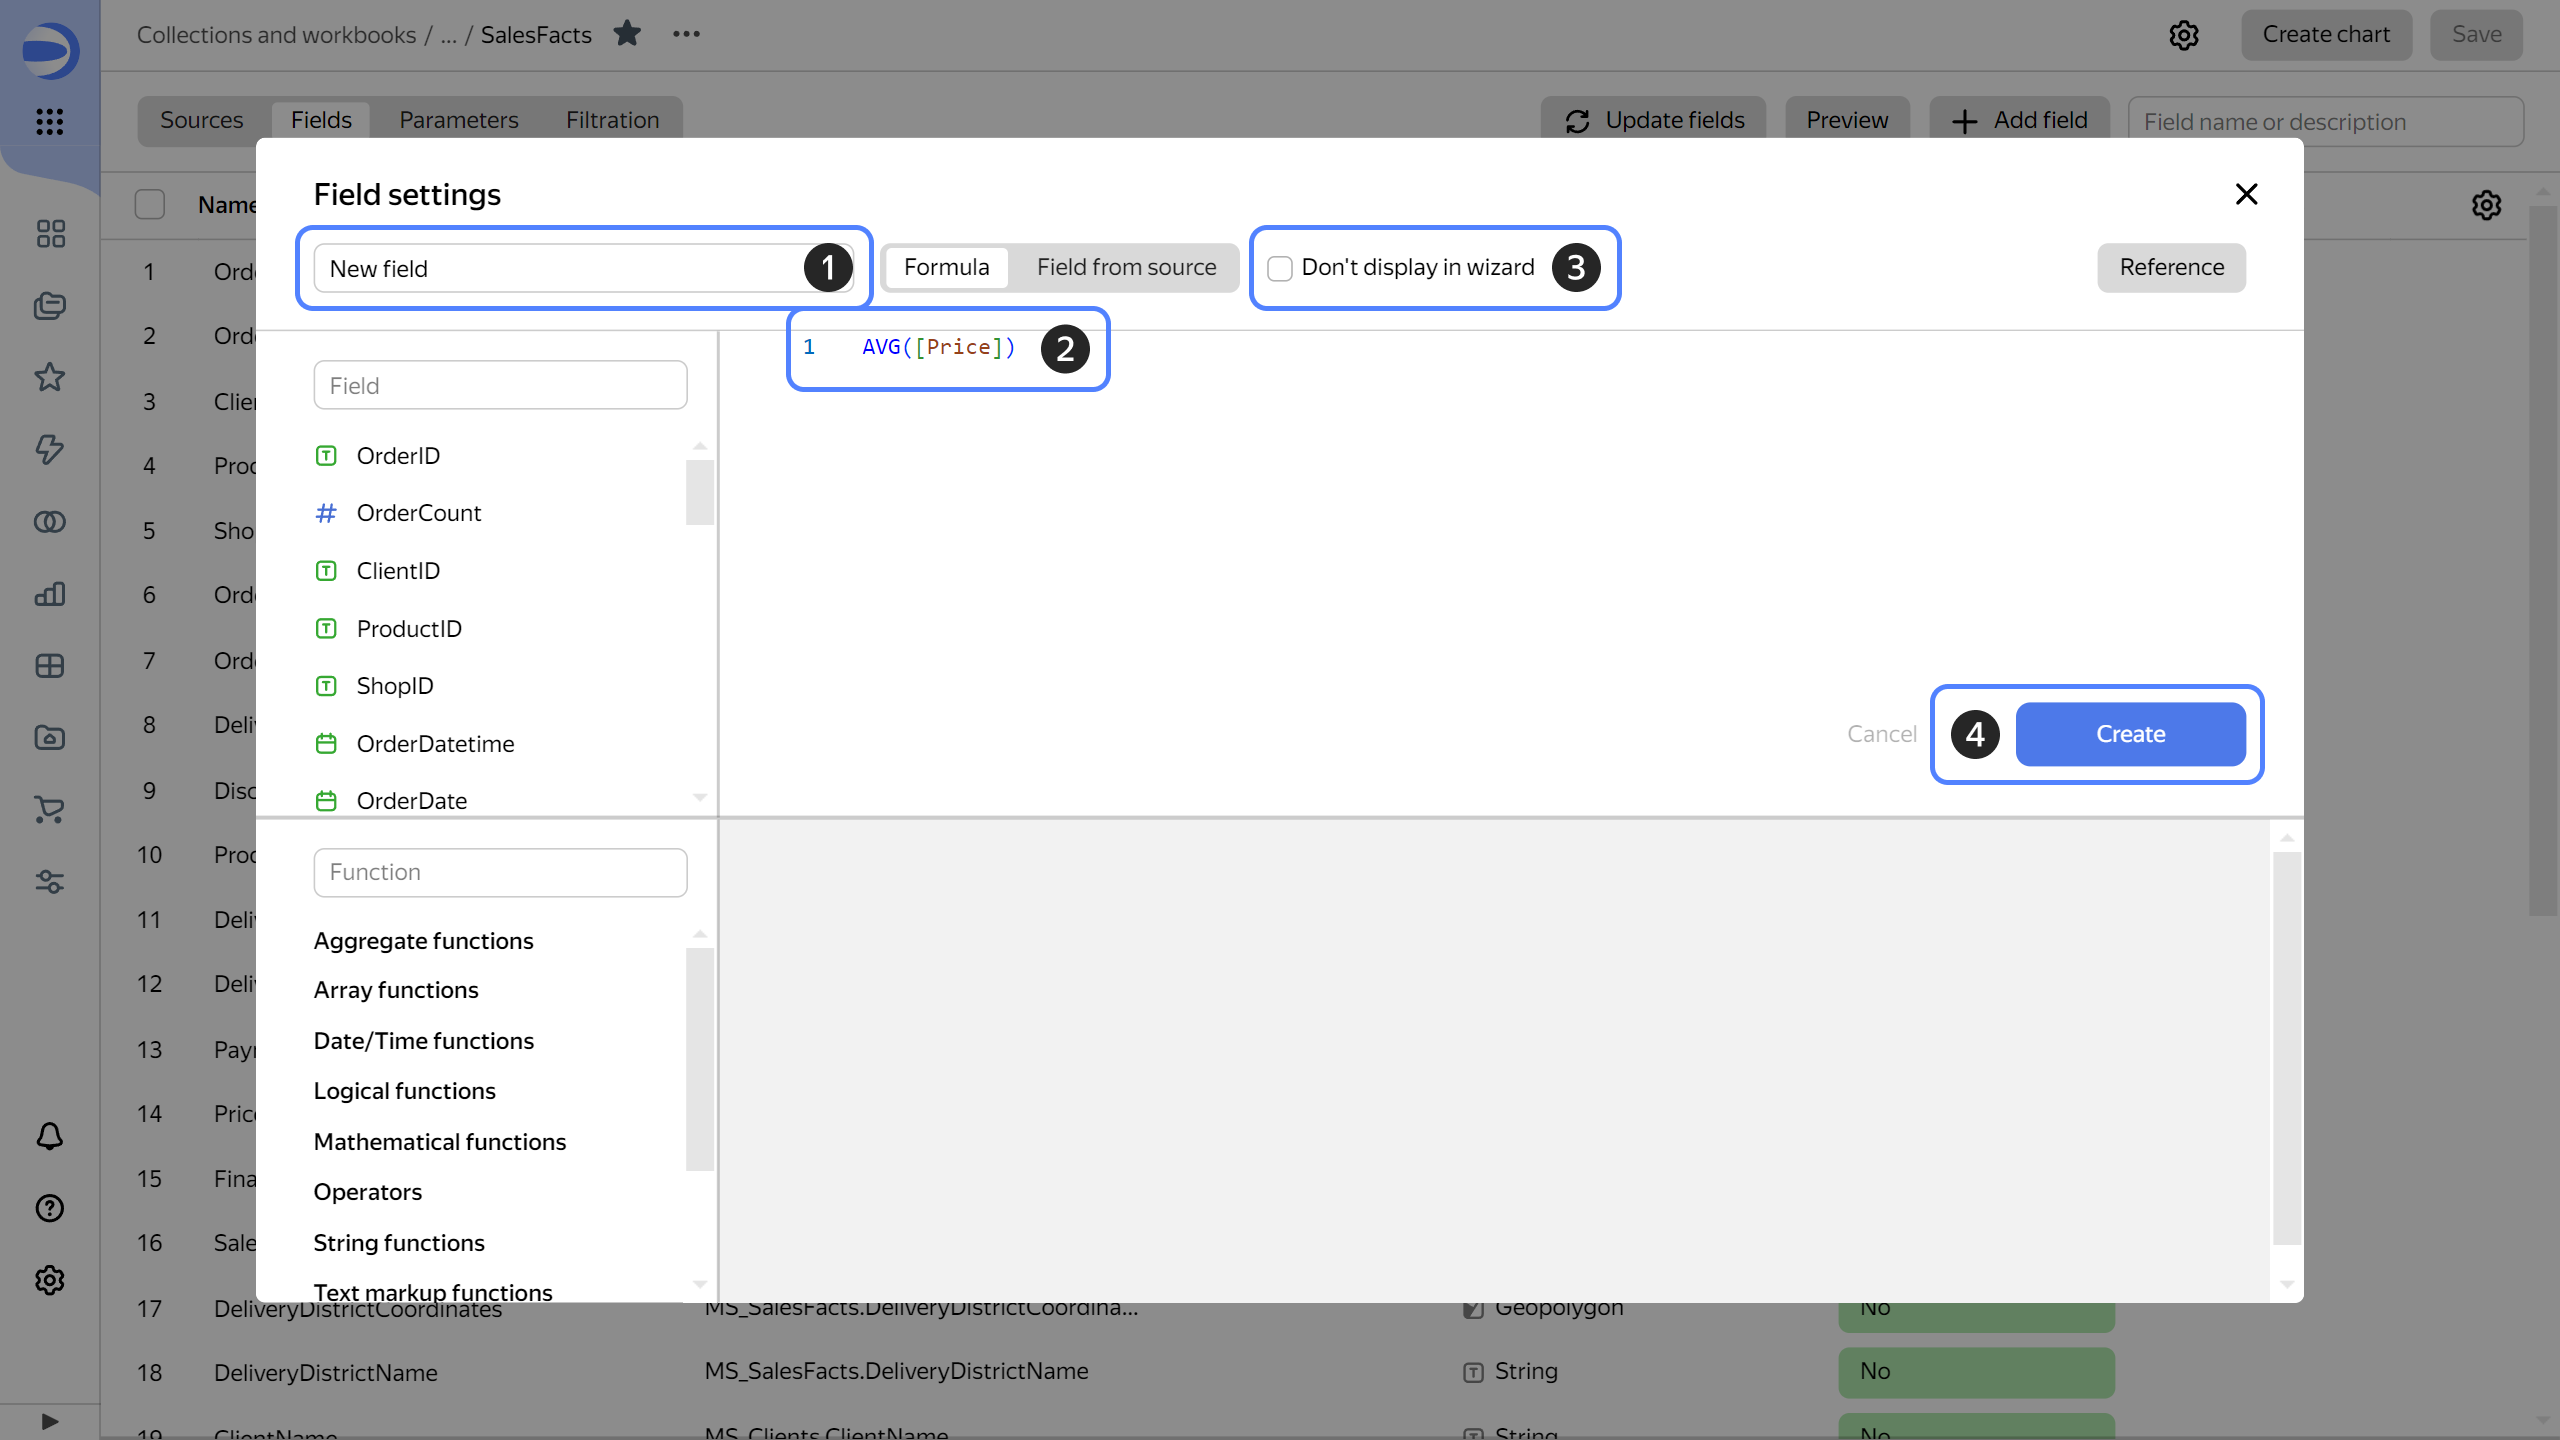
Create a field:
Calculated fieldData field-
Enter a name for the field.
-
Enter a formula to calculate the field value using data source functions.
-
Optionally, enable Don't display in wizard to hide the field in the wizard when creating a chart.
-
Click Create. The field will appear in the dataset.
-
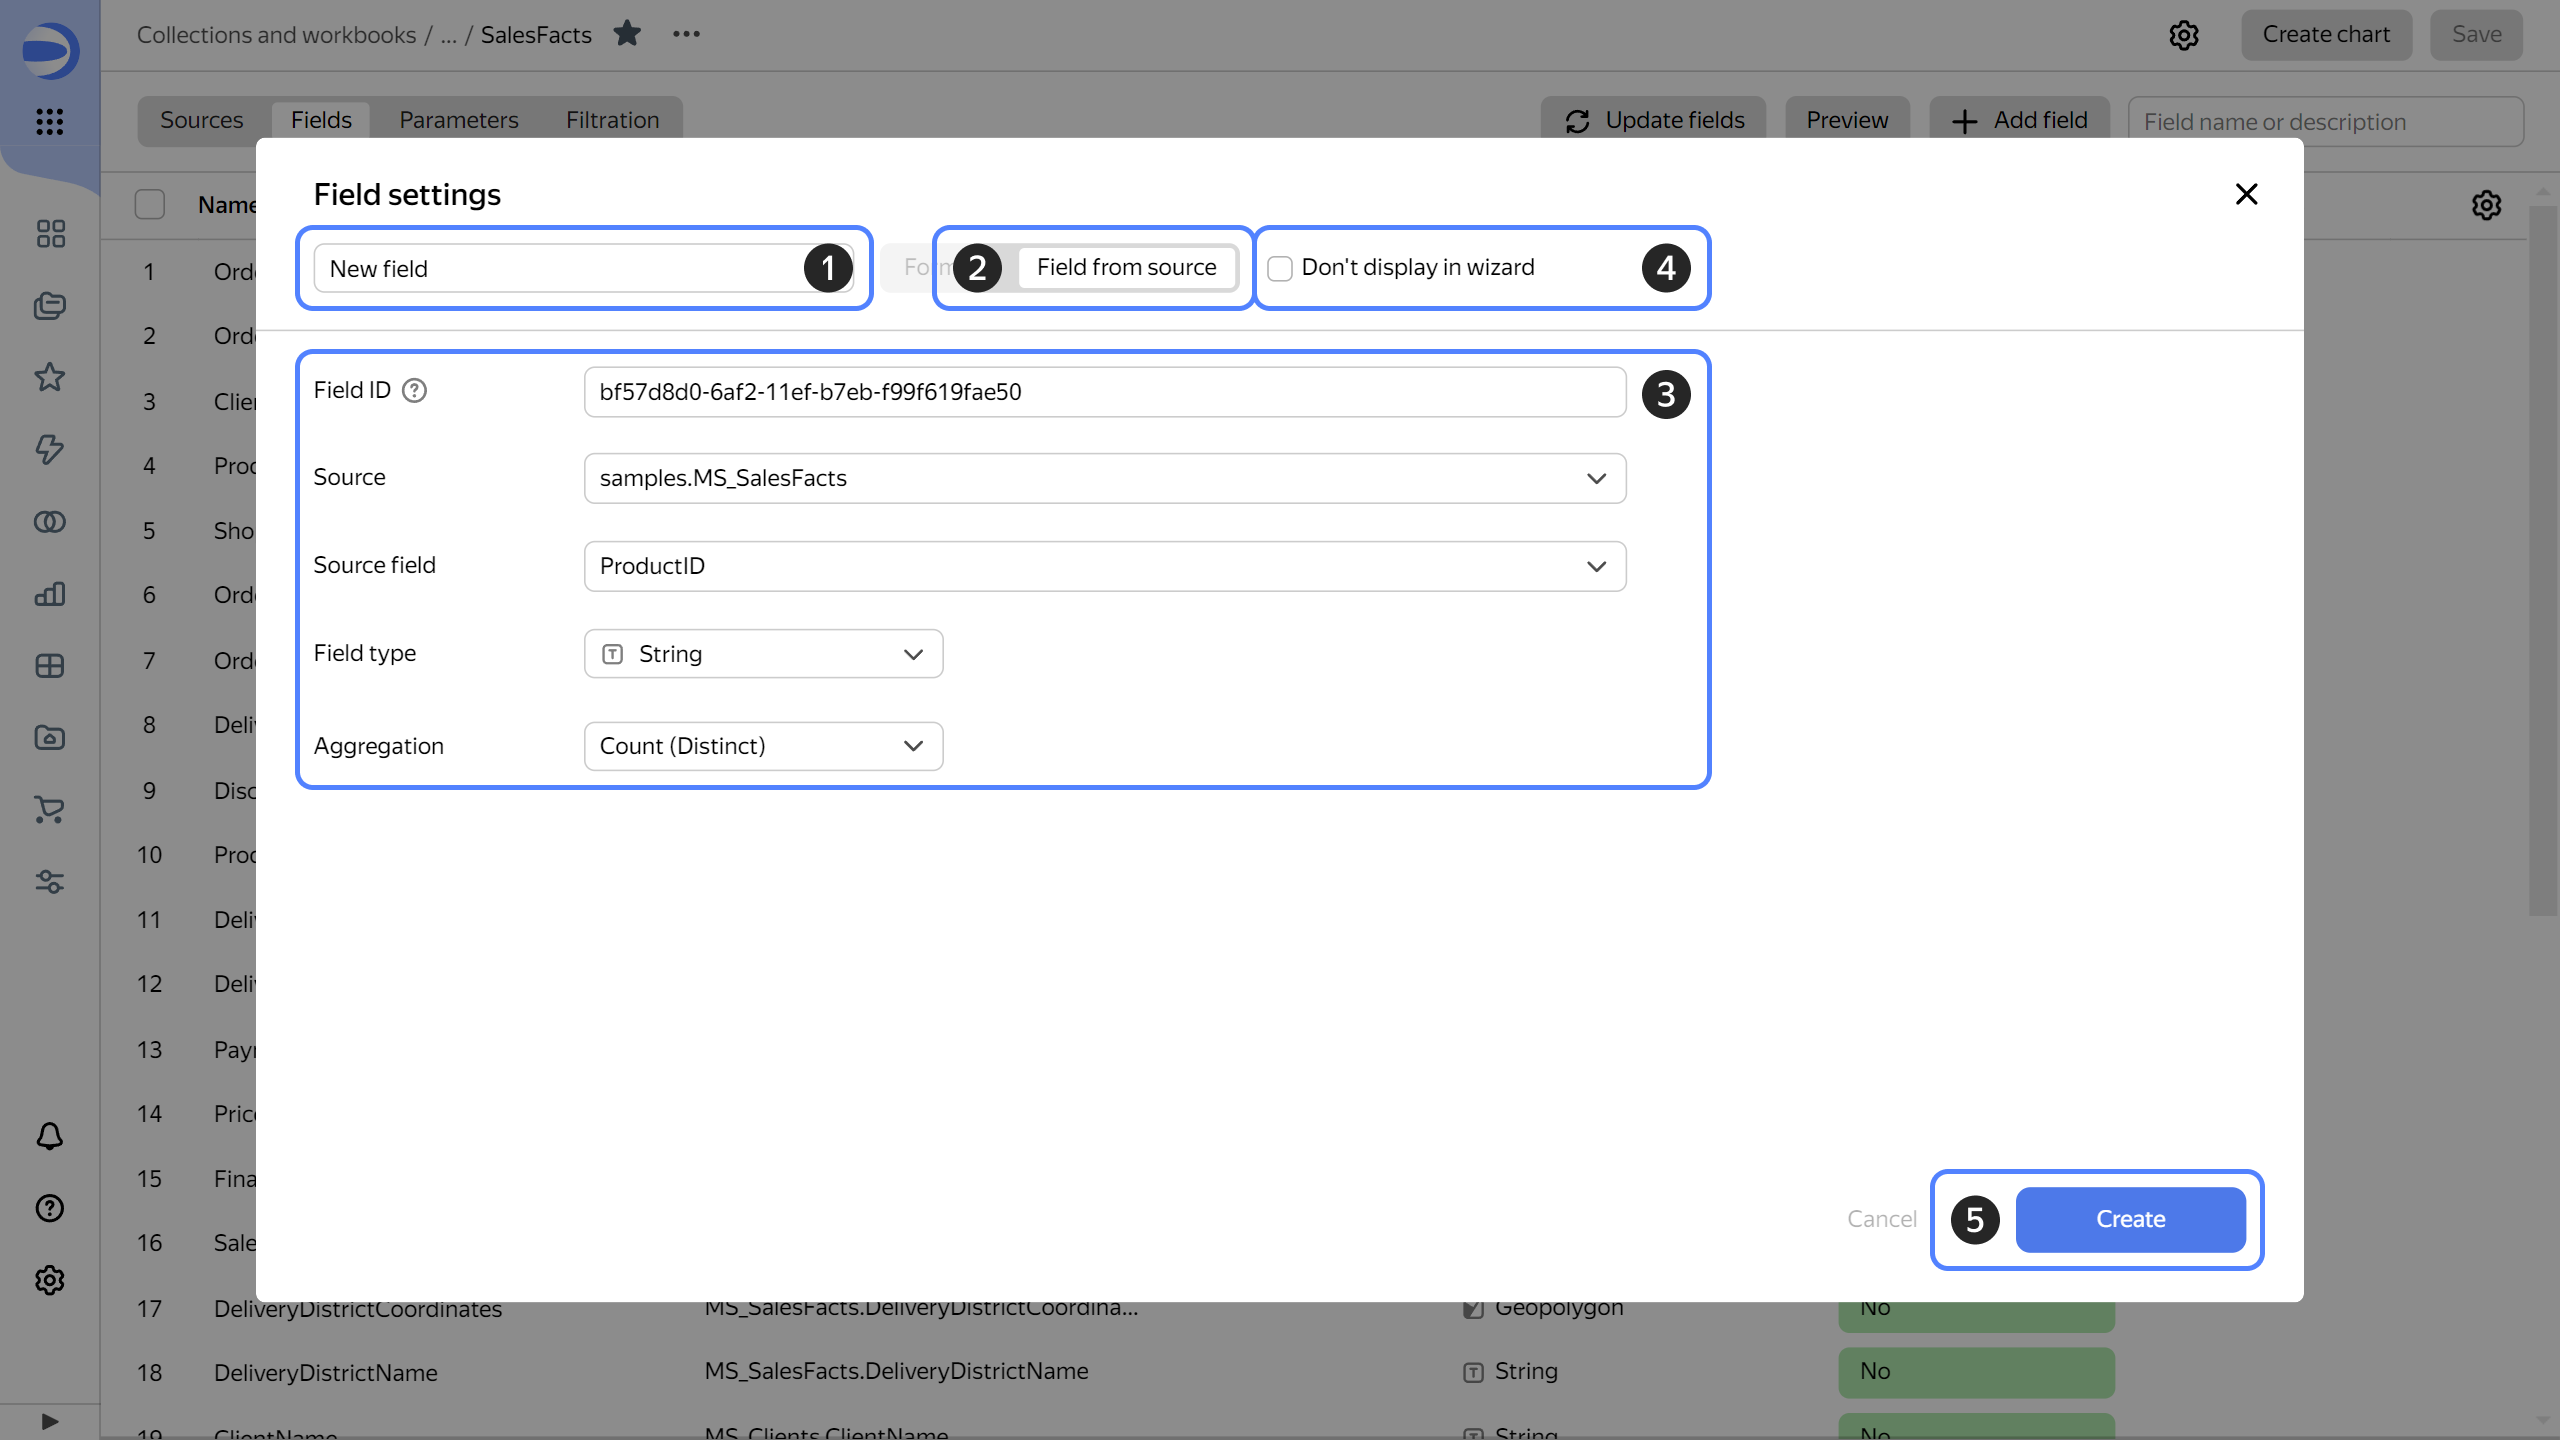
Enter a name for the field.
-
Go to the Field from source tab.
-
Specify the field parameters:
- Field ID: ID of the field you are creating that is used to provide parameters for filtering by this field on the dashboard or in the chart URL. It may contain lowercase Latin letters, as well as the
_and-characters. - Source: Table in the data source with the field you need.
- Source field: Field from the selected table in the data source.
- Field type: Field data type.
- Aggregation: Aggregation function applied to the field.
- Field ID: ID of the field you are creating that is used to provide parameters for filtering by this field on the dashboard or in the chart URL. It may contain lowercase Latin letters, as well as the
-
Optionally, enable Don't display in wizard to hide the field in the wizard when creating a chart.
-
Click Create. The field will appear in the dataset.
-
Duplicating fields
You can duplicate any dataset field, including the calculated field you previously created. To do this:
- On the right side of the field row, click
- Optionally, rename the duplicated field, change its type or formula.
Configuring fields
You can perform the following operations on dataset fields:
-
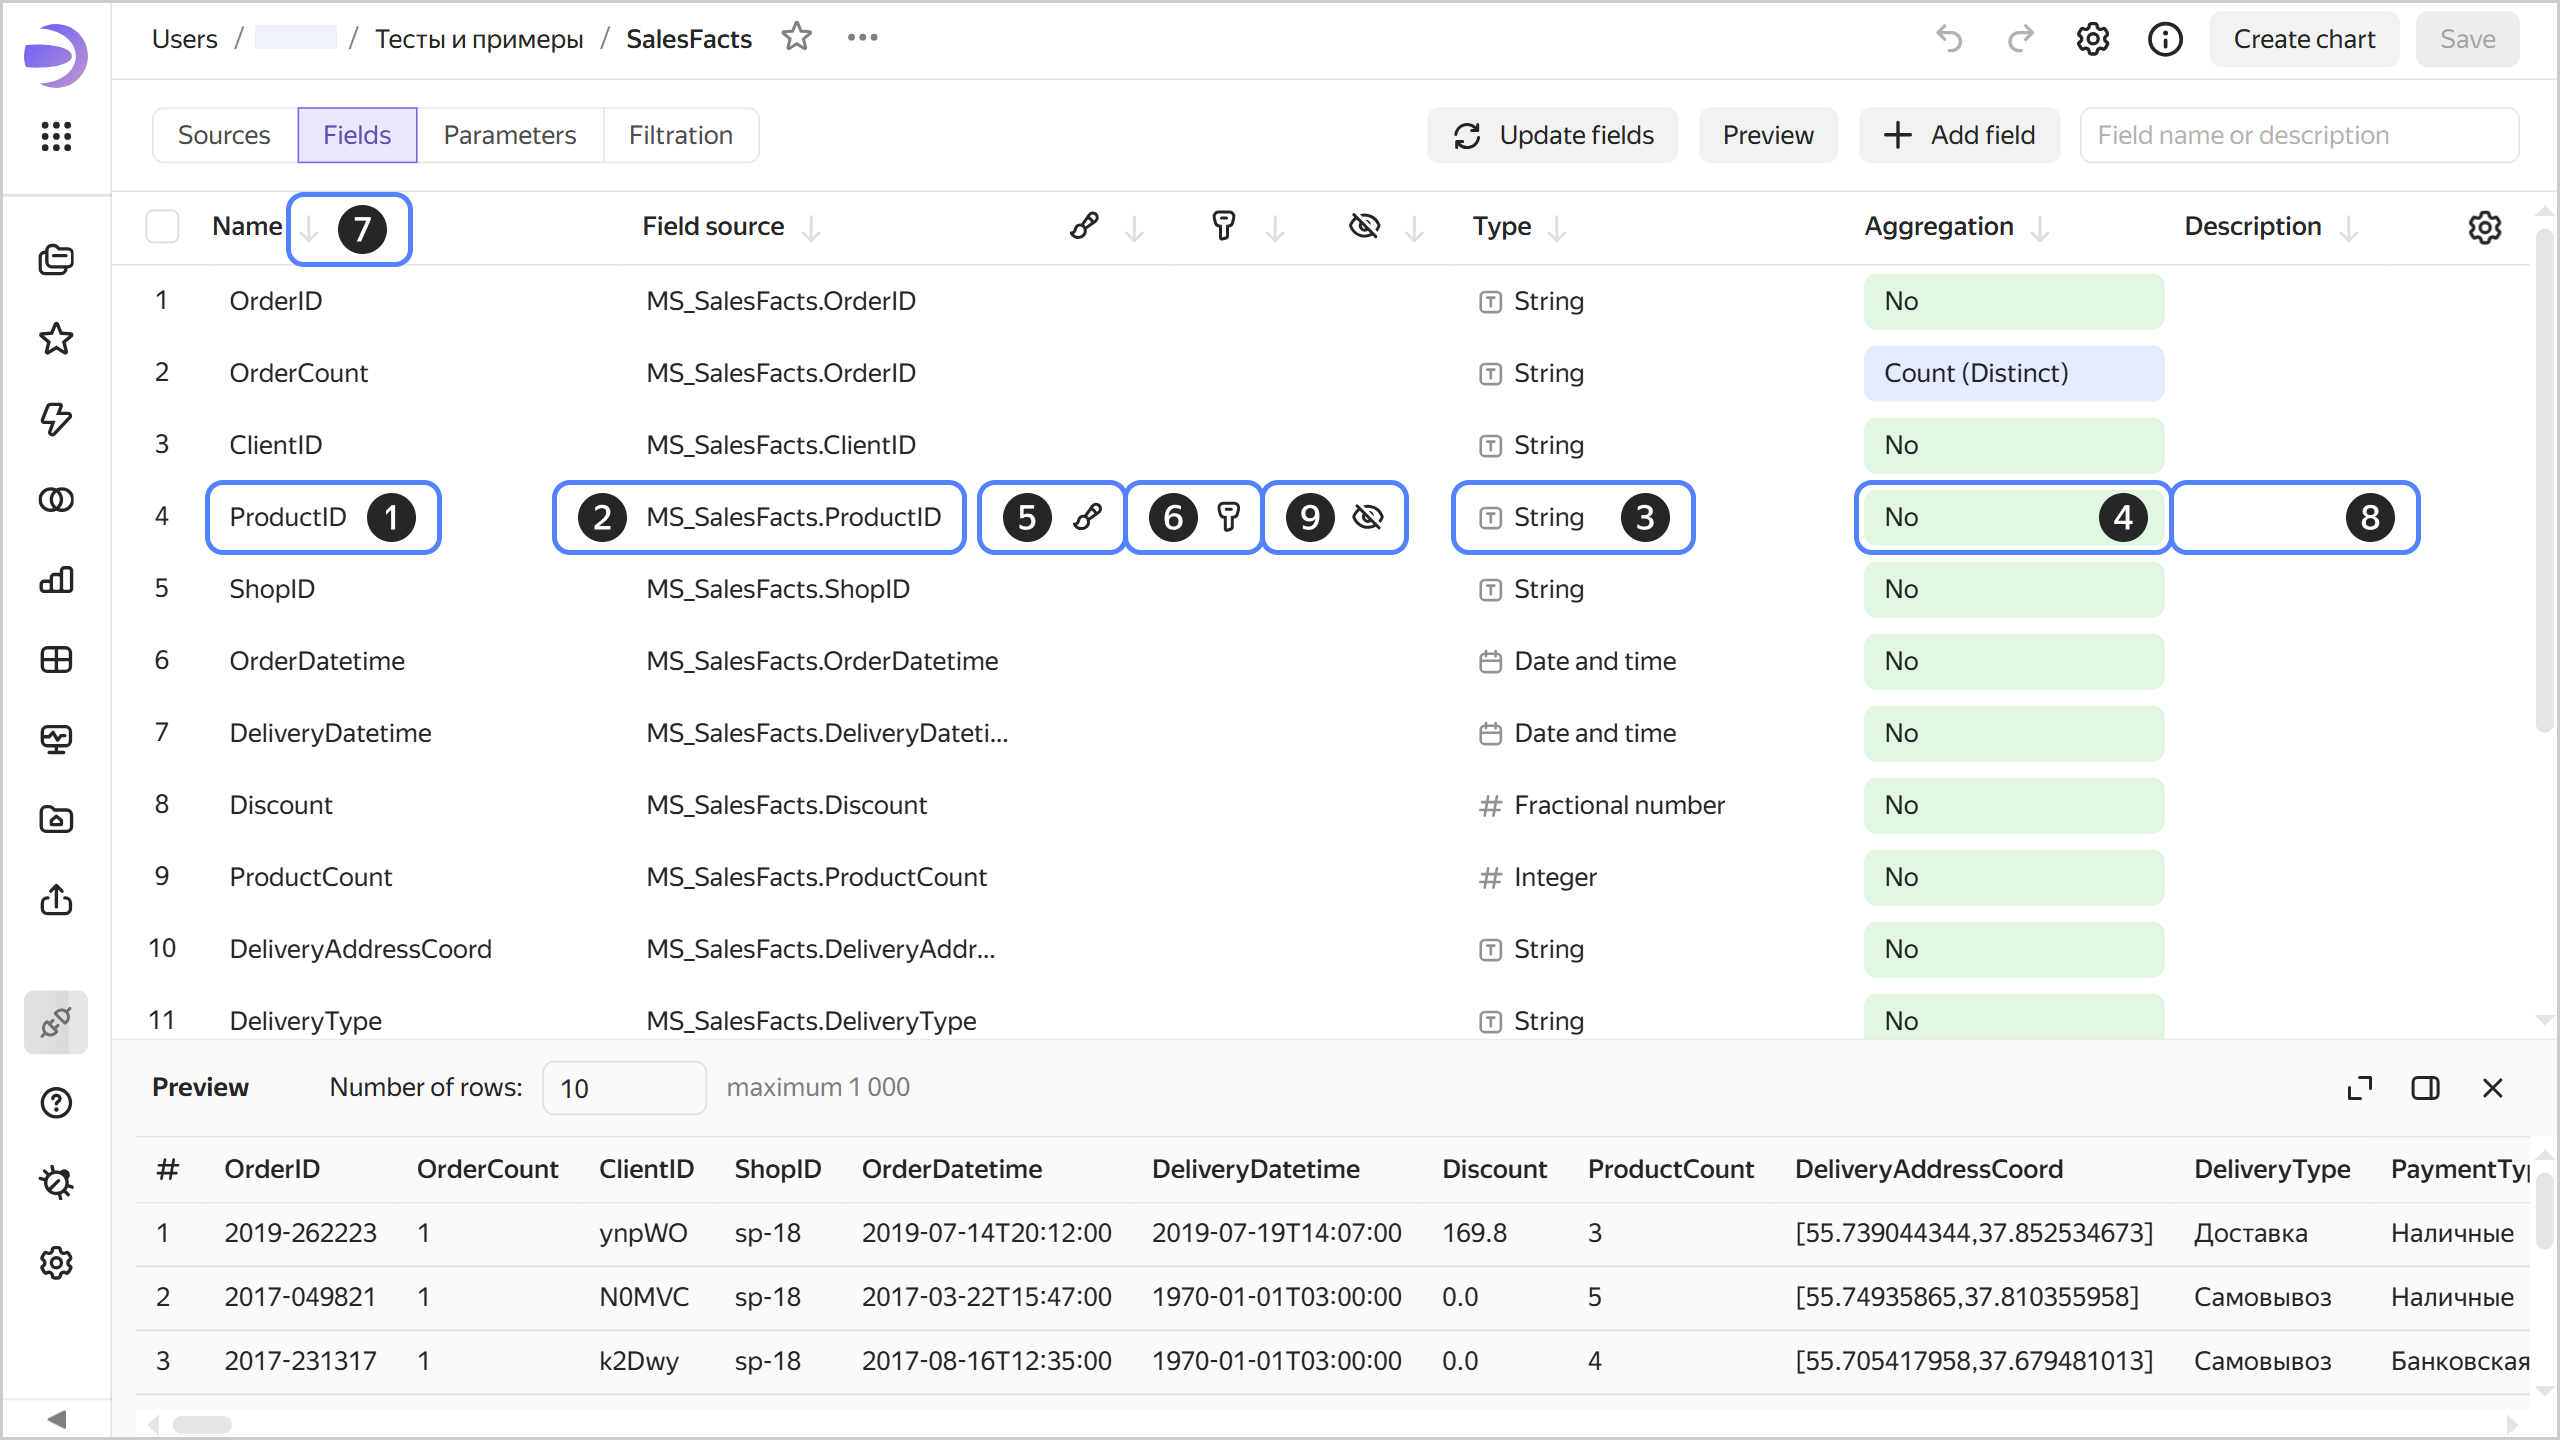
Rename a field: To rename a field, click its current name and enter a new one.
-
Change the source: If the table schema in the source has changed, you can select a new field from the source to match the dataset field.
-
Change the field data type: Data type determines how to process data and which functions can apply to the field. To change the data type, click the current type and select a new one from the list of available types.
-
Select an aggregation type: Aggregation type determines the aggregation function to apply to the field. To change the aggregation type, click the current type and select a new one from the list of available aggregation types.
-
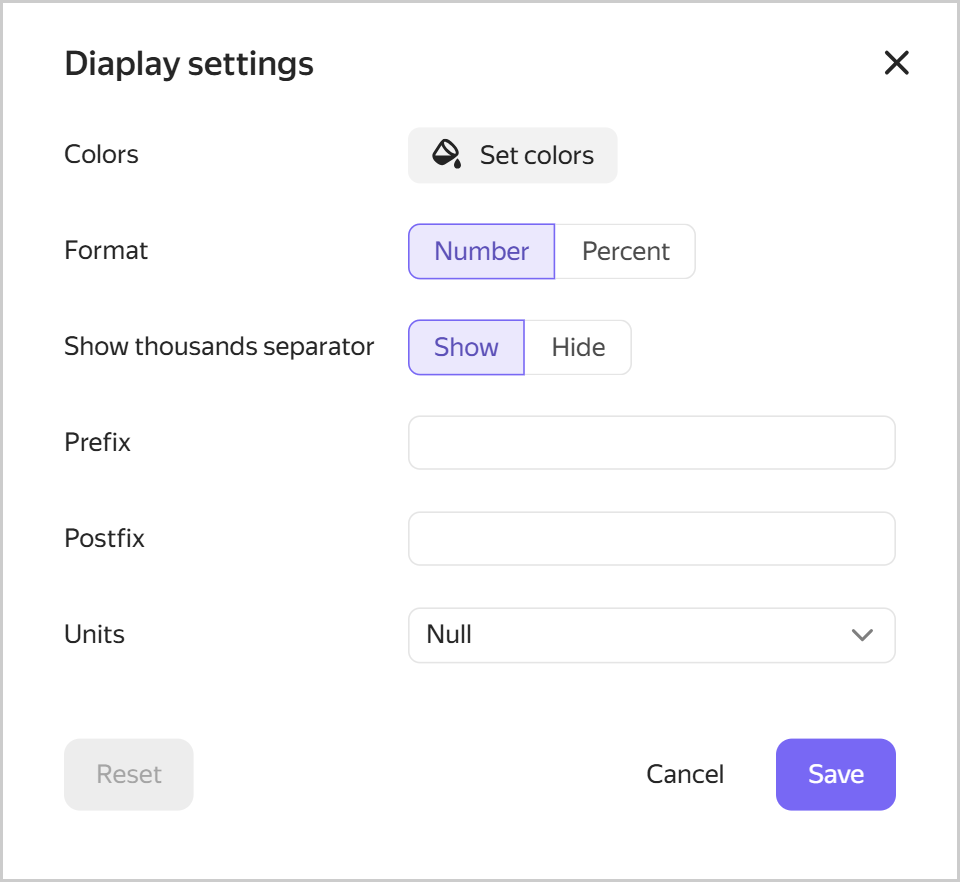
Setting up field display. For dimensions, you can choose a color and set a display format for numeric types; for metrics, you can only set a display format for numbers. These settings apply when you use these fields in charts built from this dataset.
Field display settings
-
Configure access permissions: You can restrict access to field values for different users or user groups. To do this, click
'field_value': user_emailformat. For more information, see Row-level security (RLS). -
Sort fields: You can sort fields by name, data type, aggregation type, and other parameters. To do this, use the sorting buttons at the top of the Fields table.
-
Add a description: You can add a comment to a field in the Description column. This can help other users understand what the field is used for or how it is calculated.
-
Hide fields: You can hide fields you do not need at the moment. Other users will not see these fields in the wizard when creating a chart. To do this, click
Updating fields
You need to update fields if you changed the schema of a table (or tables) in the data source or manually deleted fields from a dataset.
To update fields in a dataset:
-
In the dataset, go to the Fields tab.
-
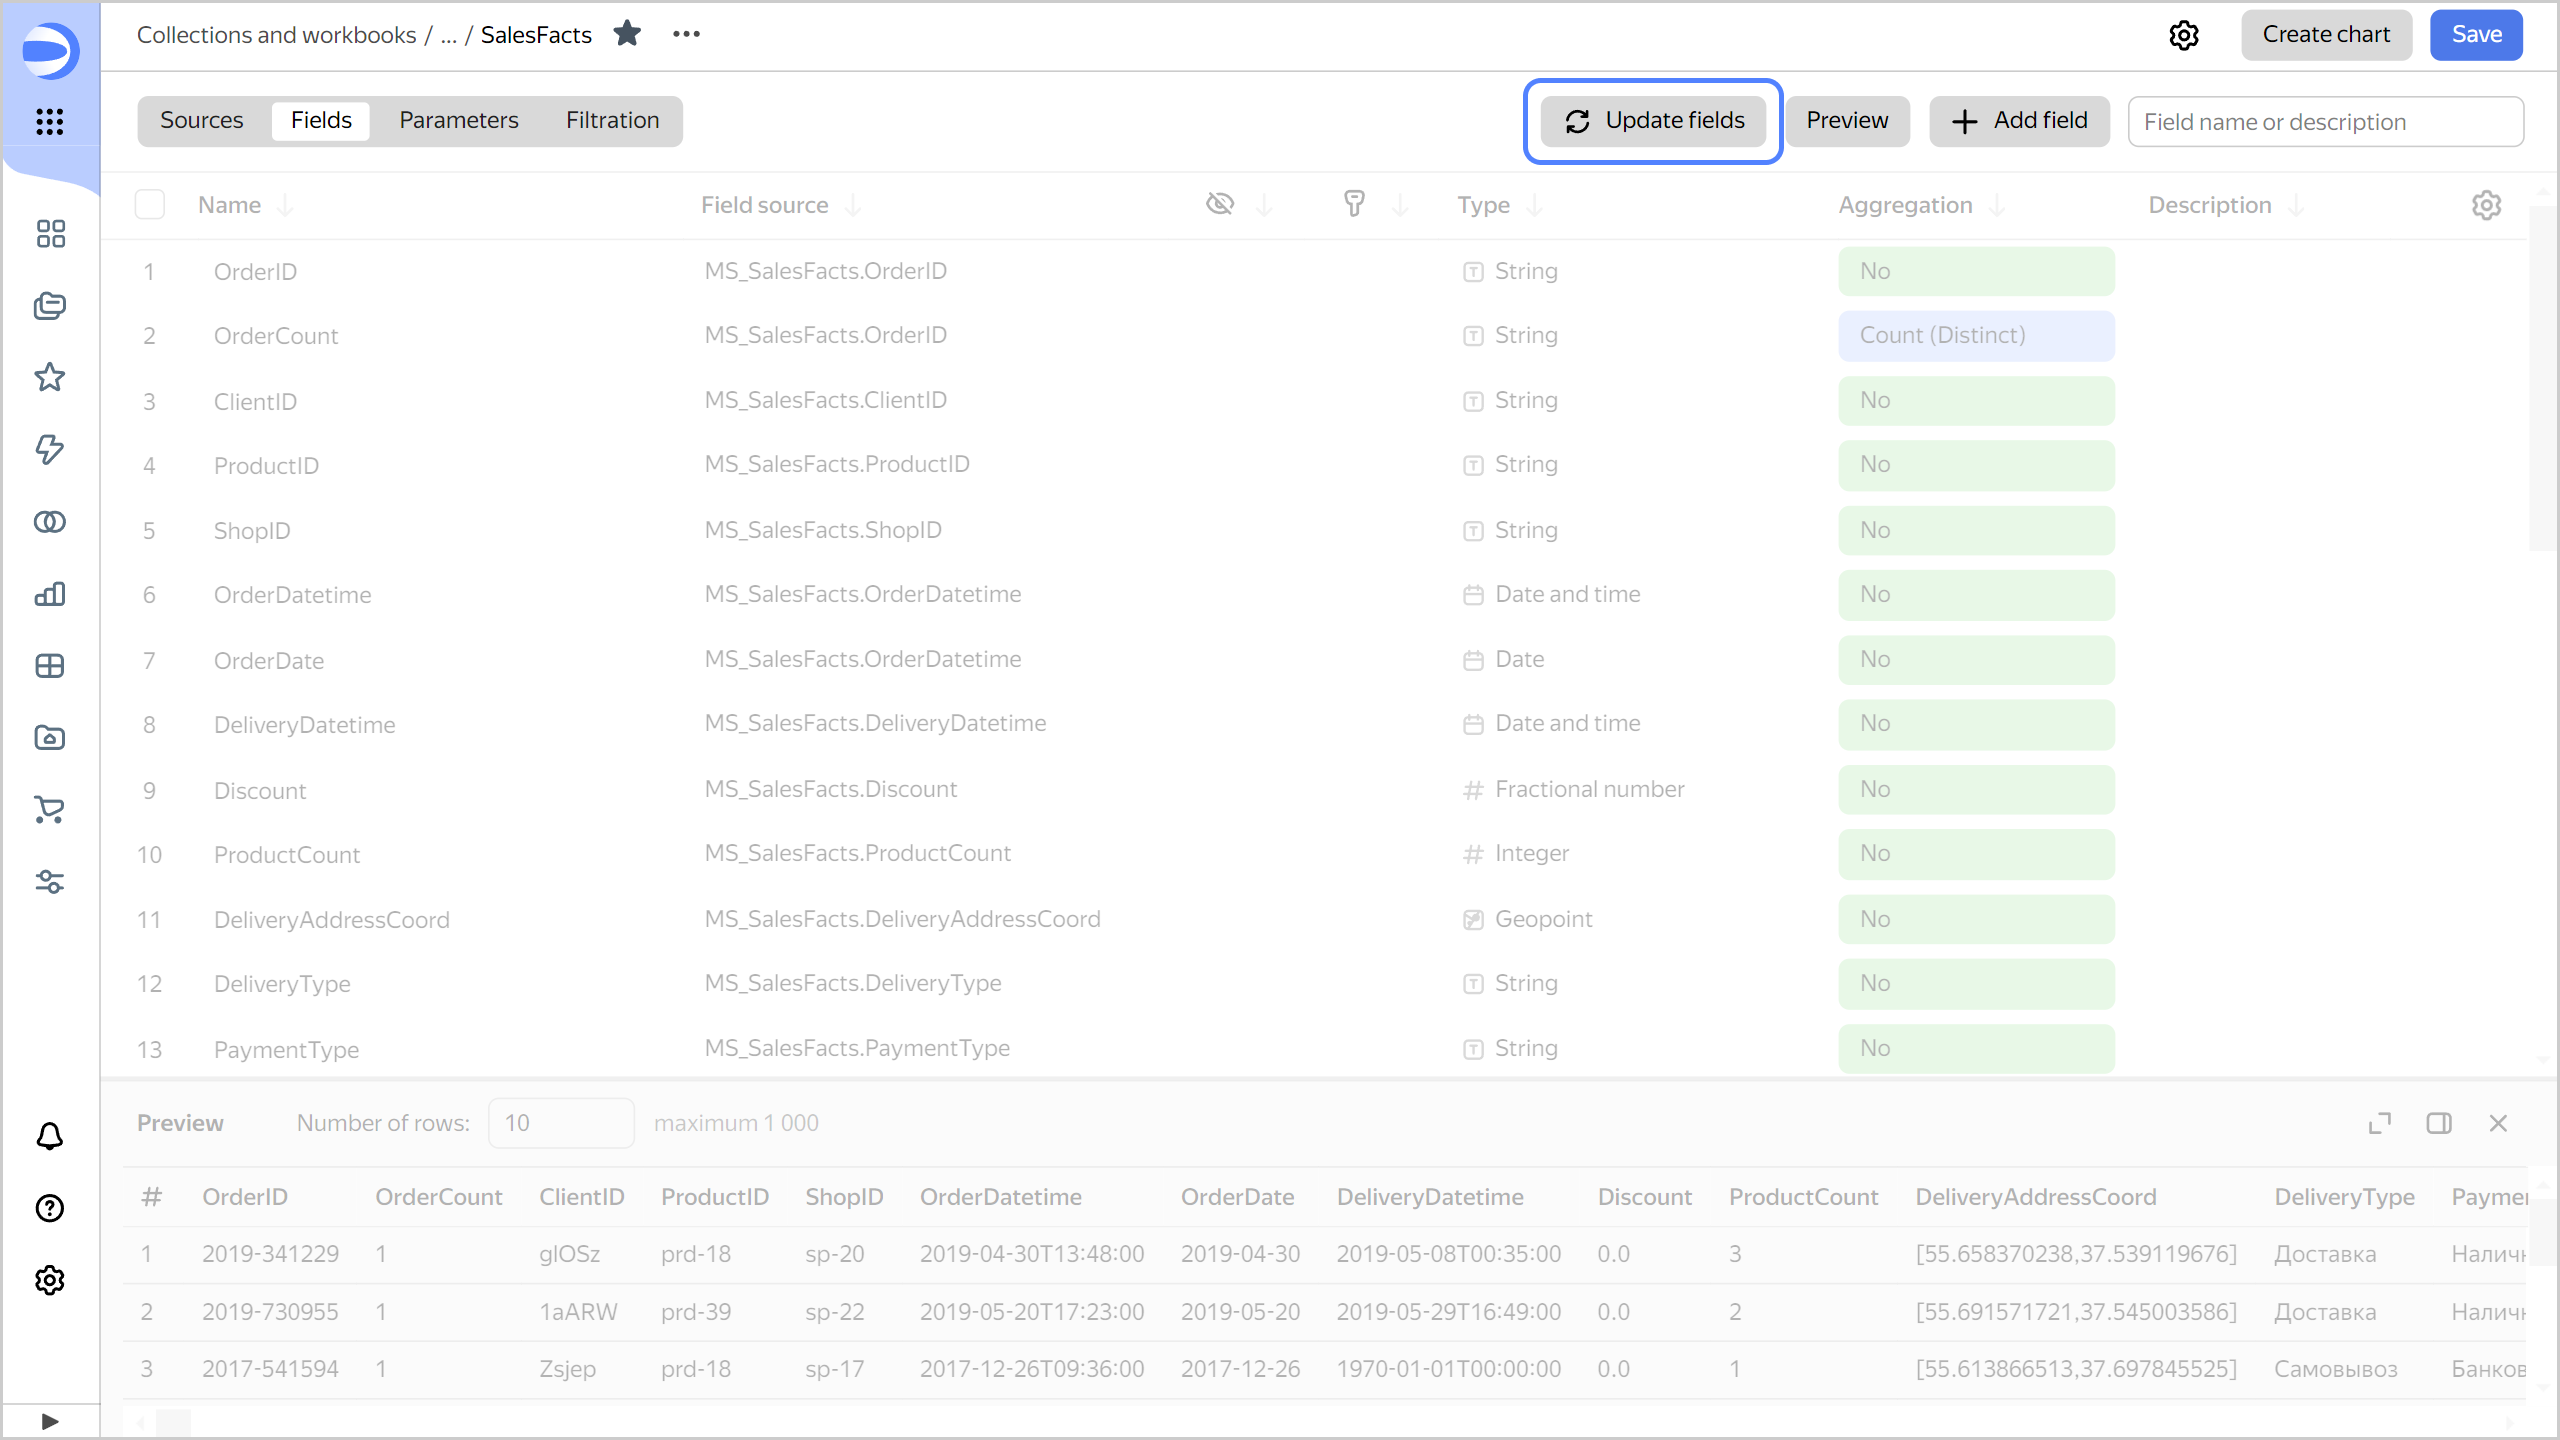
At the top of the screen, click Update fields.
- If a field is missing in the dataset but present in the data source, you will see that field in the list.
- If a field is present in both the dataset and the data source, the field will be updated, e.g., its type will change.
- If a field is present in the dataset but missing in the data source, that field will be marked in red. Delete it from the dataset or replace it with a different field from the data source.
-
In the top-right corner, click Save.
Replacing fields
If a field has been removed from a data source, it will not be updated when a dataset is updated. Charts featuring this field will show the ERR.DS_API.FORMULA.UNKNOWN_SOURCE_COLUMN error. You can delete this field from the chart or replace its source in the dataset.
To replace the field source in the dataset:
-
In the left-hand panel, click
-
In the top-left corner, select the Fields tab.
-
In the dataset, select the field you want to replace.
-
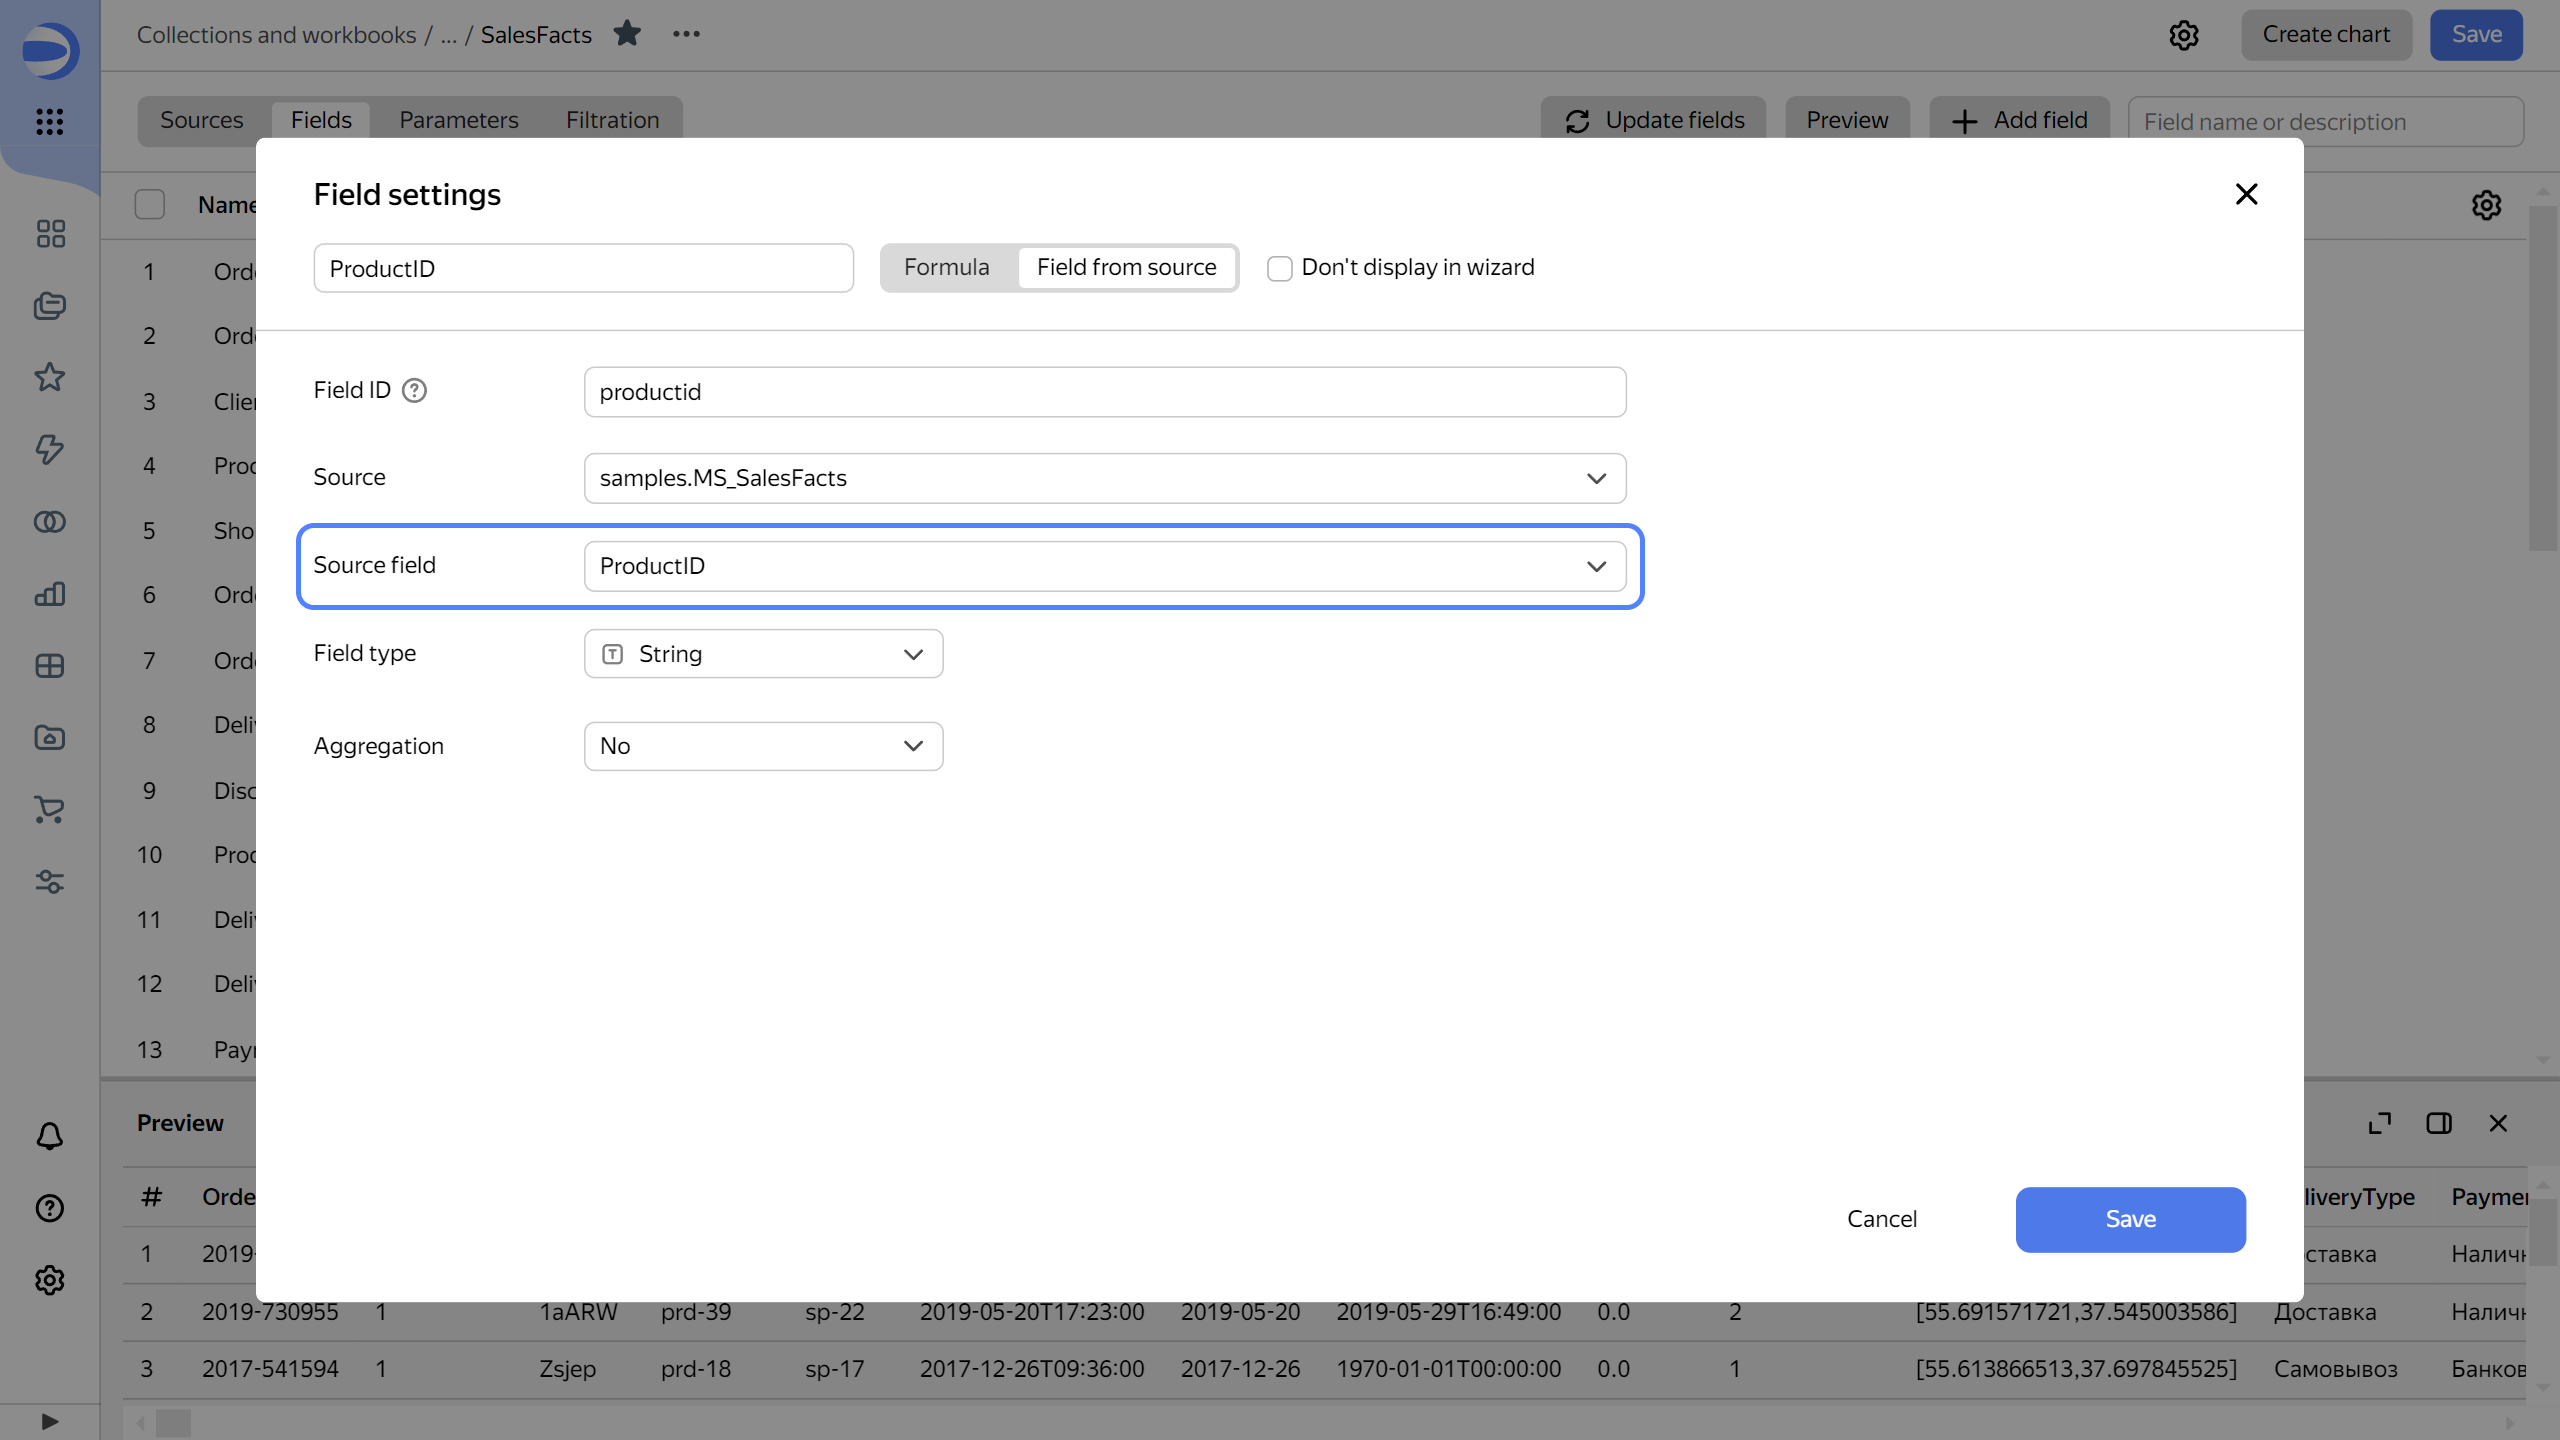
Go to the Field source column.
-
In the field settings, select the field you wish to replace the deleted field with from the Field from source list.
-
Click Save.
Performing operations with fields
To perform operations with fields, click
- Duplicate: Create a copy of the field with identical properties.
- Edit: Change the field settings, its formula, or source.
- Access permissions: Configure access to field values for different users or user groups.
- Copy ID: Copy the field ID to use it for providing parameters for filtering by this field on the dashboard or in the chart URL.
- Delete: Delete the field.
Performing bulk operations with fields
You can select multiple dataset fields at once to delete, hide, or display them, change their type or aggregation.
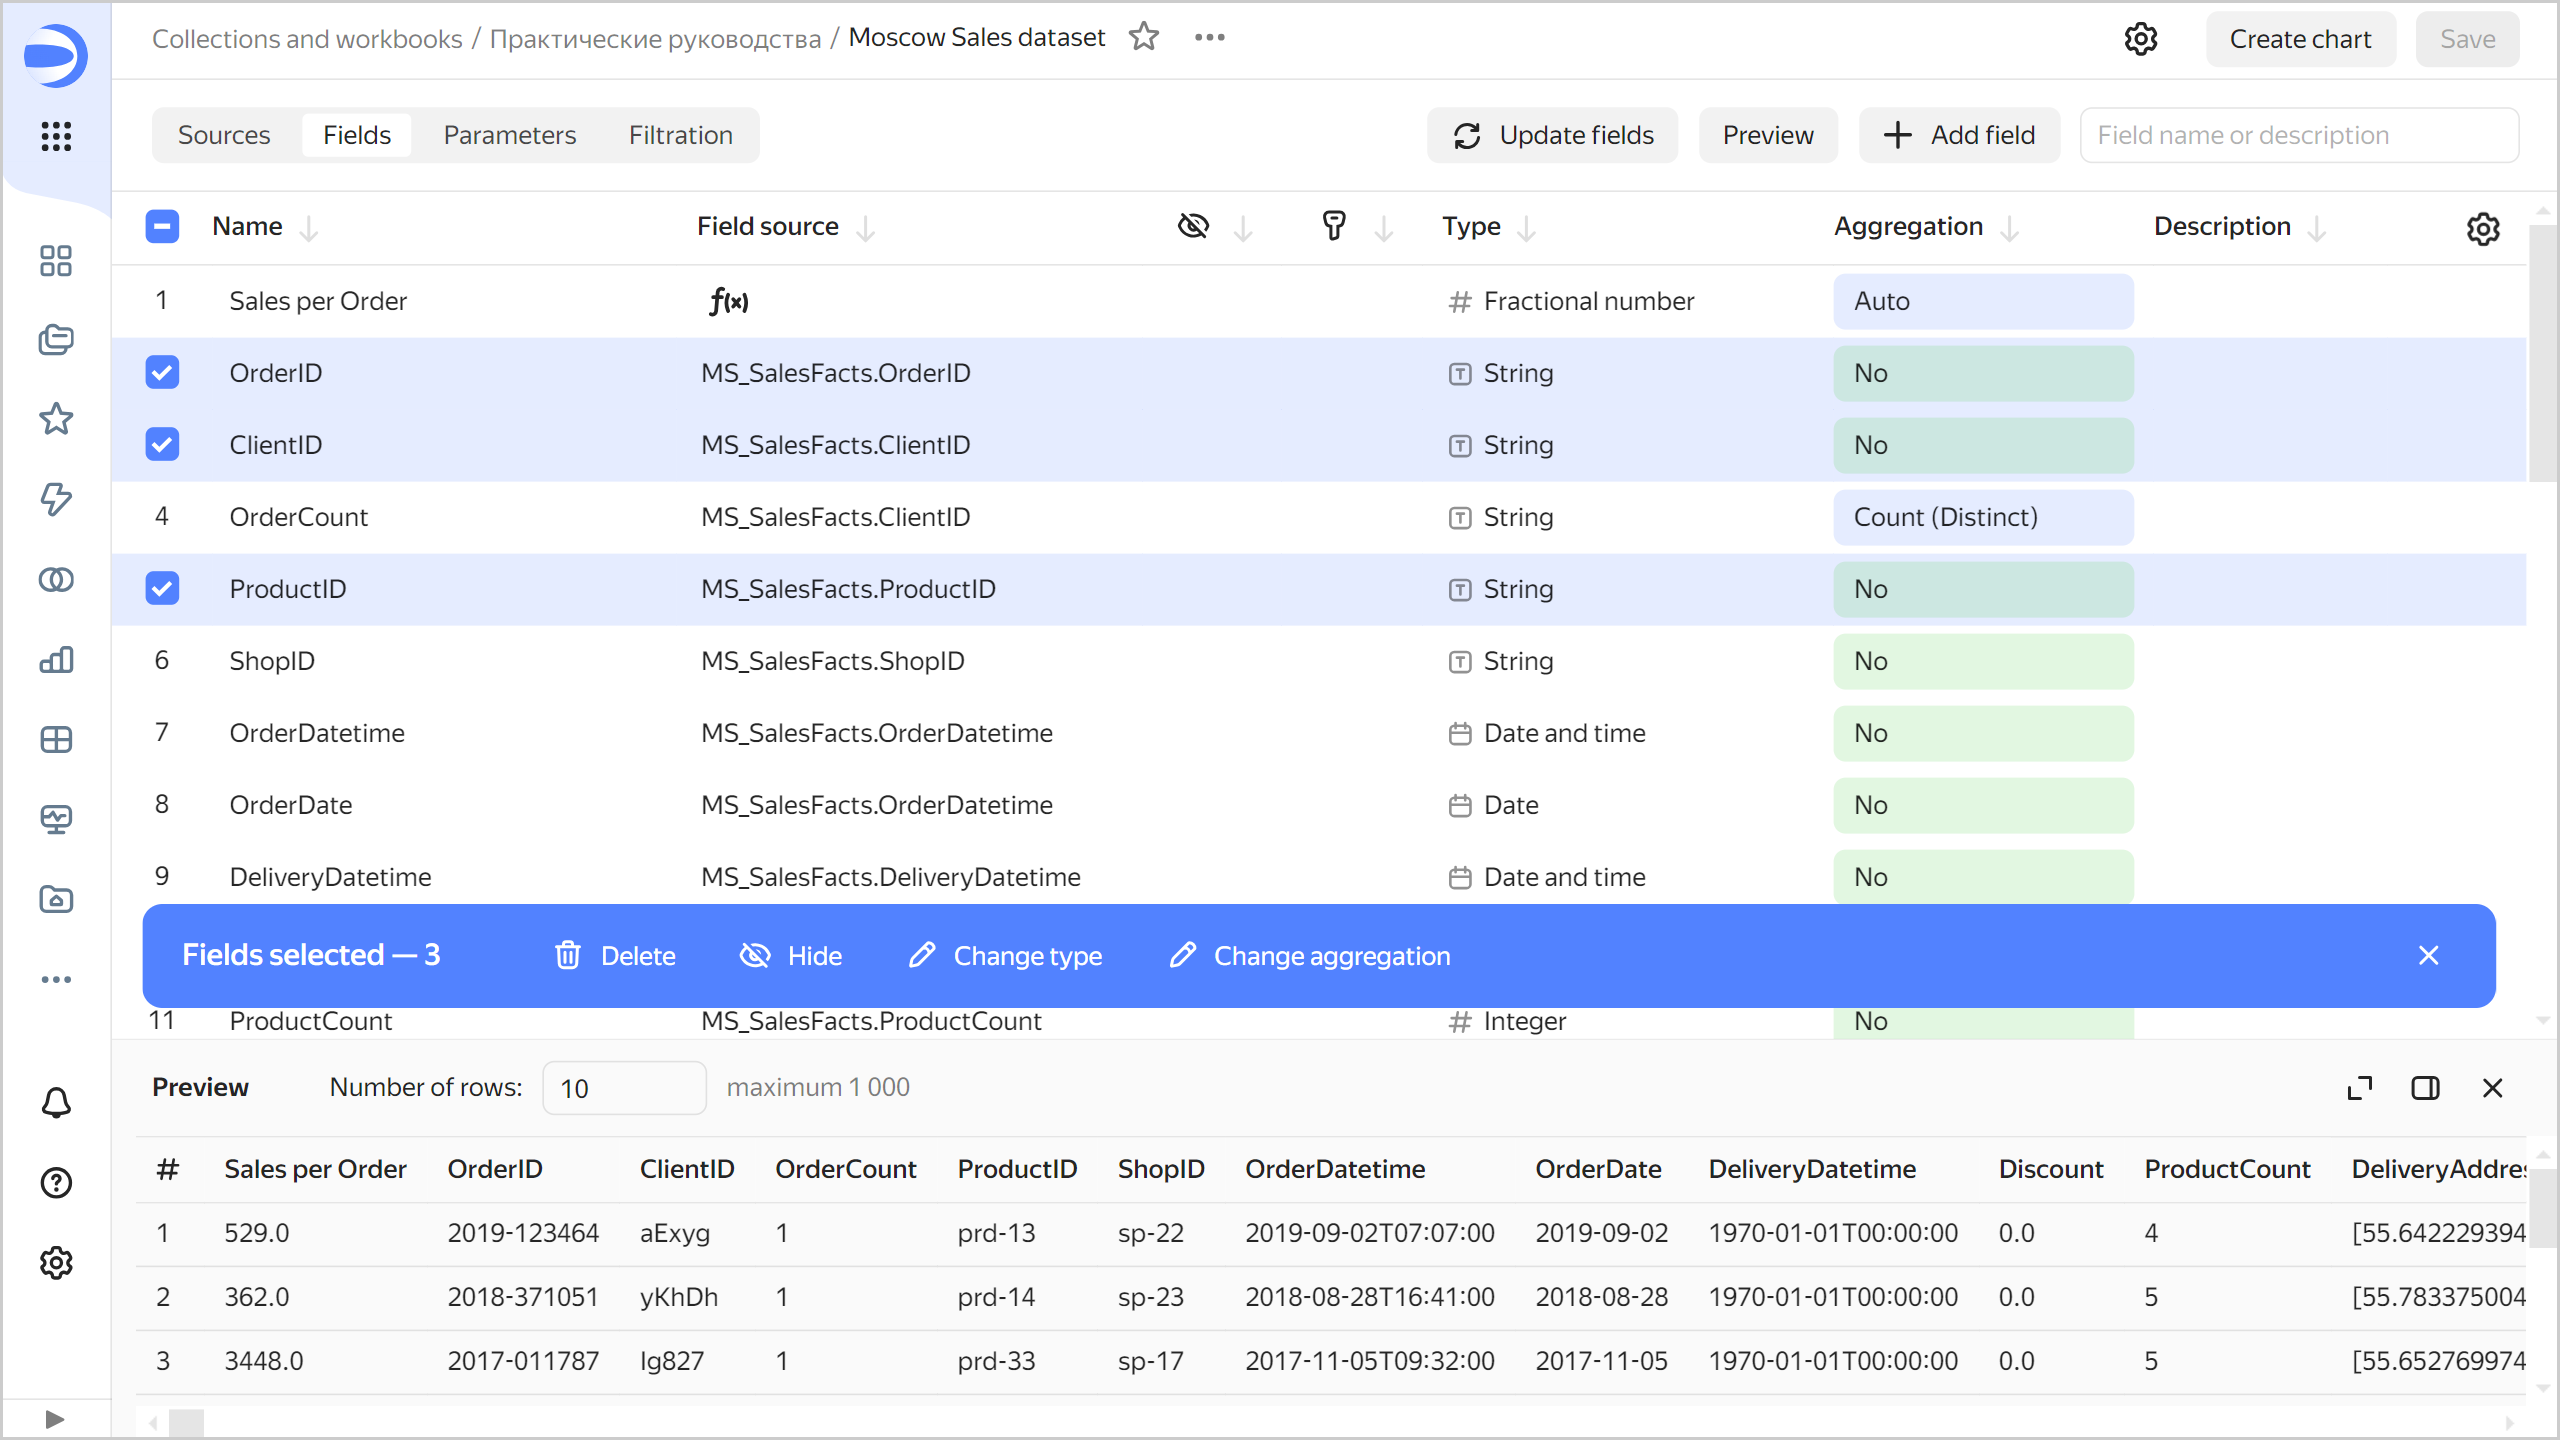
To select the field range, hold the Shift key and set the beginning and end of the range with your mouse. You can select multiple ranges. To select each of the field ranges, hold Ctrl and click the first field in the range, then hold Shift and click the last field in the range.
Adding parameters
In datasets, you can use parameters:
Note
Parameters added at the dataset level are available in all charts created based on this dataset.
-
In the dataset, go to the Parameters tab.
-
Click Add.
-
In the Add parameter window, specify:
-
Name: Sets the parameter name.
-
Type: Parameter data type.
-
Default value. This is a required value. It is used when no parameter value is set in the dashboard, chart URL, or chart settings.
-
Allow use in source settings. Enable the option if you plan to use the parameter to access the dataset source.
-
Value validation. This setting will be available if you enable the Allow use in source settings option. The default value vallidation is as follows:
^[a-zA-Z0-9а-яА-ЯёЁ_\s\(\)\.\'\=\-\+\*\/\,\<\>\!]+$. You can customize validation with a Python regular expression.
-
-
Click Add.
You can also create parameters at the chart level.
For an example of using parameters in a source, see Source parameterization in DataLens.
Adding filters
At the dataset level, you can add default filters that will automatically apply to any new chart created from the current dataset.
- In the dataset, go to the Filtering tab.
- Click Add.
- Select the field to apply the filter to.
- Set a filtering rule.
- In the bottom-right corner, click Apply filter.
Note
Default filters are not applied to data in the dataset preview area.
Disabling data export
To disable data export from charts based on a specific dataset, click
Charts based on this dataset will no longer display the data export option in their
To re-enable data export, click
Configuring access
The way you configure access to a dataset varies depending on whether it is located in a workbook or a directory.
Before assigning access permissions to a user, add this user to DataLens.
A dataset inherits all access permissions from a workbook. Assign the user permissions for the appropriate workbook and they will apply to your dataset.
-
On the dataset page, click
-
In the window that opens, click Dataset access.
-
Enter a username or select the All group.
Note
Assigning permissions to user groups is supported for workbooks and collections.
-
(Optional) Write a comment for the user you are granting permissions to.
-
Specify the appropriate permissions and click Add.
Note
You can assign roles for linked objects. For example, if you grant access to a chart, you can also grant access to a dataset and connection.
For more information on object access, see Managing access to Yandex DataLens.
Deleting a dataset
Before deleting a dataset, check which objects are using it. To do this, at the top of the dataset, click
To delete a dataset:
- At the top of the dataset, click
- Click Delete.