Creating a CDN resource with an Yandex Object Storage origin bucket

Warning
Starting July 1, 2026, a new pricing model for Cloud CDN is in effect. For more information, see Yandex Cloud CDN pricing policy.
Note
For details on creating an origin group and a CDN resource with other origin types, see these guides:
Set up content distribution over a CDN with an Object Storage bucket as the origin:
Getting started
-
Make sure you have a domain name and can access the DNS settings on your DNS hosting provider’s website. This is usually the company that registered your domain.
-
Navigate to the management console and log in to Yandex Cloud, or sign up if you have not already.
-
If you do not have a folder yet, create one.
Learn more about creating a folder
-
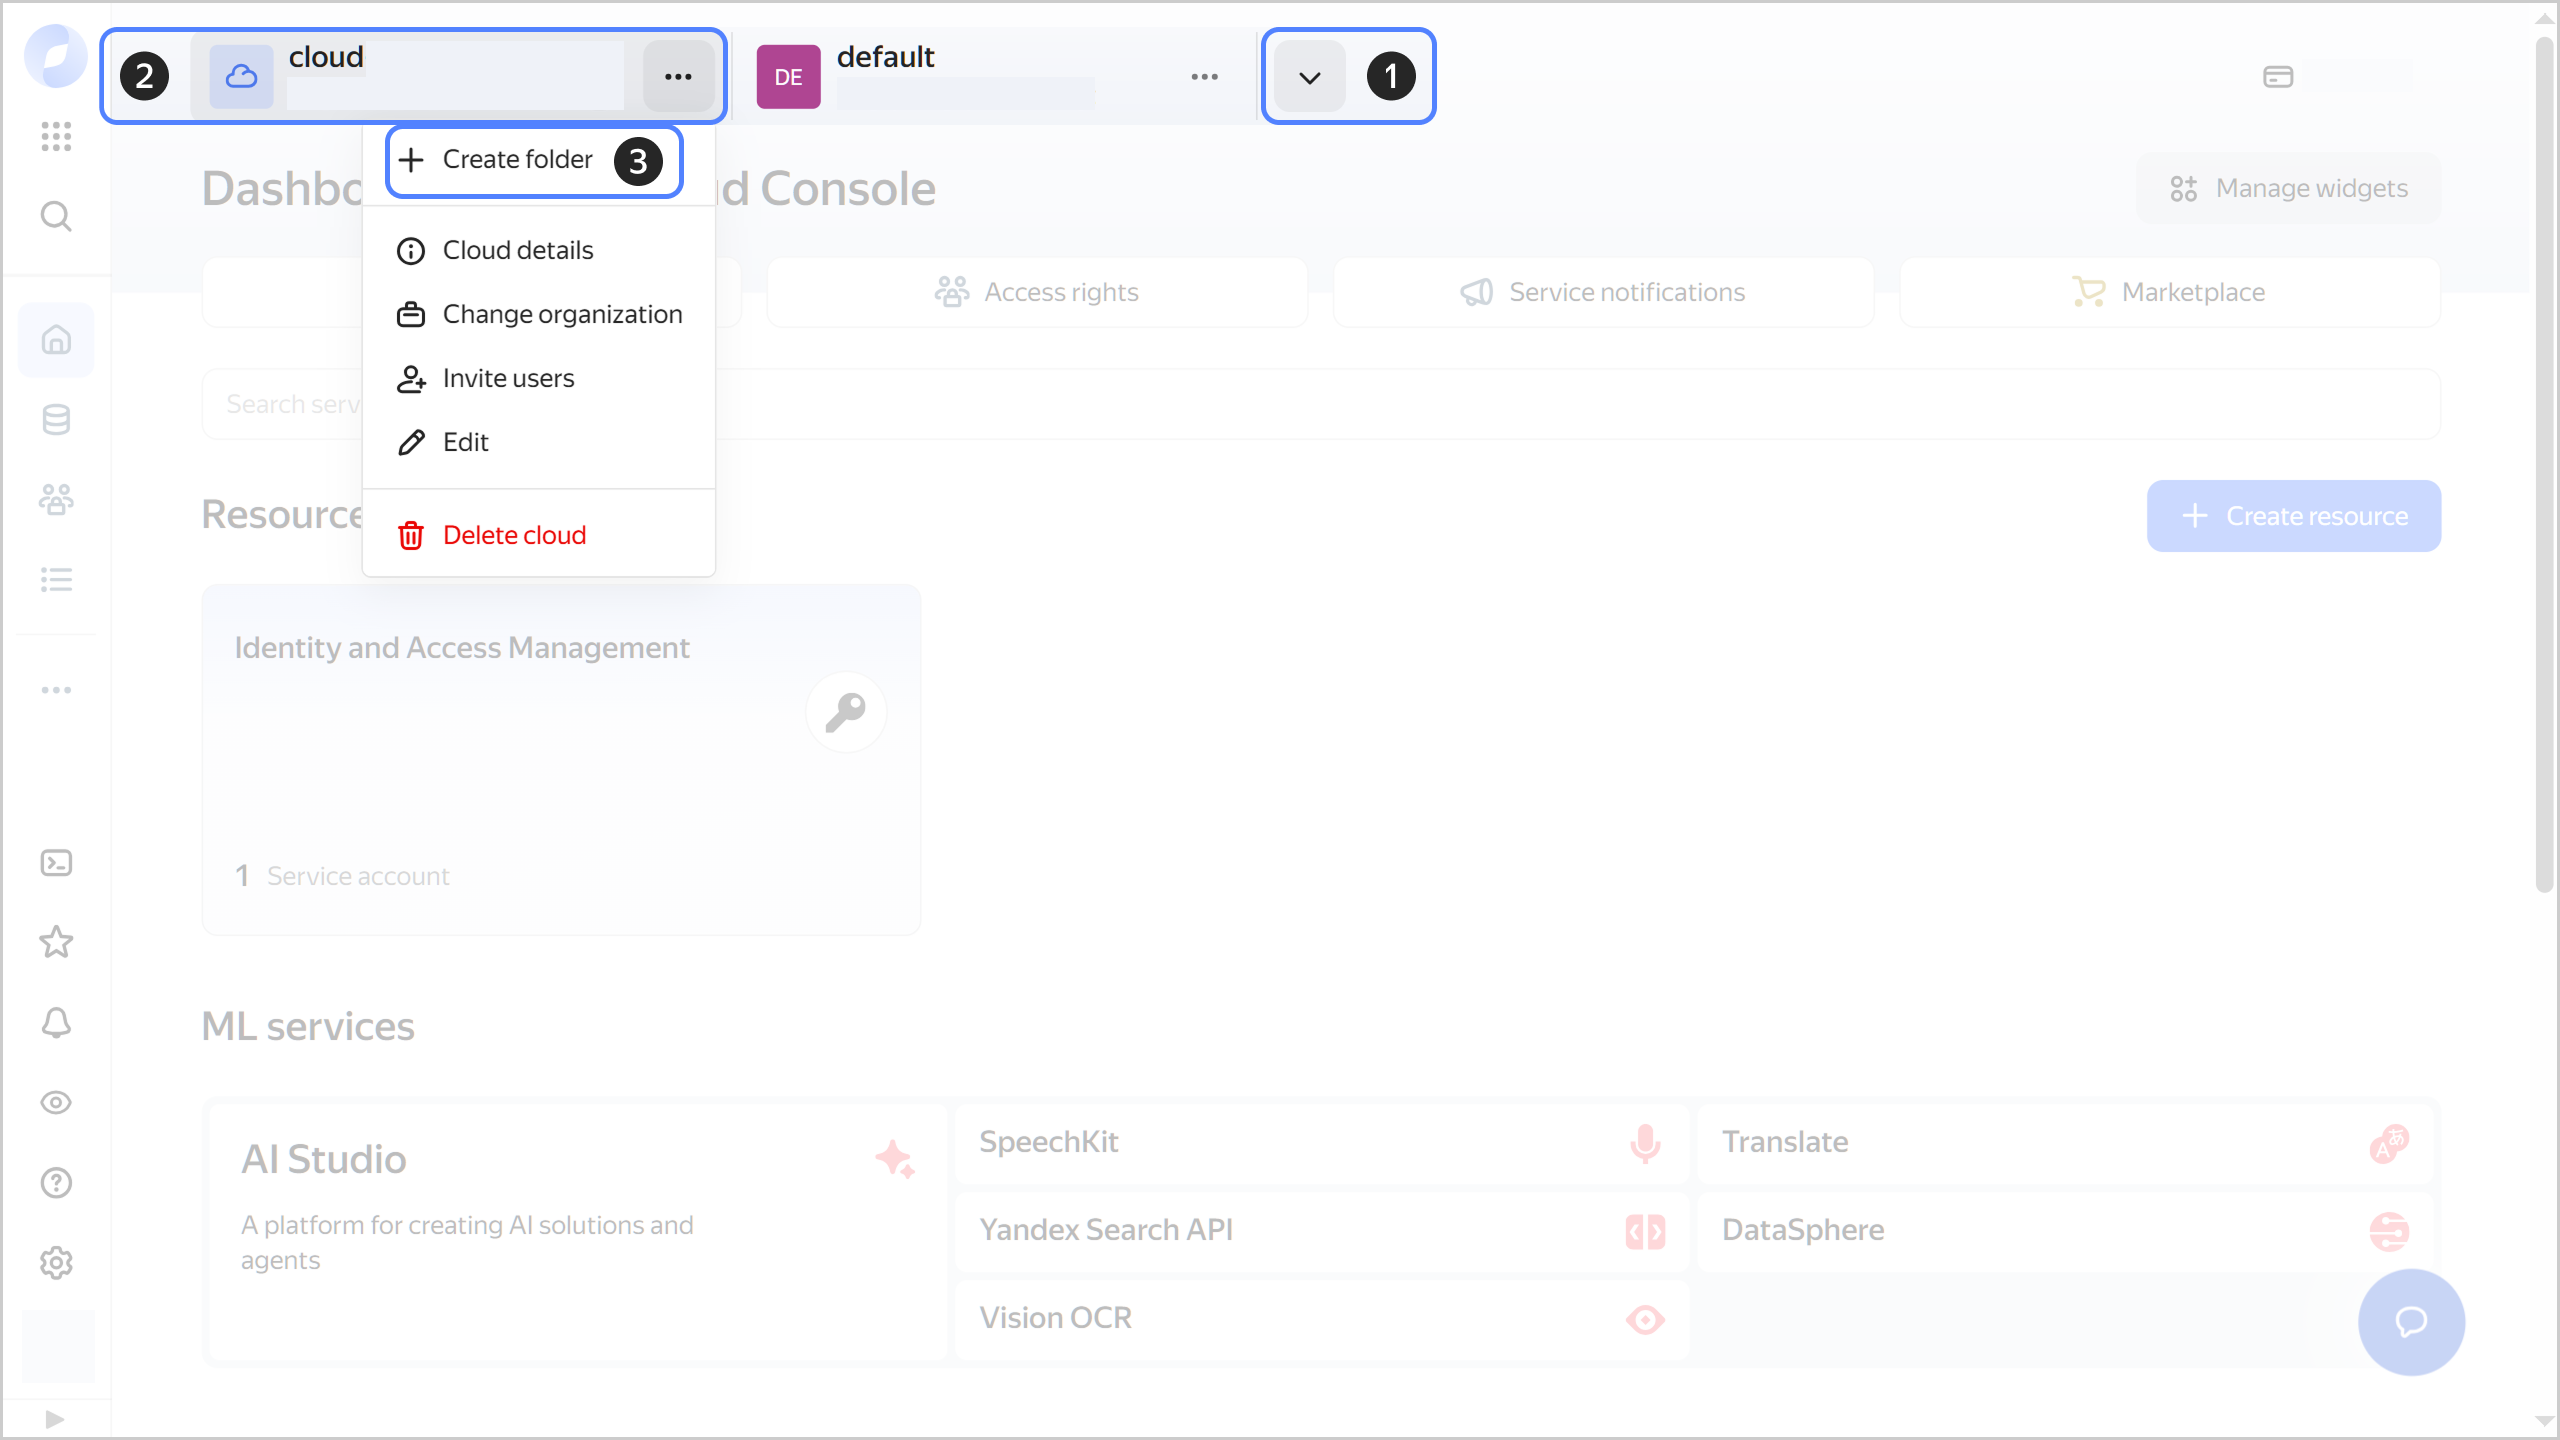
In the management console, in the top panel, click or and select the cloud.
-
To the right of the cloud name, click .
-
Select Create folder.
-
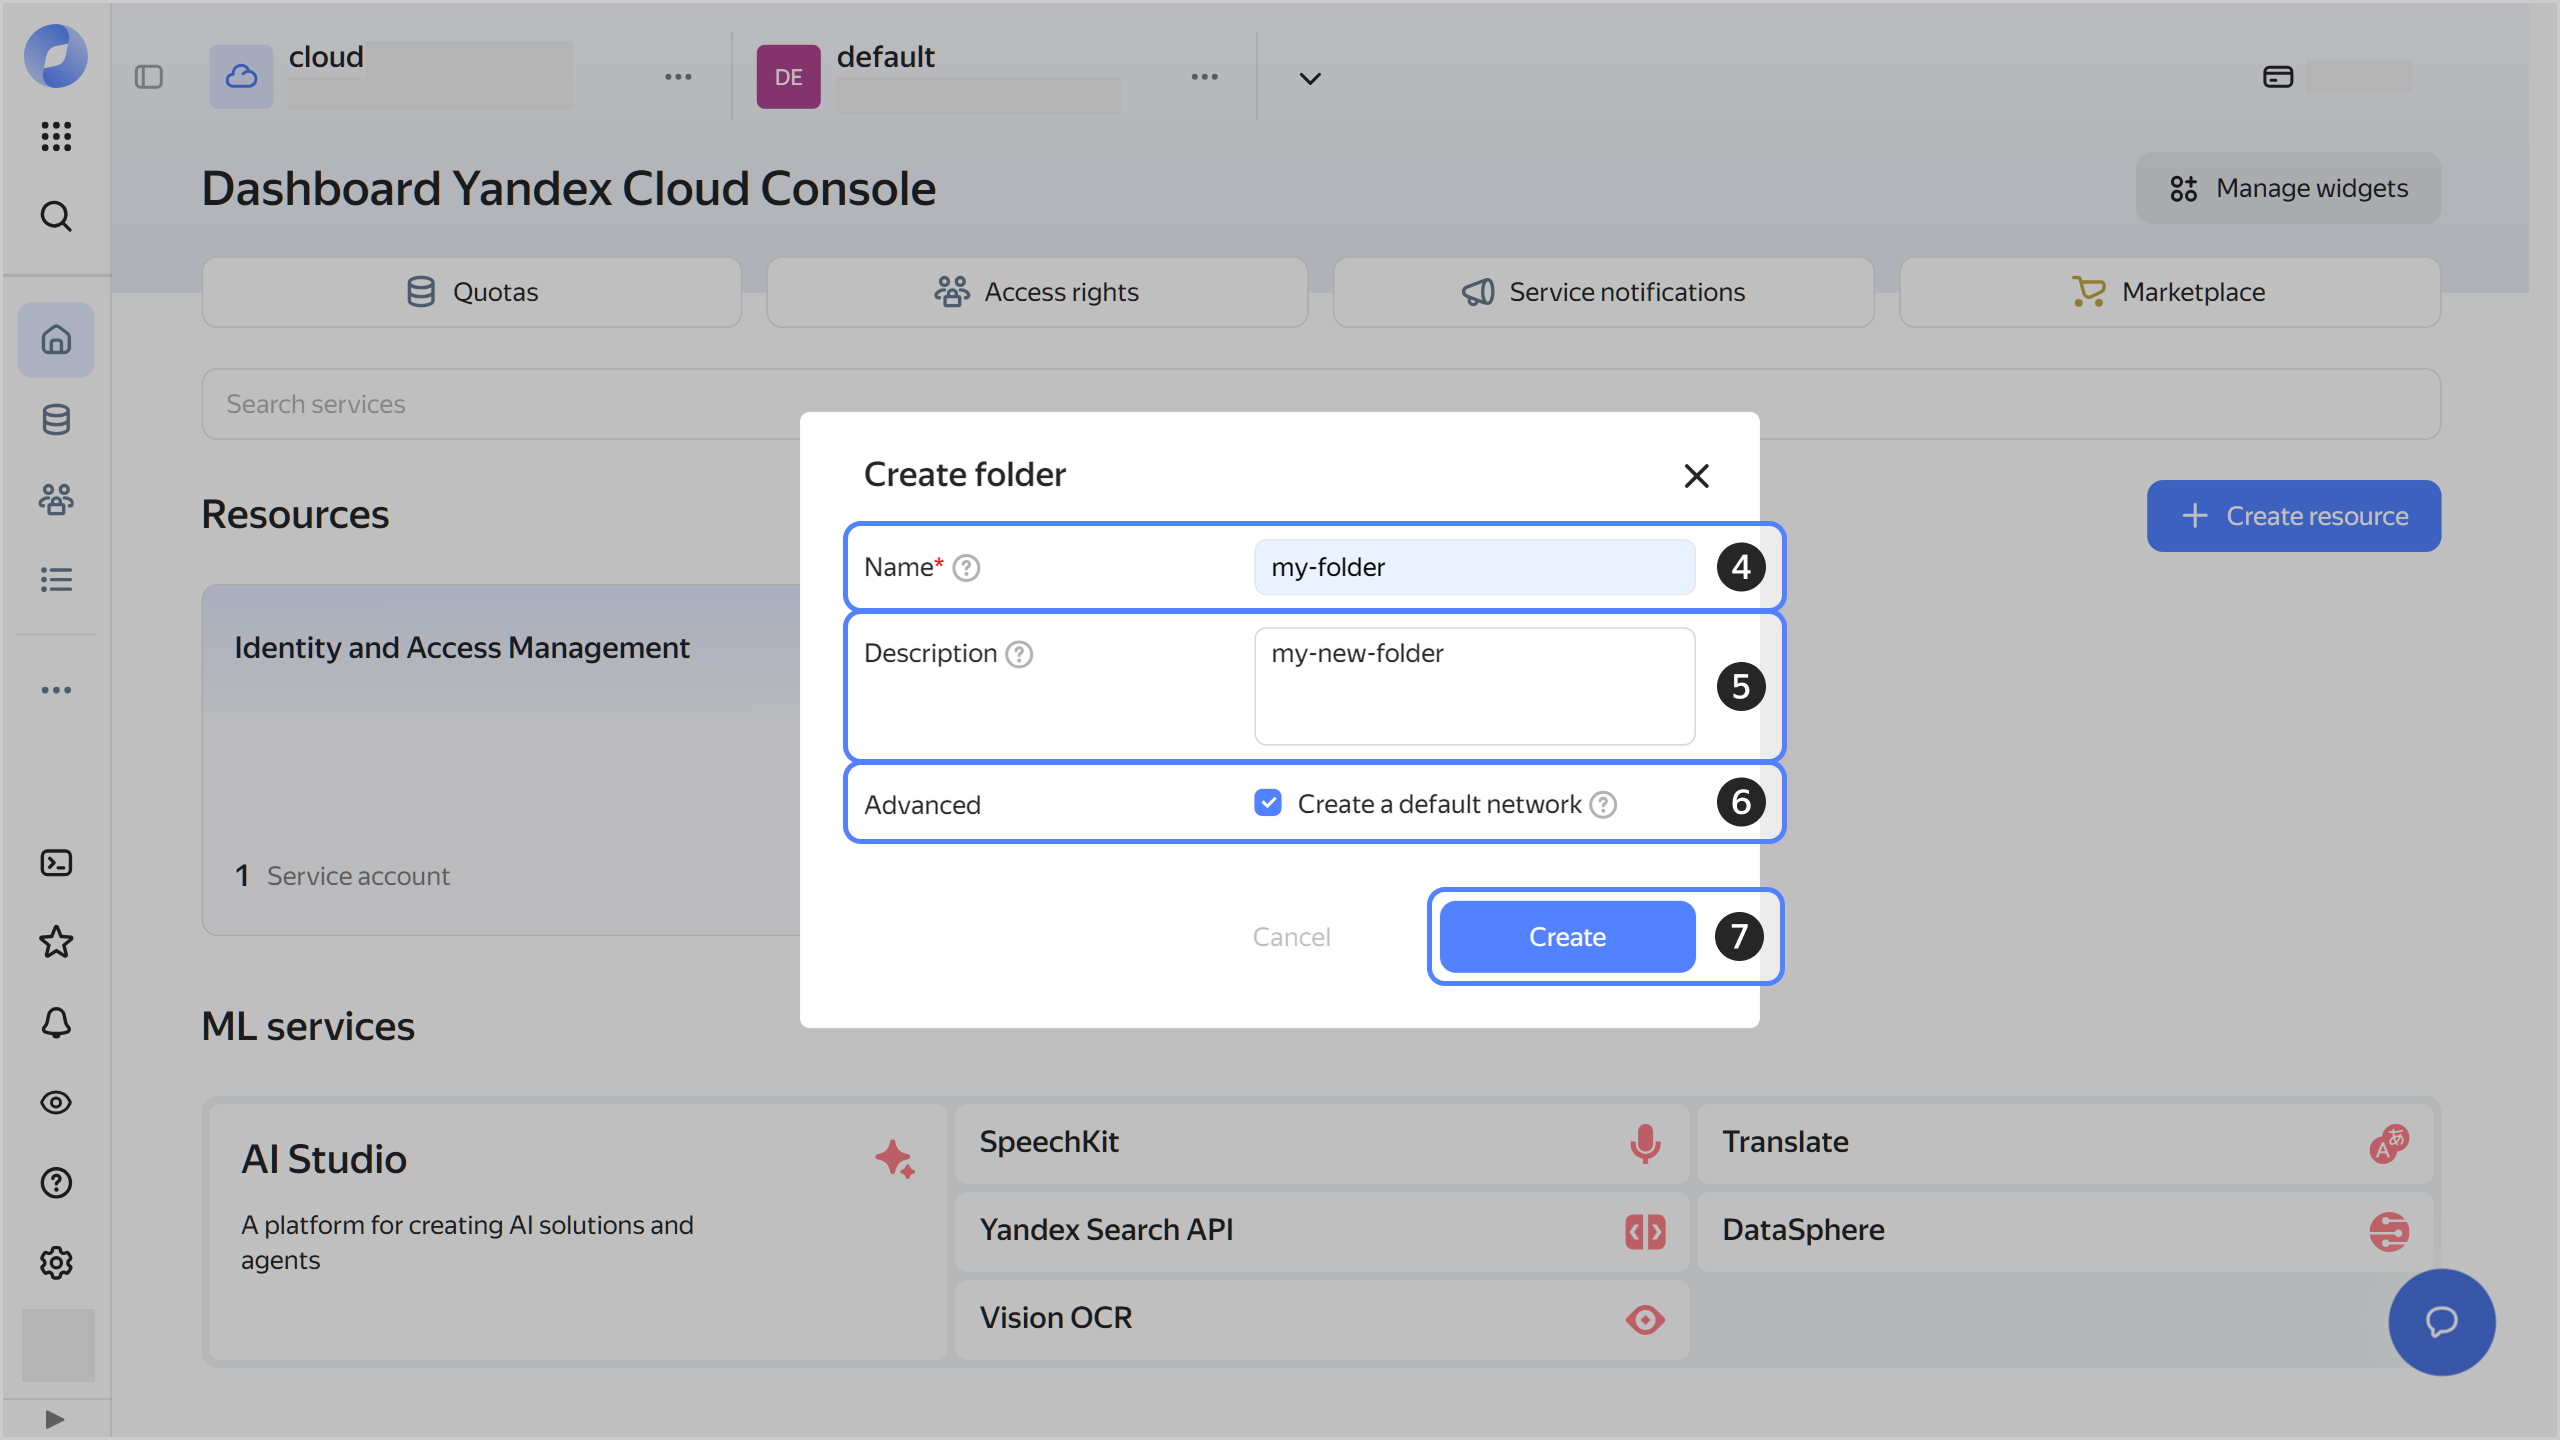
Give your folder a name. The naming requirements are as follows:
- Length: between 3 and 63 characters.
- It can only contain lowercase Latin letters, numbers, and hyphens.
- It must start with a letter and cannot end with a hyphen.
-
Optionally, specify the description for your folder.
-
Select Create a default network. This will create a network with subnets in each availability zone. Within this network, you will also have a default security group, within which all network traffic will be allowed.
-
Click Create.
-
-
If you do not have an Object Storage bucket yet:
- Create a bucket.
- Enable public access to the objects in the bucket and the object list.
- Upload your content to the bucket.
Create a CDN resource
-
Navigate to Cloud CDN.
-
In the CDN resources tab, click Create resource.
-
Under Main settings, configure the basic CDN resource settings:
-
Under Content:
-
Enable Enable access to content.
-
In the Content query field, select
From one origin. -
In the Origin type field, select
Bucket. -
In the Bucket field, select the bucket you created in Object Storage.
-
In the Origin request protocol field, select
HTTP. -
In the Domain name field, specify the primary domain name you will use in your website links to CDN-hosted content, e.g.,
cdn.example.com.Alert
You cannot change the primary domain name used for content distribution after creating a CDN resource.
-
-
Under Additional settings:
-
In the Redirect clients field, select
Don't use. -
In the Certificate type field, select
Don't use. -
In the Host header field, select
Custom. -
In the Header value field, specify the domain name from the bucket URL in
<bucket_name>.storage.yandexcloud.netformat, omitting the schema (httporhttps). Here is an example:my-bucket.storage.yandexcloud.netWarning
If the
Hostheader is misconfigured, Object Storage will return errors in response to CDN server requests.
-
-
-
Click Continue.
-
Under Caching, HTTP headers and methods, and Advanced, leave the default settings, then click Continue. You can configure these settings later, if required.
Wait until the resource is created. It may take up to 15 minutes.
Tip
We recommend prefetching large files (over 200 MB) into the CDN server cache. This is an optional step. If skipped, such content will be automatically cached on CDN servers when first accessed by the end user.
Configure a CNAME for your domain
-
In the Overview tab on the CDN resource page, under DNS settings, copy the generated domain name in
e1b83ae3********.topology.gslb.yccdn.ruformat. -
Navigate to your domain’s DNS settings on your DNS hosting provider’s website.
-
Edit the relevant CNAME record so that it points to the previously copied URL in the
.topology.gslb.yccdn.rudomain. For example, if the content delivery domain name you specified when creating your CDN resource iscdn.example.com, you need to create the following CNAME record or use it to replace the current record forcdn:cdn CNAME e1b83ae3********.topology.gslb.yccdn.ru.Note
Do not use an ANAME resource record with domain names for content distribution; otherwise, the end user will get a response from a CDN server not linked to the user geolocation. The response will always be the same for all users.
Test the CDN
-
Wait for the DNS records to update. This may take a few hours.
-
Make sure the
cdnCNAME record in the DNS server's cache points to the generated URL, e.g.,e1b83ae3********.topology.gslb.yccdn.ru. -
Open the website in your browser to make sure it is working. Here is an example:
http://cdn.example.com/index.html