Getting started with Certificate Manager


Follow this guide to add your first Let's Encrypt certificate to Certificate Manager and use it to set up HTTPS access to a static website hosted in Yandex Object Storage.
Getting started
To get started with Certificate Manager, you need:
-
Folder in Yandex Cloud. If there is no folder yet, create one:
-
In the management console, in the top panel, click or and select the cloud.
-
To the right of the cloud name, click .
-
Select Create folder.
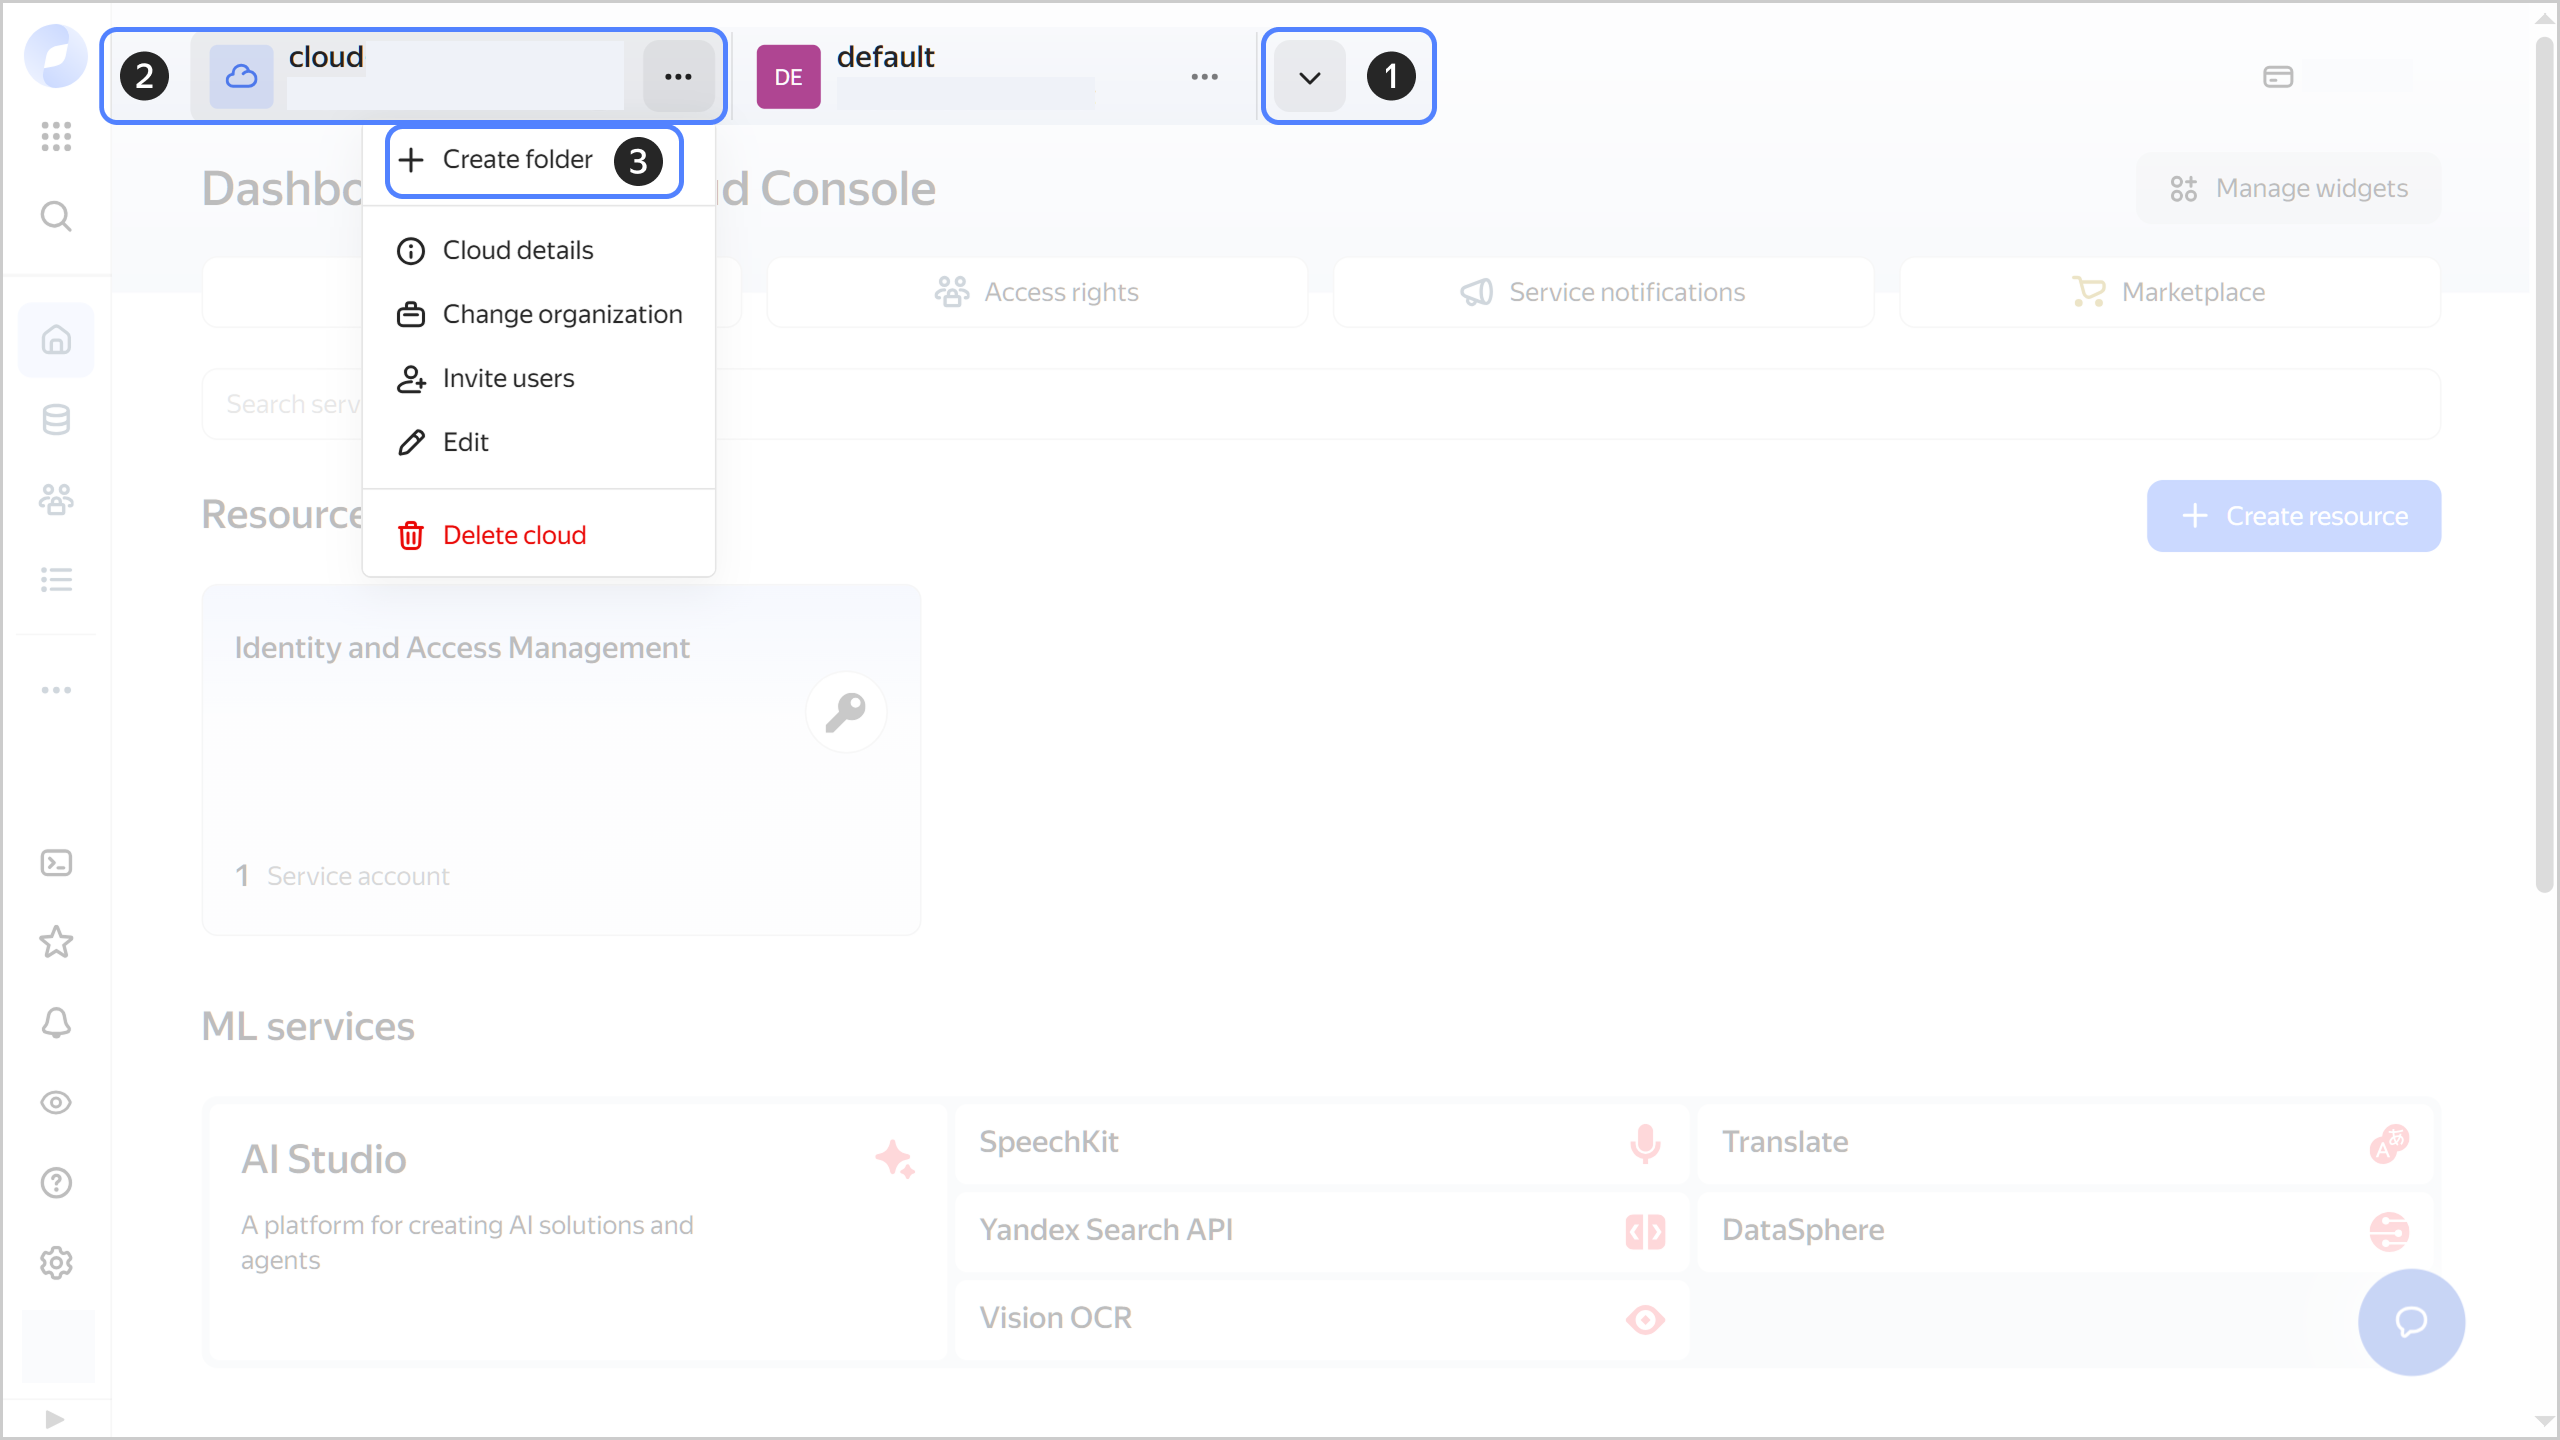
-
Give your folder a name. The naming requirements are as follows:
- Length: between 3 and 63 characters.
- It can only contain lowercase Latin letters, numbers, and hyphens.
- It must start with a letter and cannot end with a hyphen.
-
Optionally, specify the description for your folder.
-
Select Create a default network. This will create a network with subnets in each availability zone. Within this network, a default security group will be created, which allows connections to resources over
SSHandRDP, incoming traffic overICMP, and any outgoing traffic. -
Click Create.
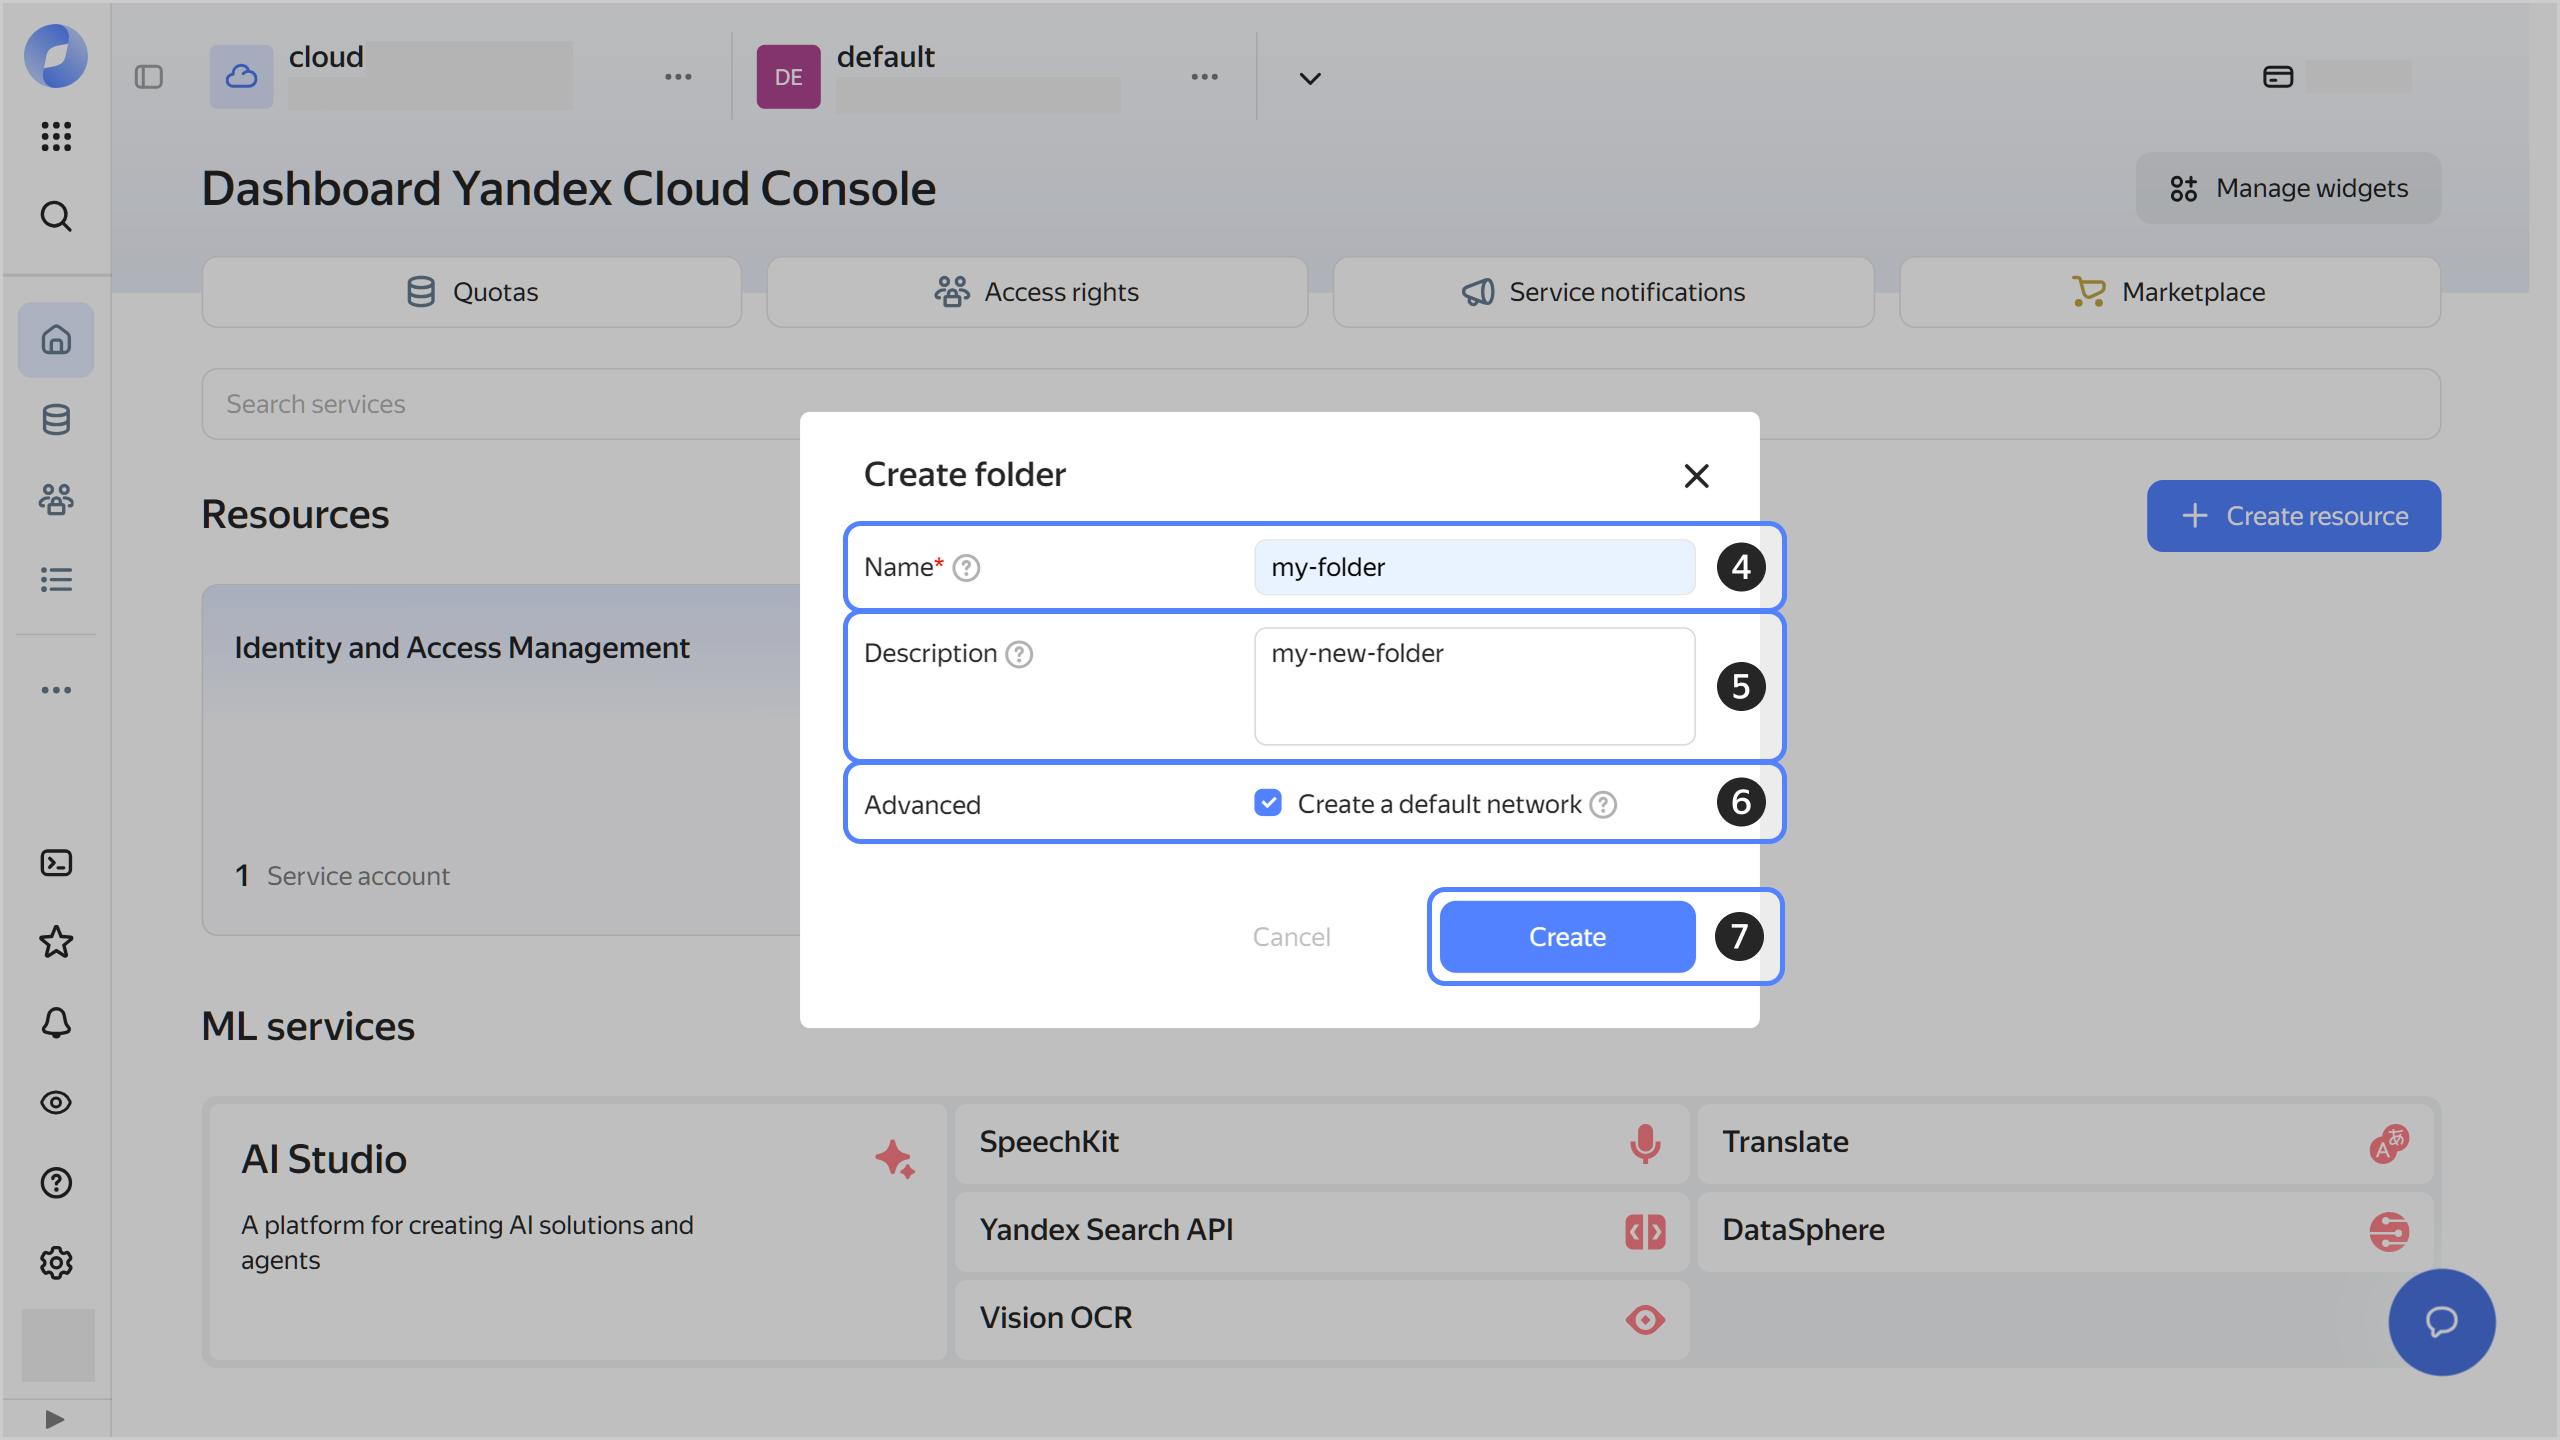
-
-
Third-level (or higher) domain for which a Let's Encrypt certificate will be issued.
Note
To pass the ownership verification procedure, the domain must be under your control.
-
Public bucket in Object Storage named exactly as the domain. If you do not have a bucket yet, create one:
- In the management console, select the folder where you want to create a bucket.
- Navigate to Object Storage.
- Click Create bucket.
- Enter exactly the same name for the bucket as the domain name.
- Select the
For allaccess type. - Select the default storage class.
- Click Create bucket to complete the operation.
-
Set up hosting in your bucket:
- In the management console, select the folder with the bucket.
- Navigate to Object Storage.
- On the Buckets tab, click the bucket with the domain name.
- In the left-hand panel, select Settings.
- Open the Website tab.
- Select
Hostingmode and specify the website's home page. - Click Save to complete the operation.
-
Set up an alias for the bucket through your DNS provider or on your own DNS server.
For instance, for the
www.example.comdomain, add the following record:www.example.com CNAME www.example.com.website.yandexcloud.net
Creating a request for a Let's Encrypt certificate
- In the management console, select the folder.
- Navigate to Certificate Manager.
- Click Add certificate.
- In the menu that opens, select Let's Encrypt certificate.
- In the window that opens, enter a name for the certificate.
- Optionally, add a description for the certificate.
- Optionally, enable deletion protection.
- Optionally, add labels.
- In the Domains field, specify the domains you want to issue the certificate for.
- Select domain ownership verification type:
HTTP. - Click Create.
Passing domain ownership verification
Creating a file for the check
-
In the management console, select the folder.
-
Navigate to Certificate Manager.
-
Select a certificate in the
Validatingstatus in the list and click it. -
Under Check rights for domains:
-
Copy the URL from the Link for hosting file field:
- The
http://example.com/.well-known/acme-challenge/part of the link is the file path. - The second part,
rG1Mm1bJ..., is the file name you should use.
- The
-
Copy and paste the Contents field to the file.
-
Uploading the file and performing the check
-
In the management console, select the folder.
-
Navigate to Object Storage.
-
On the Buckets tab, click the bucket with the domain name.
-
Click Create folder and create a folder named
.well-known. -
Under
.well-known, create a folder namedacme-challenge. -
Under
acme-challenge, click Upload. -
In the window that opens, select the file with a record and click Open.
-
Click Upload.
-
Wait until the certificate's status changes to
Issued.For more information on the status, see the certificate page. To do this, click Validation next to the Show logs field.
-
Go to the
acme-challengedirectory. -
Click to the right of the file and select Delete.
-
Confirm the deletion.
-
Install and configure the AWS CLI by following this tutorial.
-
Upload your file to the bucket so that it resides in the
.well-known/acme-challengefolder:aws --endpoint-url=https://storage.yandexcloud.net \ s3 cp <file_name> s3://<bucket_name>/.well-known/acme-challenge/<file_name> -
Wait until the certificate's status changes to
Issued. -
Delete the file you created from the bucket:
aws --endpoint-url=https://storage.yandexcloud.net \
   s3 rm s3://<bucket_name>/.well-known/acme-challenge/<file_name>
Warning
Certificates are not renewed automatically. Keep track of the lifecycle of your certificates to renew them on time. For more information, see Renewing a certificate.
Setting up static website access over HTTPS
- In the management console, select the folder.
- Navigate to Object Storage.
- On the Buckets tab, click the bucket with the domain name.
- Navigate to the Security tab.
- Select HTTPS.
- Click Configure.
- In the Source field, select
Certificate Manager. - In the Certificate field, select the certificate from the list that opens.
- Click Save.