Getting started with the Model Gallery models
In this section, you will learn how to use Model Gallery models to generate text in synchronous mode. For other examples, see Guides on how to use Yandex AI Studio.
For information about the Yandex AI Studio pricing, see Yandex AI Studio pricing policy.
Getting started
To get started in Yandex Cloud:
- Log in to the management console. If not signed up yet, navigate to the management console and follow the on-screen instructions.
- In Yandex Cloud Billing, make sure you have a billing account linked and its status is
ACTIVEorTRIAL_ACTIVE. If you do not have a billing account yet, create one. - If you do not have a folder yet, create one.
You can start working from the management console right away.
To use the examples of requests using SDK:
- Create a service account and assign the
ai.languageModels.userrole to it. -
Get and save the service account's API key with
yc.ai.foundationModels.executefor its scope.The following examples use API key authentication. Yandex Cloud ML SDK also supports IAM token and OAuth token authentication. For more information, see Authentication in Yandex Cloud ML SDK.
Note
If you are using Windows, we recommend installing the WSL shell first and using it to proceed.
-
Install Python 3.10 or higher.
-
Install Python venv to create isolated virtual environments in Python.
-
Create a new Python virtual environment and activate it:
python3 -m venv new-env source new-env/bin/activate -
Use the pip package manager to install the ML SDK library:
pip install yandex-ai-studio-sdk
Generate the text
Note
The AI Studio API logs users' prompts to keep improving its responses. Do not use sensitive information and personal data in your prompts.
-
In the management console, select a folder for which your account has the
ai.playground.userrole or higher. -
Go to AI Studio.
-
On the panel that opens, click AI Playground.
-
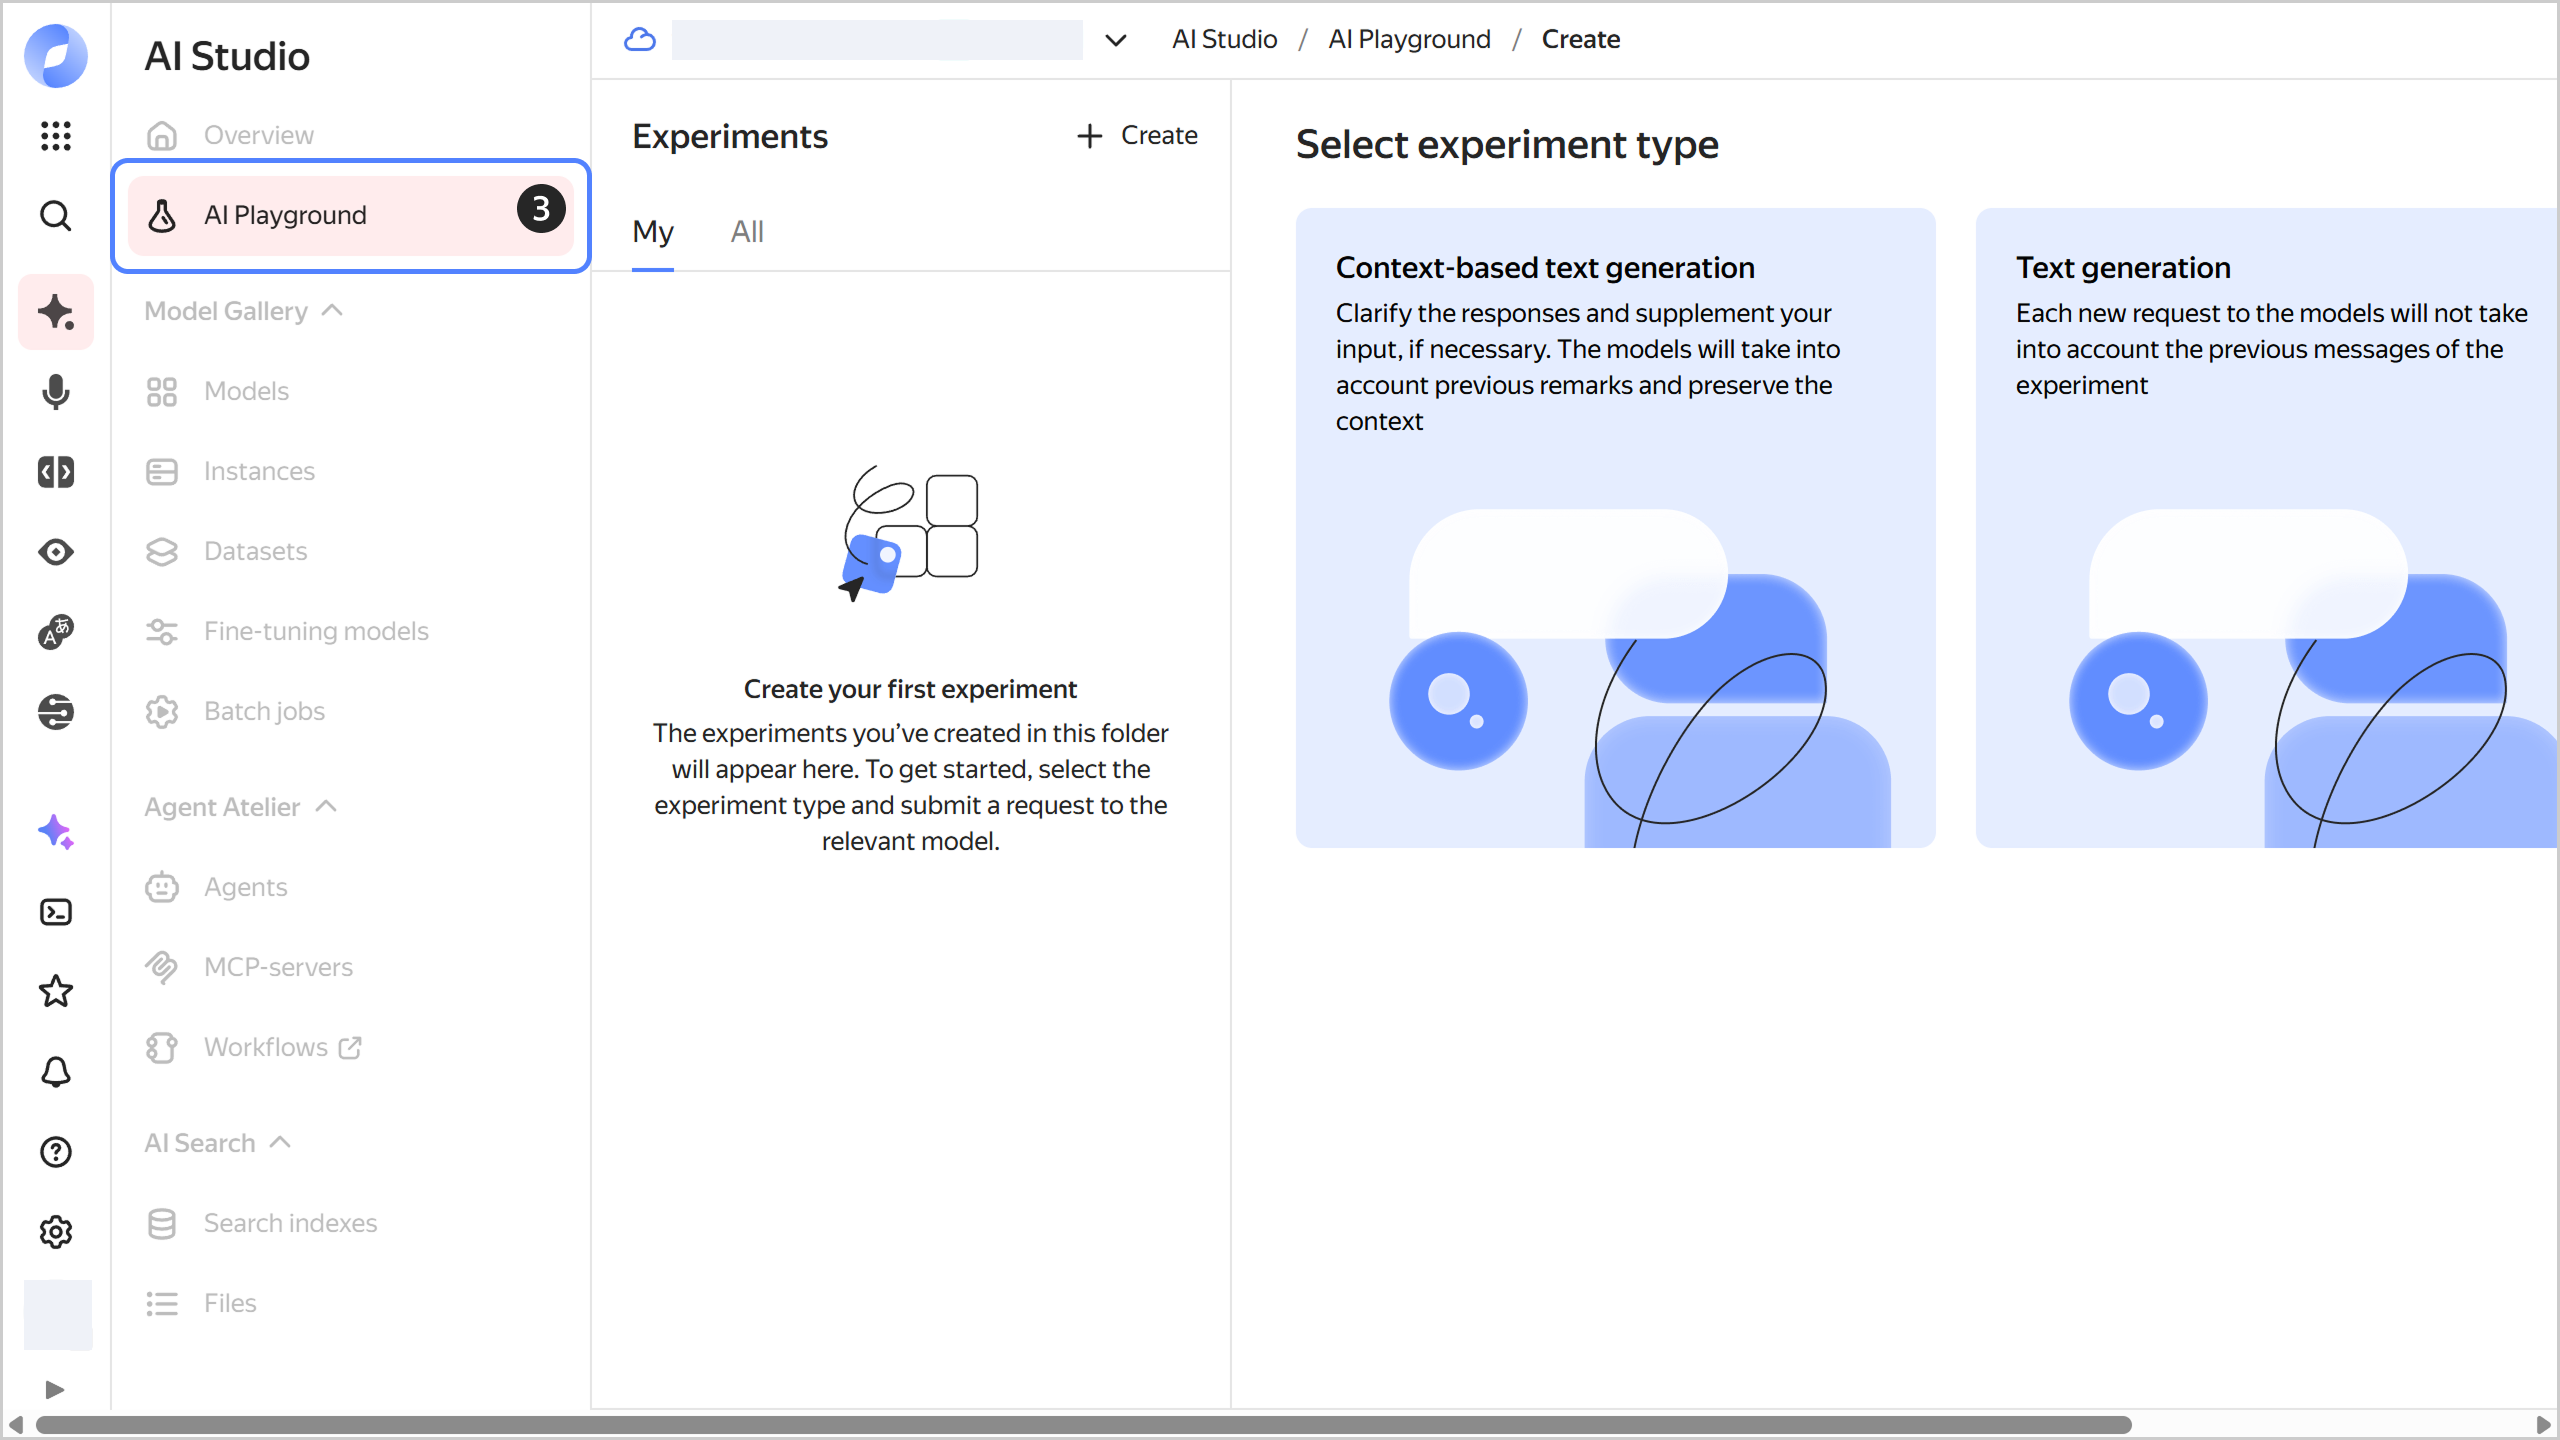
Select the generation type:
- Context-based text generation: The model will generate responses based on the dialog history. This will allow you to refine the result during the interaction.
- Text generation: The model will generate responses based only on your last message and instructions.
-
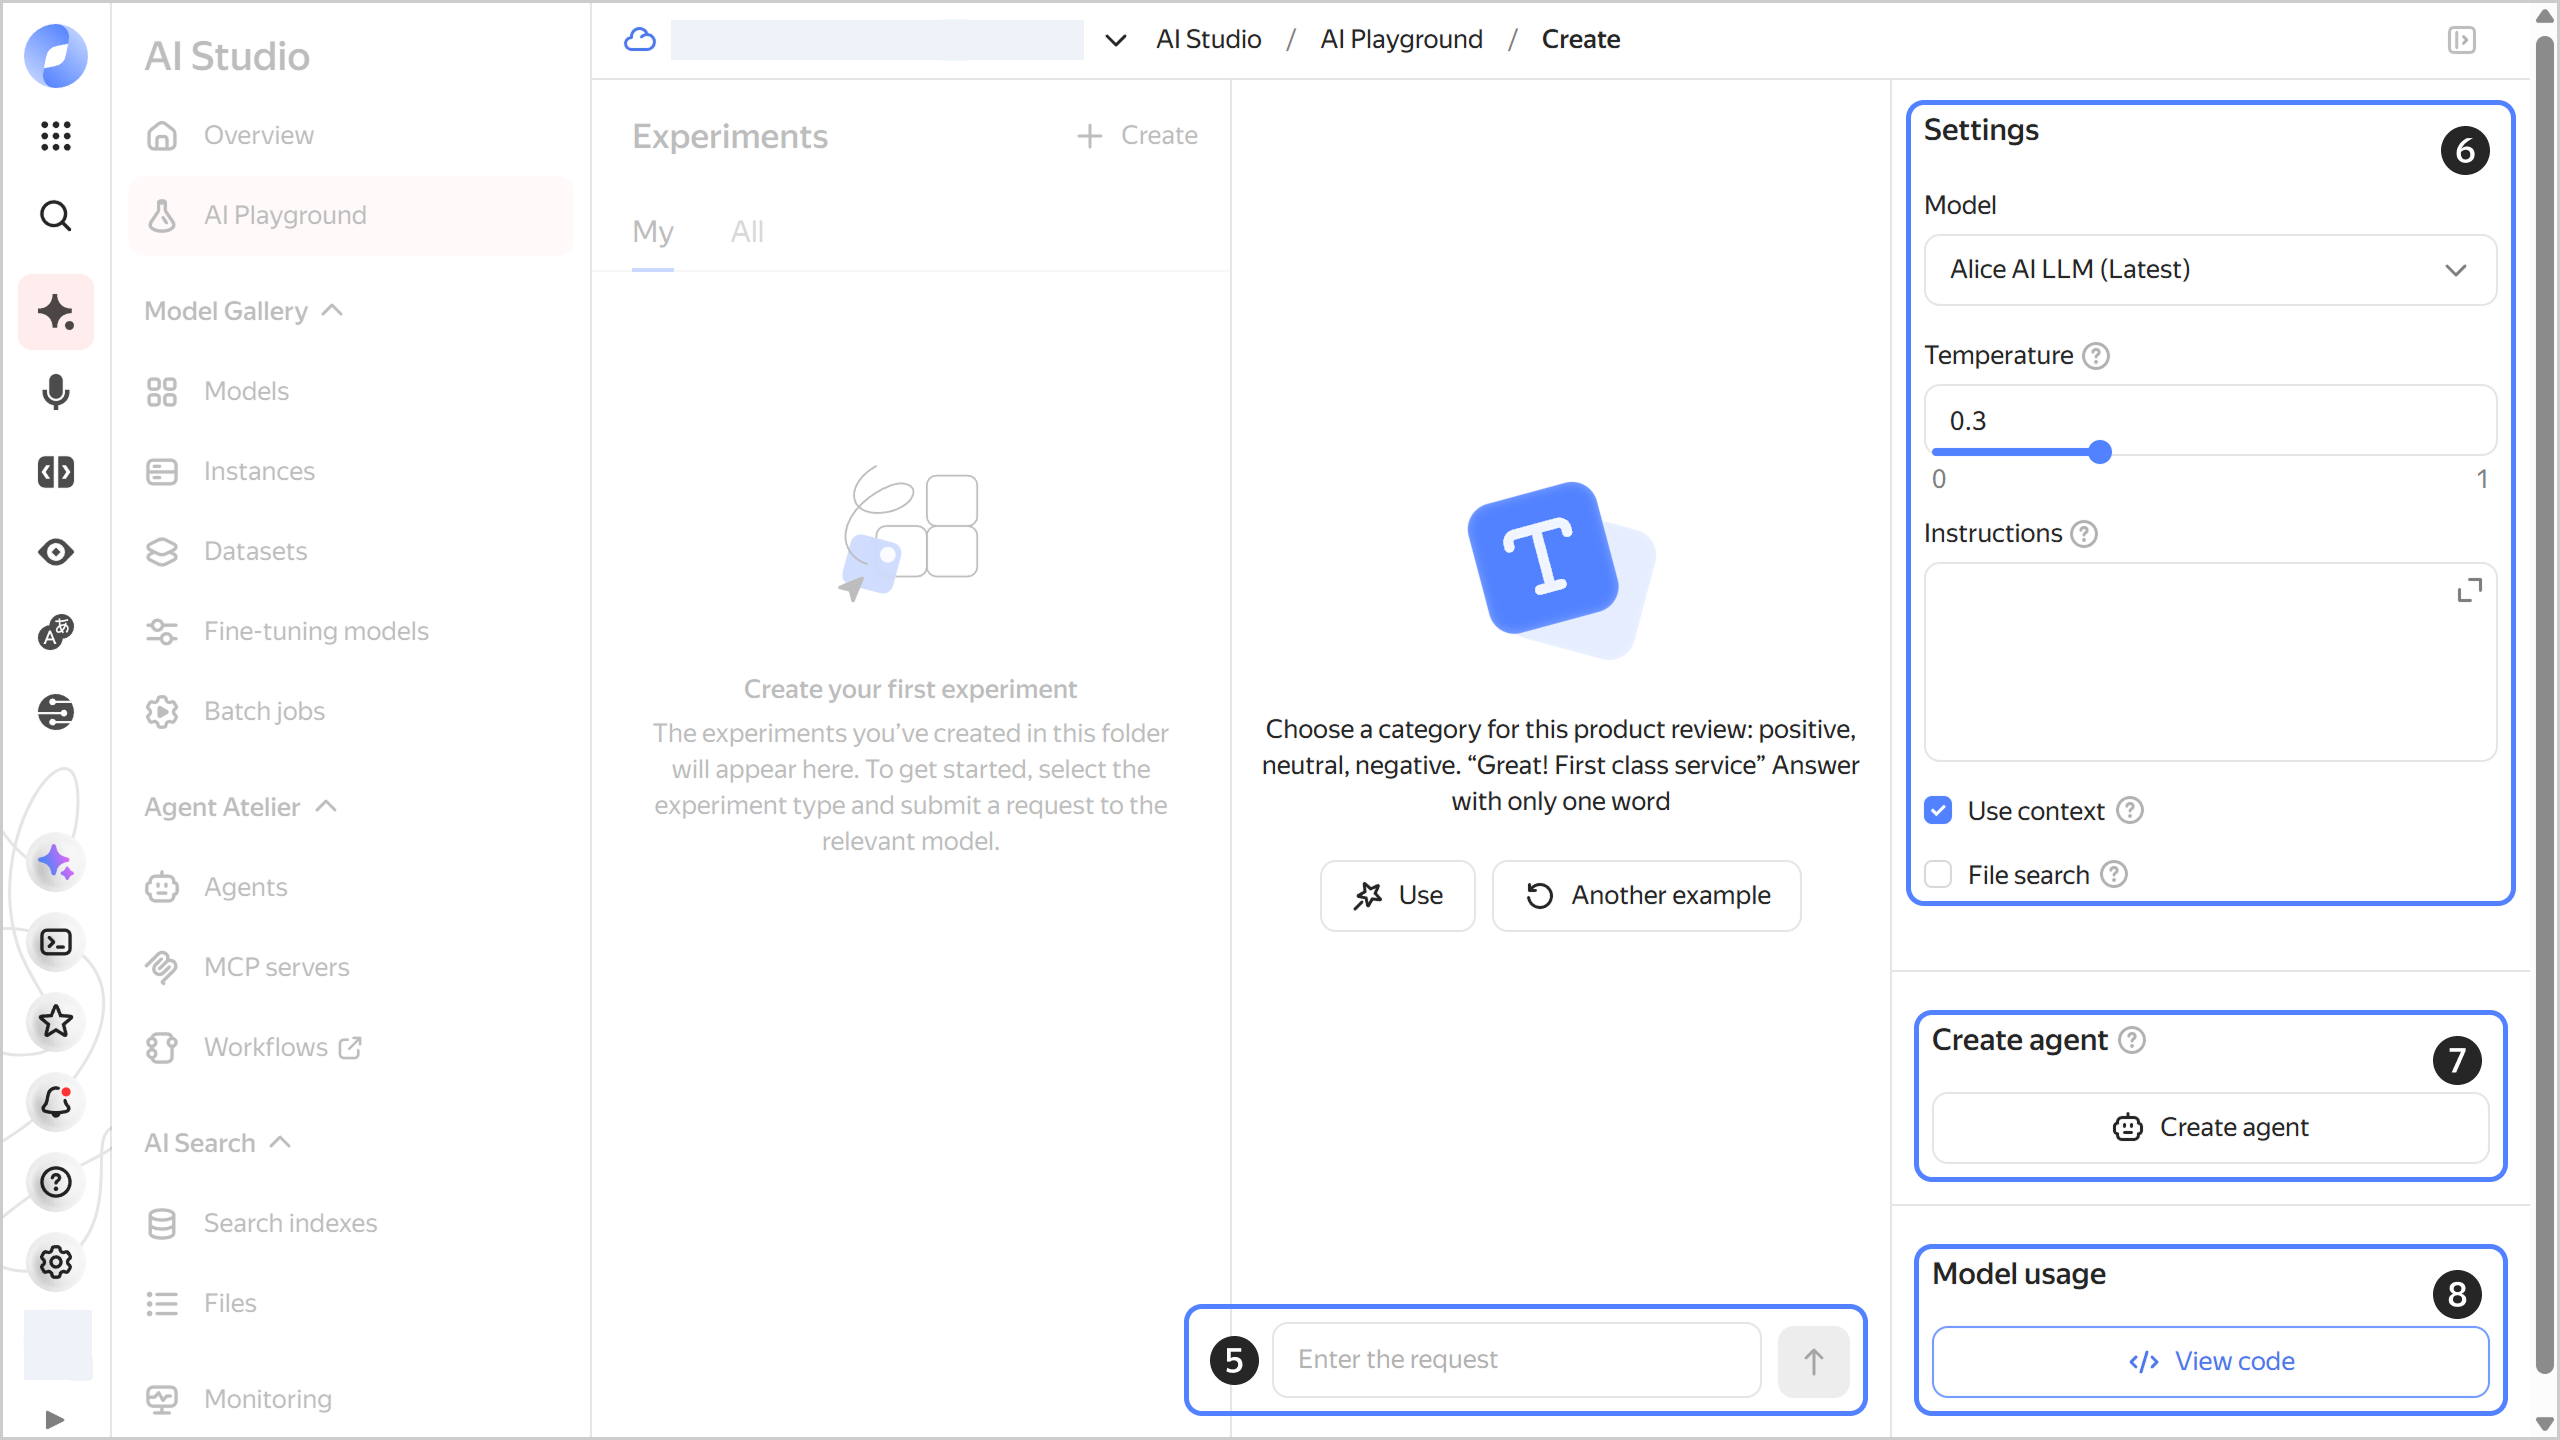
Type your query in the input field below and click or press Enter. You can also use the query examples provided above.
All your dialogs are saved in the Experiments panel on the right. Click next to the dialog to rename or delete it.
-
Under Settings, specify the following generation settings:
- Select a generation model.
- Temperature: Enter a value between
0and1for the model's response variability. With a higher value, you get a more unpredictable result. - Instructions: Describe your task, the appropriate writing style, limits, and other requirements for the model.
- Use context: Switch to a different generation type.
- File search: Allow your model to use the search index to select files as an additional source of information. Once you activate the option, select a search index from the list of available ones or create a new one.
-
Click Create agent to create an agent for task automation.
-
Click View code to get the code for a request to the model via the API using Python, Node.js, or cURL.
-
Create a file named
generate-text.pyand paste the following code into it:#!/usr/bin/env python3 from __future__ import annotations from yandex_ai_studio_sdk import AIStudio messages = [ { "role": "system", "text": "Find errors in the text and correct them", }, { "role": "user", "text": """Laminate flooring is sutiable for instalation in the kitchen or in a child's room. It withsatnds moisturre and mechanical dammage thanks to a 0.2 mm thick proctive layer of melamine films and a wax-treated interlocking system.""", }, ] def main(): sdk = AIStudio( folder_id="<folder_ID>", auth="<API_key>", ) result = ( sdk.models.chat("yandexgpt").configure(temperature=0.5).run(messages) ) for alternative in result: print(alternative) if __name__ == "__main__": main()Where:
Note
As input data for a request, Yandex Cloud ML SDK can accept a string, a dictionary, an object of the
TextMessageclass, or an array containing any combination of these data types. For more information, see Yandex Cloud ML SDK usage.-
messages: List of messages that set the context for the model:-
role: Message sender's role:user: To send user messages to the model.system: To set the request context and define the model's behavior.assistant: For responses generated by the model. In chat mode, the model's responses tagged with theassistantrole are included in the message to save the conversation context. Do not send user messages with this role.
-
text: Message text.
-
-
<folder_ID>: ID of the folder in which the service account was created. -
<API_key>: Service account API key you got earlier required for authentication in the API.The following examples use API key authentication. Yandex Cloud ML SDK also supports IAM token and OAuth token authentication. For more information, see Authentication in Yandex Cloud ML SDK.
For more information about accessing a specific model version, see {#T}.
-
-
Run the file you created:
python3 generate-text.pyResult:
Alternative(role='assistant', text='Laminate flooring is suitable for installation in the kitchen or in a child's room. It withstands moisture and mechanical damage thanks to a 0.2 mm thick protective layer of melamine films and a wax-treated interlocking system.', status=<AlternativeStatus.FINAL: 3>)