Creating a YTsaurus CHYT connection in Yandex DataLens
To create a YTsaurus CHYT connection:
-
Open the page for creating a new connection
-
Under Databases, select the YTsaurus CHYT connection.
-
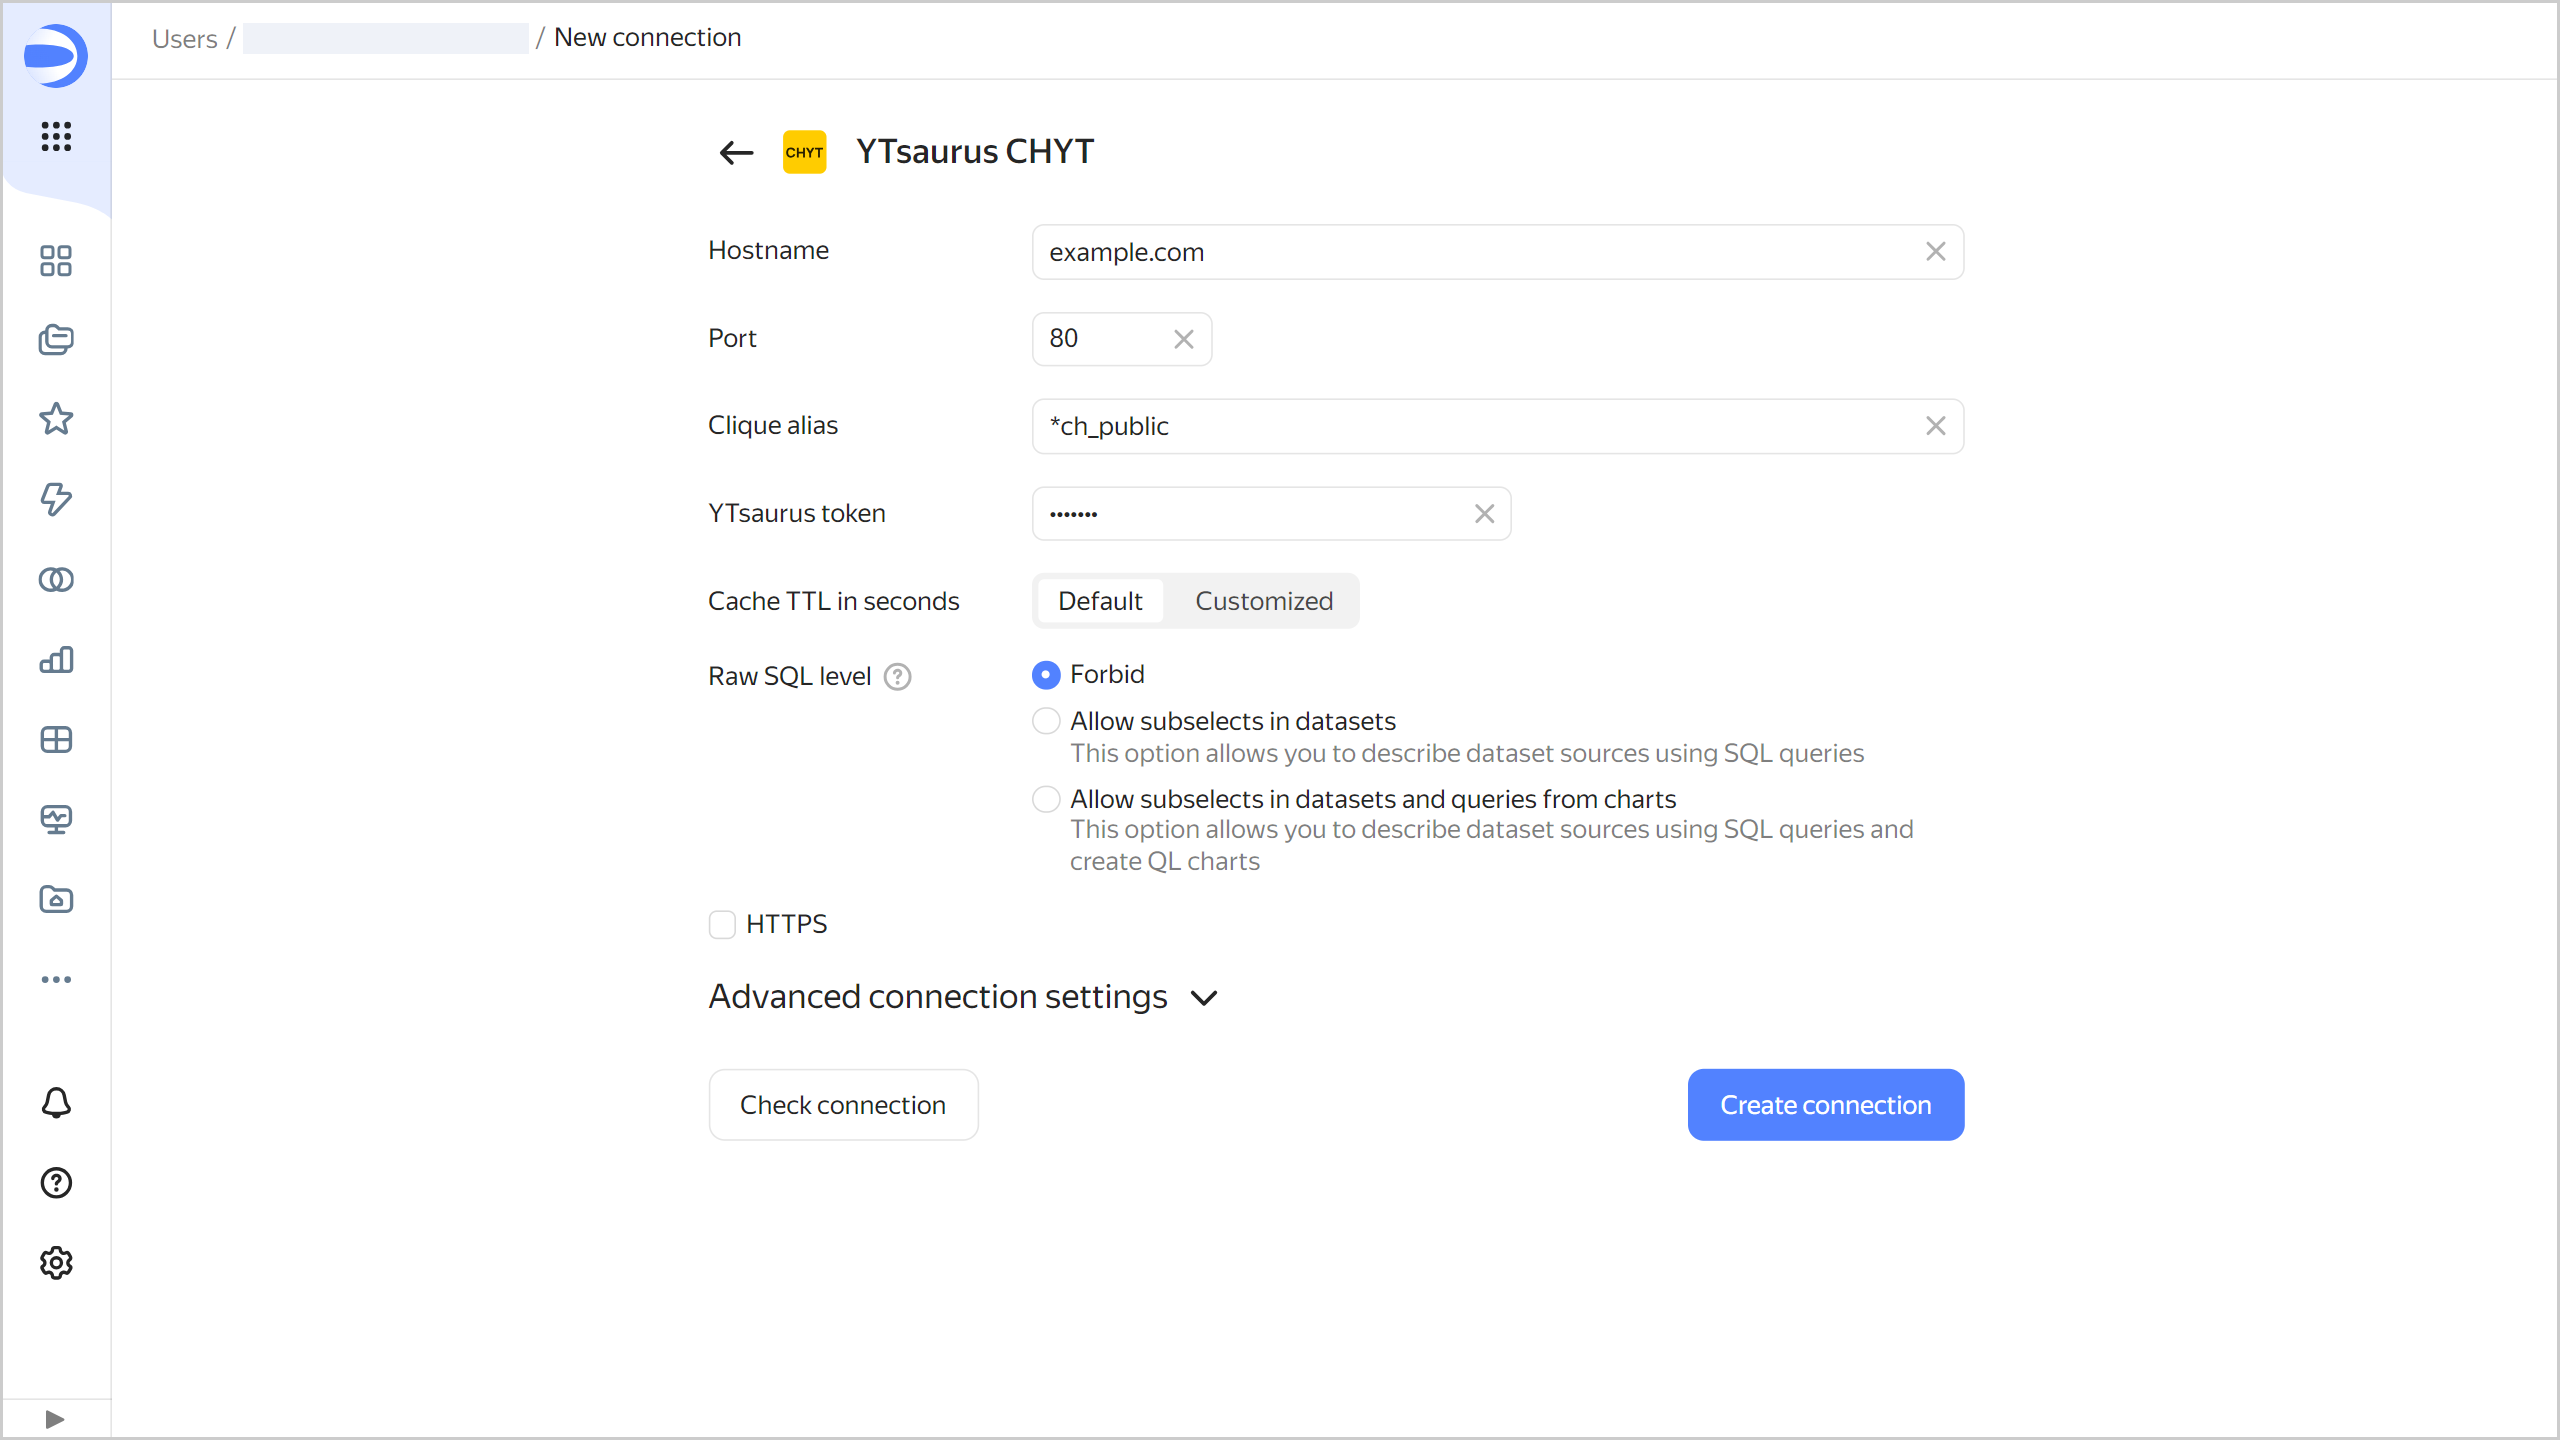
Configure the connection as follows:
- Hostname. Specify the YTsaurus proxy server address.
- Port. Specify the CHYT connection port.
- Clique alias: Specify the alias of a running clique. By default, the
*ch_publicpublic clique is used. - YTsaurus token: Manually set the OAuth token to use with YTsaurus. For more information, see this YTsaurus article
- Cache TTL in seconds. Specify the cache time-to-live or leave the default value. The recommended value is 300 seconds (5 minutes).
-
Raw SQL level. Enables you to use an ad-hoc SQL query to generate a dataset. This option is disabled by default. When enabling it, you will need to select the raw SQL level:
- Allow subqueries in datasets: Describe dataset sources using SQL queries.
- Allow subqueries in datasets and source parameterization: Describe dataset sources using SQL queries and use source parameterization.
- Allow subqueries in datasets, source parameterization, and QL charts: Describe dataset sources using SQL queries, use source parameterization, and create QL charts.
- HTTPS. Enable the secure connection option if your server supports HTTPS.

-
(Optional) Test the connection. To do this, click Check connection.
-
Click Create connection.
-
Select a workbook to save your connection to or create a new one. If using legacy folder navigation, select a folder to save the connection to. Click Create.
-
Enter a name for the connection and click Create.
Additional settings
You can limit data export from charts by enabling Disable data export under Advanced connection settings. With this option enabled, charts based on the respective connection will no longer display the export data option in their