Creating an Oracle Database connection in Yandex DataLens
Warning
Yandex Cloud holds no responsibility for configuring a remote connection on an external database server side. When connecting an external database which is not a Yandex Cloud resource:
-
Make sure the database uses an SSL certificate signed by a SSL certificate authority. You will not be able to create a connection in DataLens if the database uses a self-signed SSL certificate.
-
Grant database access to the following DataLens IP ranges (
/is followed by subnet mask length):ipv4ipv6178.154.242.176/28178.154.242.192/28178.154.242.208/28178.154.242.128/28178.154.242.144/28178.154.242.160/28130.193.60.0/28
2a02:6b8:c03:500:0:f83d:a987:0/1122a02:6b8:c02:900:0:f83d:a987:0/1122a02:6b8:c0e:500:0:f83d:a987:0/1122a02:6b8:c41:1300:0:f83d:a987:0/112
To create an Oracle Database connection:
-
Open the new connection creation page
-
Under Databases, selec the Oracle Database connection.
-
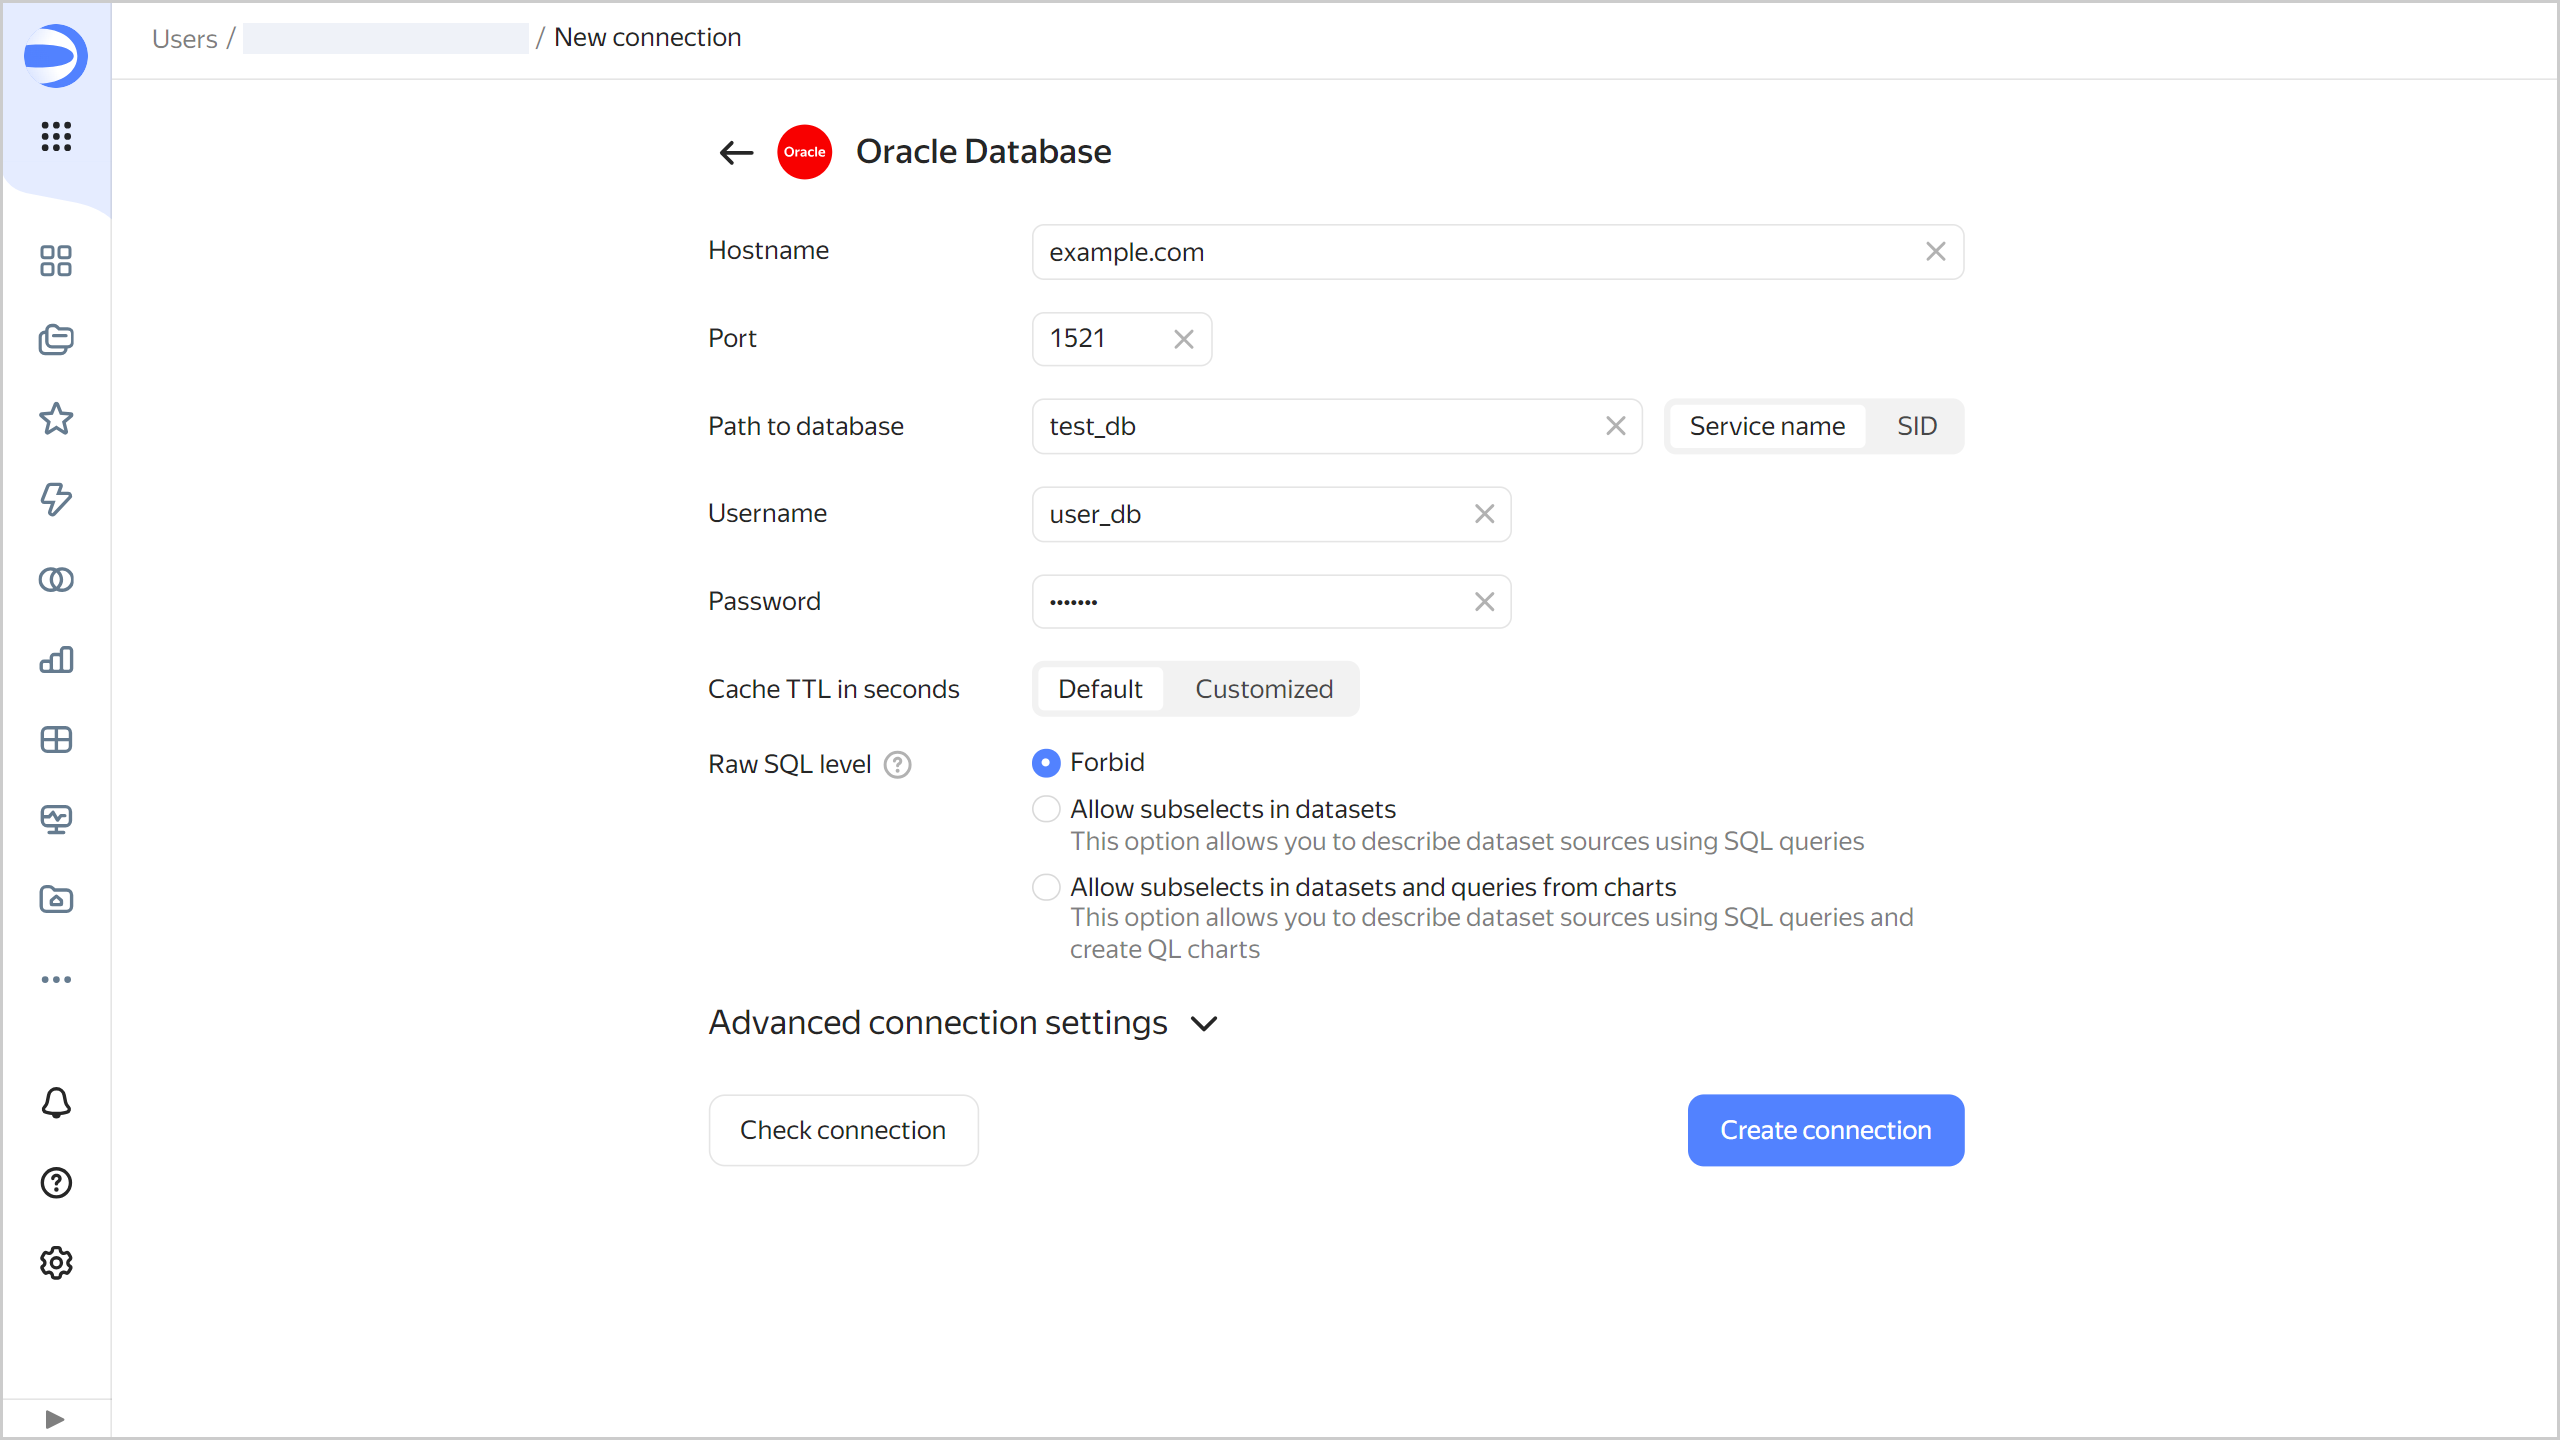
Configure the connection as follows:
- Hostname. Specify the path to the master host or the IP address of the Oracle Database master host. You can specify multiple hosts in a comma-separated list. If you are unable to connect to the first host, DataLens will select the next one from the list.
- Port. Specify the Oracle Database connection port. The default port is 1521.
- Path to database. Specify the service name or the system ID of the database to connect and select the Service name or SID option, respectively.
- Username. Specify the username for the Oracle Database connection.
- Password. Enter the password for the specified user.
- Cache TTL in seconds. Specify the cache time-to-live or leave the default value. The recommended value is 300 seconds (5 minutes).
-
Raw SQL level. Enables you to use an ad-hoc SQL query to generate a dataset. This option is disabled by default. When enabling it, you will need to select the raw SQL level:
- Allow subqueries in datasets: Describe dataset sources using SQL queries.
- Allow subqueries in datasets and source parameterization: Describe dataset sources using SQL queries and use source parameterization.
- Allow subqueries in datasets, source parameterization, and QL charts: Describe dataset sources using SQL queries, use source parameterization, and create QL charts.

-
(Optional) Test the connection. To do this, click Check connection.
-
Click Create connection.
-
Select a workbook to save your connection to or create a new one. If using legacy folder navigation, select a folder to save the connection to. Click Create.
-
Enter a name for the connection and click Create.
Additional settings
You can specify additional connection settings in the Advanced connection settings section:
- TLS: Indicates whether TLS is required. When this option is enabled, the connection requires using SSL.
- CA Certificate: To upload a certificate, click Attach file and specify the certificate file. When the certificate is uploaded, the field shows the file name.
-
Disable data export: When this option is on, the data export item will be unavailable in the