Creating a Snowflake connection
To create a Snowflake connection:
-
Open the connection creation page.
-
Under Databases, select the Snowflake connection.
-
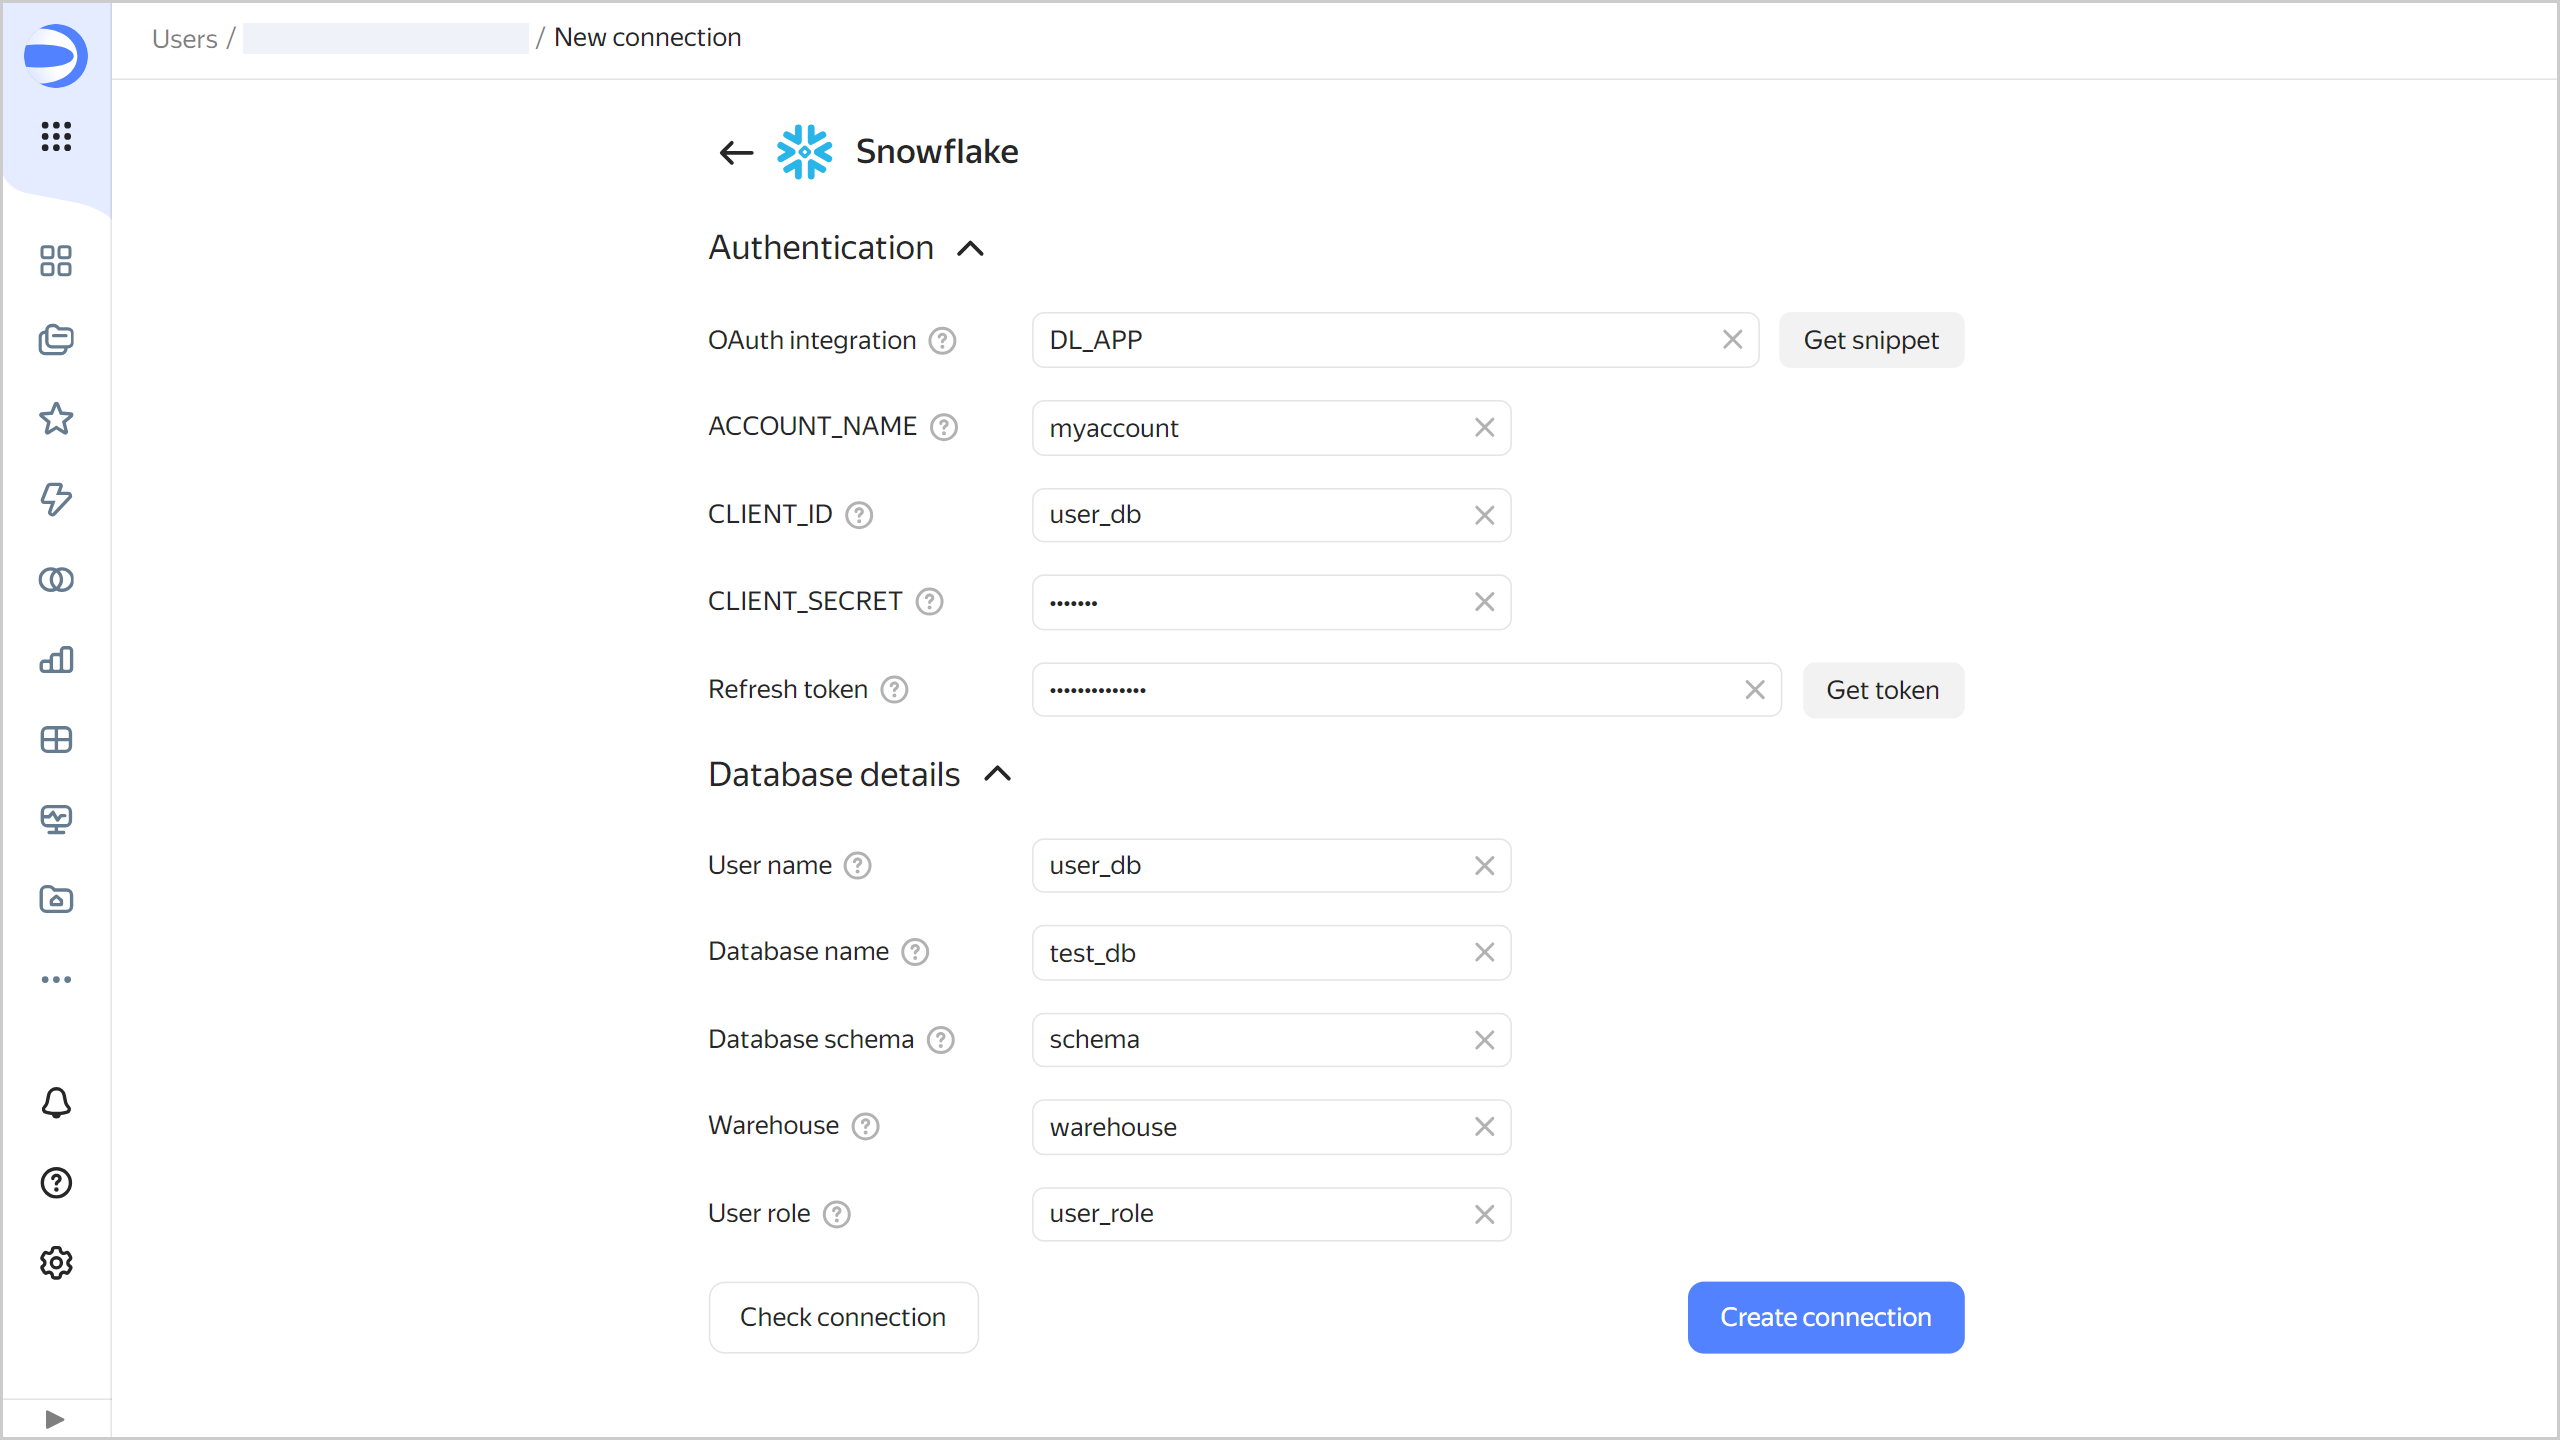
Fill out the fields under Authentication:
Note
To get the token, create a Snowflake user with restricted access permissions.
-
If this is your first connection to Snowflake in DataLens, set up the OAuth integration:
-
In the OAuth integration field, add a name for the integration object using Latin characters, and then click Get snippet.
-
Create an integration: in the Snowflake environment, run the snippet that you copied to the clipboard. Run the snippet code on behalf of the user with the relevant permission. In the request response, you will get values to insert to DataLens.
Note
You can use the parameters you got for other Snowflake connections from the same account.
-
-
Fill out the parameters you got after running the snippet code in the Snowflake environment:
- ACCOUNT_NAME: Name of the account in the Snowflake environment.
- CLIENT_ID: Client ID for the integration object.
- CLIENT_SECRET: Client secret.
-
Click Get token next to the Refresh token field. This will open the Snowflake page for confirming access. Make sure you are logged in with the Snowflake user account with restricted access.
-
-
Specify the connection parameters under Database details:
- User name: Name of the user who confirmed the access permissions to Snowflake.
- Database name: Name of the database you are connecting to.
- Database schema: Database schema.
- Warehouse: Storage used by the database.
- User role: Role of the user who has access to the database you are connecting to.
-
Optionally, test the connection by clicking Check connection.
-
Click Create connection.
-
Select the workbook to save your connection to or create a new one. If using legacy folder navigation, select a folder to save the connection to. Click Create.
-
Enter a name for the connection and click Create.