Creating an MLFlow server for logging experiments and artifacts

This tutorial describes how to deploy an MLFlow tracking server for logging experiments and artifacts on a separate Yandex Compute Cloud VM. We will run experiments in JupyterLab Notebook. We will use a Yandex Managed Service for PostgreSQL database to store internal objects and a Yandex Object Storage bucket to store artifacts.
To create an MLFlow server for logging JupyterLab Notebook experiments and artifacts:
- Set up your infrastructure.
- Create a static access key.
- Create an SSH key pair.
- Create a VM.
- Create a managed DB.
- Create a bucket.
- Install the MLFlow tracking server and add it to the VM auto start.
- Create secrets.
- Train your model.
If you no longer need the resources you created, delete them.
Getting started
Before getting started, register in Yandex Cloud, set up a community, and link your billing account to it.
- On the DataSphere home page, click Try for free and select an account to log in with: Yandex ID or your working account with the identity federation (SSO).
- Select the Yandex Identity Hub organization you are going to use in Yandex Cloud.
- Create a community.
- Link your billing account to the DataSphere community you are going to work in. Make sure you have a linked billing account and its status is
ACTIVEorTRIAL_ACTIVE. If you do not have a billing account yet, create one in the DataSphere interface.
Required paid resources
- Managed Service for PostgreSQL cluster: computing resources allocated to hosts, storage and backup size (see Managed Service for PostgreSQL pricing).
- VM instance: use of computing resources, storage, public IP address, and OS (see Compute Cloud pricing).
- Object Storage bucket: use of storage, data operations (see Object Storage pricing).
- DataSphere project: use of computing resources and storage (see DataSphere pricing).
Set up your infrastructure
Log in to the Yandex Cloud management console and select the organization you use to access DataSphere. On the Yandex Cloud Billing page, make sure you have a billing account linked.
If you have an active billing account, you can go to the cloud page to create or select a folder to run your infrastructure.
Note
If you are using an identity federation to work with Yandex Cloud, you might not have access to billing details. In this case, contact your Yandex Cloud organization administrator.
Create a folder
- In the management console, select a cloud and click Create folder.
- Name your folder, e.g.,
data-folder. - Click Create.
Create a service account for Object Storage
To access a bucket in Object Storage, you will need a service account with the storage.viewer and storage.uploader roles.
- In the management console, navigate to
data-folder. - Navigate to Identity and Access Management.
- Click Create service account.
- Name your service account, e.g.,
datasphere-sa. - Click Add role and assign the
storage.viewerandstorage.uploaderroles to the service account. - Click Create.
Create a static access key
To access Object Storage from DataSphere, you will need a static key.
- In the management console, navigate to the folder the service account belongs to.
- Navigate to Identity and Access Management.
- In the left-hand panel, select Service accounts.
- In the list that opens, select
datasphere-sa. - In the top panel, click Create new key.
- Select Create static access key.
- Enter a description for the key and click Create.
- Save the ID and secret key. After you close this dialog, the key value will no longer be available.
-
Create an access key for the
datasphere-saservice account:yc iam access-key create --service-account-name datasphere-saResult:
access_key: id: aje6t3vsbj8l******** service_account_id: ajepg0mjt06s******** created_at: "2022-07-18T14:37:51Z" key_id: 0n8X6WY6S24N7Oj***** secret: JyTRFdqw8t1kh2-OJNz4JX5ZTz9Dj1rI9hx***** -
Save the
key_idandsecretvalues. You will not be able to get the secret key again.
Create an SSH key pair
To connect to a VM over SSH, you will need a key pair: the public key resides on the VM, and the private one is kept by the user. This method is more secure than login and password authentication.
Note
SSH connections using a login and password are disabled by default on public Linux images that are provided by Yandex Cloud.
To create a key pair:
-
Open the terminal.
-
Use the
ssh-keygencommand to create a new key:ssh-keygen -t ed25519 -C "<optional_comment>"You can specify an empty string in the
-Cparameter to avoid adding a comment, or you may not specify the-Cparameter at all: in this case, a default comment will be added.After running this command, you will be prompted to specify the name and path to the key files, as well as enter the password for the private key. If you only specify the name, the key pair will be created in the current directory. The public key will be saved in a file with the
.pubextension, while the private key, in a file without extension.By default, the command prompts you to save the key under the
id_ed25519name in the following directory:/home/<username>/.ssh. If there is already an SSH key namedid_ed25519in this directory, you may accidentally overwrite it and lose access to the resources it is used in. Therefore, you may want to use unique names for all SSH keys.
If you do not have OpenSSH installed yet, follow this guide to install it.
-
Run
cmd.exeorpowershell.exe(make sure to update PowerShell before doing so). -
Use the
ssh-keygencommand to create a new key:ssh-keygen -t ed25519 -C "<optional_comment>"You can specify an empty string in the
-Cparameter to avoid adding a comment, or you may not specify the-Cparameter at all: in this case, a default comment will be added.After running this command, you will be prompted to specify the name and path to the key files, as well as enter the password for the private key. If you only specify the name, the key pair will be created in the current directory. The public key will be saved in a file with the
.pubextension, while the private key, in a file without extension.By default, the command prompts you to save the key under the
id_ed25519name in the following folder:C:\Users\<username>/.ssh. If there is already an SSH key namedid_ed25519in this directory, you may accidentally overwrite it and lose access to the resources it is used in. Therefore, you may want to use unique names for all SSH keys.
Create keys using the PuTTY app:
-
Download and install PuTTY.
-
Add the folder with PuTTY to the
PATHvariable:- Click Start and type Change system environment variables in the Windows search bar.
- Click Environment Variables... at the bottom right.
- In the window that opens, find the
PATHparameter and click Edit. - Add your folder path to the list.
- Click OK.
-
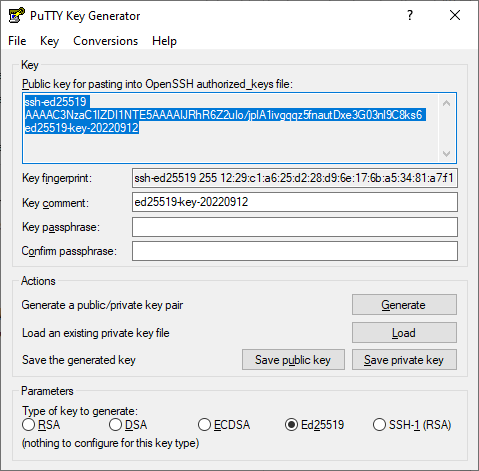
Launch the PuTTYgen app.
-
Select EdDSA as the pair type to generate. Click Generate and move the cursor in the field above it until key creation is complete.
-
In Key passphrase, enter a strong password. Enter it again in the field below.
-
Click Save private key and save the private key. Do not share its key phrase with anyone.
-
Click Save public key and save the public key to a file named
<key_name>.pub.
Create a VM
-
In the management console, navigate to the folder dashboard, click Create resource, and select
Virtual machine instance. -
Under Boot disk image, in the Product search field, enter
Ubuntu 22.04and select a public Ubuntu 22.04 image. -
Under Location, select the
ru-central1-aavailability zone. -
Under Disks and file storages, select the
SSDdisk type and specify its size:20 GB. -
Under Computing resources, navigate to the
Customtab and specify the platform, number of vCPUs, and amount of RAM:- Platform:
Intel Ice Lake - vCPU:
2 - Guaranteed vCPU performance:
100% - RAM:
4 GB
- Platform:
-
Under Network settings:
- In the Subnet field, select the subnet specified in the DataSphere project settings. Make sure to set up a NAT gateway for the subnet.
- In the Public IP address field, keep
Autoto assign the VM a random external IP address from the Yandex Cloud pool or select a static address from the list if you reserved one.
-
Under Access, select SSH key and specify the VM access credentials:
- In the Login field, enter a username. Do not use
rootor other reserved usernames. To perform operations requiring root privileges, use thesudocommand. -
In the SSH key field, select the SSH key saved in your organization user profile.
If there are no SSH keys in your profile or you want to add a new key:
-
Click Add key.
-
Enter a name for the SSH key.
-
Select one of the following:
-
Enter manually: Paste the contents of the public SSH key. You need to create an SSH key pair on your own. -
Load from file: Upload the public part of the SSH key. You need to create an SSH key pair on your own. -
Generate key: Automatically create an SSH key pair.When adding a new SSH key, an archive containing the key pair will be created and downloaded. In Linux or macOS-based operating systems, unpack the archive to the
/home/<user_name>/.sshdirectory. In Windows, unpack the archive to theC:\Users\<user_name>/.sshdirectory. You do not need additionally enter the public key in the management console.
-
-
Click Add.
The system will add the SSH key to your organization user profile. If the organization has disabled the ability for users to add SSH keys to their profiles, the added public SSH key will only be saved in the user profile inside the newly created resource.
-
- In the Login field, enter a username. Do not use
-
Under General information, specify the VM name:
mlflow-vm. -
Under Additional, select the
datasphere-saservice account. -
Click Create VM.
Create a managed DB
- In the management console, select the folder where you want to create your database cluster.
- Navigate to Managed Service for PostgreSQL.
- Click Create cluster.
- Name the cluster, e.g.,
mlflow-bd. - Under Host class, select the
s3-c2-m8configuration. - Under Storage size, select
250 GB. - Under Database, enter your username and password. You will need these to establish a connection.
- Under Hosts, select the
ru-central1-aavailability zone. - Click Create cluster.
- Go to the DB you created and click Connect.
- Save the host link from the
hostfield: you will need it to establish a connection.
Create a bucket
- In the management console, select the folder where you want to create a bucket.
- Navigate to Object Storage.
- At the top right, click Create bucket.
- In the ** Name** field, enter a name for the bucket, e.g.,
mlflow-bucket. - In the Read objects, Read object list, and Read settings fields, select With authorization.
- Click Create bucket.
- To create a folder for MLflow artifacts, open the bucket you created and click Create folder.
- Enter a name for the folder, e.g.,
artifacts.
Install the MLFlow tracking server and add it to the VM auto start
-
Connect to the VM over SSH.
-
Download the
Anacondadistribution:curl --remote-name https://repo.anaconda.com/archive/Anaconda3-2023.07-1-Linux-x86_64.sh -
Run its installation:
bash Anaconda3-2023.07-1-Linux-x86_64.shWait for the installation to complete and restart the shell.
-
Create an environment:
conda create -n mlflow -
Activate the environment:
conda activate mlflow -
Install the required packages by running these commands one by one:
conda install -c conda-forge mlflow conda install -c anaconda boto3 pip install psycopg2-binary pip install pandas -
Create the environment variables for S3 access:
-
Open the file with the variables:
sudo nano /etc/environment -
Add these lines to the file while substituting the placeholders with your VM's internal IP address:
MLFLOW_S3_ENDPOINT_URL=https://storage.yandexcloud.net/
MLFLOW_TRACKING_URI=http://<VM_internal_IP_address>:8000
-
-
Specify the data for the
boto3library to access S3:-
Create the
.awsfolder:mkdir ~/.aws -
Create the
credentialsfile:nano ~/.aws/credentials -
Add these lines to the file while substituting the placeholders with the static key ID and value:
[default]
aws_access_key_id=<static_key_ID>
aws_secret_access_key=<secret_key>
-
-
Run the MLFlow tracking server while substituting the placehoders with your cluster data:
mlflow server --backend-store-uri postgresql://<username>:<password>@<host>:6432/db1?sslmode=verify-full --default-artifact-root s3://mlflow-bucket/artifacts -h 0.0.0.0 -p 8000You can check your connection to MLFlow at
http://<VM_public_IP_address>:8000.
Enable MLFlow autorun
For MLFlow to run automatically after the VM restarts, you need to convert it into a Systemd service.
-
Create directories for storing logs and error details:
mkdir ~/mlflow_logs/ mkdir ~/mlflow_errors/ -
Create the
mlflow-tracking.servicefile:sudo nano /etc/systemd/system/mlflow-tracking.service -
Add these lines to the file while substituting the placeholders with your data:
[Unit]
Description=MLflow Tracking Server
After=network.target

[Service]
Environment=MLFLOW_S3_ENDPOINT_URL=https://storage.yandexcloud.net/
Restart=on-failure
RestartSec=30
StandardOutput=file:/home/<VM_user_name>/mlflow_logs/stdout.log
StandardError=file:/home/<VM_username>/mlflow_errors/stderr.log
User=<VM_username>
ExecStart=/bin/bash -c 'PATH=/home/<VM_username>/anaconda3/envs/mlflow_env/bin/:$PATH exec mlflow server --backend-store-uri postgresql://<DB_user_name>:<password>@<host>:6432/db1?sslmode=verify-full --default-artifact-root s3://mlflow-bucket/artifacts -h 0.0.0.0 -p 8000'

[Install]
WantedBy=multi-user.target
Where:
<VM_user_name>: VM account user name.<DB_user_name>: User name specified when creating the database cluster.
-
Run the service and enable autoload at system startup:
sudo systemctl daemon-reload
sudo systemctl enable mlflow-tracking
sudo systemctl start mlflow-tracking
sudo systemctl status mlflow-tracking
Create secrets
-
Select the project in your community or on the DataSphere home page in the Recent projects tab.
- Under Project resources, click Secret.
- Click Create.
- In the Name field, enter the secret name:
MLFLOW_S3_ENDPOINT_URL. - In the Value field, paste the URL:
https://storage.yandexcloud.net/. - Click Create.
- Create three more secrets:
MLFLOW_TRACKING_URIwith thehttp://<VM_internal_IP_address>:8000value.AWS_ACCESS_KEY_IDwith the static key ID.AWS_SECRET_ACCESS_KEYwith the static key value.
Train your model
This tutorial features a set of data for predicting the quality of wine based on quantitative properties, such as acidity, pH, residual sugar, etc. To train your model, copy and paste the code into the notebook cells.
-
Open the DataSphere project:
-
Select the project in your community or on the DataSphere home page in the Recent projects tab.
- Click Open project in JupyterLab and wait for the loading to complete.
- Open the notebook tab.
-
-
Install the required modules:
%pip install mlflow -
Import the required libraries:
import os import warnings import sys import pandas as pd import numpy as np from sklearn.metrics import mean_squared_error, mean_absolute_error, r2_score from sklearn.model_selection import train_test_split from sklearn.linear_model import ElasticNet from urllib.parse import urlparse import mlflow import mlflow.sklearn from mlflow.models import infer_signature import logging -
Create an experiment in MLFlow:
mlflow.set_experiment("my_first_experiment") -
Create a function for prediction quality assessment:
def eval_metrics(actual, pred): rmse = np.sqrt(mean_squared_error(actual, pred)) mae = mean_absolute_error(actual, pred) r2 = r2_score(actual, pred) return rmse, mae, r2 -
Get your data ready, train your model, and register it in MLflow:
logging.basicConfig(level=logging.WARN)
logger = logging.getLogger(__name__)

warnings.filterwarnings("ignore")
np.random.seed(40)

# Uploading the dataset to assess wine quality
csv_url = (
   "https://raw.githubusercontent.com/mlflow/mlflow/master/tests/datasets/winequality-red.csv"
)
try:
    data = pd.read_csv(csv_url, sep=";")
except Exception as e:
    logger.exception(
        "Unable to download training & test CSV, check your internet connection. Error: %s", e
   )

# Splitting the dataset into a training sample and a test sample
train, test = train_test_split(data)

# Allocating a target variable and variables used for prediction
train_x = train.drop(["quality"], axis=1)
test_x = test.drop(["quality"], axis=1)
train_y = train[["quality"]]
test_y = test[["quality"]]

alpha = 0.5
l1_ratio = 0.5

# Creating an `mlflow` run
with mlflow.start_run():

   # Creating and training the ElasticNet model
   lr = ElasticNet(alpha=alpha, l1_ratio=l1_ratio, random_state=42)
   lr.fit(train_x, train_y)

   # Making quality predictions against the test sample
   predicted_qualities = lr.predict(test_x)

   (rmse, mae, r2) = eval_metrics(test_y, predicted_qualities)

   print("Elasticnet model (alpha={:f}, l1_ratio={:f}):".format(alpha, l1_ratio))
   print("  RMSE: %s" % rmse)
   print("  MAE: %s" % mae)
   print("  R2: %s" % r2)

   # Logging data on hyperparameters and quality metrics in MLflow
   mlflow.log_param("alpha", alpha)
   mlflow.log_param("l1_ratio", l1_ratio)
   mlflow.log_metric("rmse", rmse)
   mlflow.log_metric("r2", r2)
   mlflow.log_metric("mae", mae)

   predictions = lr.predict(train_x)
   signature = infer_signature(train_x, predictions)

   tracking_url_type_store = urlparse(mlflow.get_tracking_uri()).scheme

   # Registering the model in MLflow
   if tracking_url_type_store != "file":
     mlflow.sklearn.log_model(
           lr, "model", registered_model_name="ElasticnetWineModel", signature=signature
     )
   else:
      mlflow.sklearn.log_model(lr, "model", signature=signature)
You can check the result at
http://<VM_public_IP_address>:8000.
How to delete the resources you created
To stop paying for the resources you created:
- Delete the VM.
- Delete the database cluster.
- Delete the objects from the bucket.
- Delete the bucket.
- Delete the project.