Yandex Cloud
Search
Discuss with expertTry it for free
  • Customer Stories
  • Documentation
  • Blog
  • All Services
    • Cloud Interconnect
    • Cloud Backup
    • Cloud Registry
    • Yandex AI Studio
    • Compute Cloud
    • Object Storage
    • Managed Service for Kubernetes®
    • Yandex BareMetal
    • Smart Web Security
    • Security Deck
    • Managed Service for PostgreSQL
    • Managed Service for ClickHouse®
    • Monium
    • Cloud CDN
    • Network Load Balancer
    • Virtual Private Cloud
    • Cloud DNS
    • Application Load Balancer
    • Yandex Cloud Video
    • Stackland
    • Yandex Cloud Router
    • Yandex Managed Service for Trino
    • Managed Service for MySQL®
    • Managed Service for Valkey™
    • Managed Service for Apache Spark™
    • Yandex StoreDoc
    • Managed Service for OpenSearch
    • Managed Service for Apache Kafka®
    • Data Transfer
    • Yandex MPP Analytics Engine for PostgreSQL
    • Yandex Managed Service for Apache Airflow®
    • Data Processing
    • Yandex MetaData Hub
    • Managed Service for YDB
    • Managed Service for Sharded PostgreSQL
    • Managed Service for YTsaurus
    • Yandex WebSQL
    • DataLens
    • Yandex Search API
    • SpeechSense
    • SpeechKit
    • DataSphere
    • Vision OCR
    • Translate
    • Yandex Identity Hub
    • Key Management Service
    • Certificate Manager
    • Yandex Lockbox
    • Audit Trails
    • SmartCaptcha
    • Cloud Desktop
    • SourceCraft Code Assistant
    • Container Registry
    • Managed Service for GitLab
    • Managed Service for Prometheus®
    • Cloud Functions
    • API Gateway
    • Yandex Cloud Postbox
    • Message Queue
    • Serverless Integrations
    • IoT Core
    • Data Streams
    • Serverless Containers
    • Cloud Notification Service
    • Yandex Query
    • Identity and Access Management
    • Yandex Cloud Console
    • Resource Manager
    • Yandex Cloud Billing
    • Yandex Cloud Quota Manager
    • Cloud Apps
  • System Status
  • Marketplace
    • Featured
    • Infrastructure & Network
    • Data Platform
    • AI for business
    • Security
    • DevOps tools
    • Serverless
    • Monitoring & Resources
  • All Solutions
    • By industry
    • By use case
    • Economics and Pricing
    • Security
    • Technical Support
    • Start testing with double trial credits
    • Cloud credits to scale your IT product
    • Gateway to Russia
    • Cloud for Startups
    • Center for Technologies and Society
    • Yandex Cloud Partner program
    • Price calculator
    • Pricing plans
  • Customer Stories
  • Documentation
  • Blog
© 2026 Direct Cursus Technology L.L.C.
Tutorials
    • All tutorials
      • Deploying a service in DataSphere from an ONNX model
      • Deploying a service in DataSphere from a Docker image
      • Deploying a service in DataSphere from a Docker image with FastAPI
      • Deploying a gRPC service based on a Docker image
      • Image generation using the Stable Diffusion model

In this article:

  • Getting started
  • Required paid resources
  • Set up your infrastructure
  • Create a project
  • Create a notebook and install the libraries
  • Create a model and generate an image
  • How to delete the resources you created
  1. Machine learning and artificial intelligence
  2. Usage DataSphere
  3. Image generation using the Stable Diffusion model

Image generation using the Stable Diffusion model

Written by
Yandex Cloud
Updated at July 13, 2026
View in Markdown
  • Getting started
    • Required paid resources
  • Set up your infrastructure
    • Create a project
    • Create a notebook and install the libraries
  • Create a model and generate an image
  • How to delete the resources you created

In DataSphere, you can deploy a neural network based on the Stable Diffusion model and generate images based on text descriptions.

Stable Diffusion is an open-source text-to-image model developed by stability.ai.

In this tutorial, you will generate an image based on a text description by implementing the Stable Diffusion model in the Diffusers library. This library prioritizes ease of use and customization over performance.

To generate an image using the Stable Diffusion model:

  1. Set up your infrastructure.
  2. Create a model and generate an image.

If you no longer need the resources you created, delete them.

Getting startedGetting started

Before getting started, register in Yandex Cloud, set up a community, and link your billing account to it.

  1. On the DataSphere home page, click Try for free and select an account to log in with: Yandex ID or your working account with the identity federation (SSO).
  2. Select the Yandex Identity Hub organization you are going to use in Yandex Cloud.
  3. Create a community.
  4. Link your billing account to the DataSphere community you are going to work in. Make sure you have a linked billing account and its status is ACTIVE or TRIAL_ACTIVE. If you do not have a billing account yet, create one in the DataSphere interface.

Note

If you are using an identity federation to work with Yandex Cloud, you might not have access to billing details. In this case, contact your Yandex Cloud organization administrator.

Required paid resourcesRequired paid resources

The cost of using the model includes a fee for running code cells (see DataSphere pricing).

Set up your infrastructureSet up your infrastructure

Create a projectCreate a project

  1. Open the DataSphere home page.
  2. In the left-hand panel, select Communities.
  3. Select the community where you want to create a project.
  4. On the community page, click Create project.
  5. In the window that opens, enter Stable Diffusion as your project name and add a description (optional).
  6. Click Create.

Create a notebook and install the librariesCreate a notebook and install the libraries

Note

In this tutorial, all computations use the g1.1 configuration. However, you can run the model on other configurations as well.

  1. In the DataSphere interface, open the project you created.

  2. Create a new notebook:

    1. In the top panel of the project window, click File → New → Notebook.
    2. In the window that opens, select DataSphere Kernel.
  3. Install the Diffusers library. Paste the below code into the cell and click :

    %pip install diffusers
    
  4. Install the Transformers library:

    %pip install transformers
    
  5. Once the installation is complete, select Kernel ⟶ Restart kernel... on the top panel.

Create a model and generate an imageCreate a model and generate an image

  1. Import the libraries to the project:

    from diffusers import StableDiffusionPipeline
    import torch
    
  2. Create a model:

    model_id = "runwayml/stable-diffusion-v1-5"
    pipe = StableDiffusionPipeline.from_pretrained(model_id, torch_dtype=torch.float16)
    pipe = pipe.to("cuda")
    
  3. Generate an image by its description:

    prompt = "a photo of an astronaut riding a horse on mars"
    image = pipe(prompt).images[0]
    
  4. Save the output image:

    image.save("astronaut_rides_horse.png")
    

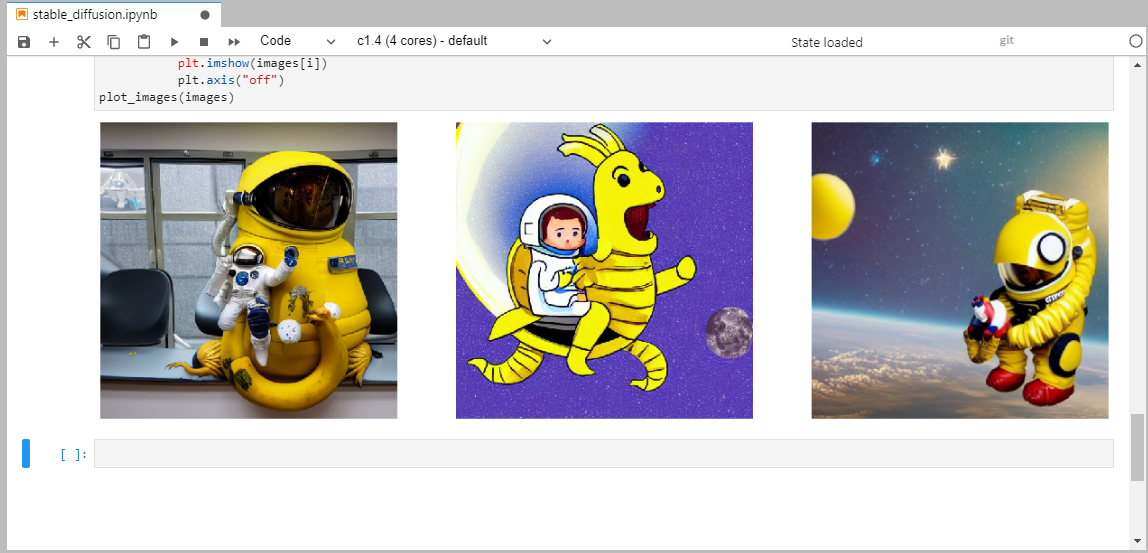
    The image file will appear next to the notebook. Result:
    generate-image

How to delete the resources you createdHow to delete the resources you created

If you no longer plan to use the Stable Diffusion project, delete it.

Useful linksUseful links

  • Working with models
  • Running computations in DataSphere using the API

Was the article helpful?

Previous
Deploying a gRPC service based on a Docker image
Next
Analyzing data with Query
© 2026 Direct Cursus Technology L.L.C.