Running a Docker image on a VM using Yandex Cloud Registry
In this tutorial, you will deploy a Docker image from a registry in Yandex Cloud Registry and run a container on a Yandex Compute Cloud VM instance.
To run a Docker image on a VM:
- Get your cloud ready.
- Create a registry in Cloud Registry.
- Create a service account.
- Create an authorized key for the service account.
- Create a cloud network with a subnet.
- Create a VM.
- Build a Docker image and push it to Cloud Registry.
- Push the Docker image to the VM.
If you no longer need the resources you created, delete them.
Get your cloud ready
Sign up for Yandex Cloud and create a billing account:
- Navigate to the management console and log in to Yandex Cloud or create a new account.
- On the Yandex Cloud Billing page, make sure you have a billing account linked and it has the
ACTIVEorTRIAL_ACTIVEstatus. If you do not have a billing account, create one and link a cloud to it.
If you have an active billing account, you can create or select a folder for your infrastructure on the cloud page.
Learn more about clouds and folders here.
Required paid resources
The cost of resources for running a Docker image includes:
- Fee for a continuously running VM (see Yandex Compute Cloud pricing).
- Fee for storing the created images (see Yandex Cloud Registry pricing).
- Fee for outbound traffic from Yandex Cloud to the internet (see Yandex Compute Cloud pricing).
Create an SSH key pair
Prepare an SSH key for VM access.
-
Open the terminal.
-
Use the
ssh-keygencommand to create a new key:ssh-keygen -t ed25519 -C "<optional_comment>"You can specify an empty string in the
-Cparameter to avoid adding a comment, or you may not specify the-Cparameter at all: in this case, a default comment will be added.After running this command, you will be prompted to specify the name and path to the key files, as well as enter the password for the private key. If you only specify the name, the key pair will be created in the current directory. The public key will be saved in a file with the
.pubextension, while the private key, in a file without extension.By default, the command prompts you to save the key under the
id_ed25519name in the following directory:/home/<username>/.ssh. If there is already an SSH key namedid_ed25519in this directory, you may accidentally overwrite it and lose access to the resources it is used in. Therefore, you may want to use unique names for all SSH keys.
If you do not have OpenSSH installed yet, follow this guide to install it.
-
Run
cmd.exeorpowershell.exe(make sure to update PowerShell before doing so). -
Use the
ssh-keygencommand to create a new key:ssh-keygen -t ed25519 -C "<optional_comment>"You can specify an empty string in the
-Cparameter to avoid adding a comment, or you may not specify the-Cparameter at all: in this case, a default comment will be added.After running this command, you will be prompted to specify the name and path to the key files, as well as enter the password for the private key. If you only specify the name, the key pair will be created in the current directory. The public key will be saved in a file with the
.pubextension, while the private key, in a file without extension.By default, the command prompts you to save the key under the
id_ed25519name in the following folder:C:\Users\<username>/.ssh. If there is already an SSH key namedid_ed25519in this directory, you may accidentally overwrite it and lose access to the resources it is used in. Therefore, you may want to use unique names for all SSH keys.
Create keys using the PuTTY app:
-
Download and install PuTTY.
-
Add the folder with PuTTY to the
PATHvariable:- Click Start and type Change system environment variables in the Windows search bar.
- Click Environment Variables... at the bottom right.
- In the window that opens, find the
PATHparameter and click Edit. - Add your folder path to the list.
- Click OK.
-
Launch the PuTTYgen app.
-
Select EdDSA as the pair type to generate. Click Generate and move the cursor in the field above it until key creation is complete.
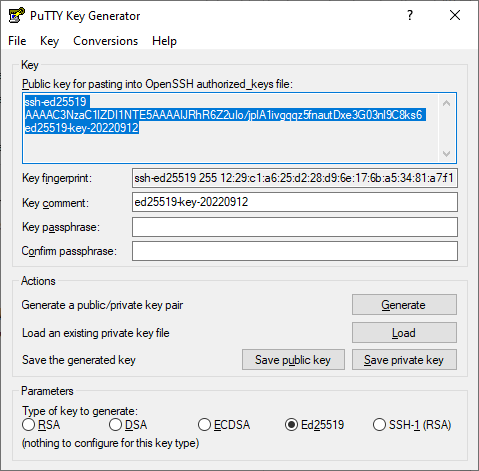
-
In Key passphrase, enter a strong password. Enter it again in the field below.
-
Click Save private key and save the private key. Do not share its key phrase with anyone.
-
Click Save public key and save the public key to a file named
<key_name>.pub.
Warning
Store your private key securely, as you will not be able to connect to the VM without it.
Install and configure Docker
-
Install Docker Engine. Use this guide to install and run Docker for your operating system.
-
After the installation is complete, add the current user to the
dockergroup:sudo groupadd docker sudo usermod -aG docker $USER newgrp docker
For groups to update successfully, you may need to log back into the OS or reboot the computer.
For information on additional Docker settings in Linux, see this developer guide.
If you are working on a device with a GUI, you can also install Docker Desktop for Linux.
Download and install the Docker Desktop distribution for macOS. For more information, see this developer guide.
-
Download and install the Docker Desktop distribution for Windows.
-
After the installation is complete, add the current user to the
docker-usersgroup:-
Run Computer Management as administrator:
compmgmt.msc -
Expand the (Local) Computer Management menu, then go Utilities → Local Users and Groups → Groups and open the
docker-usersgroup. -
Click Add and add the required user to the group.
-
Click OK.
-
-
Run Docker Desktop and make sure the app's status is
running.
For information on additional Docker settings in Windows, see this developer guide.
Create a registry in Cloud Registry
Create a registry for storing Docker images.
-
In the management console, select the folder you want to create a registry in.
-
Navigate to Cloud Registry.
-
Click Create registry.
-
Select Docker for the format.
-
Set the registry type to Local.
-
Enter a name for the registry. The naming requirements are as follows:
- It must be from 3 to 62 characters long.
- It can only contain lowercase Latin letters, numbers, and hyphens.
- It must start with a letter and cannot end with a hyphen.
-
Click Create.
If you do not have the Yandex Cloud CLI yet, install and initialize it.
The folder used by default is the one specified when creating the CLI profile. To change the default folder, use the yc config set folder-id <folder_ID> command. You can also specify a different folder for any command using --folder-name or --folder-id. If you access a resource by its name, the search will be limited to the default folder. If you access a resource by its ID, the search will be global, i.e., through all folders based on access permissions.
-
See the description of the CLI command for creating a registry:
yc cloud-registry registry create --help -
Create a registry:
yc cloud-registry registry create \
  --name docker-ycr \
  --description "Created with CLI" \
  --registry-kind docker \
  --registry-type local
Result:
id: cn191rncdrhd********
folder_id: b1g681qpemb4********
name: docker-ycr
kind: DOCKER
type: LOCAL
status: ACTIVE
description: Created with CLI
created_at: "2025-12-12T04:56:32.681439Z"
modified_at: "2025-12-12T04:56:34.171714Z"
Use the create REST API method for the Registry resource or the RegistryService/Create gRPC API call.
Create a service account
Create a service account you will use to pull the Docker image to the VM. Assign it the cloud-registry.artifacts.puller role for the created registry.
- In the management console, select the relevant folder.
- Navigate to Identity and Access Management.
- Click Create service account.
- Name the service account:
docker-puller. - Click Create.
- Navigate to Cloud Registry.
- Select the previously created registry.
- Navigate to the Access bindings tab.
- Click Assign roles.
- In the window that opens, select the
docker-pullerservice account. - Click Add role and select
cloud-registry.artifacts.puller. - Click Save.
-
Create a service account:
yc iam service-account create --name docker-pullerResult:
id: ajelabcde12f******** folder_id: b0g12ga82bcv******** created_at: "2020-11-30T14:32:18.900092Z" name: docker-puller -
Assign the
cloud-registry.artifacts.pullerrole to the service account:yc cloud-registry registry add-access-binding <registry_name_or_ID> \ --role cloud-registry.artifacts.puller \ --subject serviceAccount:<service_account_ID>Where
--subjectis thedocker-pullerservice account ID.Result:
...1s...done (5s)
- To create a service account, use the create REST API method for the ServiceAccount resource.
- To assign the service account a role for the registry, use the updateAccessBindings REST API method for the Registry resource.
Create an authorized key for the service account
Create an authorized key for the docker-puller service account An authorized key will allow the service account to get an IAM token for authentication in the Yandex Cloud API.
- Navigate to Identity and Access Management.
- In the list that opens, select the
docker-pullerservice account. - In the top panel, click Create new key and select
Create authorized key. - Click Create.
- In the window that opens, click Download file with keys and then Close
The action will download to your computer a file named authorized_key.json containing the authorized key. You will need this key later to set up Docker on your VM.
Run this command:
yc iam key create \
  --service-account-name docker-puller \
  -o authorized_key.json
Result:
id: ajetn5b1efv2********
service_account_id: ajefbp899mcl********
created_at: "2025-12-17T04:57:16.241850455Z"
key_algorithm: RSA_2048
The action will download to your computer a file named authorized_key.json containing the authorized key. You will need this key later to set up Docker on your VM.
Use the create REST API method for the Key resource or the KeyService/Create gRPC API call.
Create a cloud network with a subnet
Create a cloud network with a subnet to host the VM.
- Navigate to Virtual Private Cloud.
- Click Create network.
- In the Name field, specify
docker-ycr-network. - In the Advanced field, disable Create subnets.
- Click Create network.
- Select
vipnet-network. - Click Create subnet at the top right.
- In the Name field, specify
docker-ycr-subnet-ru-central1-b. - In the Availability zone field, select
ru-central1-b. - In the CIDR field, specify
192.168.1.0/24. - Click Create subnet.
-
Create a cloud network named
docker-ycr-network:yc vpc network create docker-ycr-networkResult:
id: enp1gg8kr3pv********
folder_id: b1gt6g8ht345********
created_at: "2023-12-20T20:08:11Z"
name: docker-ycr-network
default_security_group_id: enppne4l2eg5********
For more information about the
yc vpc network createcommand, see the CLI reference. -
Create a subnet in the
ru-central1-bavailability zone:yc vpc subnet create docker-ycr-subnet-ru-central1-b \ --zone ru-central1-b \ --network-name docker-ycr-network \ --range 192.168.1.0/24Result:
id: e2li9tcgi7ii********
folder_id: b1gt6g8ht345********
created_at: "2023-12-20T20:11:16Z"
name: docker-ycr-subnet-ru-central1-b
network_id: enp1gg8kr3pv********
zone_id: ru-central1-b
v4_cidr_blocks:
  - 192.168.1.0/24
For more information about the
yc vpc subnet createcommand, see the CLI reference.
- To create a cloud network, use the create REST API method or the NetworkService/Create gRPC API call.
- To create a subnet, use the create REST API method or the SubnetService/Create gRPC API call.
Create a VM
Create a VM with a public IP address and associate it with the service account you created.
-
Navigate to Compute Cloud.
-
Click Create virtual machine.
-
Under Boot disk image, select an image and a Linux-based OS version.
-
Under Location, select an availability zone where your VM will reside.
-
Under Network settings:
- In the Subnet field, select the previously created network and subnet.
- In the Public IP address field, leave the Auto value to assign a random external IP address from the Yandex Cloud pool.
-
Under Access, specify the VM access credentials:
- In the Login field, enter the username.
- In the SSH key field, paste the contents of the public key file.
-
Under General information, specify the VM name:
docker-vm. -
Under Additional, select the
docker-pullerservice account you created earlier. -
Click Create VM.
Create a VM in the default folder:
yc compute instance create \
  --name docker-vm \
  --zone ru-central1-b \
  --network-interface subnet-name=docker-ycr-subnet-ru-central1-b,nat-ip-version=ipv4 \
  --create-boot-disk image-folder-id=standard-images,image-family=ubuntu-2004-lts \
  --ssh-key <public_SSH_key_file_path> \
  --service-account-name docker-puller
Where:
--name: VM name.--zone: Availability zone matching the subnet.subnet-name: Name of the subnet you created earlier.image-family: Image family.--ssh-key: Public SSH key path.--service-account-name: Service account name.
Result:
id: epd6kj8giu79********
folder_id: b1g681qpemb4********
created_at: "2025-12-12T16:14:50Z"
name: docker-vm
zone_id: ru-central1-b
platform_id: standard-v2
resources:
  memory: "2147483648"
  cores: "2"
  core_fraction: "100"
status: RUNNING
metadata_options:
  gce_http_endpoint: ENABLED
  aws_v1_http_endpoint: ENABLED
  gce_http_token: ENABLED
  aws_v1_http_token: DISABLED
boot_disk:
  mode: READ_WRITE
  device_name: epdvqn83lud9********
  auto_delete: true
  disk_id: epdvqn83lud9********
network_interfaces:
  - index: "0"
    mac_address: d0:0d:**:**:**:**
    subnet_id: e2l8hdblgki4********
    primary_v4_address:
      address: 192.168.1.7
      one_to_one_nat:
        address: 158.***.**.***
        ip_version: IPV4
serial_port_settings:
  ssh_authorization: OS_LOGIN
gpu_settings: {}
fqdn: epd6kj8giu79********.auto.internal
scheduling_policy: {}
service_account_id: ajes3g9rg94s********
network_settings:
  type: STANDARD
placement_policy: {}
hardware_generation:
  legacy_features:
    pci_topology: PCI_TOPOLOGY_V2
application: {}
Use the Create REST API method for the Instance resource or the InstanceService/Create gRPC API call.
Build a Docker image and push it to Cloud Registry
Build a Docker image and push it to the registry.
-
Get authenticated in Cloud Registry.
-
Create a file called Dockerfile:
echo "FROM ubuntu:latest" > Dockerfile echo "CMD echo 'Hello World'" >> Dockerfile -
Build the Docker image:
docker build . -t registry.yandexcloud.net/<registry_ID>/ubuntu:helloWhere
<registry_ID>is the ID of the registry you created earlier.Result:
... Successfully built db45******** Successfully tagged registry.yandexcloud.net/cn1k31pgpovl********/ubuntu:hello -
Push the Docker image to the registry:
docker push registry.yandexcloud.net/<registry_ID>/ubuntu:helloResult:
e8bc********: Pushed
hello: digest: sha256:96d... size: 529
Push the Docker image to the VM
Set up the environment on the VM, pull the Docker image, and run it.
-
Connect to the VM over SSH.
-
Install the CLI and restart the terminal:
curl -sSL https://storage.yandexcloud.net/yandexcloud-yc/install.sh | bash exec -l $SHELL -
Create a file named
key.jsonand paste the contents of thedocker-pullerservice account key file to it:sudo nano key.json -
Configure the CLI for the service account:
yc config profile create docker-puller
yc config set service-account-key key.json
yc config set folder-id <folder_ID>
For
folder-id, specify the ID of the folder containing the registry.Result:
Profile 'docker-puller' created and activated -
Install Docker:
sudo apt update sudo apt install docker.io -
Add the current user to the
dockergroup and disconnect from the VM:sudo usermod -aG docker $USER exit -
Reconnect to the VM over SSH.
-
Set up Docker:
mkdir -p ~/.docker cat > ~/.docker/config.json <<'EOF' { "credHelpers": { "registry.yandexcloud.net": "yc" } } EOF sudo tee /usr/local/bin/docker-credential-yc >/dev/null <<'EOF' #!/usr/bin/env bash exec yc cloud-registry docker-credential "$@" EOF sudo chmod +x /usr/local/bin/docker-credential-yc -
Push the Docker image to the VM:
docker pull registry.yandexcloud.net/<registry_ID>/ubuntu:helloResult:
hello: Pulling from cn191rncdrhd********/ubuntu 02de********: Pull complete Digest: sha256:96d... Status: Downloaded newer image for registry.yandexcloud.net/cn191rncdrhd********/ubuntu:hello registry.yandexcloud.net/cn191rncdrhd********/ubuntu:hello -
Run the Docker image:
docker run registry.yandexcloud.net/<registry_ID>/ubuntu:helloResult:
Hello World
How to delete the resources you created
Delete the resources you no longer need to avoid paying for them:
- Delete the VM.
- Delete the static public IP address if you reserved one.
- Delete the network and the subnets.
- Delete the Docker image from the registry.
- Delete the registry.