Setting up virtual hosting
- Get your cloud ready
- Create a cloud network
- Reserve a static public IP address
- Create security groups
- Import TLS certificates of the websites to Certificate Manager
- Create instance groups for the websites
- Upload the website files to the VMs
- Create backend groups
- Create and configure HTTP routers
- Create an L7 load balancer
- Configure DNS for the websites
- Test the hosting
- Delete the resources you created
This tutorial describes how to set up virtual hosting: use Yandex Application Load Balancer to host multiple websites with different domain names at the same IP address.
As examples, we are going to use these three domain names: site-a.com, site-b.com, and default.com.
To set up virtual hosting:
- Get your cloud ready.
- Create a cloud network.
- Reserve a static public IP address.
- Create security groups.
- Import TLS certificates of the websites to Yandex Certificate Manager.
- Create instance groups for websites.
- Upload the website files to the VMs.
- Create backend groups.
- Create and configure HTTP routers.
- Create an L7 load balancer.
- Configure DNS for the websites.
- Test the hosting.
If you no longer need the resources you created, delete them.
Get your cloud ready
Sign up for Yandex Cloud and create a billing account:
- Navigate to the management console and log in to Yandex Cloud or create a new account.
- On the Yandex Cloud Billing page, make sure you have a billing account linked and it has the
ACTIVEorTRIAL_ACTIVEstatus. If you do not have a billing account, create one and link a cloud to it.
If you have an active billing account, you can create or select a folder for your infrastructure on the cloud page.
Learn more about clouds and folders here.
Required paid resources
The cost of virtual hosting includes:
- Fee for continuously running VMs (see Yandex Compute Cloud pricing).
- Fee for using a public static IP address (see Yandex Virtual Private Cloud pricing).
- Fee for using the computing resources of the L7 load balancer (see Application Load Balancer pricing).
- Fee for public DNS queries and DNS zones if using Yandex Cloud DNS (see Cloud DNS pricing).
Create a cloud network
All resources created in this tutorial will belong to the same cloud network.
To create a network:
- In the management console, select a folder.
- Navigate to Virtual Private Cloud.
- Click Create network.
- Specify the network Name:
vhosting-network. - Select Create subnets.
- Click Create network.
Reserve a static public IP address
For your virtual hosting to run, you need to assign a static public IP address to the L7 load balancer.
To reserve an IP address:
- In the management console, select a folder.
- Navigate to Virtual Private Cloud.
- In the left-hand panel, select Public IP addresses. Click Reserve public IP address.
- In the window that opens, select the
ru-central1-davailability zone. Click ** Reserve**.
Create security groups
Security groups include rules that allow the load balancer to receive inbound traffic and redirect it to the VMs so they can receive it. In this tutorial, we will create two security groups: one for the load balancer and another one for all VMs.
To create security groups:
-
In the management console, select a folder.
-
Navigate to Virtual Private Cloud.
-
In the left-hand panel, select Security groups.
-
Create a security group for the load balancer:
-
Click Create security group.
-
Specify the group Name:
vhosting-sg-balancer. -
Select Network:
vhosting-network. -
Under Rules, create the following rules using the instructions below the table:
Traffic
directionDescription Port range Protocol Destination name /
SourceCIDR blocks EgressanySelect entire rangeAnyCIDR0.0.0.0/0Ingressext-http80TCPCIDR0.0.0.0/0Ingressext-https443TCPCIDR0.0.0.0/0Ingresshealthchecks30080TCPLoad balancer healthchecks— -
Select the Egress or Ingress tab.
-
Click Add.
-
In the Port range field of the window that opens, specify a single port or a range of ports open for inbound or outbound traffic.
-
In the Protocol field, specify the appropriate protocol or leave
Anyto allow traffic transmission over any protocol. -
In the Destination name or Source field, select the rule purpose:
CIDR: Rule will apply to the range of IP addresses. In the CIDR blocks field, specify the CIDRs and masks of subnets traffic will move to/from. To add multiple CIDRs, click Add.Security group: Rule will apply to the current or selected security group VMs.Load balancer healthchecks: Rule allowing a load balancer to health-check VMs.
-
Click Save. Repeat these steps to create all rules from the table.
-
Click Create.
-
-
Similarly, create a security group for the VM named
vhosting-sg-vmswith the samevhosting-networkand the following rules:Traffic
directionDescription Port range Protocol Source CIDR blocks Ingressbalancer80TCPSecurity groupvhosting-sg-balancerIngressssh22TCPCIDR0.0.0.0/0
Import TLS certificates of the websites to Certificate Manager
To access the websites using the secure HTTPS protocol (HTTP over TLS), you must have TLS certificates issued for them. To use the certificates in the L7 load balancer, import them to Certificate Manager.
If your websites do not have certificates, you can use Certificate Manager to get them from Let's Encrypt®. You do not need to do anything else after creating certificates this way, because the certificates are imported automatically.
To import an existing certificate for site-a.com:
- In the management console, select a folder.
- Navigate to Certificate Manager.
- Click Add certificate and select User certificate.
- Specify the certificate Name:
vhosting-cert-a. - In the Certificate field, click Add certificate. Upload the File with your certificate or enter its Content and click Add.
- If your certificate is issued by a third-party certificate authority, click Add chain in the Intermediate certificate chain field. Upload the File with the certificate chain or enter its Content and click Add.
- In the Private key field, click Add private key. Upload the File with the key or enter its Content and click Add.
- Click Create.
Similarly, import the certificates for site-b.com and default.com named vhosting-cert-b and vhosting-cert-default, respectively.
Create instance groups for the websites
Compute Cloud VMs will act as web servers for the two websites: one group of multiple identical instances for each website. In this tutorial, the LEMP stack (Linux, NGINX, MySQL®, PHP) will be installed on the servers. For more information, see LAMP or LEMP-based website.
To create an instance group for site-a.com:
-
In the management console, select a folder.
-
Navigate to Compute Cloud.
-
In the left-hand panel, select Instance groups. Click Create group of virtual machines.
-
Specify the VM group Name:
vhosting-ig-a. -
Under Allocation, select multiple availability zones to ensure the fault tolerance of your hosting.
-
Under Instance template, click Define.
-
Under Boot disk image, open the Marketplace tab and click Show all Marketplace products. Select LEMP and click Use.
-
Under Computing resources:
- Choose a VM platform.
- Specify the required number of vCPUs and the amount of RAM.
This minimum configuration will do for functional website testing:
- Platform:
Intel Ice Lake - Guaranteed vCPU performance:
20% - vCPU:
2 - RAM:
1 GB
-
Under Network settings, select the Network named
vhosting-networkyou created earlier and its subnets. -
In the Public address field, select
Auto. -
Select the
vhosting-sg-vmssecurity group created earlier. -
Specify the VM access data:
-
In the Login field, enter the username.
-
In the SSH key field, paste the contents of the public key file.
You need to create a key pair for the SSH connection by yourself.
Alert
Once created, the VM gets an IP address and a host name (FQDN) for connections. If you selected
No addressin the Public address field, you will not be able to access the VM from the internet. -
-
Click Save.
-
Under Scaling, specify the instance group Size:
2. -
Under Integration with Application Load Balancer, select Create target group and enter
vhosting-tg-aas the group name. Read more about target groups. -
Click Create.
Follow the same steps to create a second instance group named vhosting-ig-b and a target group named vhosting-tg-b for site-b.com.
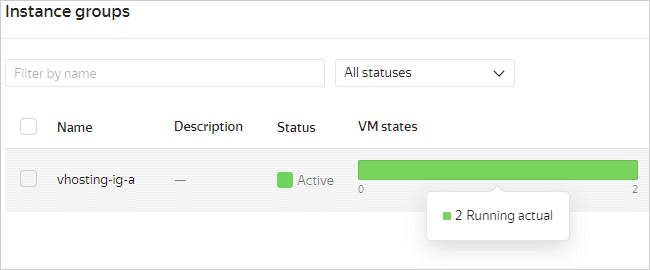
It may take a few minutes to create an instance group. As soon as the group changes its status to RUNNING, and all its VMs to RUNNING_ACTUAL, you can upload the website files to them.
Upload the website files to the VMs
To test your web servers, upload index.html files with different contents to the VMs: one content version for the vhosting-ig-a instance group VMs, and another for the vhosting-ig-b instance group VMs.
Example of the index.html file for the vhosting-ig-a group
<!DOCTYPE html>
<html>
  <head>
    <title>Site A</title>
  </head>
  <body>
    <p>This is site A</p>
  </body>
</html>
Example of the index.html file for the vhosting-ig-b group
<!DOCTYPE html>
<html>
  <head>
    <title>Site B</title>
  </head>
  <body>
    <p>This is site B</p>
  </body>
</html>
To upload a file to a VM:
-
On the VM page of the management console, under Network, find the VM's public IP address.
-
Connect to the VM over SSH.
-
Grant your user write permissions for the
/var/www/htmldirectory:UbuntuCentOSsudo chown -R "$USER":www-data /var/www/htmlsudo chown -R "$USER":apache /var/www/html -
Upload the website files to the VM via SCP.
Linux/macOSWindowsUse the
scpcommand line utility:scp -r <path_to_directory_with_files> <VM_user_name>@<VM_IP_address>:/var/www/htmlUse WinSCP to copy the local file directory to
/var/www/htmlon the VM.
Repeat the above steps for the files you want to upload to each VM in the vhosting-ig-a and vhosting-ig-b groups.
Create backend groups
Target groups created together with instance groups must be linked to the backend groups that define the traffic allocation settings.
For the backends, the groups will implement health checks: the load balancer will periodically send health check requests to the VMs and expect a response for a certain period.
To create a backend group for site-a.com:
- In the management console, select a folder.
- Navigate to Application Load Balancer.
- In the left-hand panel, select Backend groups. Click Create backend group.
- Enter the backend group Name:
vhosting-bg-a. - Under Backends, click Add.
- Enter the backend Name:
vhosting-backend-a. - In the Target groups field, select the
vhosting-tg-agroup. - Specify the Port the backend VMs will use to receive inbound traffic from the load balancer:
80. - Click Add health check.
- Specify the Port the backend VMs will use to accept health check connections:
80. - Specify the Path the load balancer will use for health checks:
/. - Click Create.
Follow the same steps to create a second backend group named vhosting-bg-b for site-b.com. In this group, create the vhosting-backend-b backend and link the vhosting-tg-b target group to it.
Create and configure HTTP routers
Backend groups must be linked to HTTP routers that define the HTTP request routing rules. In this tutorial, you will create two routers for the main sites (site-a.com and site-b.com) and the default router for default.com, which will respond to each request with the 404 Not Found HTTP status code.
Create HTTP routers for the websites
To create an HTTP router for site-a.com:
- In the management console, select a folder.
- Navigate to Application Load Balancer.
- In the left-hand panel, select HTTP routers. Click Create HTTP router.
- Specify the HTTP router Name:
vhosting-router-a. - Click Add virtual host.
- Specify the virtual host Name:
vhosting-host-a. - In the Authority field, specify the website domain name:
site-a.com. - Click Add route.
- Specify the route Name:
vhosting-route-a. - In the Backend group field, select the
vhosting-bg-agroup. - Click Create.
Follow the same steps to create the vhosting-router-b HTTP router for site-b.com and link the vhosting-bg-b backend group to it.
Create the default HTTP router
To create an HTTP router for default.com:
-
In the management console, select a folder.
-
Navigate to Application Load Balancer.
-
In the left-hand panel, select HTTP routers. Click Create HTTP router.
-
Specify the HTTP router Name:
vhosting-router-default. -
Click Add virtual host.
-
Specify the virtual host Name:
vhosting-host-default. -
In the Authority field, specify the website domain name:
default.com. -
Click Add route.
-
Specify the route Name:
vhosting-route-a. -
In the Action field, select
Response. -
In the HTTP status code field, select
404 Not Found. -
In the Response body field, click Select. Select the
Textmethod and enter the following in the Content field:404 Not Found This is the default site.Click Add.
-
Click Create.
Create an L7 load balancer
To create a load balancer:
- In the management console, select a folder.
- Navigate to Application Load Balancer.
- Click Create L7 load balancer.
- In the menu that opens, select Manual.
- Enter the load balancer Name:
vhosting-alb. - Under Network settings, select the
vhosting-sg-balancersecurity group you created earlier. - Create a listener to redirect HTTP requests to HTTPS:
- Under Listeners, click Add listener.
- Enter the listener Name:
vhosting-listener-http. - Under Public IP address, select Type
Listand the IP address you reserved earlier. - In the Protocol field, select
Redirect to HTTPS.
- Create an HTTPS request listener:
- Click Add listener again.
- Enter the listener Name:
vhosting-listener-https. - Under Public IP address, select Type
Listand the IP address you reserved earlier. - In the Protocol field, select
HTTPS. - Under Main listener, select
vhosting-cert-defaultfor the certificate andvhosting-router-defaultfor the HTTP router. - Add an SNI handler for
site-a.com:- Click Add SNI match.
- Specify the Name for the SNI handler:
vhosting-sni-a. - In the Server names field, specify
site-a.com. - Select
vhosting-cert-afor the certificate andvhosting-router-afor the HTTP router.
- Follow the same steps to add an SNI handler for
site-b.comwithvhosting-sni-bas its name,site-b.comas the server name, thevhosting-cert-bcertificate, and thevhosting-router-bHTTP router.
- Click Create.
Configure DNS for the websites
The site-a.com, site-b.com, and default.com domain names must be mapped to the L7 load balancer IP address using DNS records.
To configure DNS for site-a.com:
-
In the management console, select a folder.
-
Navigate to Application Load Balancer.
-
Copy the IP address of the load balancer that you created.
-
On the website of your DNS hosting provider, navigate to the DNS settings.
-
Create or edit the A record for
site-a.comso that it points to the copied IP address:site-a.com. A <L7_load_balancer_IP_address>If you use Yandex Cloud DNS, follow this guide to configure the record:
Configuring DNS records for Cloud DNS
Management console- In the management console, select a folder.
- Navigate to Cloud DNS.
- If you do not have a public DNS zone, create one:
- Click Create zone.
- Specify the zone Name:
vhosting-dns-a. - In the Zone field, enter the website domain name with a trailing dot:
site-a.com.. - Select a Type of the zone:
Public. - Click Create.
- Create a record in the zone:
- In the list of zones, click
vhosting-dns-a. - Click Create record.
- Leave the Name field empty for the record to match the
site-a.comdomain name (rather than a name with a subdomain, e.g.,www.site-a.com). - Select the record Type: A.
- In the Data field, paste the load balancer's IP address.
- Click Create.
- In the list of zones, click
Follow the same steps to configure DNS for site-b.com and default.com using the same IP address.
You can test your websites 15-20 minutes after you have configured DNS.
Test the hosting
To test the hosting, open each of the three websites in your browser:
- For
https://site-a.comandhttps://site-b.com, you should see the pages you uploaded to the VMs. - For
https://default.com, you should see the404 Not Founderror page configured when creating the HTTP router.
Delete the resources you created
To shut down the hosting and stop paying for the resources you created: