User management
The guide in this checklist item will help you add users to your created organization, appoint an administrator, and set user roles.
Add a Yandex user
If your employees have Yandex accounts, e.g., login@yandex.ru, they can use them to access Yandex Cloud services enabled in your organization.
To add employee accounts to the organization, follow these steps:
-
Go to Yandex Identity Hub.
-
In the left-hand panel, select Users.
-
In the top-right corner of the screen, click Add user and select Invite users with a Yandex account from the drop-down list.
-
Enter the email addresses of the users you want to invite to the organization (e.g.,
login@yandex.com).You can send invitations to any email address. Invited users will be able to select the appropriate Yandex account once they accept the invitation.
-
Click Send invitation.
-
Log in to the management console with the cloud administrator account.
-
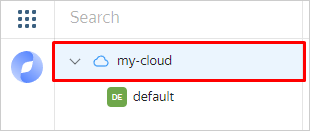
Select the appropriate cloud from the list on the left. Example:
-
In the top-right corner, click and select Invite users.
-
Enter the email addresses of the users you want to invite to the organization (e.g.,
login@yandex.com).You can send invitations to any email address. Invited users will be able to select the appropriate Yandex account once they accept the invitation.
-
Click Send invitation.
The users will be added to the organization as soon as they accept the invitation and select a log-in account for the organization.
To access the organization's enabled services, invited users simply need to log in to their Yandex account.
Add federated users
To add federated users, you need to know the user Name IDs returned by the Identity Provider (IdP) server together with the authentication successful response. This is usually the user's primary email address. If you do not know what the server returns as the name ID, contact the administrator who configured authentication for your federation.
To add federation users to an organization:
-
Go to Yandex Identity Hub.
-
In the left-hand panel, select Users.
-
In the top-right corner, click Add user and select Add federated users from the drop-down list.
-
In the Federation field, select the identity federation you want to add users from.
-
In the Users field, list the name IDs of users, separating them with spaces or line breaks.
-
Click Add. This will give the users access to the organization.
If you do not have the Yandex Cloud CLI installed yet, install and initialize it.
By default, the CLI uses the folder specified when creating the profile. To change the default folder, use the yc config set folder-id <folder_ID> command. You can also set a different folder for any specific command using the --folder-name or --folder-id parameter.
-
View the description of the add user command:
yc organization-manager federation saml add-user-accounts --help -
Add users by listing their name IDs separated by a comma:
yc organization-manager federation saml add-user-accounts \
   --name <federation_name> \
   --name-ids <list_of_user_name_IDs>
With Terraform, you can quickly create a cloud infrastructure in Yandex Cloud and manage it using configuration files. These files store the infrastructure description written in HashiCorp Configuration Language (HCL). If you change the configuration files, Terraform automatically detects which part of your configuration is already deployed, and what should be added or removed.
Terraform is distributed under the Business Source License. The Yandex Cloud provider for Terraform is distributed under the MPL-2.0 license.
For more information about the provider resources, see the relevant documentation on the Terraform website or its mirror.
If you do not have Terraform yet, install it and configure the Yandex Cloud provider.
-
In the configuration file, describe the resources you want to create:
resource "yandex_organizationmanager_saml_federation_user_account" "some_account" {
  federation_id = "<federation_ID>"
  name_id       = "<user_name_ID>"
}
Where:
federation_id: ID of the federation to add the user to.name_id: Name ID of the user.
For more information about
yandex_organizationmanager_saml_federation_user_accountproperties, see this Terraform article. -
Create the resources:
-
In the terminal, go to the directory where you edited the configuration file.
-
Make sure the configuration file is correct using this command:
terraform validateIf the configuration is correct, you will get this message:
Success! The configuration is valid. -
Run this command:
terraform planYou will see a detailed list of resources. No changes will be made at this step. If the configuration contains any errors, Terraform will show them.
-
Apply the changes:
terraform apply -
Type
yesand press Enter to confirm the changes.
Terraform will create all the required resources. You can check the new resources in the management console or using this CLI command:
yc organization-manager federations saml \ --organization-id <organization_ID> list-user-accounts \ --id <federation_ID> -
Use the addUserAccounts REST API method for the Federation resource or the FederationService/AddUserAccounts gRPC API call and provide the following in the request:
- Federation ID in the
federationIdparameter. - List of user name IDs in the
nameIdsparameter.
Assign roles to the users
- Add the appropriate user, if required.
- In the management console, on the left, select a cloud.
- Navigate to the Access bindings tab.
- Click Configure access.
- In the window that opens, select User accounts.
- Select a user from the list or use the user search option.
- Click Add role and select a role for the cloud.
- Click Save.
- Select a role from the Yandex Cloud role reference.
- Get the user ID.
- Assign the role using this command:
yc <SERVICE-NAME> <RESOURCE> add-access-binding <RESOURCE-NAME>|<RESOURCE-ID> \
  --role <ROLE-ID> \
  --subject userAccount:<USER-ACCOUNT-ID>
Where:
<SERVICE-NAME>: Name of the service for whose resource you are assigning the role, e.g.,resource-manager.<RESOURCE>: Resource category, e.g.,cloud.<RESOURCE-NAME>: Resource name. You can specify a resource by its name or ID.<RESOURCE-ID>: Resource ID.<ROLE-ID>: Role ID, e.g.,resource-manager.clouds.owner.<USER-ACCOUNT-ID>: ID of the user account that gets the role.
For example, assign the viewer role for the my-cloud cloud.
$ yc resource-manager cloud add-access-binding mycloud \
  --role viewer \
  --subject userAccount:aje6o61dvog2h6g9a33s
Use the updateAccessBindings method for the appropriate resource.
- Select a role from the Yandex Cloud role reference.
- Get the user ID.
- Create the request body, e.g., in the
body.jsonfile. In theactionproperty, enterADDand specify theuserAccounttype and user ID undersubject.
body.json:
{
  "accessBindingDeltas": [{
    "action": "ADD",
    "accessBinding": {
      "roleId": "editor",
      "subject": {
        "id": "gfei8n54hmfhuk5nogse",
        "type": "userAccount"
        }
      }
    }
  ]
}
-
Assign a role to a service account. For example, for a folder with the
b1gvmob95yys********ID:export FOLDER_ID=b1gvmob95yys******** export IAM_TOKEN=CggaAT******** curl \ --request POST \ --header "Content-Type: application/json" \ --header "Authorization: Bearer ${IAM_TOKEN}" \ --data '@body.json' \ "https://resource-manager.api.cloud.yandex.net/resource-manager/v1/folders/${FOLDER_ID}:updateAccessBindings"
Appoint an administrator
To grant organization management access to a user, assign one of the following roles:
-
organization-manager.admin: Organization administrator role.The role allows you to edit organization settings, create identity federations, add and remove users, create other administrators, and manage the organization's cloud resources.
-
organization-manager.organizations.owner: Organization owner role.The role allows you to appoint organization owners and use all the administrator privileges.
By default, the user who creates an organization is the organization owner.
-
organization-manager.viewer: Enables viewing the organization settings without the permission to edit them.