Getting started with Yandex Managed Service for Apache Spark™

To get started:
- Get your cloud ready.
- Set up your infrastructure.
- Create a cluster.
- Prepare a PySpark job.
- Run the job in the cluster.
- Check the job completion.
Required paid resources
The cost of infrastructure support includes a fee for using a Yandex Object Storage bucket (see Object Storage pricing).
Get your cloud ready
-
Navigate to the management console and log in to Yandex Cloud, or sign up if you have not already.
-
If you do not have a folder yet, create one:
-
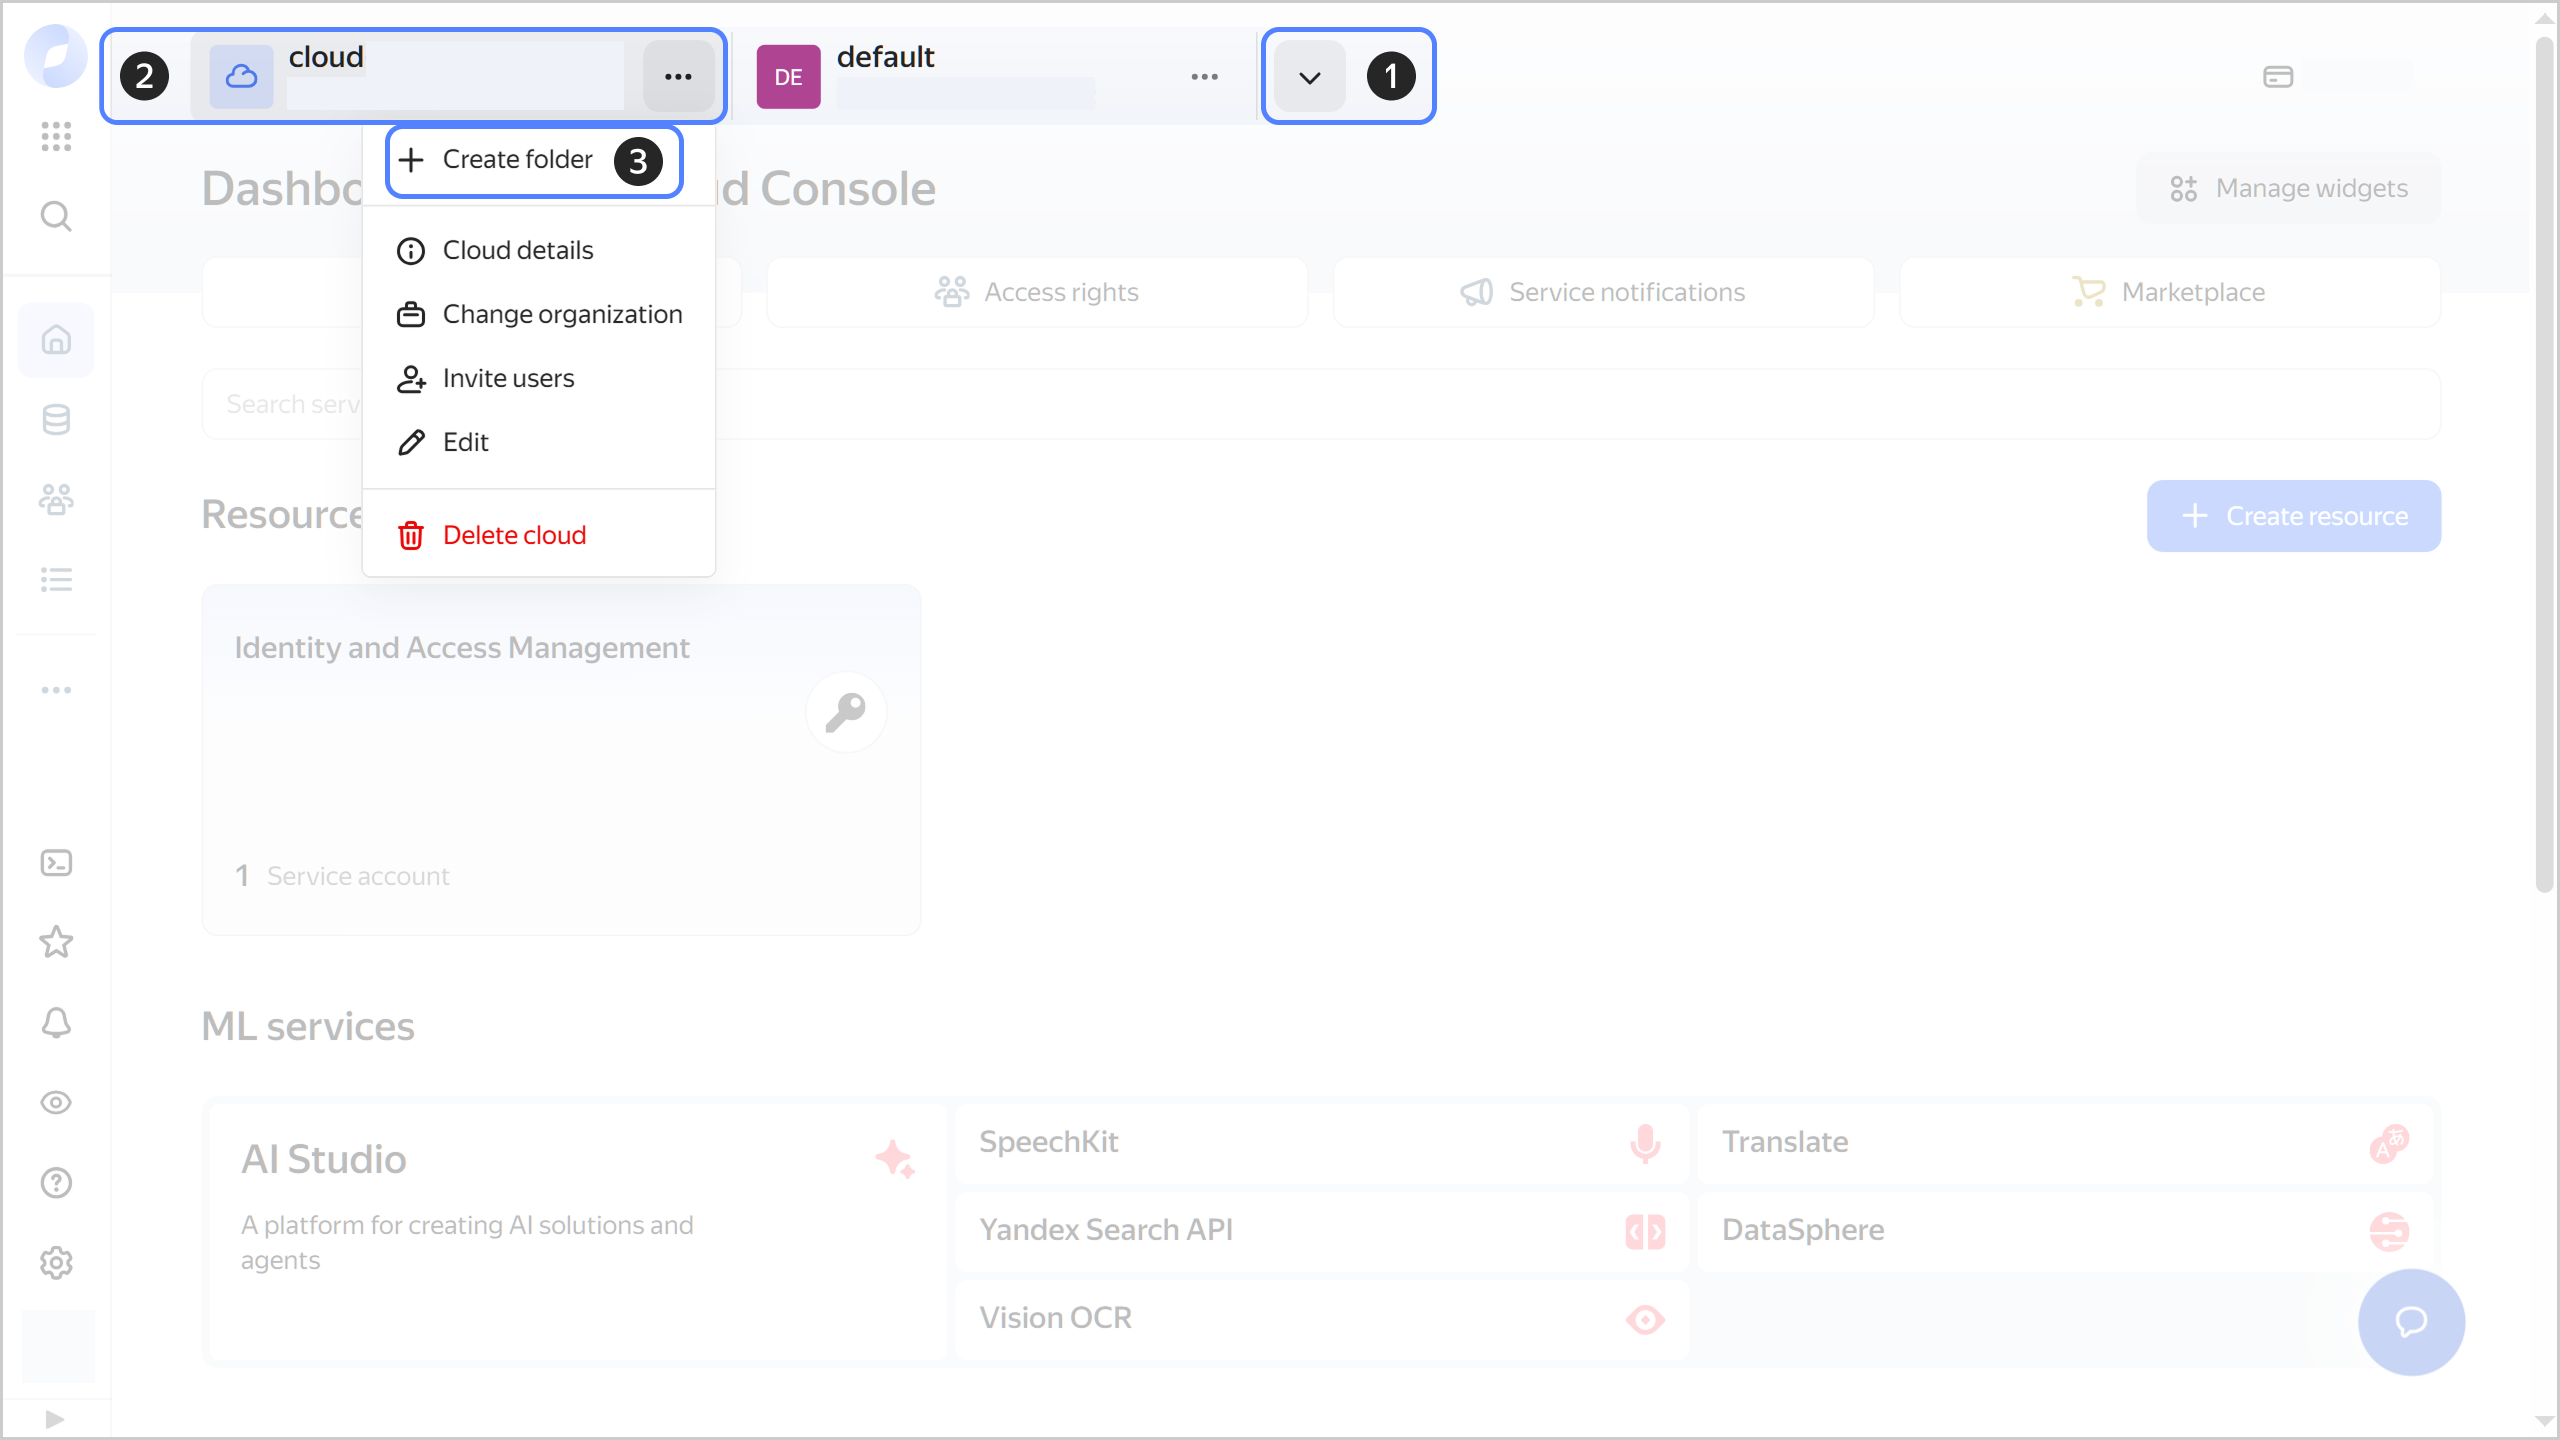
In the management console, in the top panel, click or and select the cloud.
-
To the right of the cloud name, click .
-
Select Create folder.
-
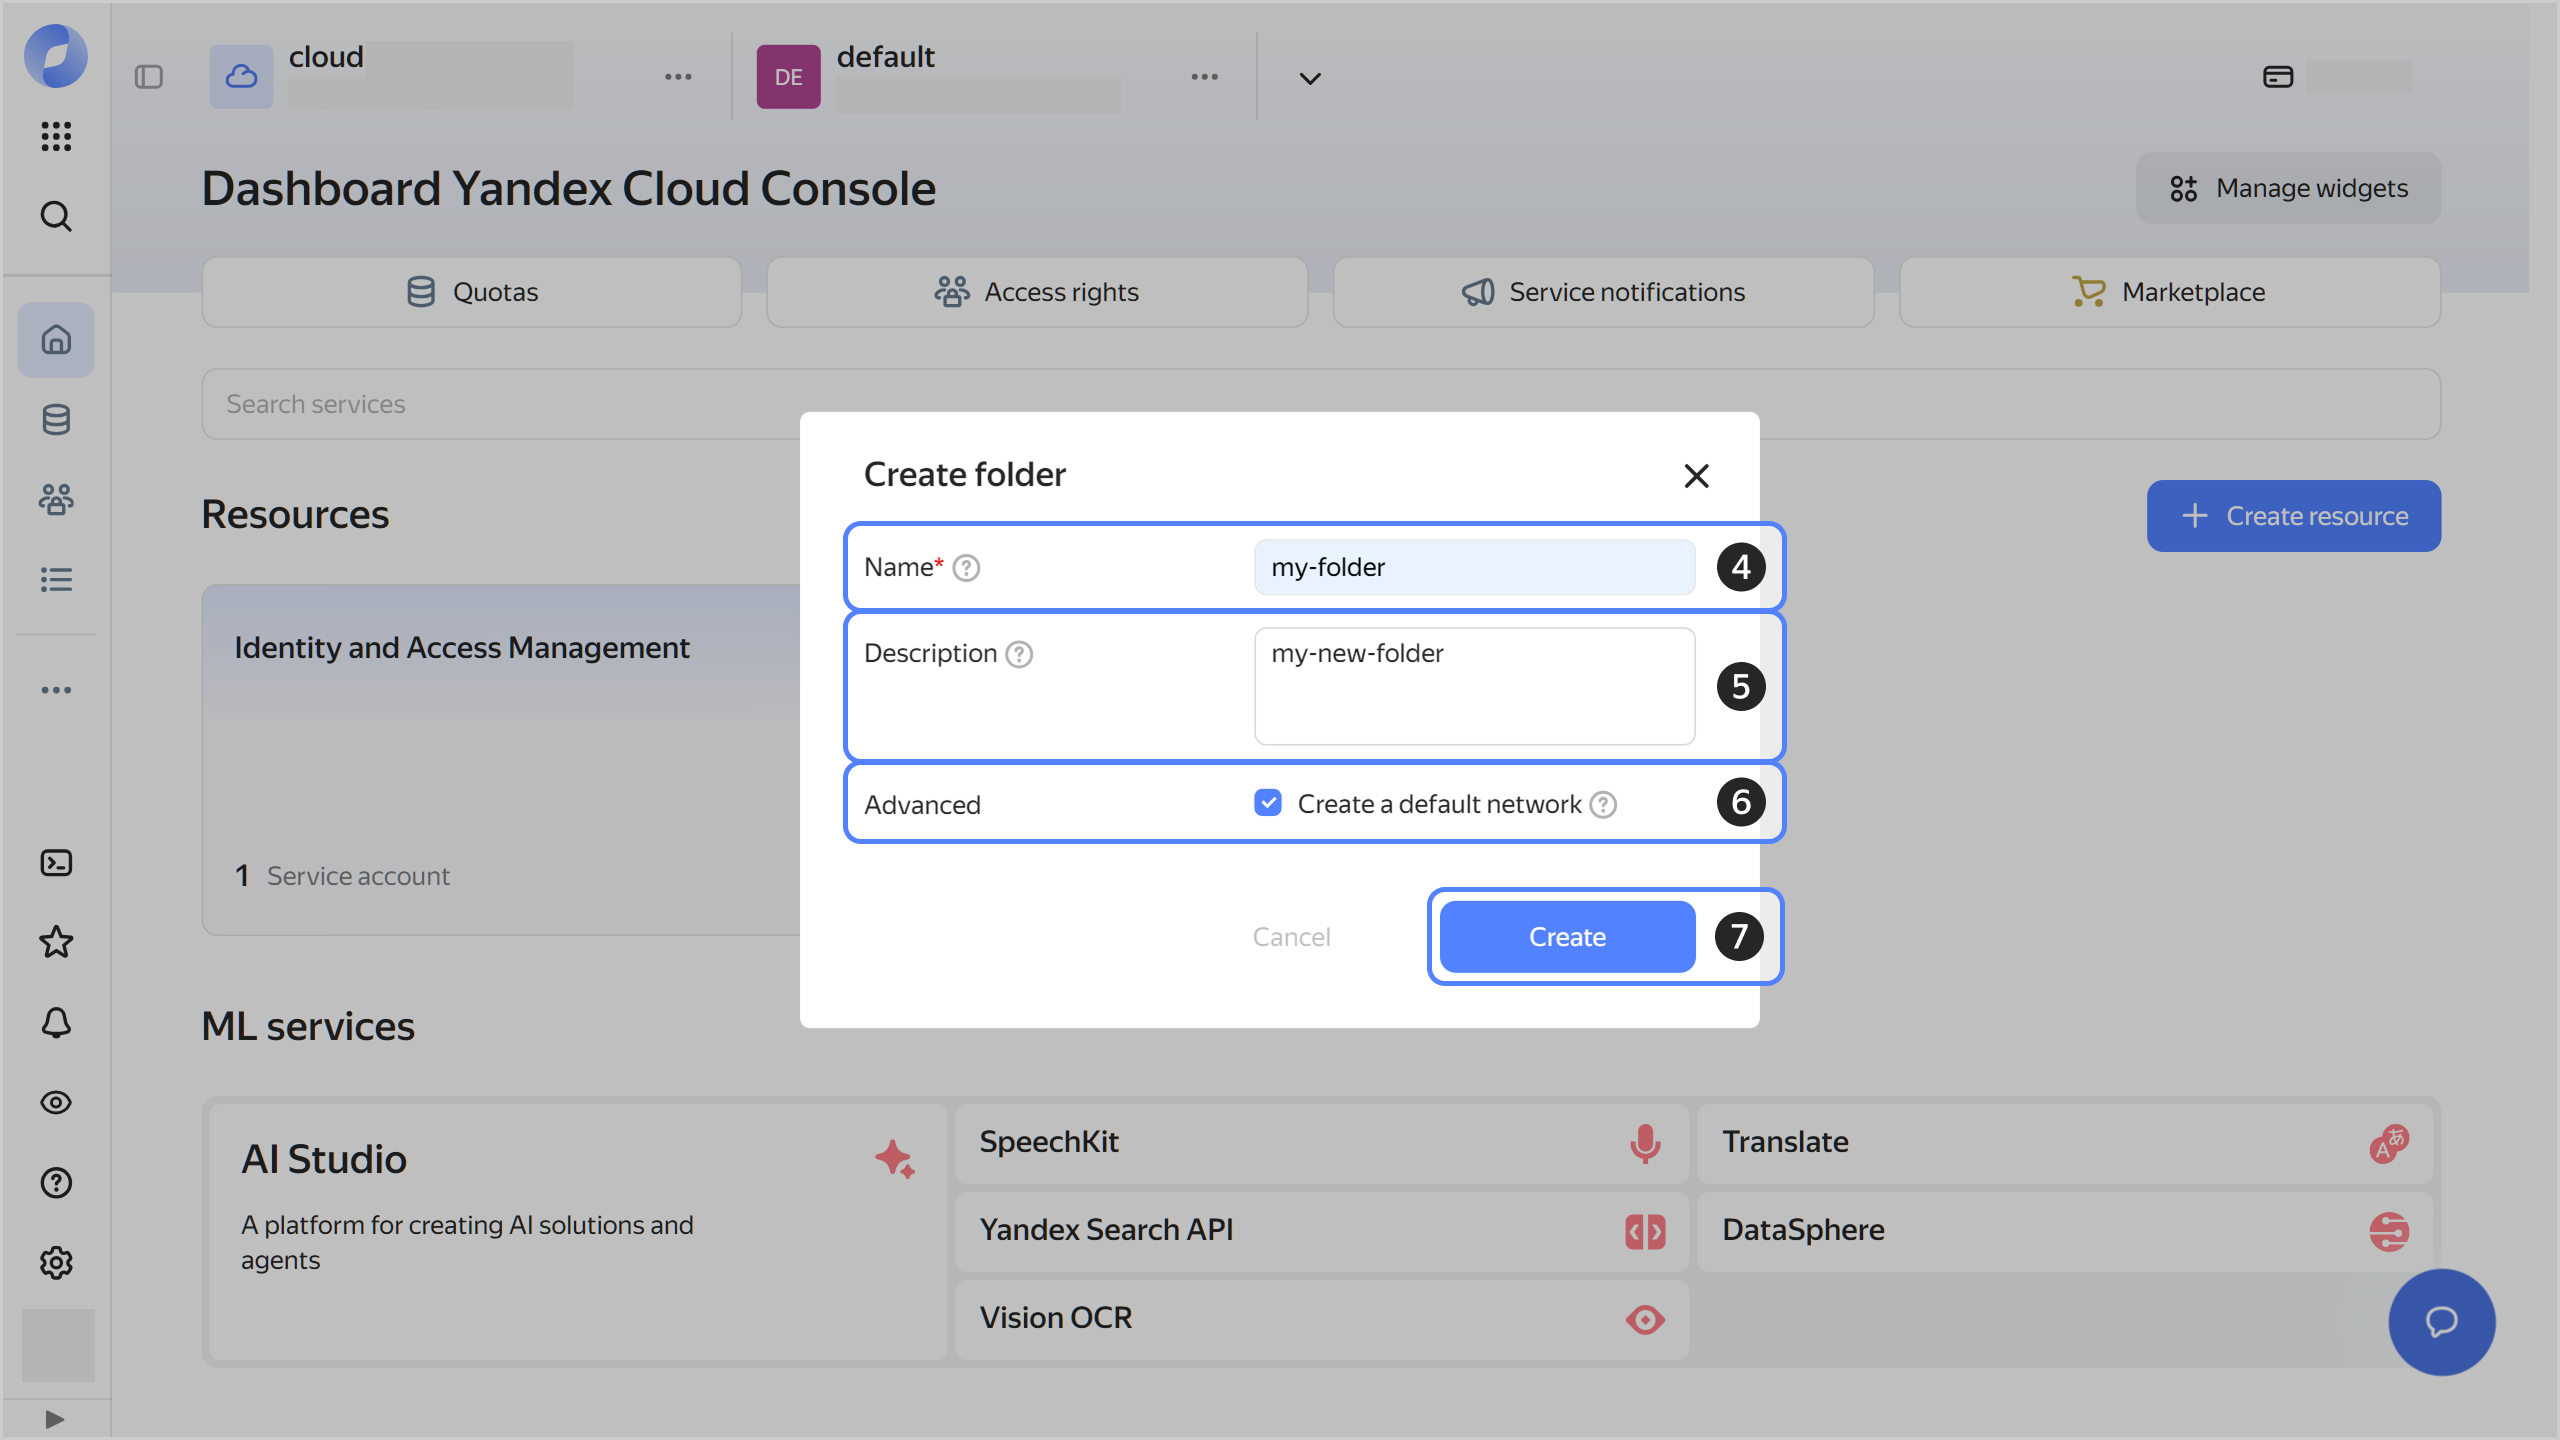
Give your folder a name. The naming requirements are as follows:
- Length: between 3 and 63 characters.
- It can only contain lowercase Latin letters, numbers, and hyphens.
- It must start with a letter and cannot end with a hyphen.
-
Optionally, specify the description for your folder.
-
Select Create a default network. This will create a network with subnets in each availability zone. Within this network, you will also have a default security group, within which all network traffic will be allowed.
-
Click Create.
-
-
Assign the following roles to your Yandex Cloud account:
- managed-spark.admin: To create a cluster.
- vpc.user: To use the cluster network.
- iam.serviceAccounts.user: To assign a service account to a cluster.
Note
If you cannot manage roles, contact your cloud or organization administrator.
Set up your infrastructure
-
Create a service account and assign the following roles to it:
managed-spark.integrationProvider: For Yandex Managed Service for Apache Spark™ to interact with other system components, e.g., for sending logs and metrics.- storage.editor: For accessing PySpark job files in an Object Storage bucket.
-
Create a Object Storage bucket.
-
Grant the service account access to the Object Storage that will be storing your code and data for cluster-specific jobs:
- In the management console, select the relevant folder.
- Navigate to Object Storage.
-
Open the bucket you created.
-
Navigate to Objects.
-
Click and select Configure ACL.
-
In the ACL editing window that opens:
- Start typing the service account name you created earlier and select it from the drop-down list.
- Select the READ and WRITE access permissions.
- Click Add.
- Click Save.
-
Create a cluster
-
In the management console, select the folder where you want to create a cluster.
-
Navigate to Managed Service for Apache Spark™.
-
Click Create cluster.
-
Give the cluster a name.
-
In the Service account field, select the previously created service account.
-
Under Network settings, select a network, subnet, and security group for the cluster.
-
Set up computing resources for hosts to run drivers and workers.
-
Under Advanced settings, configure logging:
- Enable the Write logs setting.
- In the Destination field, select where the log destination: Folder.
- In the Folder field, select your folder from the list.
- Select Min. logging level: INFO.
-
Click Create.
-
Wait until the cluster is ready: its status on the Yandex Managed Service for Apache Spark™ dashboard will change to Running and its state, to Alive. This may take a while.
Prepare a PySpark job
-
Save the pi.py file, that contains the job code, to a local computer from the Apache Spark™ repository. This code calculates the approximate value of pi using the Monte Carlo method.
-
Upload the file to the Object Storage bucket you created earlier.
Run your PySpark job
- In the management console, open the cluster you created earlier.
- Navigate to Jobs.
- Click Create job.
- Select the Job type: PySpark.
- In the Main python file field, specify the path to
pi.pyin the following format:s3a://<Object_Storage_bucket_name>/<file_name>. - Click Submit job.
Check the job completion
-
Wait for the job to become Running.
-
Navigate to the Logs tab.
-
In the logs, look for a line with the job results, such as the following:
Pi is roughly 3.144720