Creating a VM and connecting to it
Once your billing account is set up, you can start using Yandex Cloud services, e.g., create a VM in Yandex Compute Cloud.
Create a VM
-
Go to the management console and click your profile image in the left-hand panel.
-
Select
Example organization. -
In the left-hand panel, select
default. -
In the list of services, select Compute Cloud.
-
Select Virtual machines .
-
Click Create virtual machine and set the VM parameters:
- Under Operating systems and products, select Ubuntu 24.04 LTS.
- Under Computing resources, specify the computing resource configuration for the VM.
- Under Disks, specify the size and type of the disk.
- Enter the VM name.
- Set the Login of the VM administrator.
- In the SSH key field, click Add key. In the window that opens:
-
Enter a Name for the SSH key.
-
Under SSH key, select Generate key.
-
Click Add.
The SSH key will be downloaded to your computer and added to your organization user profile.
If, due to organization restrictions, you cannot add SSH keys to your user profile, the system will save the key to the VM user profile.
-
-
Click Create VM.
Configure a security group to connect to the VM
A security group (SG) is a resource created at the cloud network level. Once created, a security group can be used in Yandex Cloud services to control network access to an object it applies to.
The VM you created was assigned the default security group. To allow a connection to the VM over SSH, create a rule in this security group that allows incoming traffic via TCP to port 22:
- Navigate to the management console.
- In the list of services, select Compute Cloud and open the VM you created earlier.
- On the VM information page, under Network, open the security group assigned to the VM.
- In the top-right corner, click Edit.
- Open the Ingress tab and click Add.
- In the window that opens, set the following parameters:
- Port range:
22. - Protocol:
TCP. - Source:
Address range. - IPv4 CIDR:
0.0.0.0/0. - Click Save. Add other rules, if required.
- Port range:
- Click Save.
Connecting to a VM
You can connect to a VM with the RUNNING status over SSH. It may take some time for all services to initialize after the VM starts. If you get a connection error, try again in a few minutes.
To connect, specify the VM public IP address. You can find out the public IP address in the management console: on the VM page, go to the Public IPv4 address section and find the Network field. If you created your VM with an internal IP address only, assign it a public IP address.
You can also use internal IP addresses and FQDNs to establish an SSH connection between VMs within a single cloud network in Yandex Cloud.
In the terminal, run this command:
ssh <username>@<VM_public_IP_address>
Where <username> is the VM account username. If you created your VM via the CLI, yc-user is the default user.
If you have multiple private keys, specify the one you need:
ssh -i <key_path/key_file_name> <username>@<VM_public_IP_address>
If this is your first time connecting to the VM, you will get this unknown host warning:
The authenticity of host '51.250.83.243 (51.250.83.243)' can't be established.
ED25519 key fingerprint is SHA256:6Mjv93NJDCaf/vu3NYwiLQK4tKI+4cfLtkd********.
This key is not known by any other names.
Are you sure you want to continue connecting (yes/no/[fingerprint])?
Type yes into the terminal and press Enter.
Make sure the Windows account has read access to the key folder.
To connect to the VM, run the following command in the command line:
ssh <username>@<VM_public_IP_address>
Where <username> is the VM account username. If you created your VM via the CLI, yc-user is the default user.
If you have multiple private keys, specify the one you need:
ssh -i <key_path\key_file_name> <username>@<VM_public_IP_address>
If this is your first time connecting to the VM, you will get this unknown host warning:
The authenticity of host '89.169.132.223 (89.169.132.223)' can't be established.
ECDSA key fingerprint is SHA256:DfjfFB+in0q0MGi0HnqLNMdHssLfm1yRanB********.
Are you sure you want to continue connecting (yes/no/[fingerprint])?
Type yes in the command line and press Enter.
Establish a connection using PuTTY:
- Run Pageant.
- Right-click the Pageant icon in the task bar.
- In the context menu, select Add key.
- Select a PuTTY-generated private key in
.ppkformat. Enter the password for this key, if it is set.
- Run PuTTY.
-
In the Host Name (or IP address) field, enter the public IP address of the VM you want to connect to. Specify port
22and SSH connection type.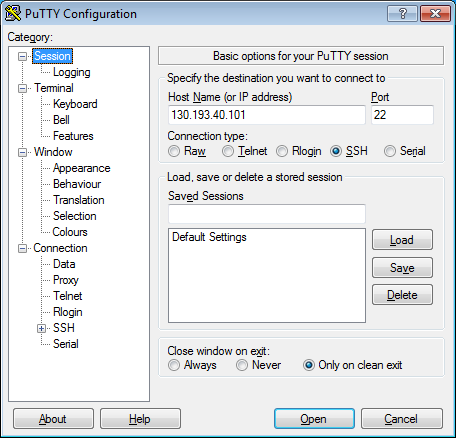
-
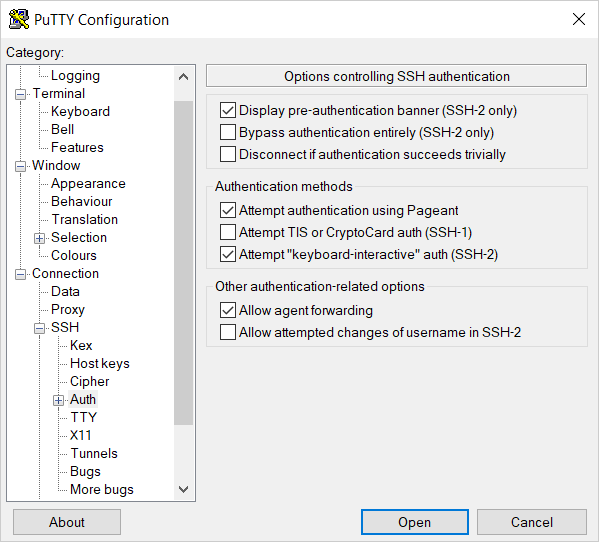
In the tree on the left, select Connection → SSH → Auth.
-
Enable Allow agent forwarding.
-
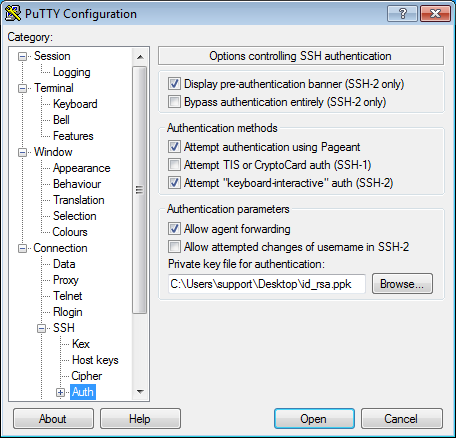
In the tree on the left, select Connection → SSH → Auth → Credentials.
-
In the Private key file for authentication field, select the private key file.
-
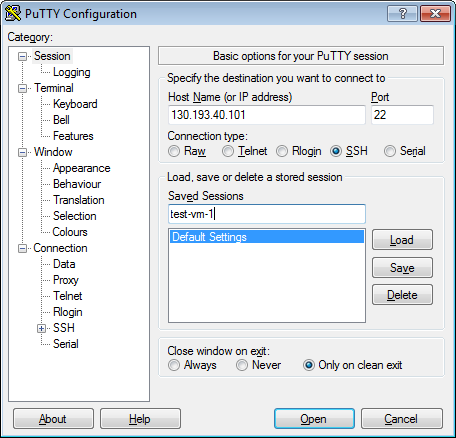
Go back to the Sessions menu. In the Saved sessions field, enter any name for the session and click Save. This will save the session settings under the specified name. You can use this session profile to connect with Pageant.
-
Click Open. If this is your first time connecting to the VM, you may get this unknown host warning:
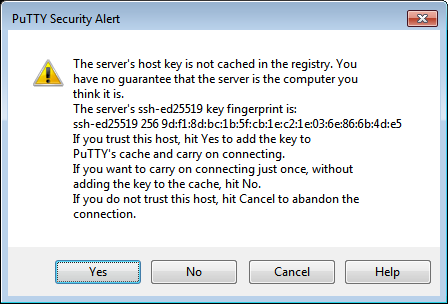
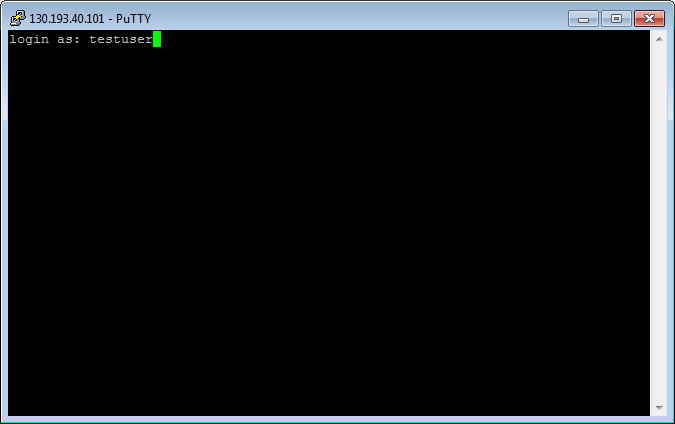
Click Accept. This will open a terminal window prompting you to enter the username to use for connection. Type the username you specified when creating the VM and press Enter. If you created your VM via the CLI,
yc-useris the default user.If everything is configured correctly, a connection to the server will be established.
-
If you saved the session profile in PuTTY, you can use Pageant for future connections:
- Right-click the Pageant icon in the task bar.
- Select Saved sessions.
- In the saved sessions list, select the session you need.
For more information on how to solve connection issues, see FAQ.