Working with a Yandex DataLens collection

In this section, you will learn how to use a collection:
- Creating a collection
- Editing a collection
- Moving a collection
- Setting up access to a collection
- Deleting a collection
- Restoring deleted objects and workbooks
Creating a collection
To create a collection:
-
Go to the DataLens home page.
-
In the left-hand panel, select Collections and workbooks.
Note
If you do not see Collections and workbooks in the left-hand panel, ask the user with the
datalens.adminrole to enable workbooks and collections in your organization. -
In the top-right corner, click Create → Create collection.
-
Enter a name for the collection.
-
Click Create.
Editing a collection
To change a collection name and description:
- At the top of the collection page, next to the name, click Edit.
- Enter a new name and description for the collection and click Save.
Moving a collection
To move a collection:
- At the top of the collection page, click → Move.
- Select the collection you want to move your collection to and click Move. To move it to a new collection, click Create collection.
Setting up access to a collection
You can assign access permissions to users and user groups for each workbook and collection. Access permissions determine what you can do with a workbook or collection. Permissions are inherited as follows:
- Workbook permissions apply to all objects within the workbook.
- Collection permissions apply to all collections and their workbooks, as well as objects within workbooks.
You can grant permissions to individual users or groups of authenticated users.
Note
- You can assign permissions for workbooks and collections to users even if they have yet to accept their invitation to DataLens.
- Permissions are inherited by all nested objects. You can only update the inherited permissions at the parent object level.
Assigning access permissions
To assign access permissions for a collection:
-
At the top of the collection page, click Access.
Under Inherited permissions, you can see the users who inherited object permissions, because they were granted permissions for one of its parent objects. For each user, the inherited permission and the object it is inherited from are displayed.
Under Direct permissions, you can see the users who have permissions for the selected object.
-
Click Add user.
-
In the window that opens, select a user or user group, specify the appropriate permission, and click Save. The user or user group will get permissions for this object.
Revoking permissions
To revoke access permissions for a collection:
-
At the top of the collection page, click Access.
-
Under Direct permissions, click next to the user or user group to revoke permissions from.
Note
If the user is missing from the list, they might have permissions for the parent object. You can revoke permissions for the parent object. To switch to the object that inherits permissions, find the user in the Inherited permissions list and click the object name.
-
In the window that opens, click Revoke role.
Deleting a collection
To delete a collection:
- At the top of the collection page, click → Delete.
- Confirm the deletion.
Restoring deleted objects and workbooks
An administrator, i.e., a user holding the datalens.admin role, can use settings to view and restore deleted workbooks or objects, including connections, datasets, charts, dashboards, reports, and HTML pages.
To restore an object or a workbook:
-
Go to the DataLens home page.
-
In the left-hand panel, select Service settings.
-
Select the Deleted objects tab.
-
This tab displays information about all deleted objects and workbooks:
- Name: Object or workbook name.
- Parent object: Name of the collection or workbook the object or workbook was deleted from. If the parent object has been deleted, the column shows the icon. If the workbook was deleted from the root collection, a dash symbol (
-) is displayed. - Deletion at: Date and time when the object or workbook was deleted.
- Deleted by: Name of the user who deleted the object or workbook.
You can sort the list by name or deletion date.
You can also search by object name or switch between tabs with object types:
Workbooks,Charts,Dashboards,Reports,More→Datasets/Connections/HTML pages.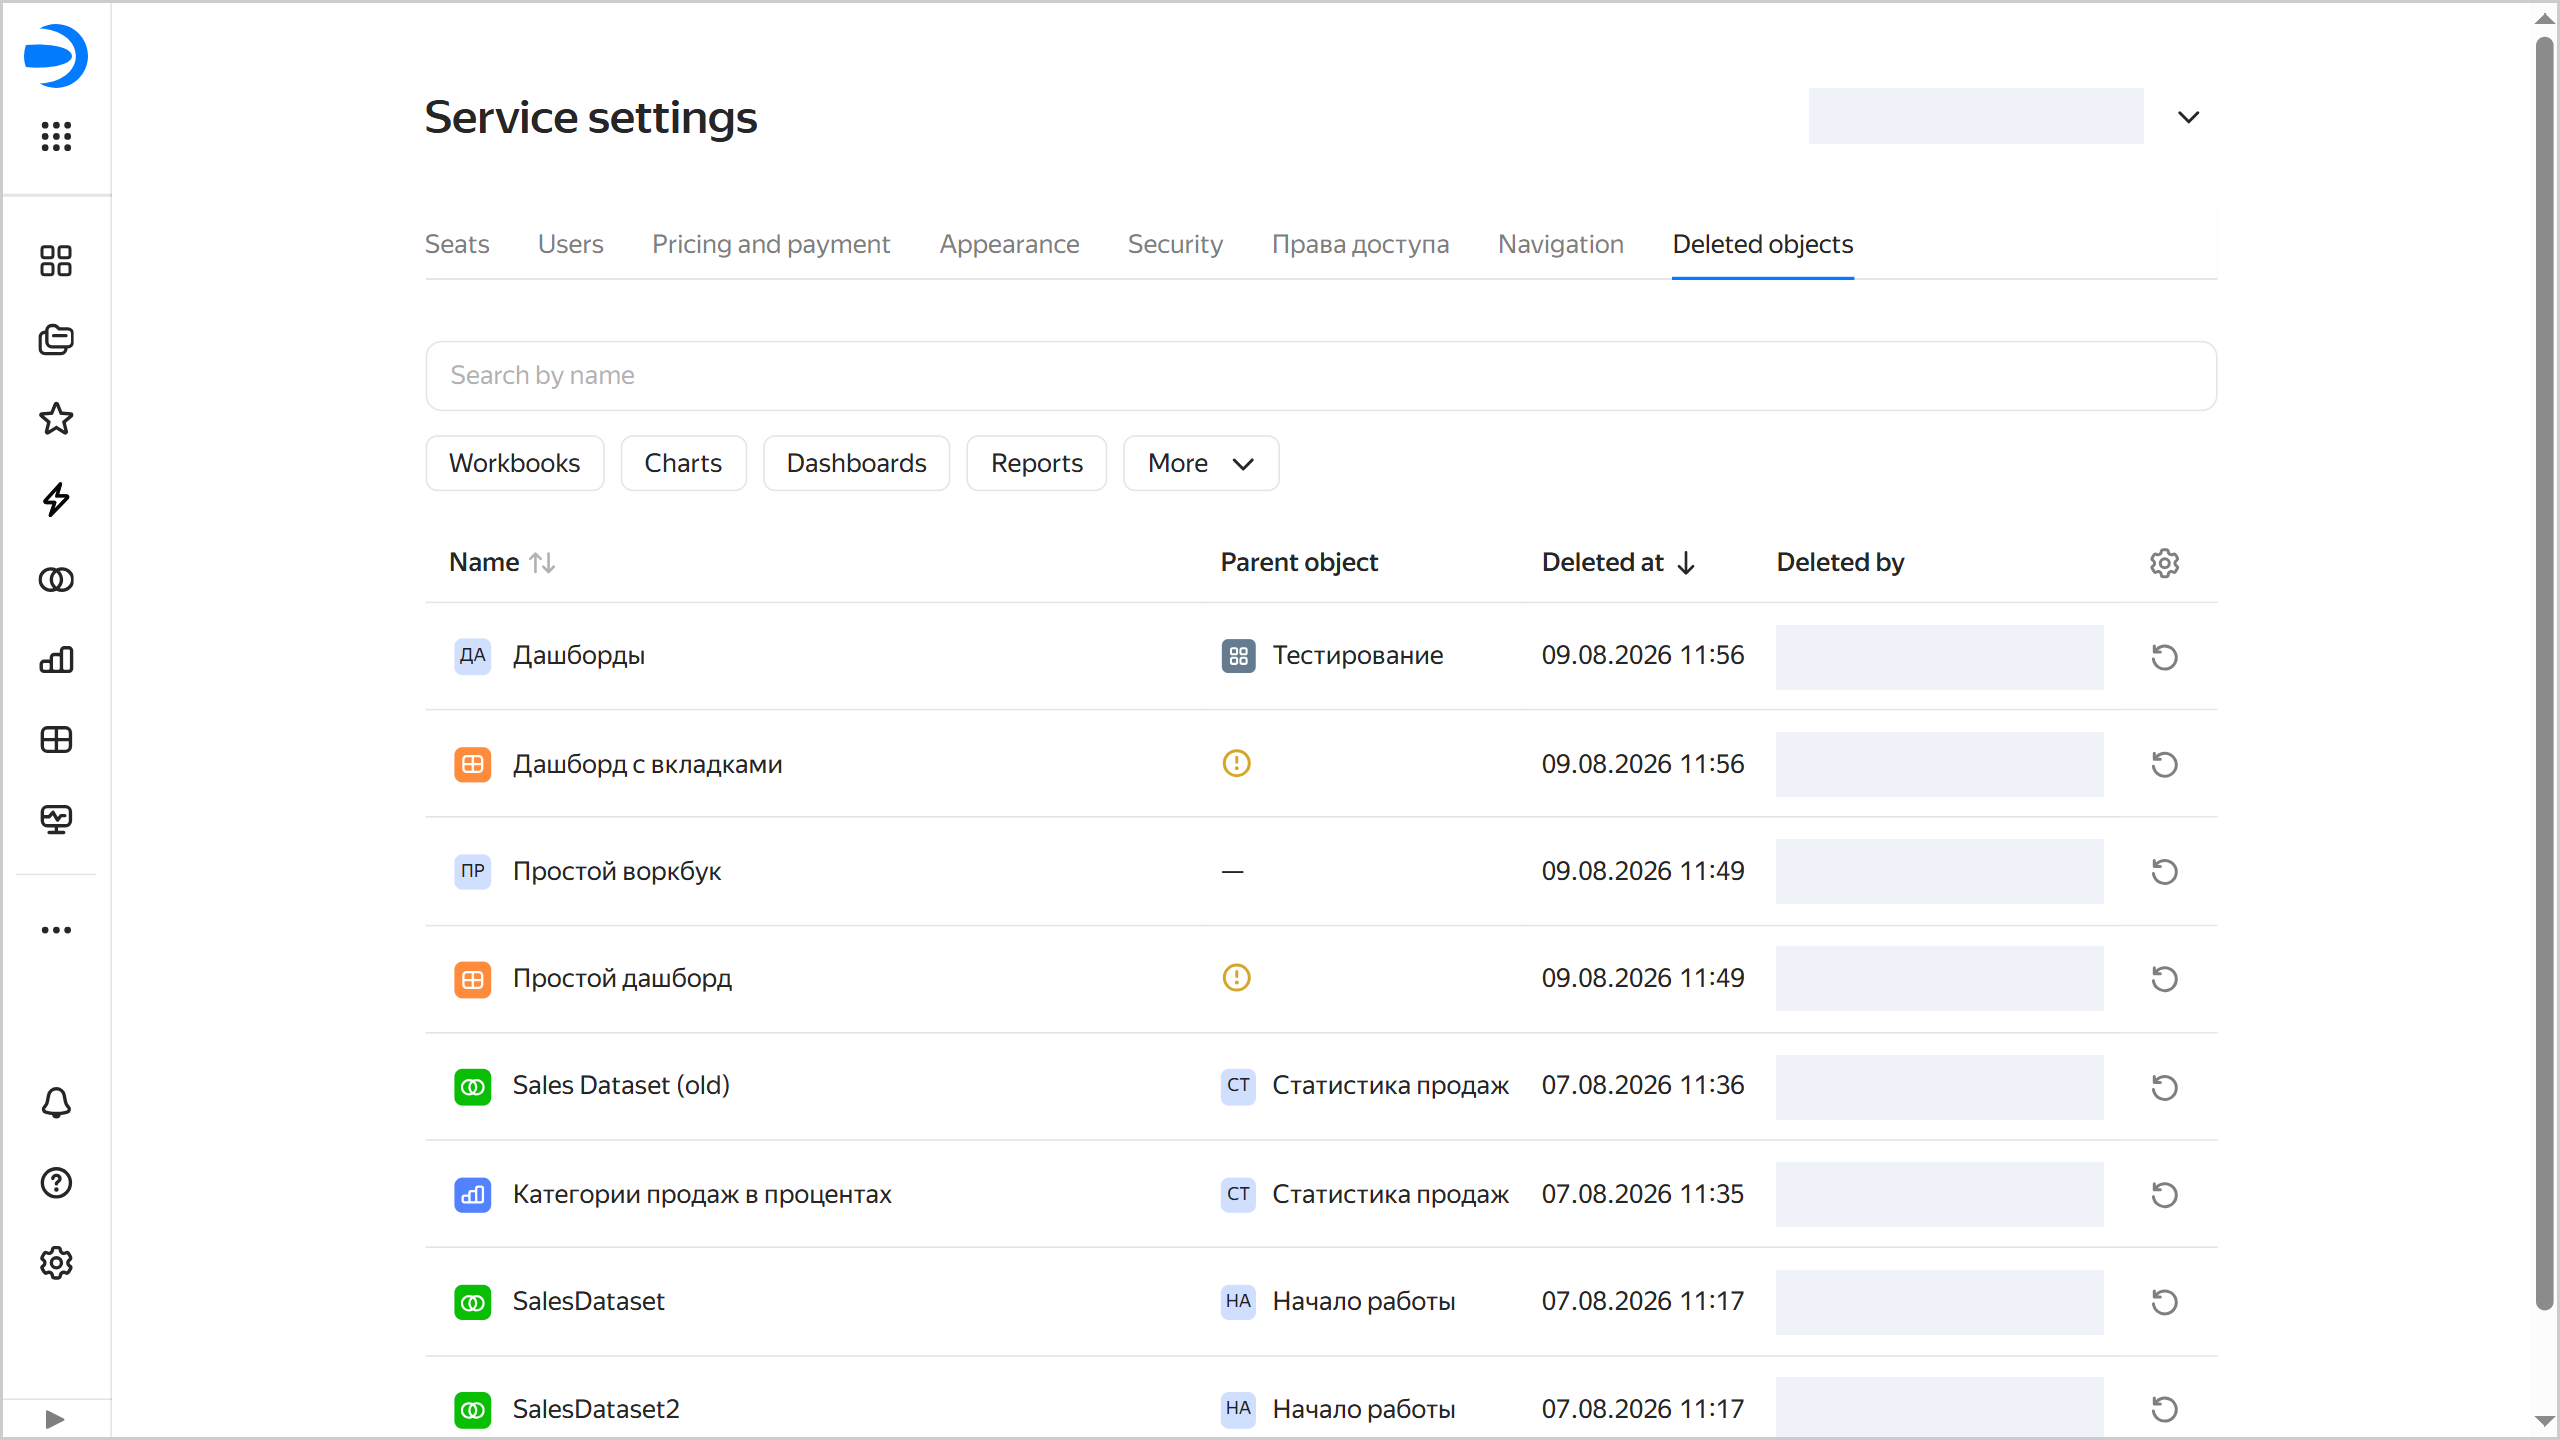
Click next to the object or workbook to restore.
-
Confirm restoring the object or workbook. Restoration specifics:
- In standard scenarios, the object or workbook is restored to the same location it was deleted from.
- If the parent collection is deleted, the system will prompt you to select or create a collection that will house the object or workbook.
- If an object or workbook with the same name and location already exists, you will be prompted to rename the object or workbook being restored.
- If the object’s parent workbook is also deleted, the system will bring back the workbook with all its contents first, and then restore your selected object.