Sending an email
You can integrate your form with Yandex Mail so that a notification is sent automatically when the user fills out the form.
Configuring notifications
-
Select the form and open the Integration tab.
-
Select a group of actions for which you want to set up sending emails and click
 Mail at the bottom of the group.
 -
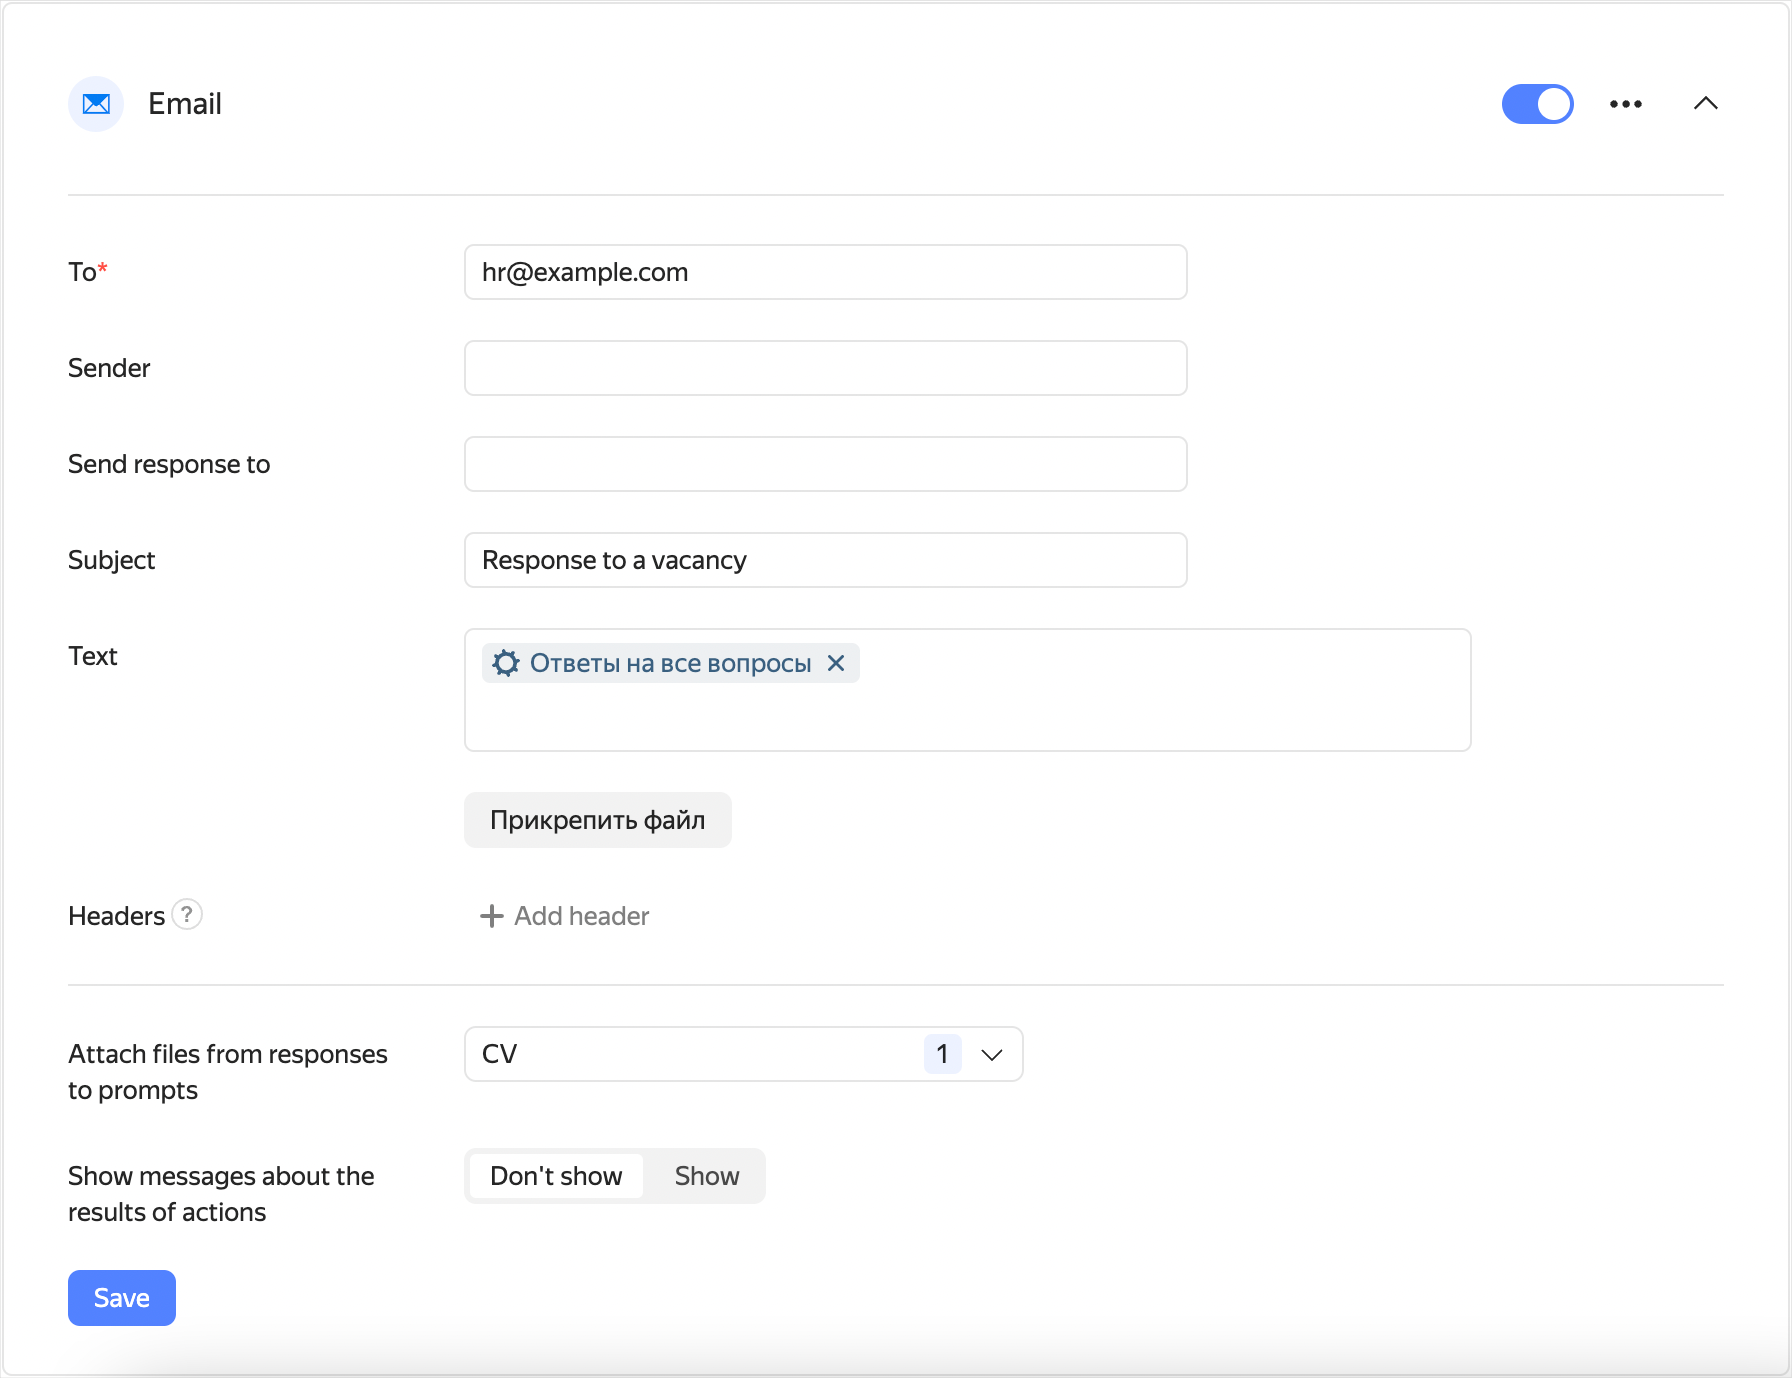
Under action settings, fill in the following fields:
-
To: Email address to send the notification to. You can list multiple addresses separated by commas, or set a variable.
-
To send a notification to the form creator's email, select the Form creator's email variable.
-
To send a notification to the Yandex email account the user was logged in to when filling out the form, select the Email variable. Is only available to Yandex Forms for business users.
-
To send a notification to the address the user gave in response to a prompt, add the Response to prompt variable and select the
Mail
prompt type.
-
-
Sender: Sender name you want the recipient to see.
-
Send response to: Email address the recipient can send responses to. If not specified, your respondents will not be able to reach you by email.
-
Subject: Email subject.
-
Text: Email text.
-
If necessary, add headers to the message. Specify a name and value for each header.
You can insert a response to a prompt or other form data in any field:
-
Select the field and click
 to the right.
 -
Select a variable from the list to add to the field. For example, you can add a variable to address the user by their name or to include their test results in the email.

-
-
To attach a file from your computer to the email, click Attach file.
To attach the files that the user sent in response to the form to your email, select prompts like
File
from the Attach files from responses to prompts list.Note
The maximum total size of all files attached is 9 GB.
-
To display a message informing the user that an email was sent after they filled out the form, enable the Show messages about the results of actions option under the action name.
-
Click Save.
To send multiple email notifications at once, add new actions using the  Mail button at the bottom of the action group.
If you want notifications to only be sent to users who gave certain responses, set your conditions.
Sample notification for a form with a questionnaire for job applicants Once the form is filled out, responses to the questionnaire are sent to the HR department's email address.
Troubleshooting
If you set up email notifications but are not getting emails after filling out the form, check your Spam folder and see if there are errors when sending emails.
Check your Spam folder
If you are not receiving email notifications, check your Spam folder. If emails from Yandex Forms were sent to the Spam folder, mark them as Not spam.
If you use your own mail server, whitelist
the sender addresses: <form_ID>@forms-mailer.yaconnect.com and sndr.bnc@yandex.ru.
Check the email text
The mail server can block an email if its text is missing or looks like spam. Fill out or edit the email text.
Check for errors when sending emails
-
Open the form with notification issues and click Integration at the top of the page.
-
Check for an error message in your notification settings.
-
If there's an error message, try to restart sending notifications.
-
If the problem persists, contact Yandex Forms support.
If there are no spam notifications or error messages
If you have no notifications in the Spam
folder or errors in the Integration tab, the email may be blocked by the recipient's mail server. To find out why the email is blocked:
-
Open the form with notification issues and click Integration at the top of the page.
-
In the email notification settings, go to the Send response to field and enter your personal or corporate email.
-
The next time the mail server blocks a notification from the form, an error message will be sent to the email that you specified. Copy the message text.
-
Contact Yandex Forms support and add the error message that you received to your request.
