Yandex Cloud
Search
Contact UsGet started
  • Blog
  • Pricing
  • Documentation
  • All Services
  • System Status
    • Featured
    • Infrastructure & Network
    • Data Platform
    • Containers
    • Developer tools
    • Serverless
    • Security
    • Monitoring & Resources
    • ML & AI
    • Business tools
  • All Solutions
    • By industry
    • By use case
    • Economics and Pricing
    • Security
    • Technical Support
    • Customer Stories
    • Gateway to Russia
    • Cloud for Startups
    • Education and Science
  • Blog
  • Pricing
  • Documentation
Yandex project
© 2025 Yandex.Cloud LLC
Yandex DataLens
    • Overview
    • Widgets
    • Link
    • Selectors
    • Filtering charts by other charts
    • Dashboard settings
    • Versioning
    • Parameters
    • Markdown
      • Creating a dashboard
      • Adding a chart to a dashboard
      • Adding a selector to a dashboard
      • Adding text to a dashboard
      • Adding a dashboard header
      • Adding a description to a dashboard
      • Adding a message displayed when contacting support
      • Adding an access error message
      • Configuring links on a dashboard
      • Creating an alias
      • Deleting an alias
      • Managing dashboard access
      • Adding parameters to a dashboard
      • Setting up filtering by charts
      • Dashboard auto-update
      • Changing dashboard settings
      • Widget display order on a mobile device
      • Adding a JS selector to a dashboard
  • Audit Trails events
  1. Dashboards
  2. Step-by-step guides
  3. Adding a JS selector to a dashboard

Adding a JS selector to a dashboard

Written by
Yandex Cloud
Updated at April 24, 2025

Note

This feature is only available with the Business service plan.

Before adding a selector, make sure you have the Write or Admin permission for the dashboard. For more information, see Object access permissions.

To add a selector to a dashboard:

  1. In the left-hand panel, click Dashboards and select the dashboard you need.

  2. At the top of the page, click Edit.

  3. In the panel at the bottom of the page, choose Selector (JS).

    image

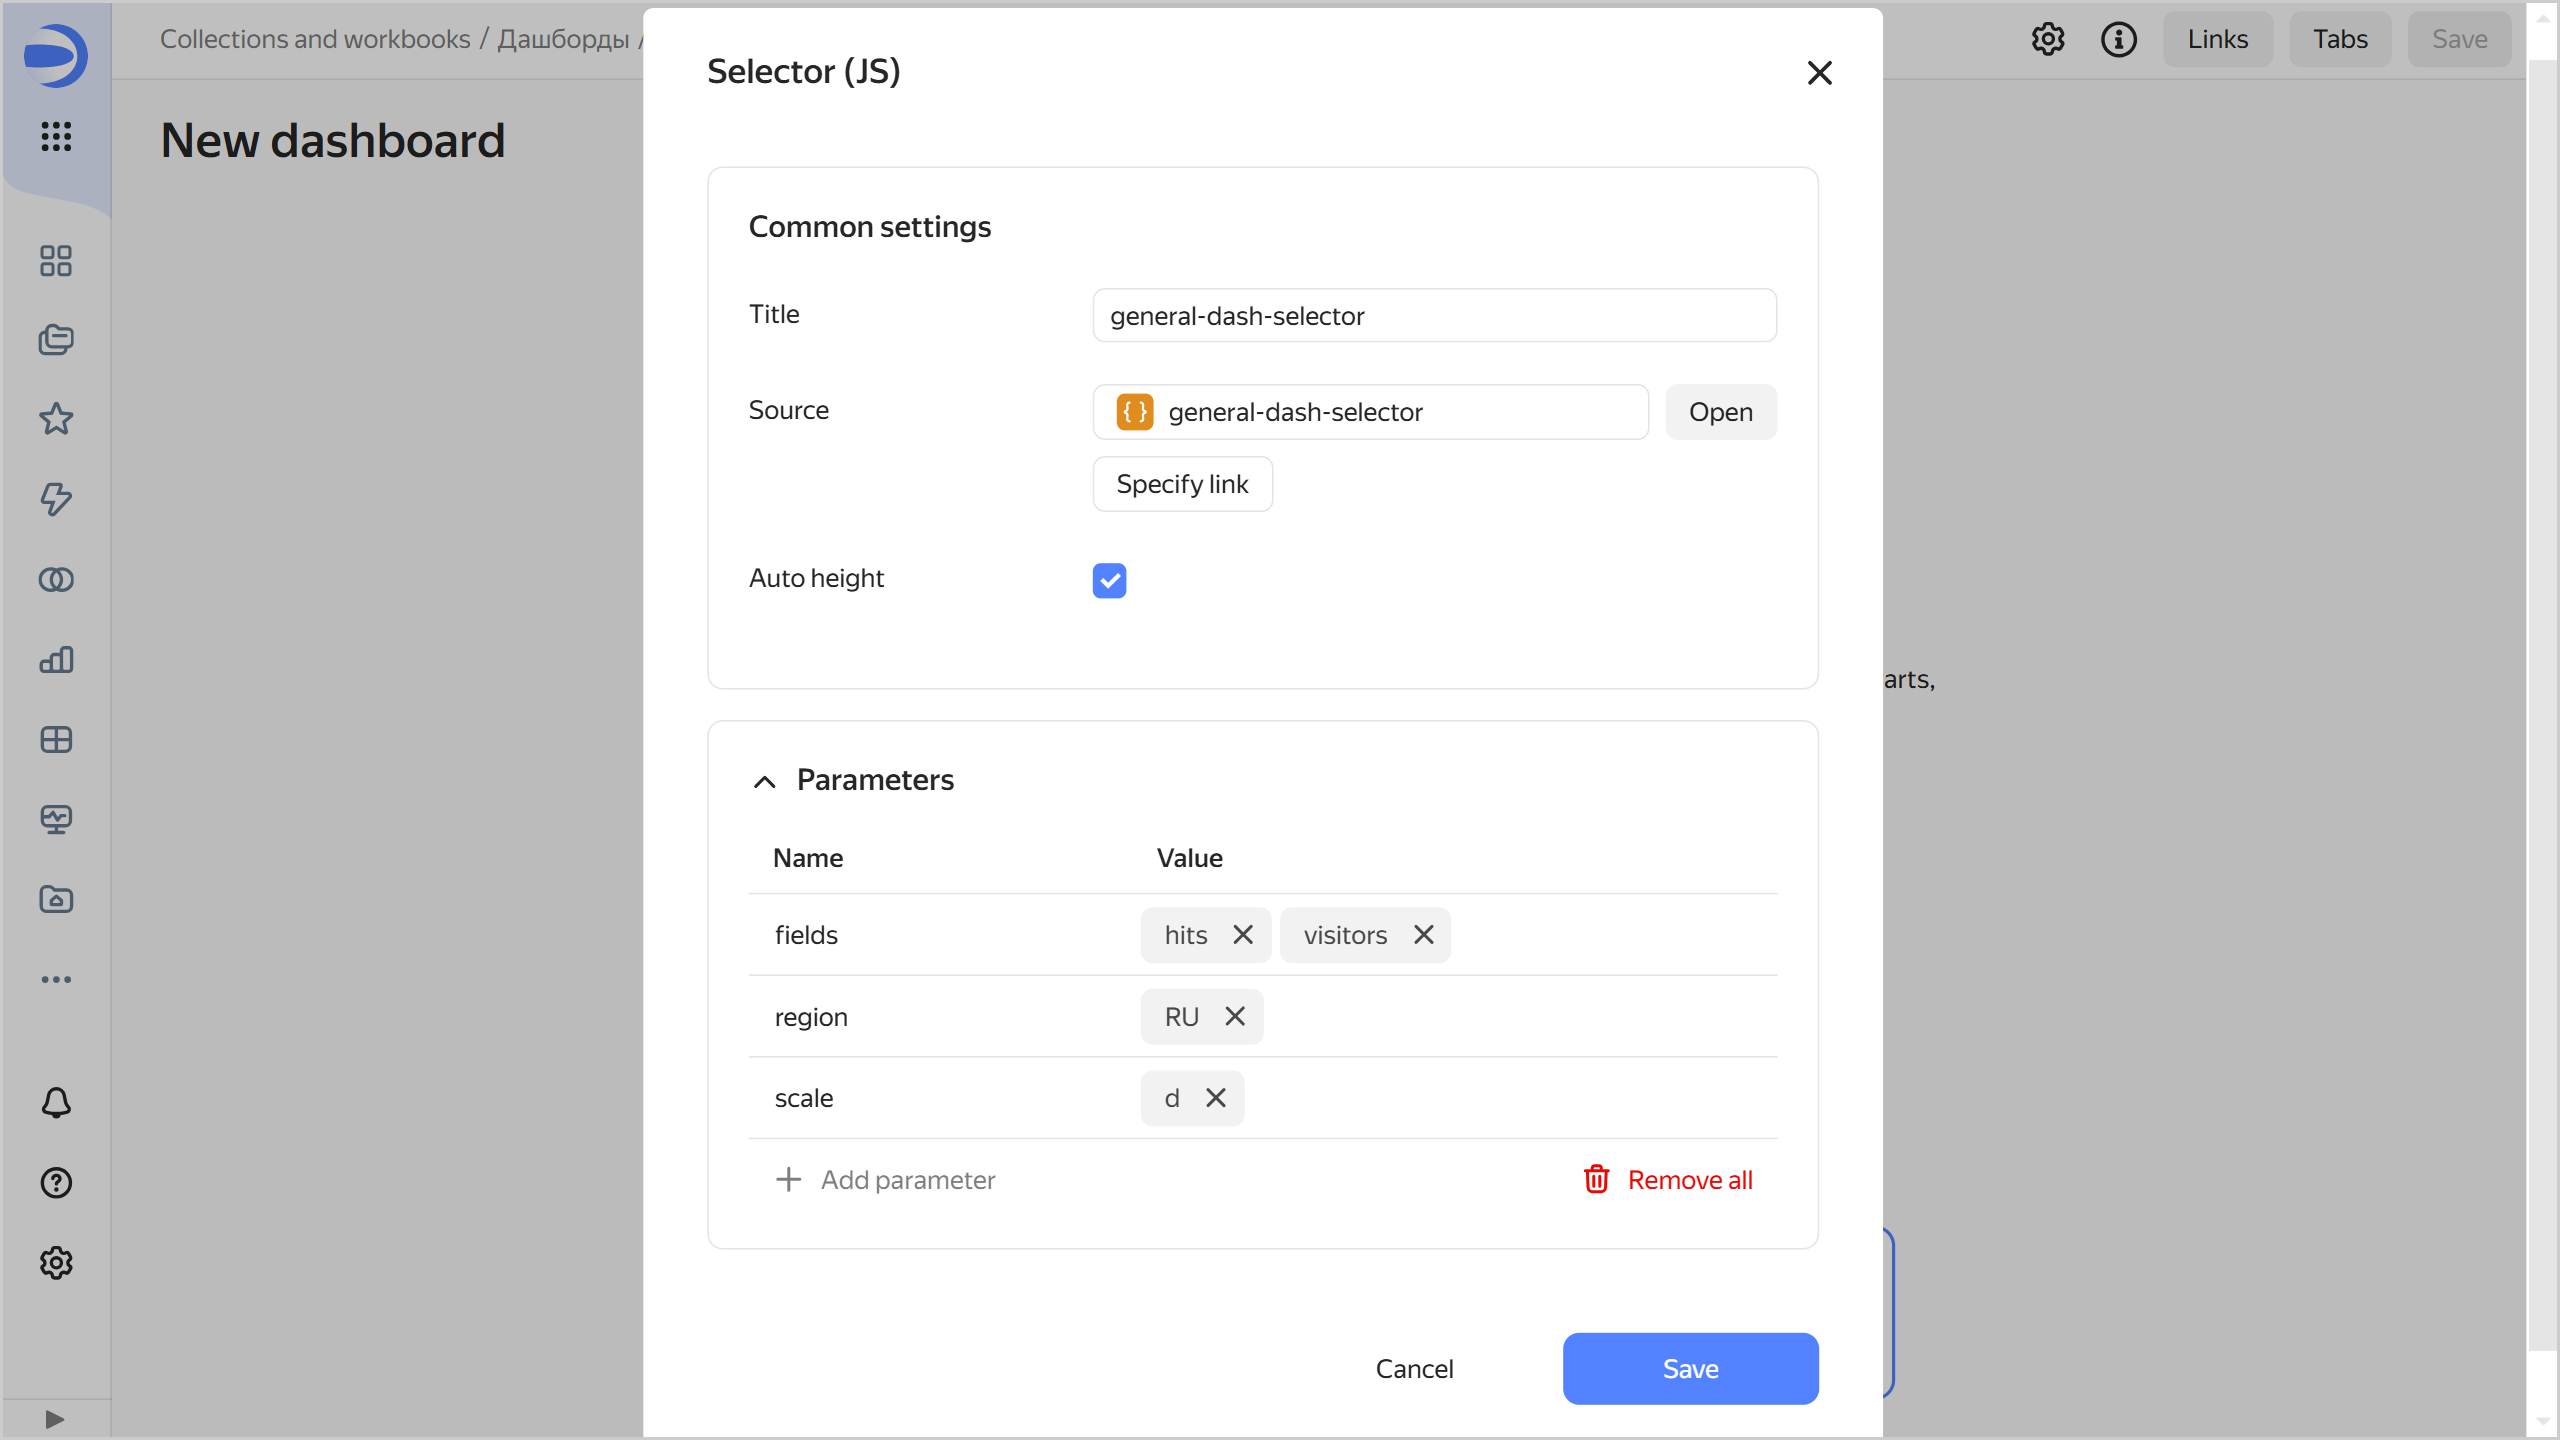
  4. Specify the selector parameters:

    • Header: Used to pick a selector when establishing a link with other widgets.

    • Source: Sets the selector created in Editor. Choose a selector:

      From the list of objects
      Via a link

      Click Select and choose a selector from the list of objects. If you have already done so, you can proceed to edit the selector. To do this, click Open to the right of the selector.

      Click Specify link. Paste the selector URL into the input field and click OK below.

    • Auto height: Sets the automatic height for a widget on the dashboard.

    • Parameters: Sets a list of selector parameters and their default values. For the widget to work correctly, specify here the selector parameters listed on the Params tab.

      selector-js

  5. Click Add. The widget will be displayed on the dashboard.

Was the article helpful?

Previous
Widget display order on a mobile device
Next
Overview
Yandex project
© 2025 Yandex.Cloud LLC