Image generation using the Stable Diffusion model
In DataSphere, you can deploy a neural network based on the Stable Diffusion model and generate images based on text descriptions.
Stable Diffusion is an open-source text-to-image model developed by stability.ai.
In this tutorial, you will generate an image based on text description by implementing the Stable Diffusion model in the Diffusers library. This library prioritizes ease of use and customization over performance.
To generate an image using the Stable Diffusion model:
If you no longer need the resources you created, delete them.
Getting started
Before getting started, register in Yandex Cloud, set up a community, and link your billing account to it.
- On the DataSphere home page, click Try for free and select an account to log in with: Yandex ID or your working account with the identity federation (SSO).
- Select the Yandex Cloud Organization organization you are going to use in Yandex Cloud.
- Create a community.
- Link your billing account to the DataSphere community you are going to work in. Make sure you have a linked billing account and its status is
ACTIVEorTRIAL_ACTIVE. If you do not have a billing account yet, create one in the DataSphere interface.
Note
If you use an identity federation to access Yandex Cloud, billing details might be unavailable to you. In this case, contact your Yandex Cloud organization administrator.
Required paid resources
The cost of using the model includes a fee for running code cells (see DataSphere pricing).
Prepare the infrastructure
Create a project
- Open the DataSphere home page.
- In the left-hand panel, select Communities.
- Select the community to create a project in.
- On the community page, click Create project.
- In the window that opens, enter
Stable Diffusionas your project name and add a description (optional). - Click Create.
Create a notebook and install the libraries
Note
In this tutorial, all computations use the g1.1 configuration. However, you can run the model on other configurations as well.
-
In the DataSphere interface, open the project you created.
-
Create a new notebook:
- In the top panel of the project window, click File → New → Notebook.
- In the window that opens, select DataSphere Kernel.
-
Install the Diffusers library. Paste the below code into the cell and click :
%pip install diffusers -
Install the Transformers library:
%pip install transformers -
Once the installation is complete, select Kernel ⟶ Restart kernel... on the top panel.
Create a model and generate an image
-
Import the libraries to the project:
from diffusers import StableDiffusionPipeline import torch -
Create a model:
model_id = "runwayml/stable-diffusion-v1-5" pipe = StableDiffusionPipeline.from_pretrained(model_id, torch_dtype=torch.float16) pipe = pipe.to("cuda") -
Generate an image by its description:
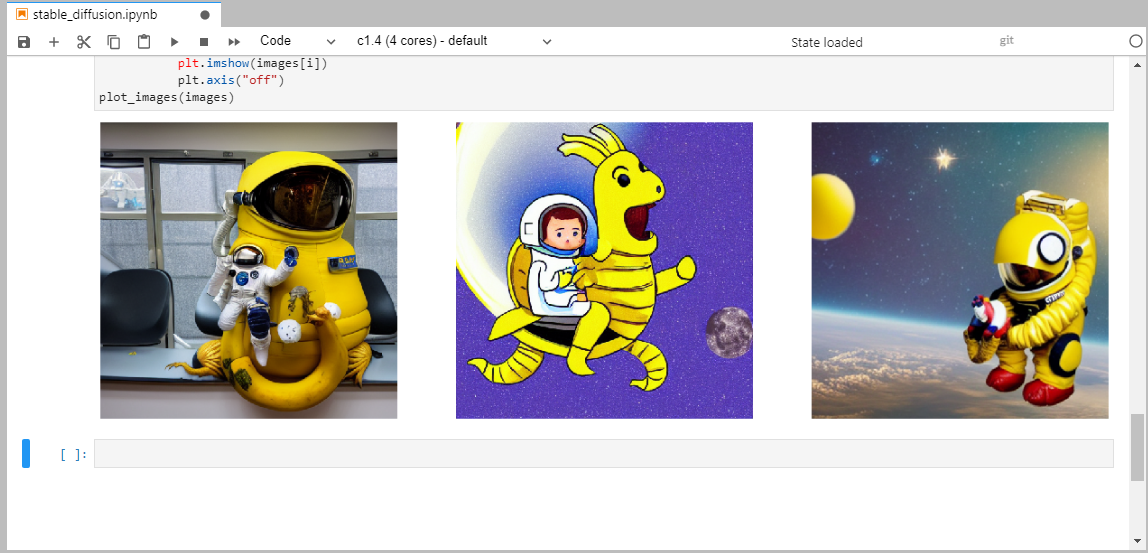
prompt = "a photo of an astronaut riding a horse on mars" image = pipe(prompt).images[0] -
Save the output image:
image.save("astronaut_rides_horse.png")The image file will appear next to the notebook. Result:
How to delete the resources you created
If you no longer plan to use the Stable Diffusion project, delete it.