Creating a bastion host
- Getting started
- Create an SSH key pair
- Create an external and internal network
- Create security groups
- Reserve a static public IP address
- Create a VM for the bastion host
- Test the bastion host
- Add a virtual server to the bastion host internal segment
- Connect to the created VM
- Additional connection options
- How to delete the resources you created
If you have ever had an interest in early modern fortifications, the word bastion should sound familiar to you. A bastion is a structure projecting outward from the outer wall of a fortification. Just like early modern fortresses, computer networks require multi-layer protection against external attacks. Such network bastions are called bastion hosts, and they form part of a network perimeter.
A bastion host is a virtual machine with a public IP address assigned to it to enable SSH access. Once set up, the bastion host acts as a jump server allowing you to securely connect to VMs with no public IP addresses. In this guide, you will learn how to deploy a bastion host and secure your access to remote virtual machines residing inside your virtual private cloud (VPC).
A bastion host will help you make your VPC servers less vulnerable. You will administer specific servers via a proxy connection through a bastion host over SSH.
To create a bastion host:
- Get your cloud ready.
- Create an SSH key pair.
- Create networks.
- Create security groups.
- Reserve a static public IP address.
- Create a virtual machine for your bastion host.
- Test your bastion host.
- Add a virtual server to your bastion host internal segment.
- Connect to the VM you created.
If you no longer need the resources you created, delete them.
Getting started
Sign up in Yandex Cloud and create a billing account:
- Navigate to the management console and log in to Yandex Cloud or register a new account.
- On the Yandex Cloud Billing page, make sure you have a billing account linked and it has the
ACTIVEorTRIAL_ACTIVEstatus. If you do not have a billing account, create one and link a cloud to it.
If you have an active billing account, you can navigate to the cloud page to create or select a folder for your infrastructure to operate in.
Learn more about clouds and folders.
Required paid resources
The infrastructure support cost includes:
- Fee for disks and continuously running VMs (see Yandex Compute Cloud pricing).
- Fee for a public IP address (see Yandex Virtual Private Cloud pricing).
Create an SSH key pair
To connect to a VM over SSH, you need a key pair: the public key resides on the VM, and the private one is kept by the user. This method is more secure than connecting with login and password.
Note
SSH connections using a login and password are disabled by default on public Linux images that are provided by Yandex Cloud.
Cisco Cloud Services Router (CSR) 1000v only supports keys generated using the RSA algorithm.
To create a key pair:
-
Open the terminal.
-
Use the
ssh-keygencommand to create a new key:ssh-keygen -t rsa -b 2048After you run the command, you will be asked to specify the names of files where the keys will be saved and enter the password for the private key. The default name is
id_rsa. Keys are created in the~/.sshdirectory.The public part of the key will be saved in the
<key_name>.pubfile.
-
Run
cmd.exeorpowershell.exe. -
Use the
ssh-keygencommand to create a new key:ssh-keygen -t rsa -b 2048After you run the command, you will be asked to specify the names of files where the keys will be saved and enter the password for the private key. The default name is
id_rsa. The keys are created inC:\Users\<username>\.ssh\orC:\Users\<username>\depending on the command-line interface.The public part of the key will be saved to a file named
<key name>.pub.
Create keys using the PuTTY app:
-
Download and install PuTTY.
-
Add the folder with PuTTY to the
PATHvariable:- Click Start and type Change system environment variables in the Windows search bar.
- Click Environment Variables... at the bottom right.
- In the window that opens, find the
PATHparameter and click Edit. - Add your folder path to the list.
- Click OK.
-
Launch the PuTTYgen app.
-
Select RSA for the type of pair to generate and set the length to 2048. Click Generate and move the cursor in the field above it until key creation is complete.
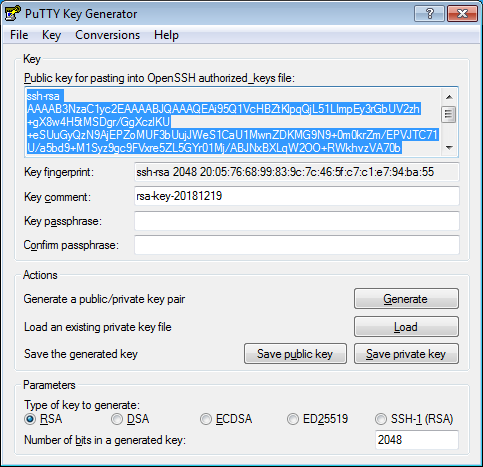
-
In Key passphrase, enter a strong password. Enter it again in the field below.
-
Click Save private key and save the private key. Do not share its key phrase with anyone.
-
Save the key to a text file. To do this, copy the public key from the text field to a text file named
id_rsa.pub. Please note that the key must be written as a single line (no returns or line breaks).
Warning
Save the private key in a secure location, as you will not be able to connect to the VM without it.
Create an external and internal network
Create an external network and subnet
-
In the management console, navigate to the folder where you want to create an infrastructure for your bastion host.
-
In the list of services, select Virtual Private Cloud.
-
In the top-right corner, click Create network.
-
Specify the network name:
external-bastion-network. -
Disable the Create subnets option.
-
Click Create network.
-
Create a subnet:
-
At the top right, click Create subnet.
-
Specify the subnet parameters:
- Name:
bastion-external-segment - Zone:
ru-central1-b - CIDR:
172.16.17.0/28
- Name:
-
Click Create subnet.
-
Create an internal network and subnet
-
In the management console, navigate to the folder where you want to create an infrastructure for your bastion host.
-
In the list of services, select Virtual Private Cloud.
-
In the top-right corner, click Create network.
-
Specify the network name:
internal-bastion-network. -
Disable the Create subnets option.
-
Click Create network.
-
Create a subnet:
-
At the top right, click Create subnet.
-
Specify the subnet parameters:
- Name:
bastion-internal-segment - Zone:
ru-central1-b - CIDR:
172.16.16.0/24
- Name:
-
Click Create subnet.
-
Create security groups
Create a security group for your bastion host
Create a security group and make the bastion host accessible from the internet by configuring its inbound traffic rules.
-
In the management console, navigate to the folder where you want to create an infrastructure for your bastion host.
-
In the list of services, select Virtual Private Cloud and the
external-bastion-networknetwork. -
In the left-hand menu, select Security groups.
-
Click Create security group.
-
Specify the security group name:
secure-bastion-sg. -
Under Rules, navigate to the Ingress tab and click Add.
-
Specify the rule settings:
- Port range:
22 - Protocol:
TCP - Source:
CIDR - CIDR blocks:
0.0.0.0/0
- Port range:
-
Click Save in the rule creation window and in the security group creation window.
Create a security group for internal hosts
Create a security group and set up rules for inbound traffic from the bastion host to internal hosts:
-
In the management console, navigate to the folder where you want to create an infrastructure for your bastion host.
-
In the list of services, select Virtual Private Cloud and
internal-bastion-network. -
In the left-hand menu, select Security groups.
-
Click Create security group.
-
Specify the security group name:
internal-bastion-sg. -
Under Rules, navigate to the Ingress tab and click Add.
-
Specify the rule settings:
- Port range:
22 - Protocol:
TCP - Source:
CIDR - CIDR blocks:
172.16.16.254/32
- Port range:
-
Click Save in the rule creation window.
-
Navigate to the Egress tab and click Add.
-
Specify the rule settings:
- Port range:
22 - Protocol:
TCP - Destination name:
Security group - Security group:
Current
- Port range:
-
Click Save in the rule creation window and in the security group creation window.
Reserve a static public IP address
The bastion host will need a static public IP address.
- In the management console, navigate to the folder where you want to create an infrastructure for your bastion host.
- In the list of services, select Virtual Private Cloud.
- In the left-hand panel, select IP addresses.
- Click Reserve address.
- In the window that opens, select the
ru-central1-bavailability zone. - Click ** Reserve**.
Create a VM for the bastion host
After you created the subnet and security group, create a virtual server for the bastion host:
-
On the folder page in the management console, click Create resource and select
Virtual machine instance. -
Under Boot disk image, in the Product search field, type
NAT instance based on Ubuntu 22.04 LTSand select a public NAT instance based on Ubuntu 22.04 LTS image. -
Under Location, select the
ru-central1-bavailability zone. -
Under Network settings, configure the first network interface:
- Subnet:
bastion-external-segment. - Public IP address: Click
Listand select the IP address reserved earlier. - Security groups:
secure-bastion-sg.
- Subnet:
-
Click Add network interface and configure the second network interface:
- Subnet:
bastion-internal-segment. - Public IP address:
No address. - Security groups:
internal-bastion-sg. - Expand the Additional section; in the Internal IPv4 address field, select
Manual. - In the input field that appears, specify
172.16.16.254.
Note
Make sure the first VM interface belongs to the external segment because the system will automatically use it as a default gateway.
In the settings above, you specified a public IP address for the external segment and internal static IP address for the internal segment.
- Subnet:
-
Under Access, select the SSH key option, and specify the VM access credentials:
- In the Login field, specify the username:
bastion. -
In the SSH key field, select the SSH key saved in your organization user profile.
If there are no saved SSH keys in your profile, or you want to add a new key:
- Click Add key.
- Enter a name for the SSH key.
- Upload or paste the contents of the public key file. You need to create a key pair for the SSH connection to a VM yourself.
- Click Add.
The SSH key will be added to your organization user profile.
If users cannot add SSH keys to their profiles in the organization, the added public SSH key will only be saved to the user profile of the VM being created.
- In the Login field, specify the username:
-
Under General information, specify the VM name:
bastion-host. -
Click Create VM.
Once the server VM starts, its status will change to Running and you will see its public IP address in the Public IP address field.
Test the bastion host
After you start your bastion host, try to connect to it with the SSH client:
ssh -i ~/.ssh/<name_of_private_key_file> bastion@<public_IP_address_of_bastion_host>
Add a virtual server to the bastion host internal segment
To administer your servers, add a network interface to the internal network segment of the bastion host, bastion-internal-segment.
If you already have a virtual machine, add another network interface to it. If not, create a new VM to test your bastion host configuration:
-
On the folder page in the management console, click Create resource and select
Virtual machine instance. -
Under Boot disk image, select a public image with any OS, e.g., Ubuntu 22.04 LTS.
-
Under Location, select the
ru-central1-bavailability zone. -
Under Network settings, configure a network interface:
- Subnet:
bastion-internal-segment. - Public IP address:
No address. - Security groups:
internal-bastion-sg. - Expand the Advanced section; in the Internal IPv4 address field, select
Auto.
- Subnet:
-
Under Access, select the SSH key option, and specify the VM access credentials:
- In the Login field, specify the username:
test. -
In the SSH key field, select the SSH key saved in your organization user profile.
If there are no saved SSH keys in your profile, or you want to add a new key:
- Click Add key.
- Enter a name for the SSH key.
- Upload or paste the contents of the public key file. You need to create a key pair for the SSH connection to a VM yourself.
- Click Add.
The SSH key will be added to your organization user profile.
If users cannot add SSH keys to their profiles in the organization, the added public SSH key will only be saved to the user profile of the VM being created.
- In the Login field, specify the username:
-
Under General information, specify the VM name:
test-vm. -
Click Create VM.
Connect to the created VM
When connecting to the VM internal IP address over SSH, you will use your bastion host as a jump host.
To configure SSH access via jump host, add the -J (ProxyJump) parameter to the SSH command:
ssh -i ~/.ssh/<name_of_private_key_file> -J bastion@<public_IP_address_of_bastion_host> test@<internal_IP_address_of_virtual_server>
The SSH client will automatically connect to the internal server.
You can use the -J flag in OpenSSH version 7.3 or higher. In earlier versions, -J is not available. The easiest and most secure alternative is to use standard I/O redirection (the -W flag) to forward the connection through the bastion host. Here is an example:
ssh -i ~/.ssh/<name_of_private_key_file> -o ProxyCommand="ssh -W %h:%p bastion@<public_IP_address_of_bastion_host>" test@<internal_IP_address_of_virtual_server>
Additional connection options
Using an SSH agent for connection via the bastion host
By default, you can only authenticate on the server using a public SSH key. We do not recommend storing keys directly on your bastion host, especially without a passphrase. Use an SSH agent instead. In this case, you will store private SSH keys on your computer only and will be able to safely use them for authentication on the internal server.
To add a key to your authentication agent, use the ssh-add command. If the key is stored in the ~/.ssh/id_rsa file, it is added automatically. You can also select a specific key by running the command below:
ssh-add <key_file_path>
If you use macOS, you can configure the ~/.ssh/config file and use the following command to add keys to the agent:
AddKeysToAgent yes
The following command connects you to the bastion host and forwards your agent to log in to the internal server using the credentials from your local computer:
ssh -A bastion@<public_IP_address_of_bastion_host>
If you use Windows, add your private keys to the Pageant tool, then open the PuTTY configuration window, select Connection → SSH → Authentication, and configure your agent forwarding.
Access to services through SSH tunnels
Sometimes, SSH access alone is not enough to accomplish your task. In this case, use SSH tunnels allowing you to connect to services requiring inbound connections, e.g., web applications.
There are three main types of SSH tunnels: local, remote, and dynamic:
-
A local tunnel is an open port on a loopback interface routing your connections to your SSH server
IP:portaddress.For example, you can connect local port 8080 to the
web_server_IP_address:80address accessible from your bastion host and then openhttp://localhost:8080in your browser:ssh bastion@<public_IP_address_of_bastion_host> -L 8080:<web_server_IP_address>:80 -
A remote tunnel works in the direction opposite to that of the local tunnel by opening a local port for incoming connections from a remote server.
-
A dynamic tunnel is a SOCKS proxy on your local port with connections originating from a remote host. For example, you can set up a dynamic tunnel on port 1080 and then specify it as a SOCKS proxy in your browser. As a result, you will be able to connect to any resources residing in a private subnet and accessible from your bastion host.
ssh bastion@<public_IP_address_of_bastion_host> -D 1080
Those techniques are a simpler replacement that in many cases would require VPN connection and can be combined with ProxyJump or ProxyCommand connections.
If you use Windows, you can set up tunnels in PuTTY by selecting Connection → SSH → Tunnels.
You can use port forwarding, especially a local one, to establish connections to Remote Desktop Services (RDS), i.e., Windows hosts running in a cloud, by tunneling port 3389 and then connecting to localhost with an RDS client. If the RDS client is already listening on the local machine, you can use another port as shown in the example below:
ssh bastion@<public_IP_address_of_bastion_host> -L 3390:<Windows_host_IP_address>:3389
File transfers
Linux clients and servers can securely transfer files through the bastion host to internal hosts and back via SCP by using ProxyCommand and ProxyJump options. Here is an example:
scp -o "ProxyJump bastion@<public_IP_address_of_bastion_host>" <file_name> bastion@<internal_IP_address_of_virtual_server>:<path_to_file>
If you use Windows, one of the most popular SCP applications is WinSCP. To transfer files through your bastion host to a remote Linux machine:
- Create a session with a private host IP address without a password. Configure an SSH key on the Linux machine.
- In the left-hand navigation menu, click Advanced and select Tunnel.
- Specify your bastion host IP address and username. In the Private key file field, select the private key you will use to authenticate with your bastion host.
- In the left-hand navigation menu, under SSH, select Authentication.
- Make sure to select Allow agent forwarding.
- Select the private key you will use to authenticate with the private host.
This configuration enables direct file transfer between your Windows machine and Linux private host protected by bastion.
For Windows hosts behind a Linux bastion, you can transfer files by using RDP and tunneling. This method ensures an efficient and secure file transfer.
How to delete the resources you created
To stop paying for the resources you created: