Creating a 1C-Bitrix website using Terraform
To create an infrastructure for your 1C-Bitrix website through Terraform:
- Prepare your cloud.
- Create an infrastructure.
- Configure a server for 1C-Bitrix.
- Configure 1C-Bitrix.
If you no longer need the resources you created, delete them.
Prepare your cloud
Sign up for Yandex Cloud and create a billing account:
- Navigate to the management console and log in to Yandex Cloud or create a new account.
- On the Yandex Cloud Billing page, make sure you have a billing account linked and it has the
ACTIVEorTRIAL_ACTIVEstatus. If you do not have a billing account, create one and link a cloud to it.
If you have an active billing account, you can create or select a folder for your infrastructure on the cloud page.
Learn more about clouds and folders here.
Required paid resources
-
VM instance: use of computing resources, storage, public IP address, and OS (see Compute Cloud pricing).
-
Managed Service for MySQL® cluster: computing resources allocated to hosts, size of storage and backups (see Managed Service for MySQL® pricing).
-
Public IP addresses if public access is enabled for cluster hosts (see Virtual Private Cloud pricing).
This tutorial uses the trial version of 1C-Bitrix with a 30-day trial period. You can check the cost of the product software versions on the 1C-Bitrix official website.
Create an infrastructure
With Terraform, you can quickly create a cloud infrastructure in Yandex Cloud and manage it using configuration files. These files store the infrastructure description written in HashiCorp Configuration Language (HCL). If you change the configuration files, Terraform automatically detects which part of your configuration is already deployed, and what should be added or removed.
Terraform is distributed under the Business Source License. The Yandex Cloud provider for Terraform is distributed under the MPL-2.0 license.
For more information about the provider resources, see the guides on the Terraform website or its mirror.
To create an infrastructure using Terraform:
-
Install Terraform, get the credentials, and specify the source for installing the Yandex Cloud provider (see Configure your provider, Step 1).
-
Set up your infrastructure description files:
Ready-made configurationManually-
Clone the repository with configuration files.
git clone https://github.com/yandex-cloud-examples/yc-bitrix-website.git -
Navigate to the repository directory. It should now contain the following files:
bitrix-website.tf: New infrastructure configuration.bitrix-website.auto.tfvars: User data file.
- Create a folder for configuration files.
- In the directory, create:
-
bitrix-website.tfconfiguration file:bitrix-website.tf
# Declaring variables for confidential parameters variable "folder_id" { type = string } variable "vm_user" { type = string } variable "ssh_key_path" { type = string } variable "mysql_user" { type = string } variable "mysql_password" { type = string sensitive = true } # Configuring a provider terraform { required_providers { yandex = { source = "yandex-cloud/yandex" version = ">= 0.47.0" } } } provider "yandex" { zone = var.folder_id } # Creating a cloud network and subnets resource "yandex_vpc_network" "network-1" { name = "network1" } resource "yandex_vpc_subnet" "subnet-1" { name = "subnet1" zone = "ru-central1-a" network_id = yandex_vpc_network.network-1.id v4_cidr_blocks = ["192.168.1.0/24"] } resource "yandex_vpc_subnet" "subnet-2" { name = "subnet2" zone = "ru-central1-b" network_id = yandex_vpc_network.network-1.id v4_cidr_blocks = ["192.168.2.0/24"] } resource "yandex_vpc_subnet" "subnet-3" { name = "subnet3" zone = "ru-central1-d" network_id = yandex_vpc_network.network-1.id v4_cidr_blocks = ["192.168.3.0/24"] } # Create security groups resource "yandex_vpc_security_group" "sg-vm" { name = "bitrix-sg-vm" description = "Description for security group" network_id = yandex_vpc_network.network-1.id egress { protocol = "ANY" description = "ANY" v4_cidr_blocks = ["0.0.0.0/0"] from_port = 0 to_port = 65535 } ingress { protocol = "TCP" description = "EXT-HTTP" v4_cidr_blocks = ["0.0.0.0/0"] port = 80 } ingress { protocol = "TCP" description = "EXT-SSH" v4_cidr_blocks = ["0.0.0.0/0"] port = 22 } ingress { protocol = "TCP" description = "EXT-HTTPS" v4_cidr_blocks = ["0.0.0.0/0"] port = 443 } } resource "yandex_vpc_security_group" "sg-mysql" { name = "bitrix-sg" description = "Security group for mysql" network_id = yandex_vpc_network.network-1.id egress { protocol = "ANY" description = "any" v4_cidr_blocks = ["0.0.0.0/0"] from_port = 0 to_port = 65535 } ingress { protocol = "TCP" description = "ext-msql" v4_cidr_blocks = ["0.0.0.0/0"] port = 3306 } } # Adding a prebuilt VM image data "yandex_compute_image" "ubuntu-image" { family = "ubuntu-2204-lts" } # Creating a boot disk resource "yandex_compute_disk" "boot-disk" { name = "bootdisk" type = "network-ssd" zone = "ru-central1-a" size = "24" image_id = data.yandex_compute_image.ubuntu-image.id } # Creating a VM instance resource "yandex_compute_instance" "vm-bitrix" { name = "bitrixwebsite" platform_id = "standard-v3" zone = "ru-central1-a" resources { core_fraction = 20 cores = 2 memory = 4 } boot_disk { disk_id = yandex_compute_disk.boot-disk.id } network_interface { subnet_id = yandex_vpc_subnet.subnet-1.id security_group_ids = ["${yandex_vpc_security_group.sg-vm.id}"] nat = true } metadata = { user-data = "#cloud-config\nusers:\n - name: ${var.vm_user}\n groups: sudo\n shell: /bin/bash\n sudo: 'ALL=(ALL) NOPASSWD:ALL'\n ssh_authorized_keys:\n - ${file("${var.ssh_key_path}")}" } } # Creating a Managed Service for MySQL cluster resource "yandex_mdb_mysql_cluster" "bitrix-cluster" { name = "BitrixMySQL" environment = "PRESTABLE" network_id = yandex_vpc_network.network-1.id version = "8.0" security_group_ids = ["${yandex_vpc_security_group.sg-mysql.id}"] resources { resource_preset_id = "s2.micro" disk_type_id = "network-hdd" disk_size = "10" } host { zone = "ru-central1-a" subnet_id = yandex_vpc_subnet.subnet-1.id assign_public_ip = false } host { zone = "ru-central1-b" subnet_id = yandex_vpc_subnet.subnet-2.id assign_public_ip = false } } # Creating a MySQL database resource "yandex_mdb_mysql_database" "bitrix-db" { cluster_id = yandex_mdb_mysql_cluster.bitrix-cluster.id name = "db1" } # Creating a database user resource "yandex_mdb_mysql_user" "bitrix-user" { cluster_id = yandex_mdb_mysql_cluster.bitrix-cluster.id name = var.mysql_user password = var.mysql_password permission { database_name = yandex_mdb_mysql_database.bitrix-db.name roles = ["ALL"] } } -
bitrix-website.auto.tfvarsuser data file:bitrix-website.auto.tfvars
folder_id      = "<folder_ID>"
vm_user        = "<VM_user_name>"
ssh_key_path   = "<path_to_file_with_public_SSH_key>"
mysql_user     = "<DB_user_name>"
mysql_password = "<DB_user_password>"
-
For more on the properties of resources used in Terraform, see these provider guides:
- Network: yandex_vpc_network.
- Subnets: yandex_vpc_subnet.
- Security groups: yandex_vpc_security_group.
- Image: yandex_compute_image.
- Disk: yandex_compute_disk.
- VM instance: yandex_compute_instance.
- MySQL cluster: yandex_mdb_mysql_cluster.
- Database: yandex_mdb_mysql_database.
- DB user: yandex_mdb_mysql_user.
-
-
In the
bitrix-website.auto.tfvarsfile, set the following user-defined properties:folder_id: Folder ID.vm_user: VM user name.ssh_key_path: Path to the public SSH key to authenticate the user on the VM. For more information, see Creating an SSH key pair.mysql_user: User name for connection to the MySQL® DB. To complete this tutorial, specifyuser1.mysql_password: User password to access the MySQL® DB. To complete this tutorial, specifyp@s$woRd!.
-
Create the resources:
-
In the terminal, navigate to the configuration file directory.
-
Make sure the configuration is correct using this command:
terraform validateIf the configuration is valid, you will get this message:
Success! The configuration is valid. -
Run this command:
terraform planYou will see a list of resources and their properties. No changes will be made at this step. Terraform will show any errors in the configuration.
-
Apply the configuration changes:
terraform apply -
Type
yesand press Enter to confirm the changes.
-
Configure a server for 1C-Bitrix
To configure a server for 1C-Bitrix:
-
Connect to the VM over SSH on behalf of the user specified when creating the VM, e.g.,
ubuntu:ssh ubuntu@<VM_public_IP_address>You can look up the VM's public IP address in the management console by checking the Public IPv4 address field under Network on the VM page.
-
Install the required software:
Note
The below install commands are for Ubuntu. For other distributions, use the relevant commands of your packet manager.
sudo apt-get update sudo apt-get install -y apache2 libapache2-mod-php php-gd php-mbstring php-mysql -
Go to the project's working folder and download the 1C-Bitrix: Site Management distribution:
cd /var/www/html/ sudo wget https://www.1c-bitrix.ru/download/business_encode.tar.gz -
Unpack the downloaded archive and delete unnecessary files:
sudo tar -zxf business_encode.tar.gz sudo rm -f index.html business_encode.tar.gz -
Make the
www-datauser the owner of the project's working folder:sudo chown -R www-data:www-data /var/www/htmlCheck the permissions and owners of the working folder:
ls -lResult:
total 40 drwxrwxr-x 7 www-data www-data 4096 Jun 8 2023 bitrix -rwxrwxr-x 1 www-data www-data 1150 Nov 30 2020 favicon.ico -rwxrwxr-x 1 www-data www-data 1353 Jun 8 2023 index.php -rwxrwxr-x 1 www-data www-data 268 Apr 17 2023 install.config -rwxrwxr-x 1 www-data www-data 12821 Mar 18 2022 readme.html -rwxrwxr-x 1 www-data www-data 112 Mar 27 2013 readme.php drwxrwxr-x 2 www-data www-data 4096 Jun 8 2023 upload -
For 1C to work correctly, configure the PHP settings. To do this, use the built-in
nanoeditor and modify the following variables in thephp.iniconfiguration file:sudo nano /etc/php/8.1/apache2/php.iniPreviously Now short_open_tag = Offshort_open_tag = Onmemory_limit = 128Mmemory_limit = 256M;date.timezone =date.timezone = Europe/Moscow;opcache.revalidate_freq =2opcache.revalidate_freq =0;session.save_path = "/var/lib/php/sessions"session.save_path = "/var/lib/php/sessions"The
php.inifile path depends on the PHP version installed. The example shows the path for version8.1. For8.0, enter/etc/php/8.0/apache2/php.ini; for8.2,/etc/php/8.2/apache2/php.ini, etc.Tip
To find the parameter you need in the
nanoeditor, press Ctrl + W. Find the required parameter from the table above and save the changes using Ctrl + O. To exit the editor, press Ctrl + X. -
Configure the Apache web server. To do this, edit the
/etc/apache2/sites-enabled/000-default.confconfiguration file.-
Open the file in the text editor:
sudo nano /etc/apache2/sites-enabled/000-default.conf -
After the
DocumentRoot /var/www/htmlline, add the following section and save the changes:<Directory /var/www/html> Options Indexes FollowSymLinks AllowOverride All Require all granted </Directory> -
Restart the web server to apply all the updated settings:
sudo systemctl restart apache2
-
After you run these commands, the server side will be configured for 1C-Bitrix to work correctly.
Configure 1C-Bitrix
Install and configure 1C-Bitrix:
-
Open the 1C-Bitrix: Site Management web interface. Do it by going to
http://<VM_public_IP_address>/in your browser. This should open a page prompting you to install 1C-Bitrix. -
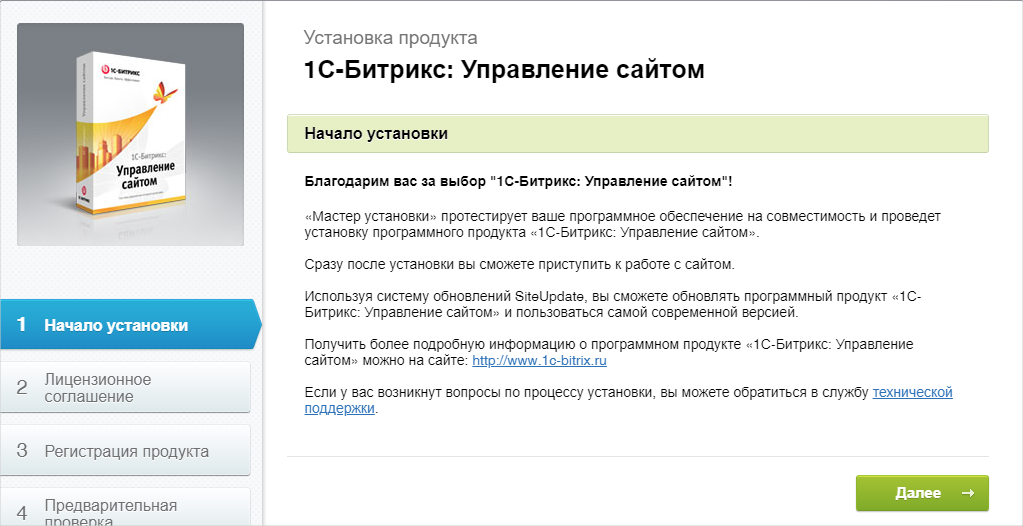
Click Next.
-
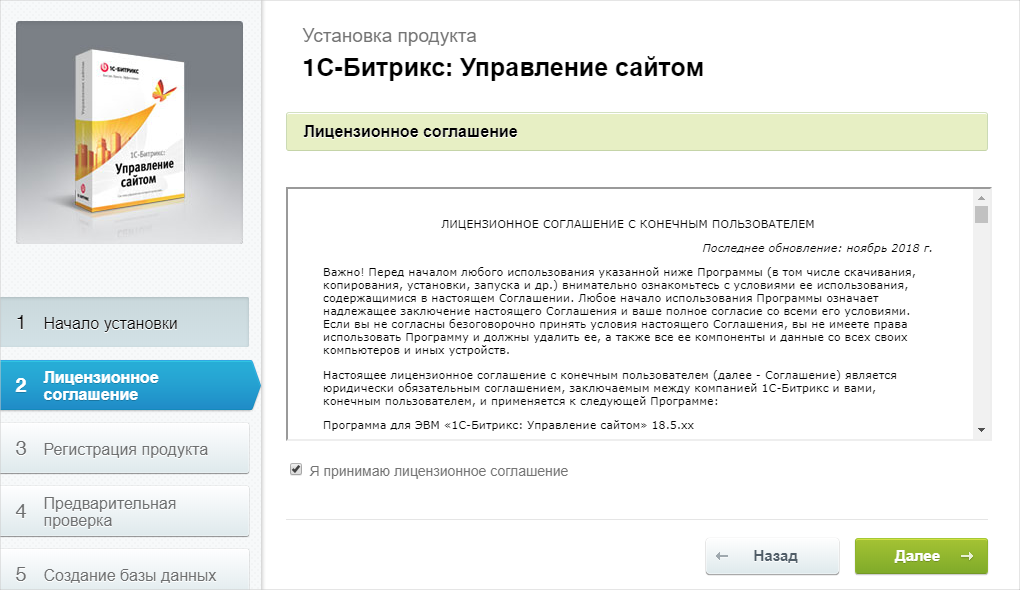
Read the license agreement and select I accept the license agreement. Then click Next.
-
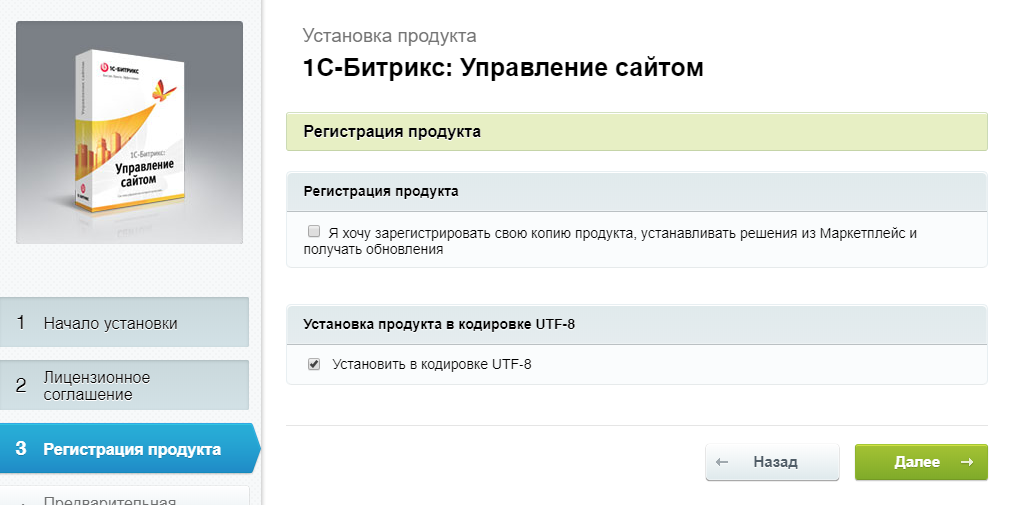
Registration is optional, so you can uncheck the corresponding checkbox, but leave Install in UTF-8 encoding and click Next.
-
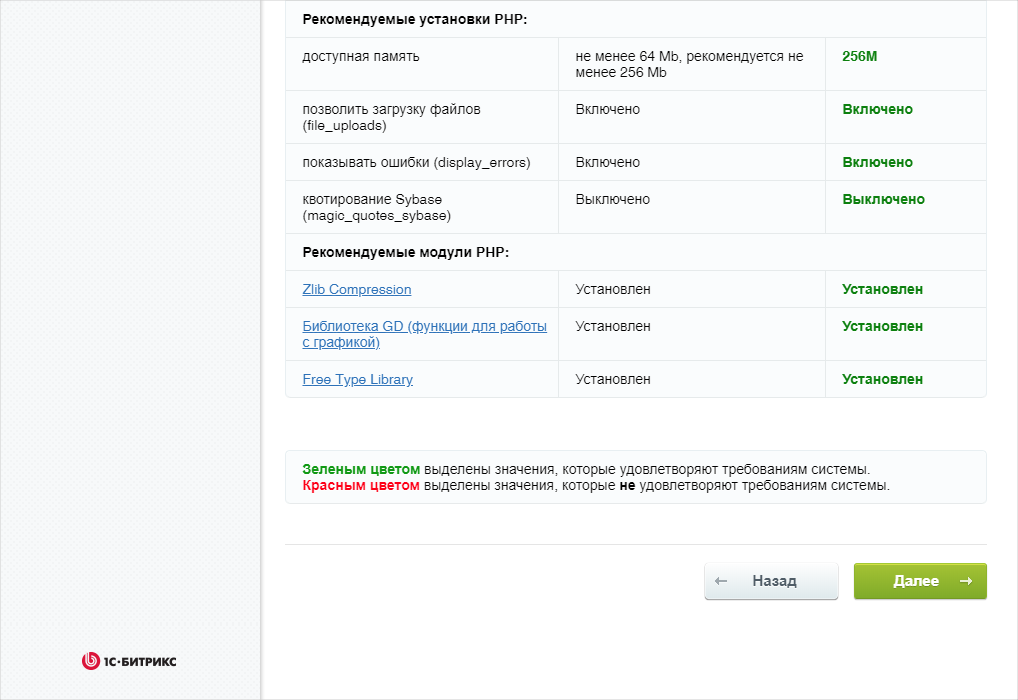
1C-Bitrix will check if the server is configured correctly. View the parameters on this page and click Next.
-
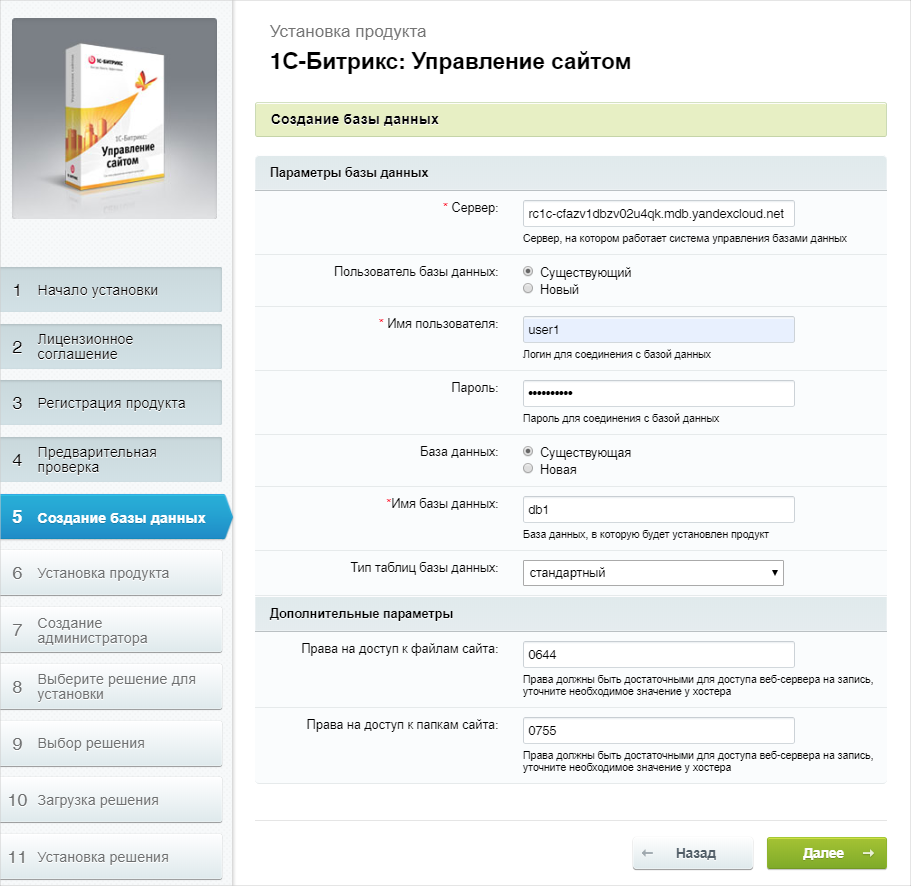
Configure the database:
- In the Server field, enter the fully qualified domain name (FQDN) of the DB you created. To find out this name:
- In the management console, open the folder page in a new browser tab.
- Navigate to Managed Service for MySQL.
- In the window that opens, select the
BitrixMySQLcluster you created earlier. - Select the Hosts tab in the left-hand menu.
- In the Host FQDN field, hover over the host name (format:
rc1c-cfazv1db********) and copy the database FQDN by clicking . The FQDN will be added to the host name, so the Server field should contain a name inrc1c-cfazv1db********.mdb.yandexcloud.netformat.
- In the Username and Password fields, enter the data that you specified when creating the DB in Create a MySQL® DB cluster.
- In the Database name field, specify the name of the new database (
db1). - Click Next.
- In the Server field, enter the fully qualified domain name (FQDN) of the DB you created. To find out this name:
-
Wait for the MySQL® DB to initialize.
-
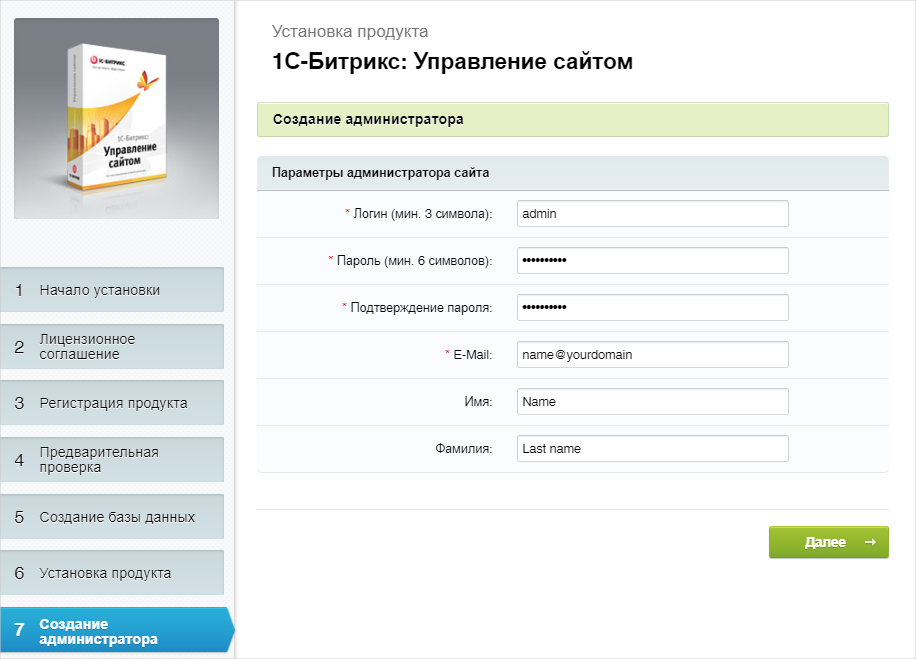
Create an administrator account authorized to make changes to your system. Fill in all the fields and click Next.
-
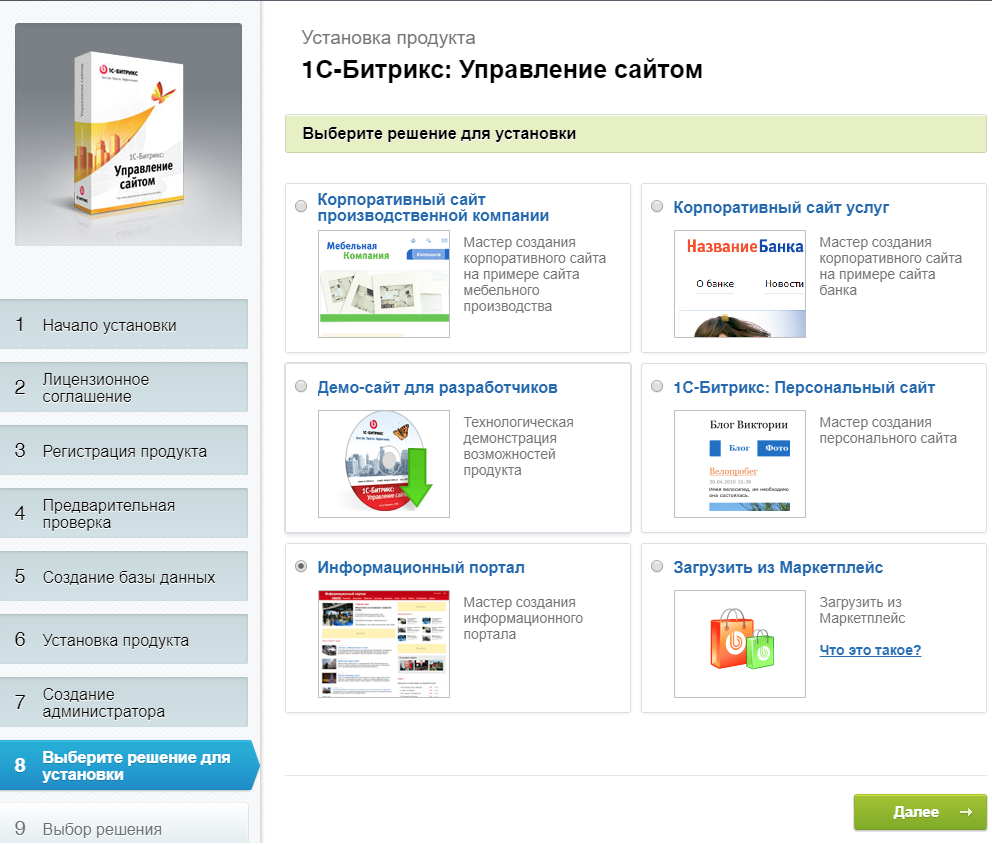
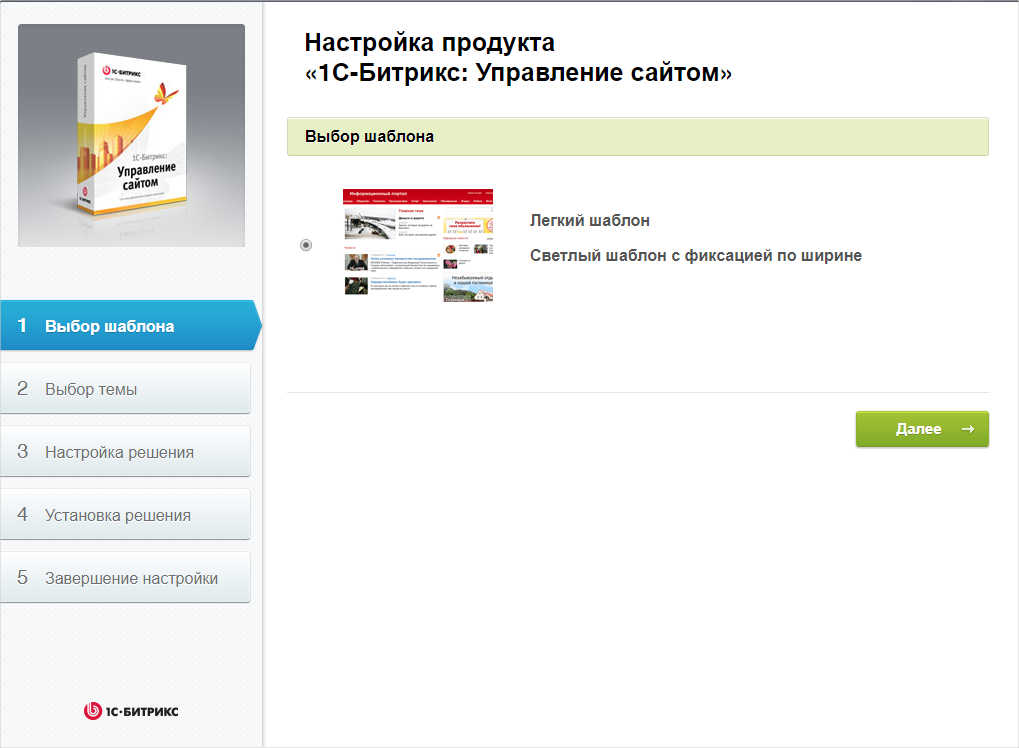
Select the Information portal template and click Next.
-
Confirm the selection of the only layout template available and click Next.
-
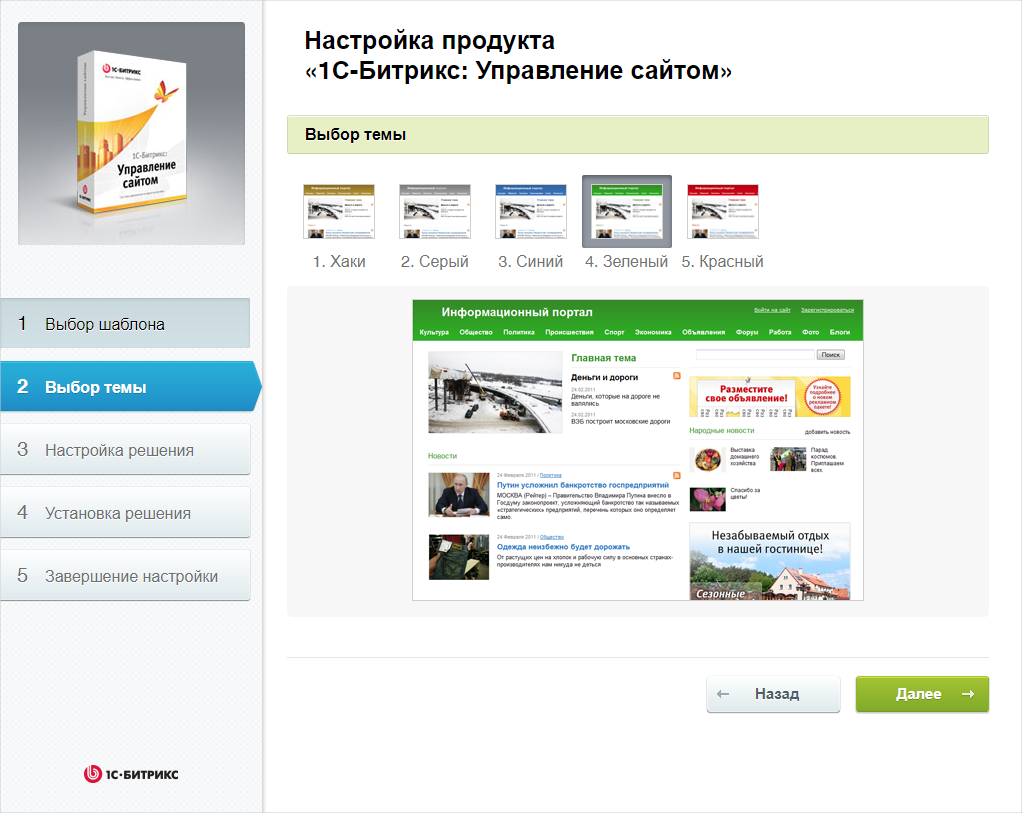
Select a color and click Next.
-
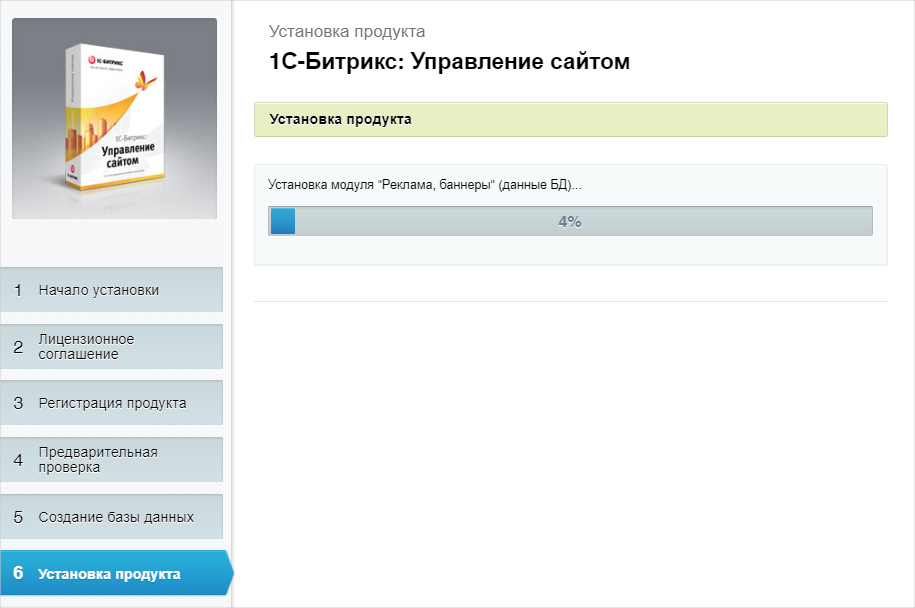
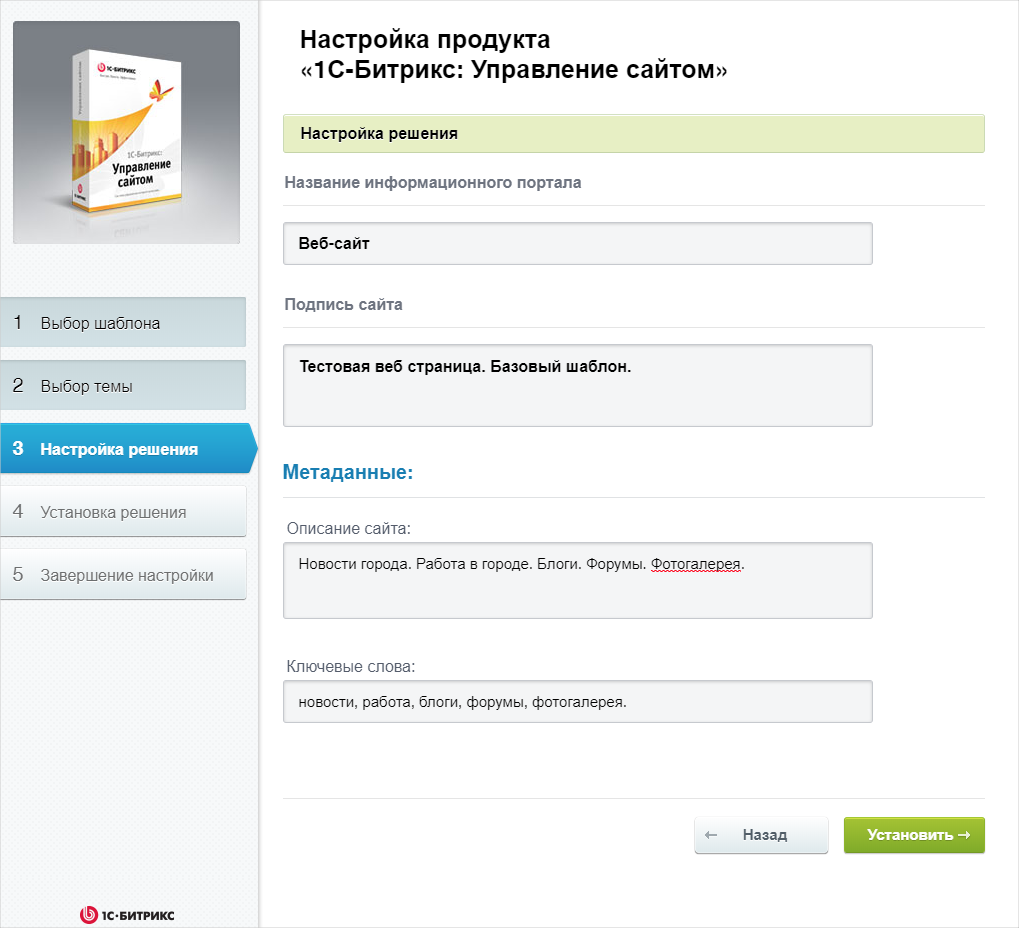
Fill in all the fields according to your website requirements and click Install to start the installation and configuration of all the system components. Wait for its completion.
-
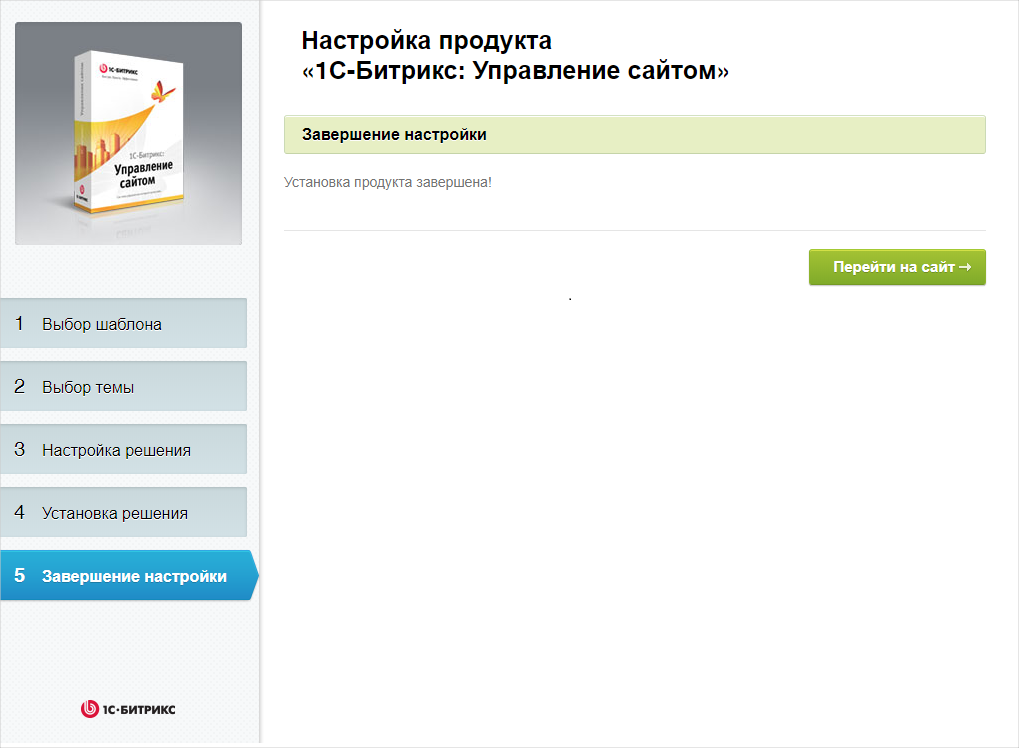
After a while, a notification page will open to inform you that the system is installed and configured. To start using the website, click Go to website.
-
You can now start working with the ready-to-use web interface in content editing mode.

-
To view the website home page as a user, exit your website administration mode. To do this, click Exit in the top-right corner of the page and go to
http://<VM_public_IP_address>/.
To return to edit mode, log in to the website using the administrator credentials you provided when configuring 1C-Bitrix.
How to delete the resources you created
To stop paying for the resources you created:
-
Open the
bitrix-website.tfconfiguration file and delete from it the description of the infrastructure you created. -
Apply the changes:
-
In the terminal, navigate to the configuration file directory.
-
Make sure the configuration is correct using this command:
terraform validateIf the configuration is valid, you will get this message:
Success! The configuration is valid. -
Run this command:
terraform planYou will see a list of resources and their properties. No changes will be made at this step. Terraform will show any errors in the configuration.
-
Apply the configuration changes:
terraform apply -
Type
yesand press Enter to confirm the changes.
-