Getting started with SpeechKit
You can test speech recognition and synthesis on the SpeechKit demo page. For information on pricing, see SpeechKit pricing policy.
Getting started
- Navigate to the management console and log in to Yandex Cloud or sign up if not signed up yet. For information on how to get started with Yandex Cloud, see Getting started with Yandex Cloud.
- Accept the user agreement.
- In Yandex Cloud Billing, make sure you have a billing account linked and its status is
ACTIVEorTRIAL_ACTIVE. If you do not have a billing account yet, create one.
Speech recognition
-
In the management console, select the folder you are going to use to work with SpeechKit.
-
Go to SpeechKit.
-
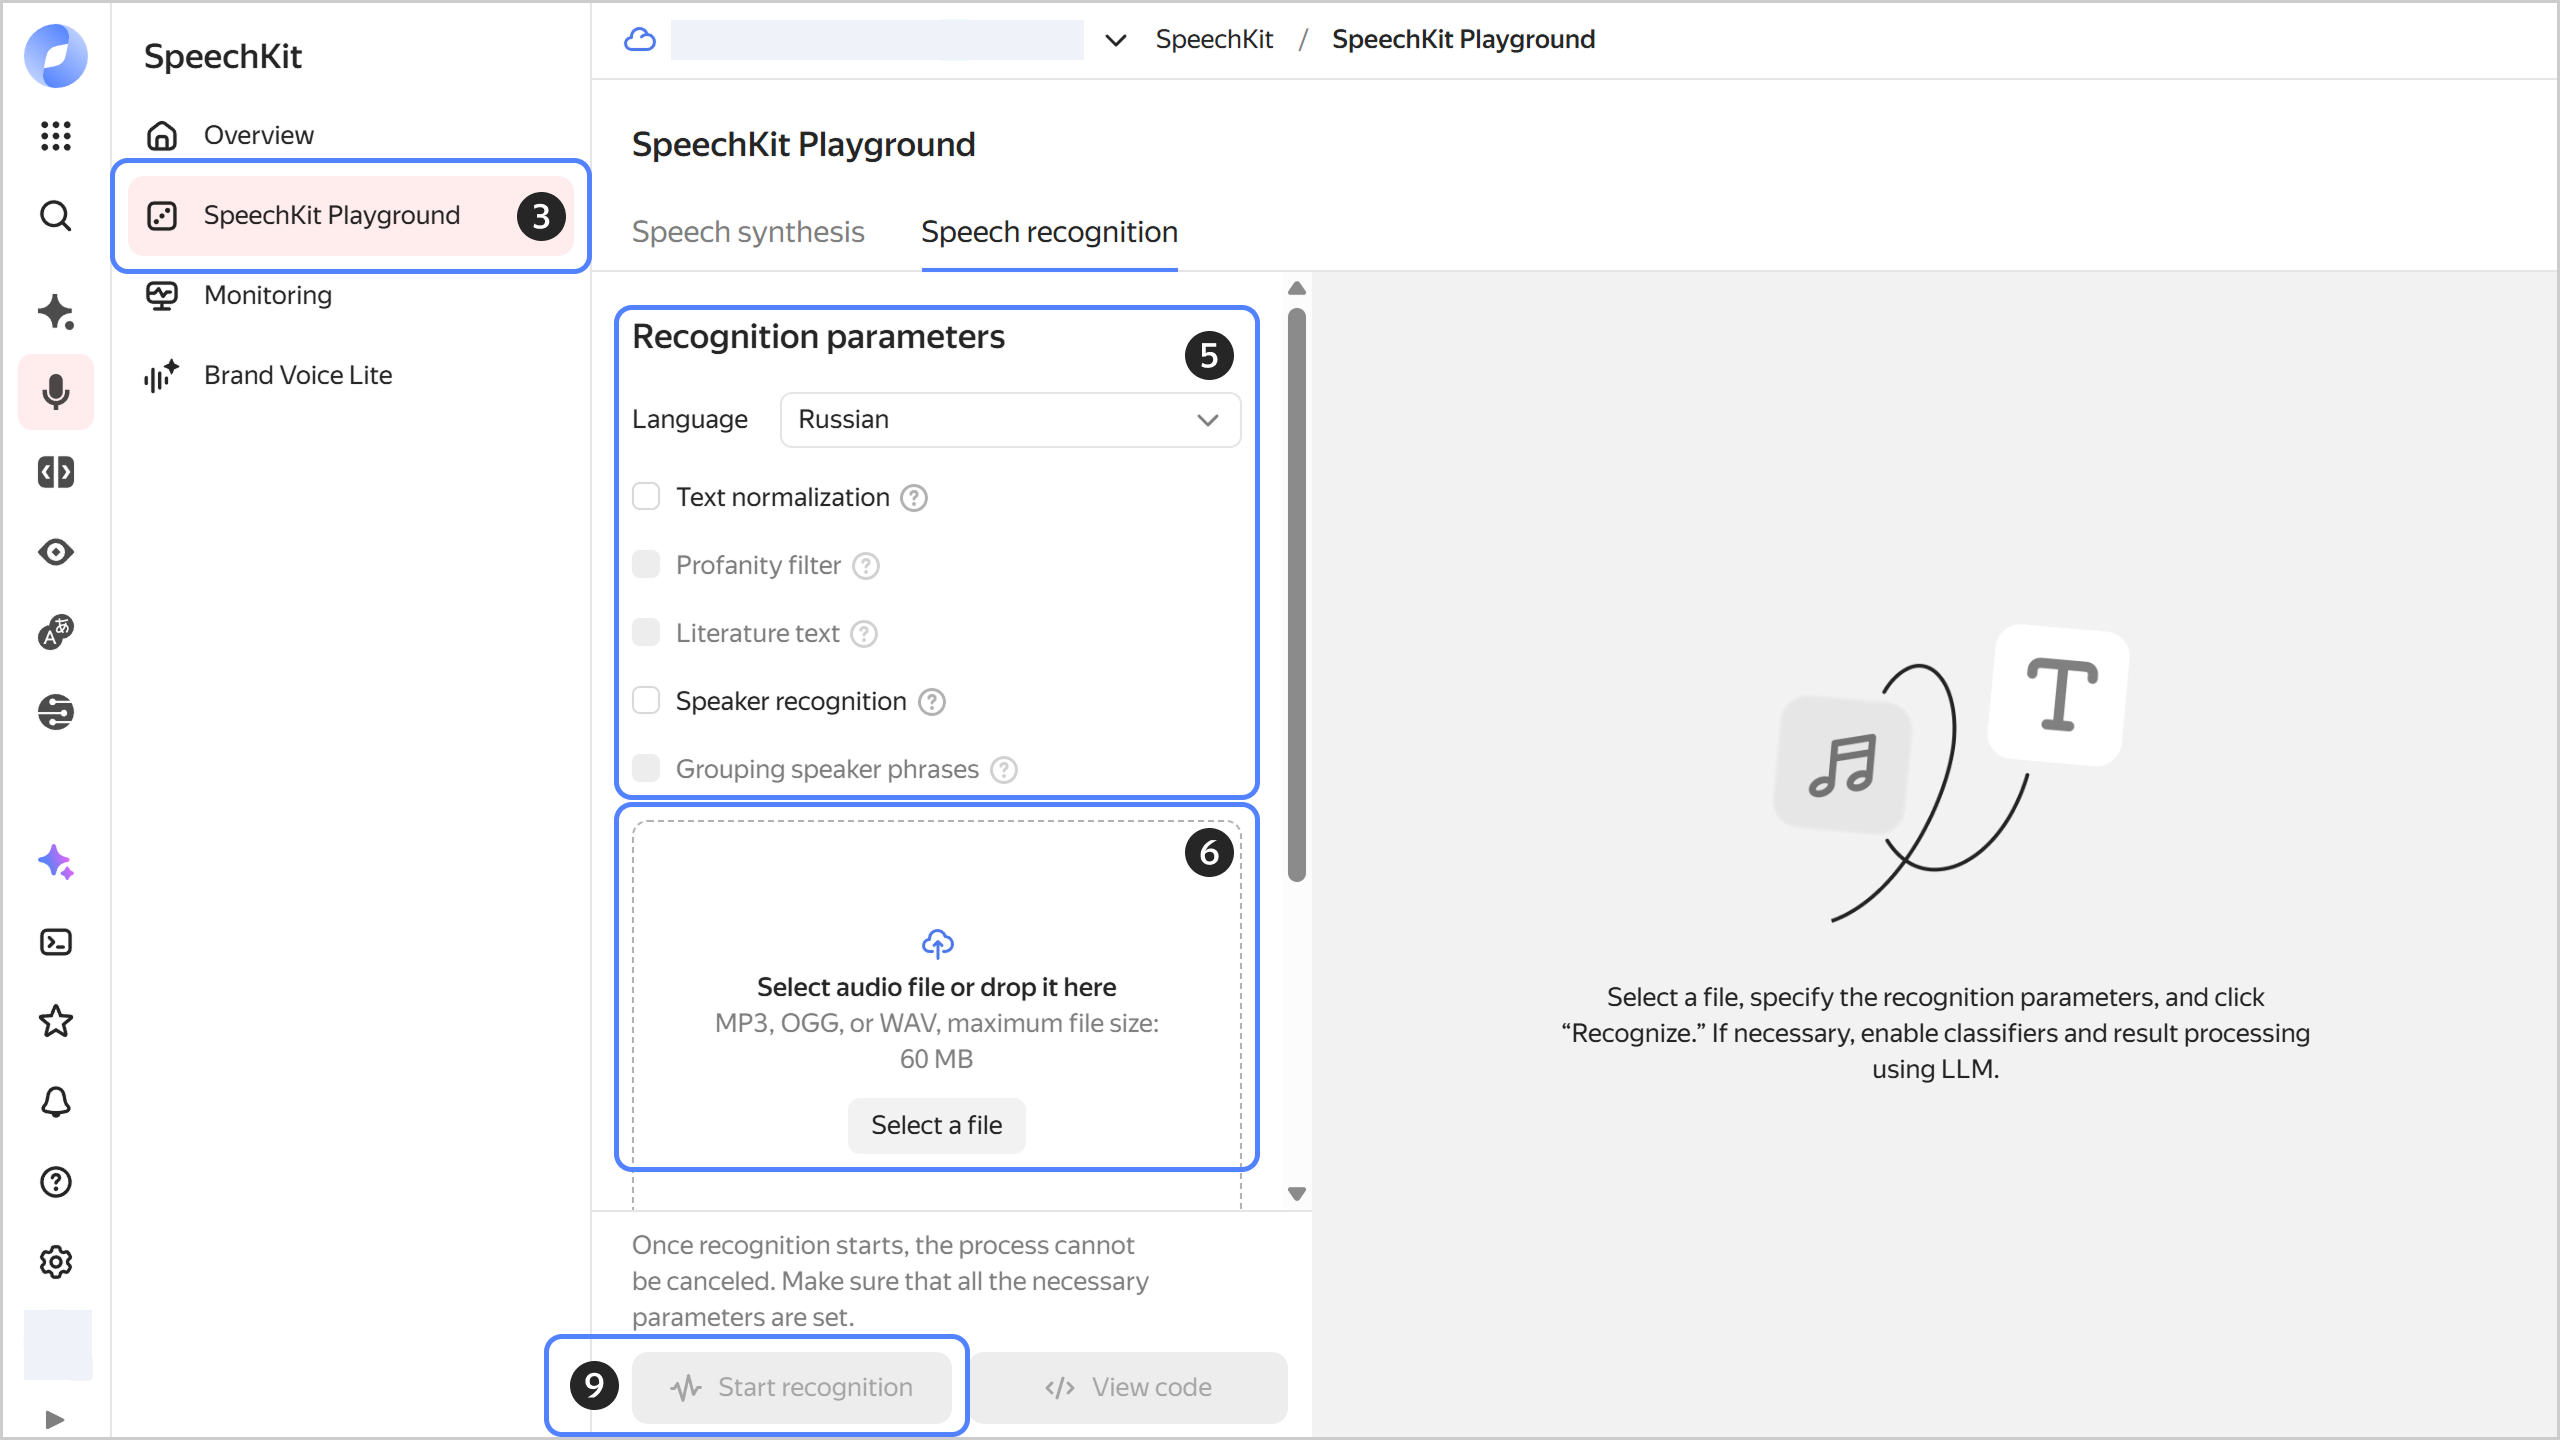
In the left-hand panel, select SpeechKit Playground.
-
Navigate to the Speech recognition tab.
-
Under Recognition parameters:
- Language: Select the language or leave
Automatic. - Text normalization: Presents dates and times in numerical format, converts numbers from text to digits, and provides access to additional settings.
- Profanity filter: Masks profanity.
- Literature text: Adds capital letters and punctuation marks.
- Speaker recognition: Attributes each recognized phrase to a particular speaker.
- Grouping speaker phrases: Divides phrases into two groups by speaker.
- Language: Select the language or leave
-
Click Select file or drag the audio file to the loading area.
-
Classifiers: Finds phrases of a given category in the text, e.g., greetings, negative or obscene language. This works only for Russian.
-
Result processing: Processing of results with the help of an LLM:
- Model: Select a model for processing. The processing cost depends on the model you select.
- Instructions:
- Enter a prompt in the input field or select a ready-made one.
- Result format: Specify your preferred recognition result format.
- Add instructions: Add another instruction. You can add up to five instructions in total.
-
Click Start recognition to start speech recognition for the audio file.
-
Click View code to get the request code for Python REST or Python gRPC.
For a detailed guide, see Speech recognition using Playground.
SpeechKit Playground features basic speech recognition options. For more flexible recognition settings, use the API.
Speech synthesis
To convert text to audio via the SpeechKit Playground:
-
In the management console, select the folder you are going to use to work with SpeechKit.
-
Go to SpeechKit.
-
In the left-hand panel, select SpeechKit Playground.
-
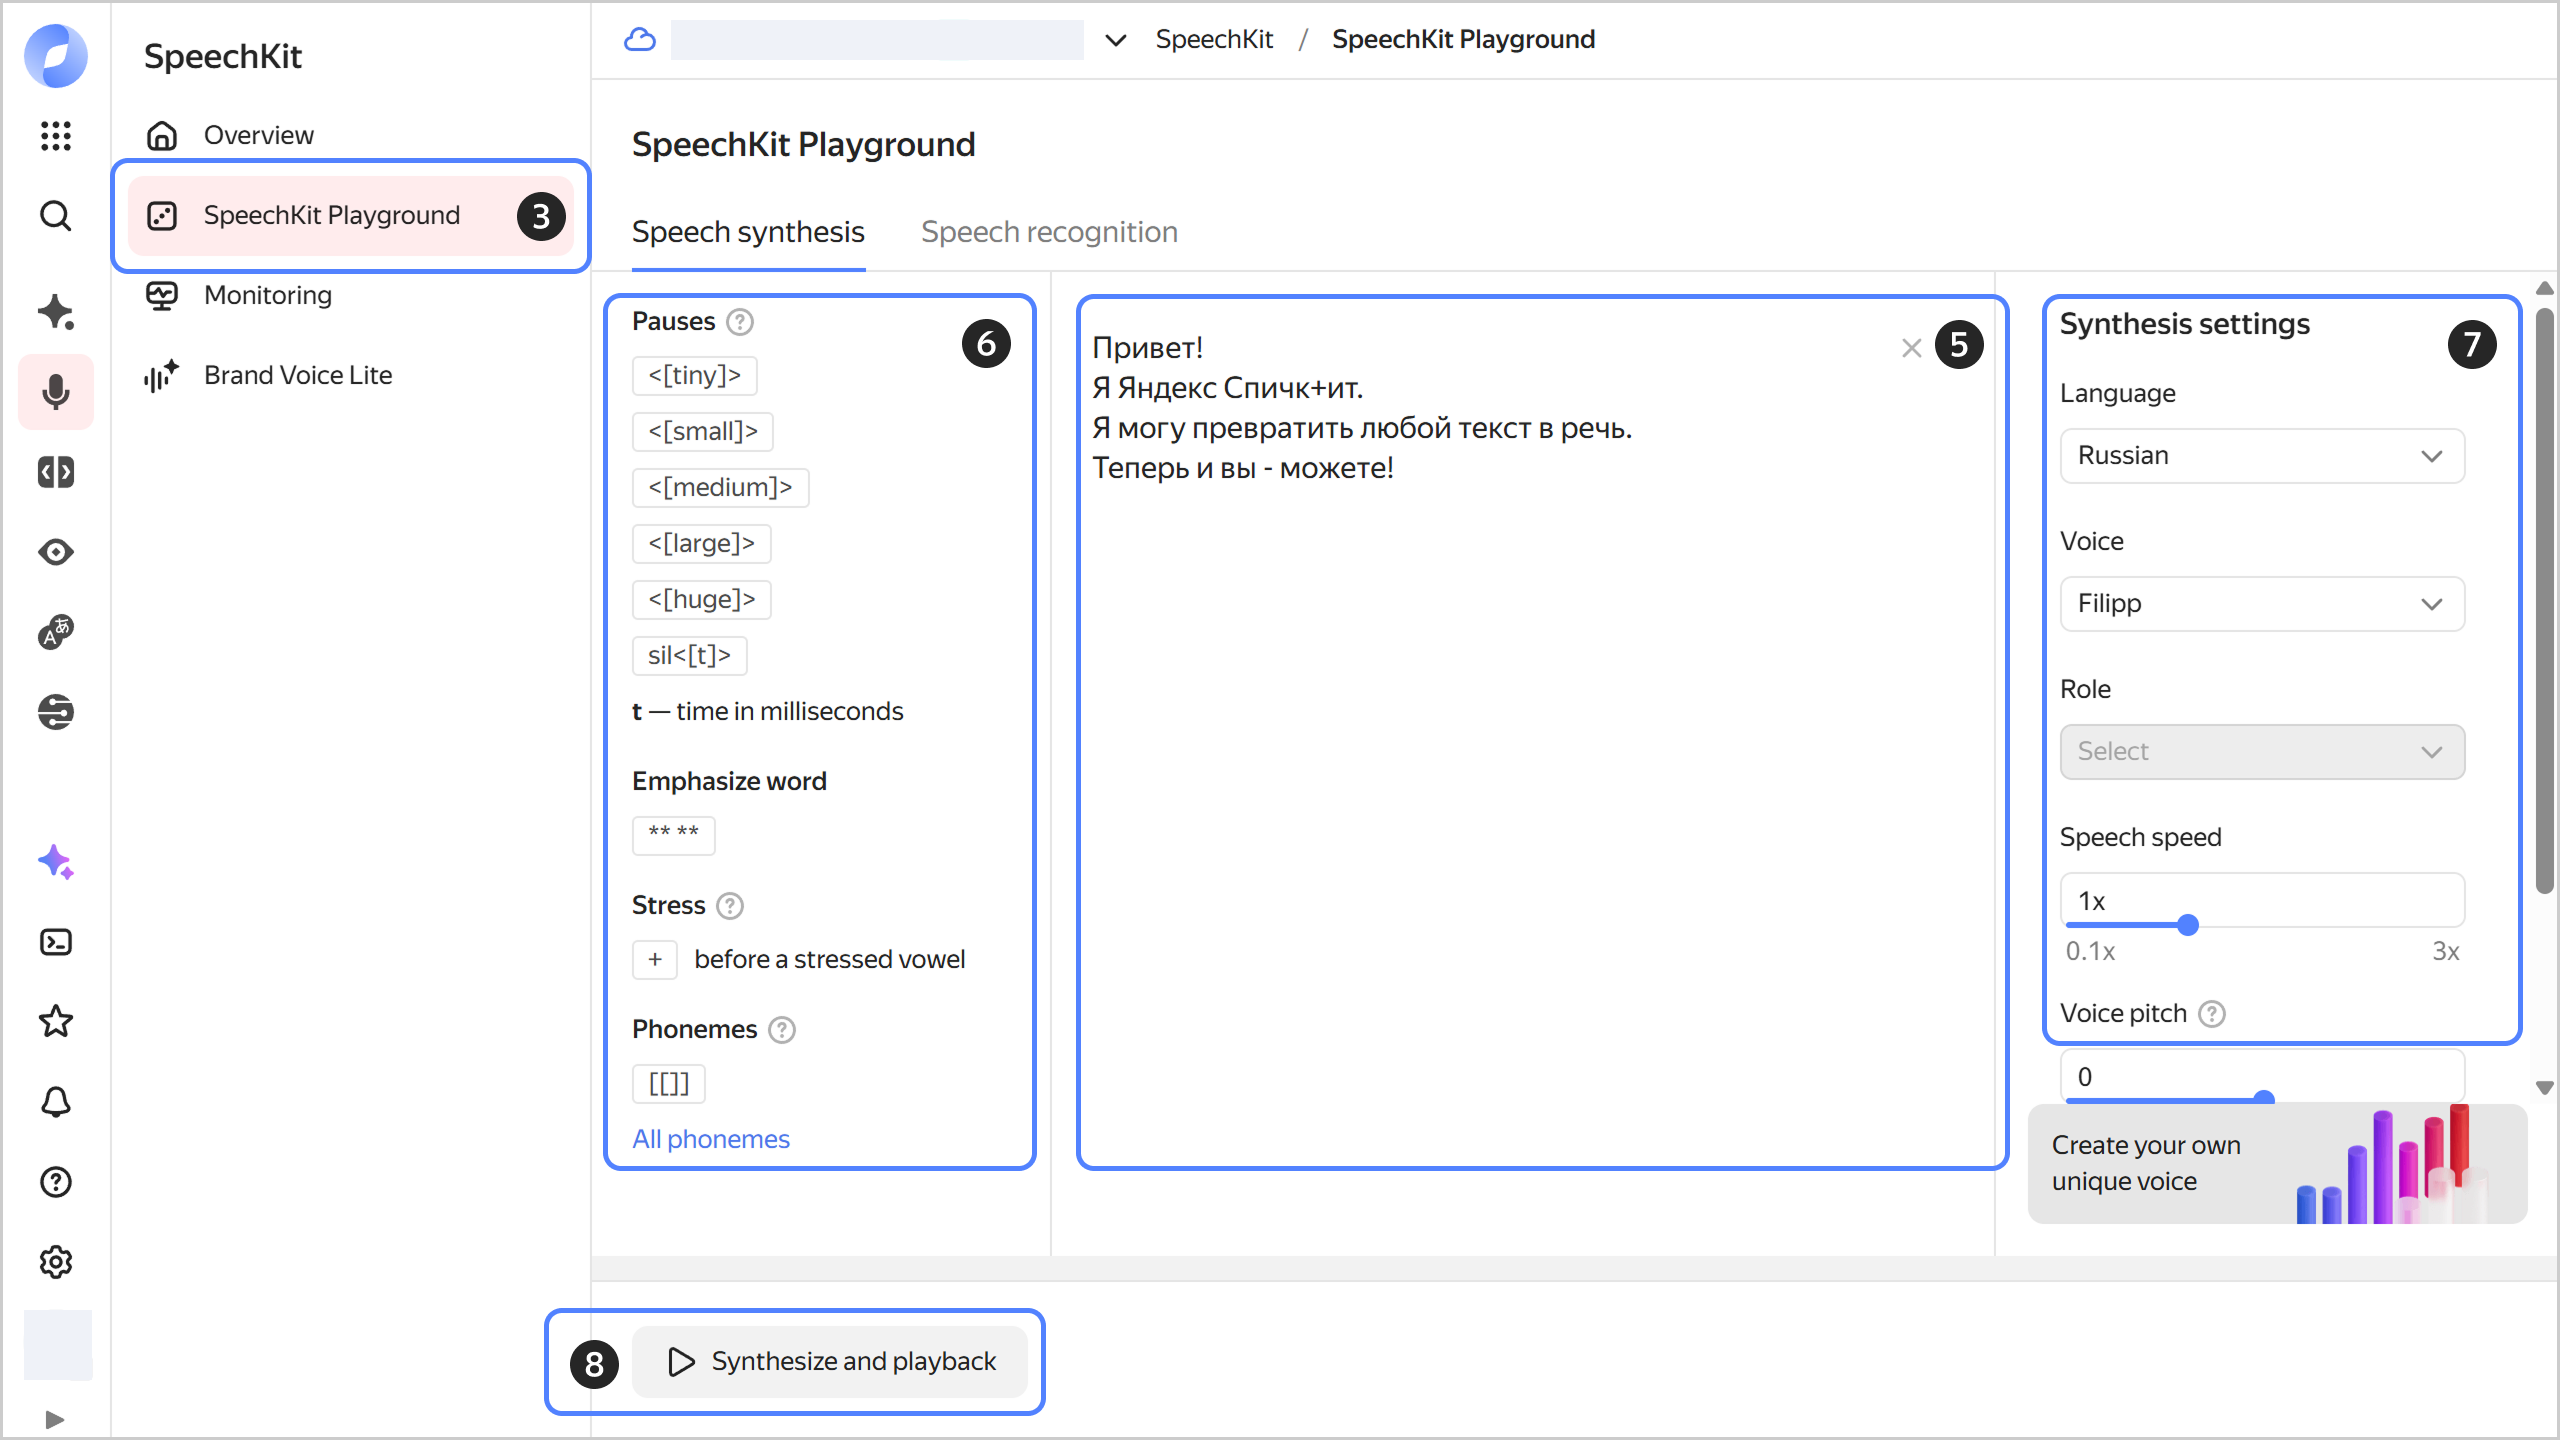
Navigate to the Speech synthesis tab.
-
Paste up to 5,000 characters of text into the central part of the window.
-
In the settings section on the left side of the window:
- Pauses: Select the length of pauses between words or specify it yourself.
- Emphasize word: Emphasize the essential words.
- Stress: Mark the stressed vowels to clarify the correct pronunciation of the words.
- Phonemes: Monitor the correct pronunciation of words using phonemes.
-
Under Synthesis settings on the right side of the window:
- Language: Select the speaker's language.
- Voice: Specify the speaker's voice.
- Role: Select the speaker's role.
- Speech speed: Set the speaker's speech rate.
- Voice pitch: Adjust the speaker's voice pitch.
- Audio format: Select the audio format.
-
To start synthesis, click Synthesize and playback.
-
To download the result, click .
For a detailed guide, see Speech synthesis using Playground.
SpeechKit Playground features basic speech synthesis options. For more flexible synthesis settings, use the API.
Learn how to convert text to audio using the SpeechKit API v1 and API v3. The API v3 provides more flexibility for speech synthesis setup. For more information about the differences between the API versions, see Synthesis options.