Getting started with Yandex SmartCaptcha
Yandex SmartCaptcha: Service for protection against bots and automated attacks.
To add a CAPTCHA to your HTML page:
- Create a CAPTCHA in Yandex Cloud.
- Copy the keys from the CAPTCHA details page.
- Add the CAPTCHA widget code on your HTML page.
- Check the user's response via a POST request.
If you are having problems configuring SmartCaptcha:
- For Business and Premium accounts, contact support.
- Otherwise, contact your account manager who will put you in touch with technical support.
Getting started
- Navigate to the management console. Log in to Yandex Cloud or sign up if you have not already.
- On the Yandex Cloud Billing page, make sure you have an
ACTIVEorTRIAL_ACTIVEbilling account. If you do not have a billing account, create one.
Create a CAPTCHA
Note
To enhance your security, we use HTTP request data to train our machine learning (ML) models. You can opt out of sharing this information using the relevant CAPTCHA settings either when you first create a CAPTCHA via the management console or any time afterwards.
-
In the management console, select a folder.
-
Navigate to SmartCaptcha.
-
Click Create captcha.
-
Specify the CAPTCHA name, e.g.,
sm-captcha. -
List the sites where you want your CAPTCHA to appear, e.g.,
my-shop.com. -
Do not change Style.
-
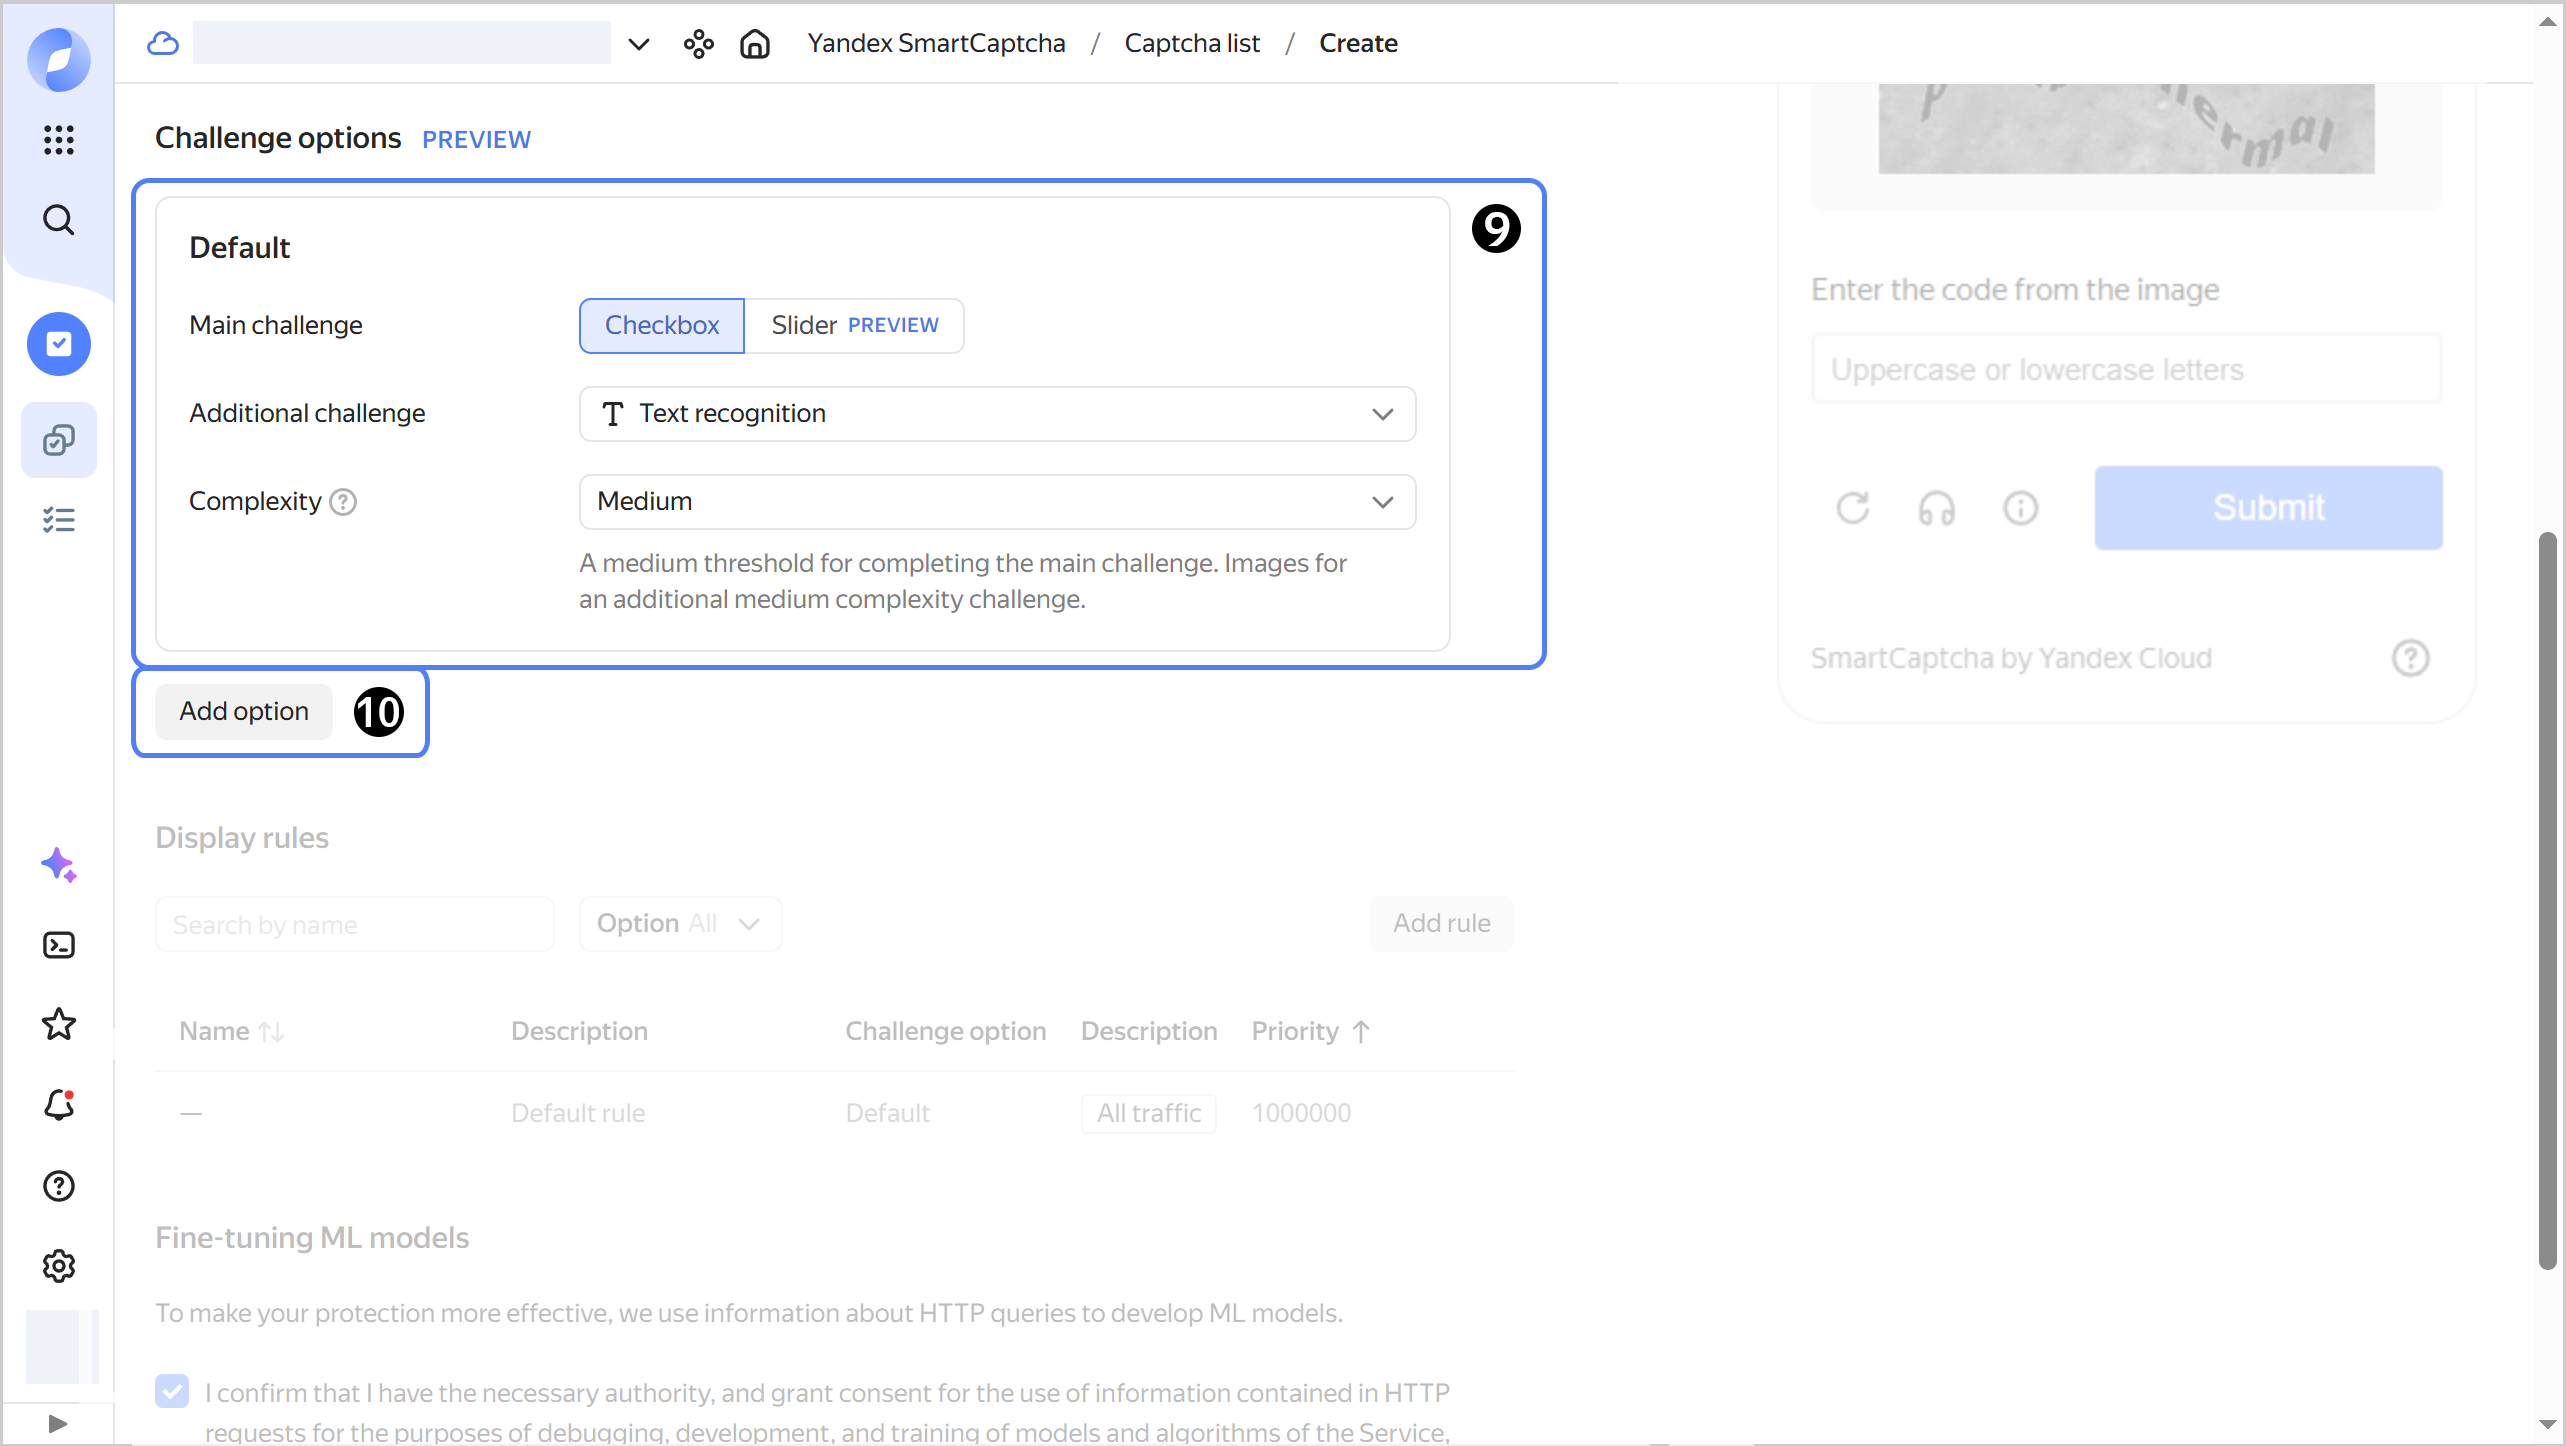
Specify the default CAPTCHA settings or keep the existing ones:
- Main challenge: The first challenge given to the user.
- Additional challenge: This challenge appears if the first challenge results are suspicious, or if the CAPTCHA is set to maximum difficulty.
- Select the difficulty level,
Medium.
You can add challenge options and configure incoming traffic rules to show different CAPTCHAs to different users. In this example, you will configure a single CAPTCHA that will apply by default to all users.
-
Click Create.
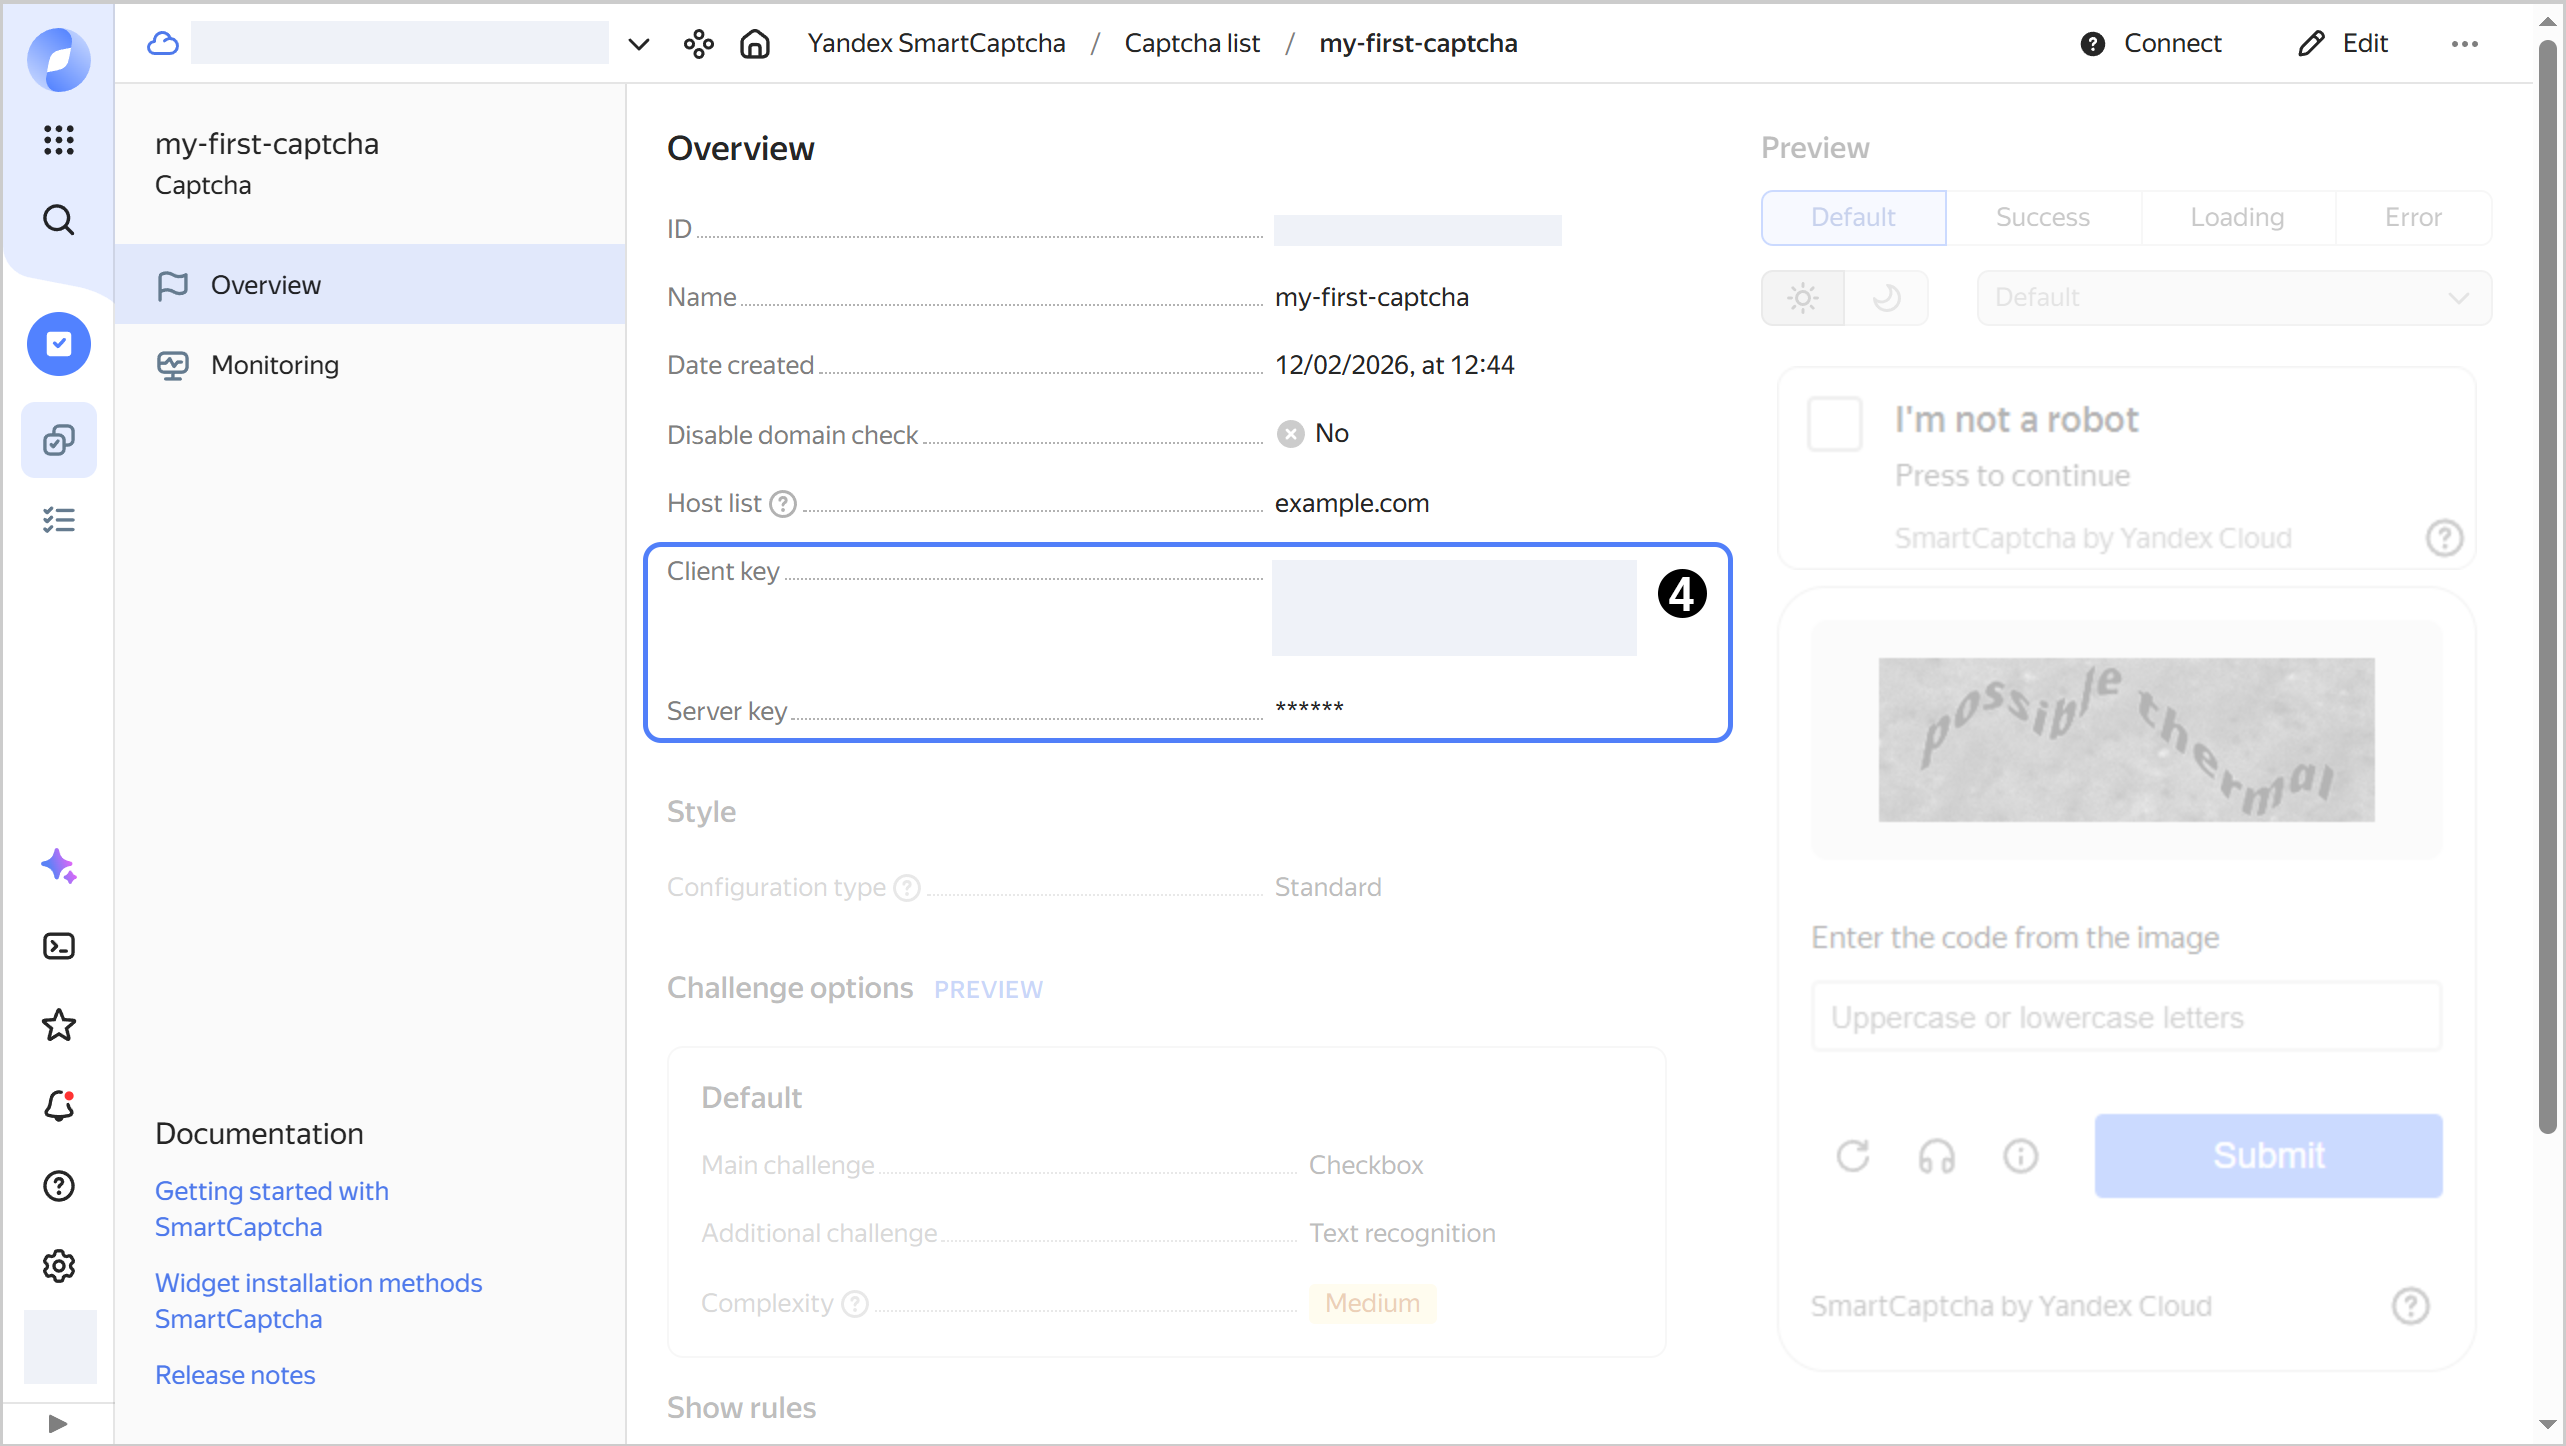
Get the CAPTCHA keys
Once you have created a CAPTCHA, select it in the list and copy its two keys:
- Client key: Required for adding a SmartCaptcha widget to the your website or HTML page.
- Server key: Required to check the user’s response.
Store them in a secure place.
Add the widget to your page
Add the widget via the automated approach:
-
Add the widget’s JS script to your HTML page by placing the following code inside the
<head>tag (or anywhere on the page):<script src="https://smartcaptcha.cloud.yandex.ru/captcha.js" defer></script>The
captcha.jsscript will automatically find alldivelements with thesmart-captchaclass and add the widget to them. -
On the page, add an empty
divcontainer for the CAPTCHA widget.<div id="captcha-container" class="smart-captcha" data-sitekey="<client_key>" ></div>Where
<client_key>is the key that you copied after creating the CAPTCHA.Note
Upon loading, the widget adjusts its container height to
100px, which may cause an unwanted layout shift. To avoid the layout shift, set the container height to100pxprior to the widget being loaded.<div ... style="height: 100px"></div>
An I’m not a robot button will appear on the page. When the user clicks the button, the service will verify their request.
If the request looks suspicious, the service will prompt the user to solve a CAPTCHA.
Verify the user’s response
After CAPTCHA verification, the user receives a unique token which is placed in the CAPTCHA widget container as an <input> element:
<div id="captcha-container" class="smart-captcha" ...>
    <input type="hidden" name="smart-token" value="<token>">
    ...
</div>
To validate the token, make a POST request to https://smartcaptcha.cloud.yandex.ru/validate, providing the following variables in x-www-form-urlencoded format:
secret=<server_key>&token=<token>&ip=<user_IP_address>
Where:
secret: Server key.token: One-time token obtained after successful verification.ip: IP address of the user who sent the token verification request. Even though this argument is optional, we recommend that you include the user’s IP in your requests as it helps improve SmartCaptcha performance.
Token validation function example:
curl -X POST https://smartcaptcha.cloud.yandex.ru/validate \
  -d "secret=<server_key>" \
  -d "token=<token_from_form>" \
  -d "ip=<user_IP_address>"
const https = require('https'),
    querystring = require('querystring');

const SMARTCAPTCHA_SERVER_KEY = "<server_key>";


function check_captcha(token, callback) {
    const postData = querystring.stringify({
        secret: SMARTCAPTCHA_SERVER_KEY,
        token: token,
        ip: '<user_IP_address>', // How you get the user’s IP address depends on your framework and proxy.
    });

    const options = {
        hostname: 'smartcaptcha.cloud.yandex.ru',
        port: 443,
        path: '/validate',
        method: 'POST',
        headers: {
            'Content-Type': 'application/x-www-form-urlencoded',
            'Content-Length': Buffer.byteLength(postData),
        },
    };

    const req = https.request(options, (res) => {
        let content = '';

        res.on('data', (chunk) => {
            content += chunk;
        });

        res.on('end', () => {
            if (res.statusCode !== 200) {
                console.error(`Allow access due to an error: code=${res.statusCode}; message=${content}`);
                callback(true);
                return;
            }

            try {
                const parsedContent = JSON.parse(content);
                callback(parsedContent.status === 'ok');
            } catch (err) {
                console.error('Error parsing response: ', err);
                callback(true);
            }
        });
    });

    req.on('error', (error) => {
        console.error(error);
        callback(true);
    });

    // Adding POST data to the request body
    req.write(postData);
    req.end();
}


let token = "<token>";
check_captcha(token, (passed) => {
    if (passed) {
        console.log("Passed");
    } else {
        console.log("Robot");
    }
});
define('SMARTCAPTCHA_SERVER_KEY', '<server_key>');

function check_captcha($token) {
    $ch = curl_init("https://smartcaptcha.cloud.yandex.ru/validate");
    $args = [
        "secret" => SMARTCAPTCHA_SERVER_KEY,
        "token" => $token,
        "ip" => "<user_IP_address>", // You need to provide the user’s IP address.
                    // How you get the user’s IP address depends on your proxy.
    ];
    curl_setopt($ch, CURLOPT_TIMEOUT, 1);
    curl_setopt($ch, CURLOPT_POST, true);
    curl_setopt($ch, CURLOPT_POSTFIELDS, http_build_query($args));
    curl_setopt($ch, CURLOPT_RETURNTRANSFER, true);

    $server_output = curl_exec($ch);
    $httpcode = curl_getinfo($ch, CURLINFO_HTTP_CODE);
    curl_close($ch);

    if ($httpcode !== 200) {
        echo "Allow access due to an error: code=$httpcode; message=$server_output\n";
        return true;
    }

    $resp = json_decode($server_output);
    return $resp->status === "ok";
}

$token = "<token>"; // For example, $_POST['smart-token'];
if (check_captcha($token)) {
    echo "Passed\n";
} else {
    echo "Robot\n";
}
import requests
import sys
import json

SMARTCAPTCHA_SERVER_KEY = "<server_key>"

def check_captcha(token):
    resp = requests.post(
       "https://smartcaptcha.cloud.yandex.ru/validate",
       data={
          "secret": SMARTCAPTCHA_SERVER_KEY,
          "token": token,
          "ip": "<user_IP_address>"   # How you get the IP address depends on your framework and proxy.
                                            # In Flask, for example, you can use `request.remote_addr`.
       },
       timeout=1
    )
    server_output = resp.content.decode()
    if resp.status_code != 200:
       print(f"Allow access due to an error: code={resp.status_code}; message={server_output}", file=sys.stderr)
       return True
    return json.loads(server_output)["status"] == "ok"

token = "<token>"  # For example, request.form["smart-token"]
if check_captcha(token):
    print("Passed")
else:
    print("Robot")
The service will respond with a JSON object containing the following fields:
status: Validation result,okorfailed. If validation succeeds, the JSON object will include thehostfield, indicating the website where the validation took place.message: Validation message, e.g.,Invalid or expired Token.
To process responses correctly, refer to their status field. Use the message field for diagnostic purposes only.
For response examples and processing details, see User validation.
FAQ
How to test the CAPTCHA?
Open the CAPTCHA page in incognito mode or use a VPN to increase the chance of getting a challenge.
How to customize the CAPTCHA appearance?
What should I do if the CAPTCHA does not appear?
Make sure the domain is listed among allowed websites in the CAPTCHA settings.