Getting started with Yandex Managed Service for Valkey™

To get started:
Getting started
-
Navigate to the management console and log in to Yandex Cloud or sign up if not signed up yet.
-
If you do not have a folder yet, create one:
-
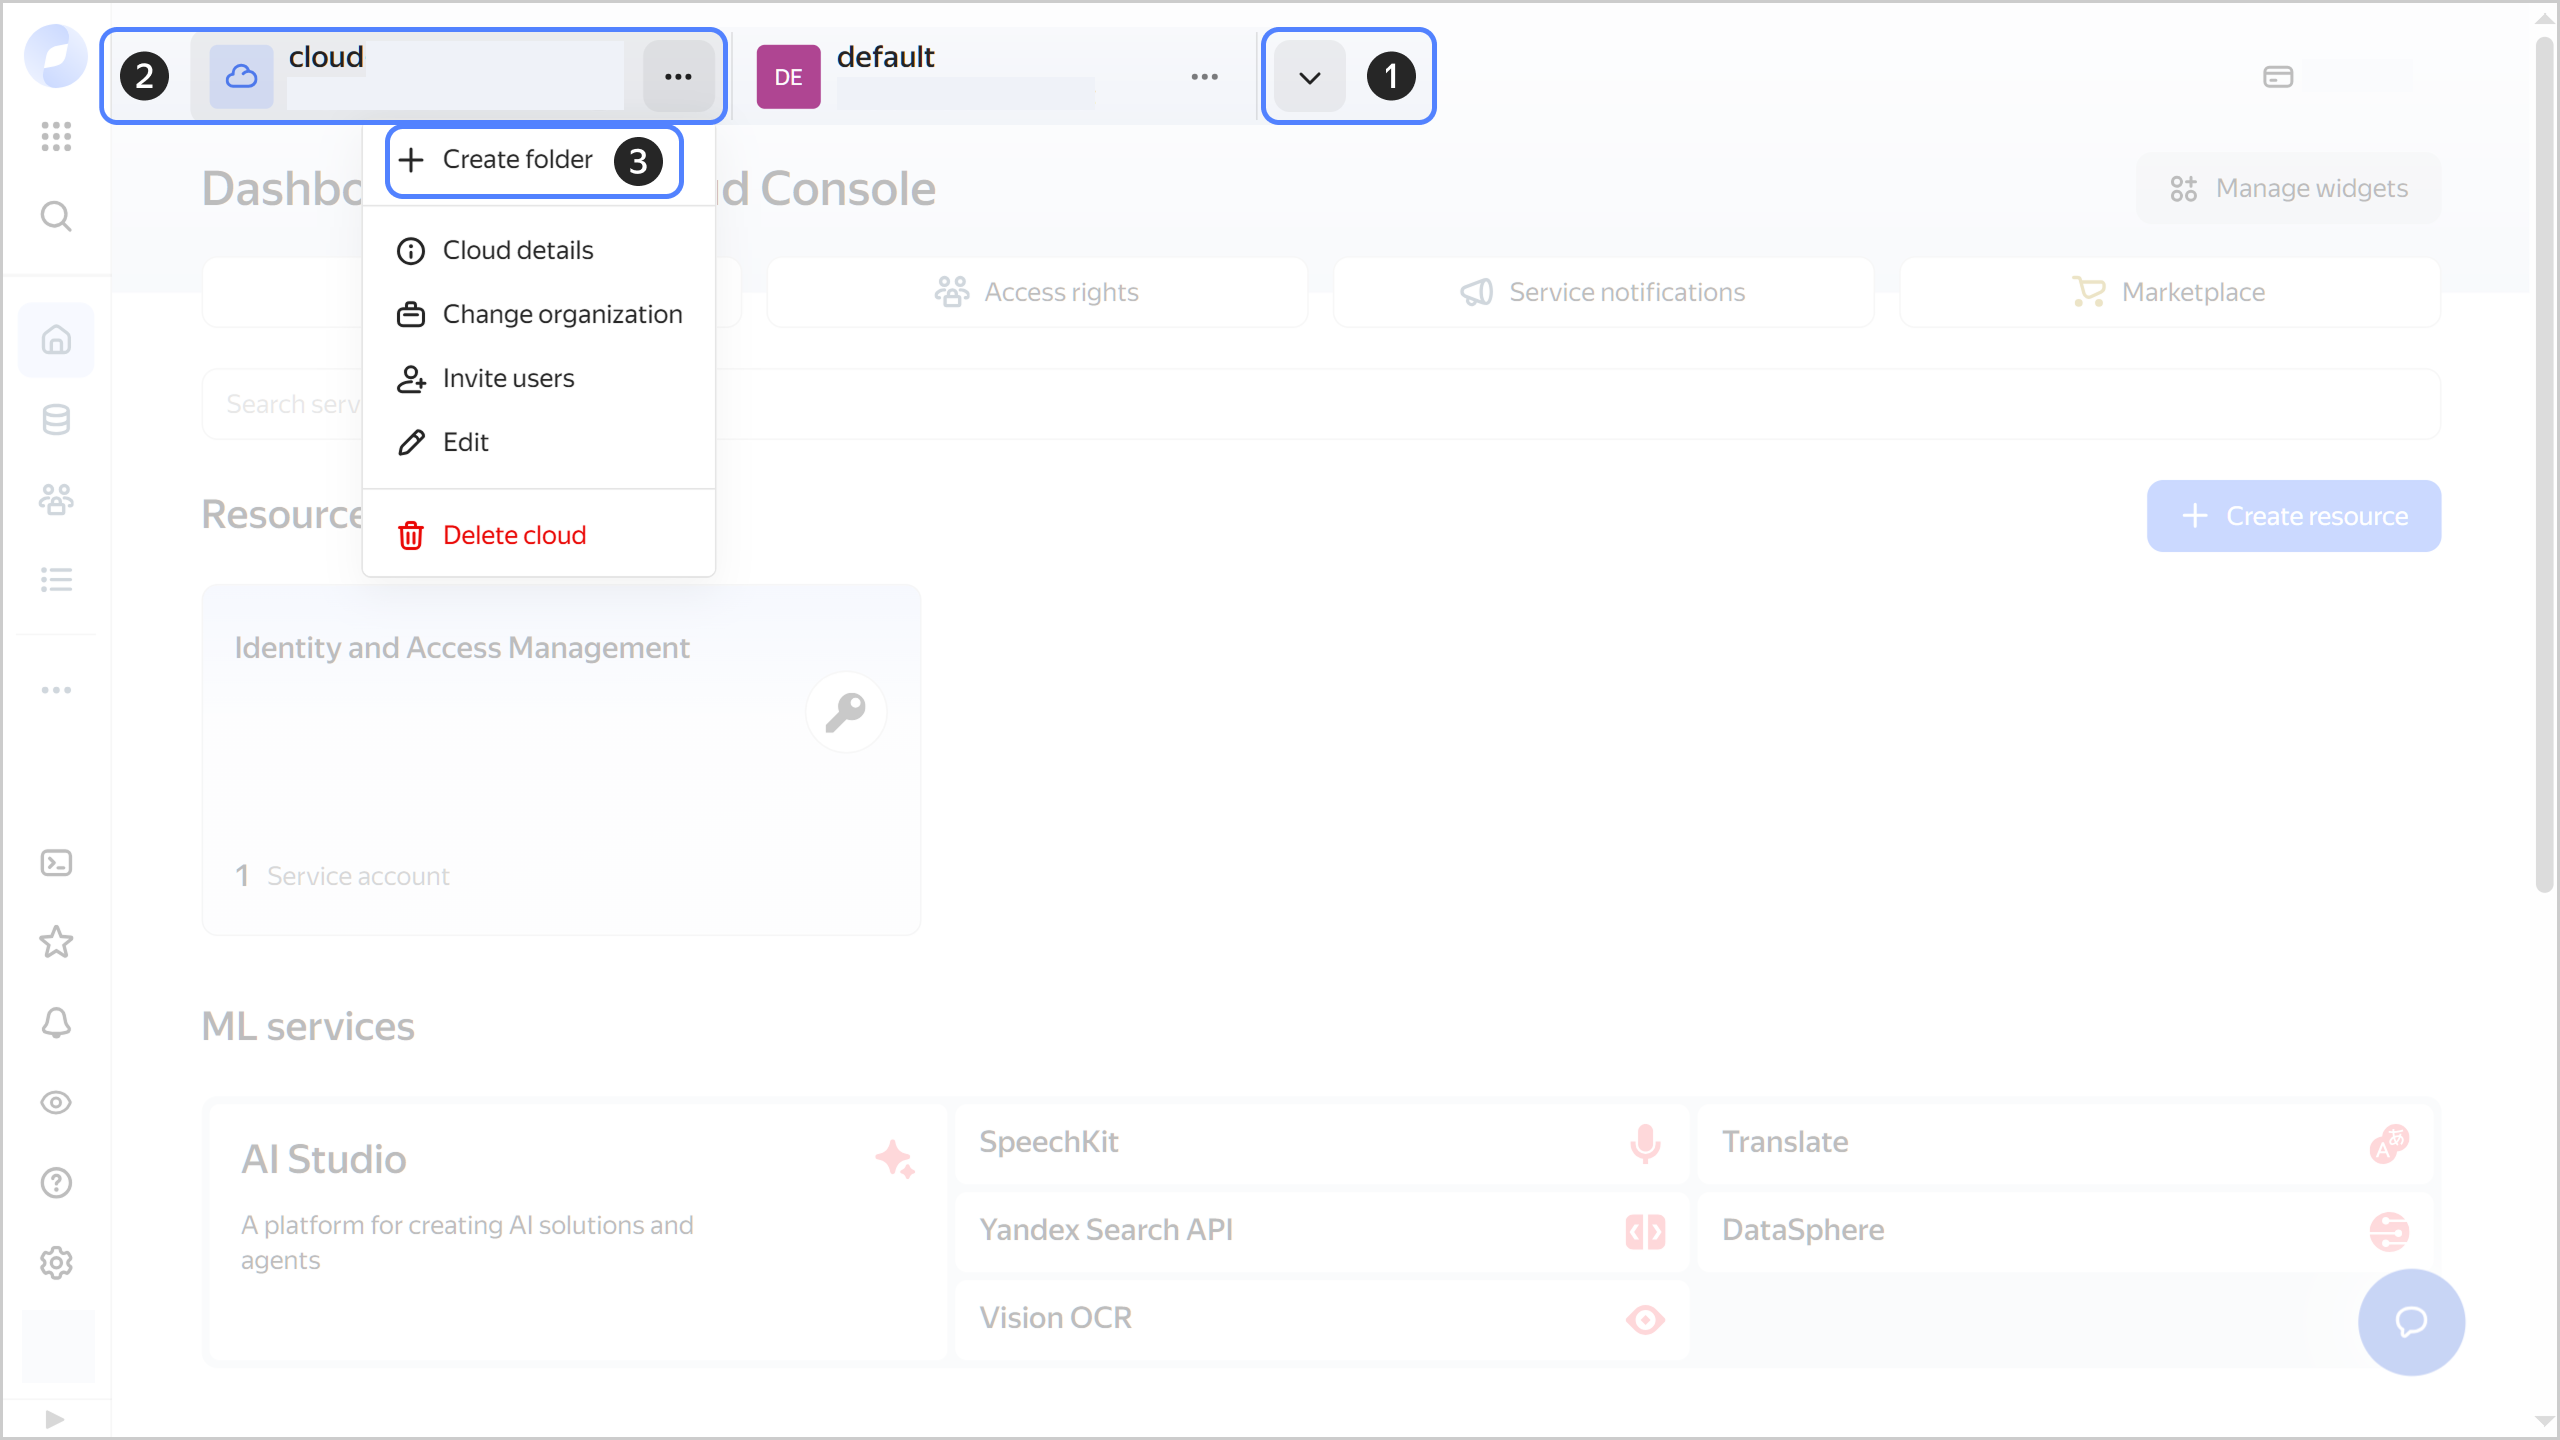
In the management console, in the top panel, click or and select the cloud.
-
To the right of the cloud name, click .
-
Select Create folder.
-
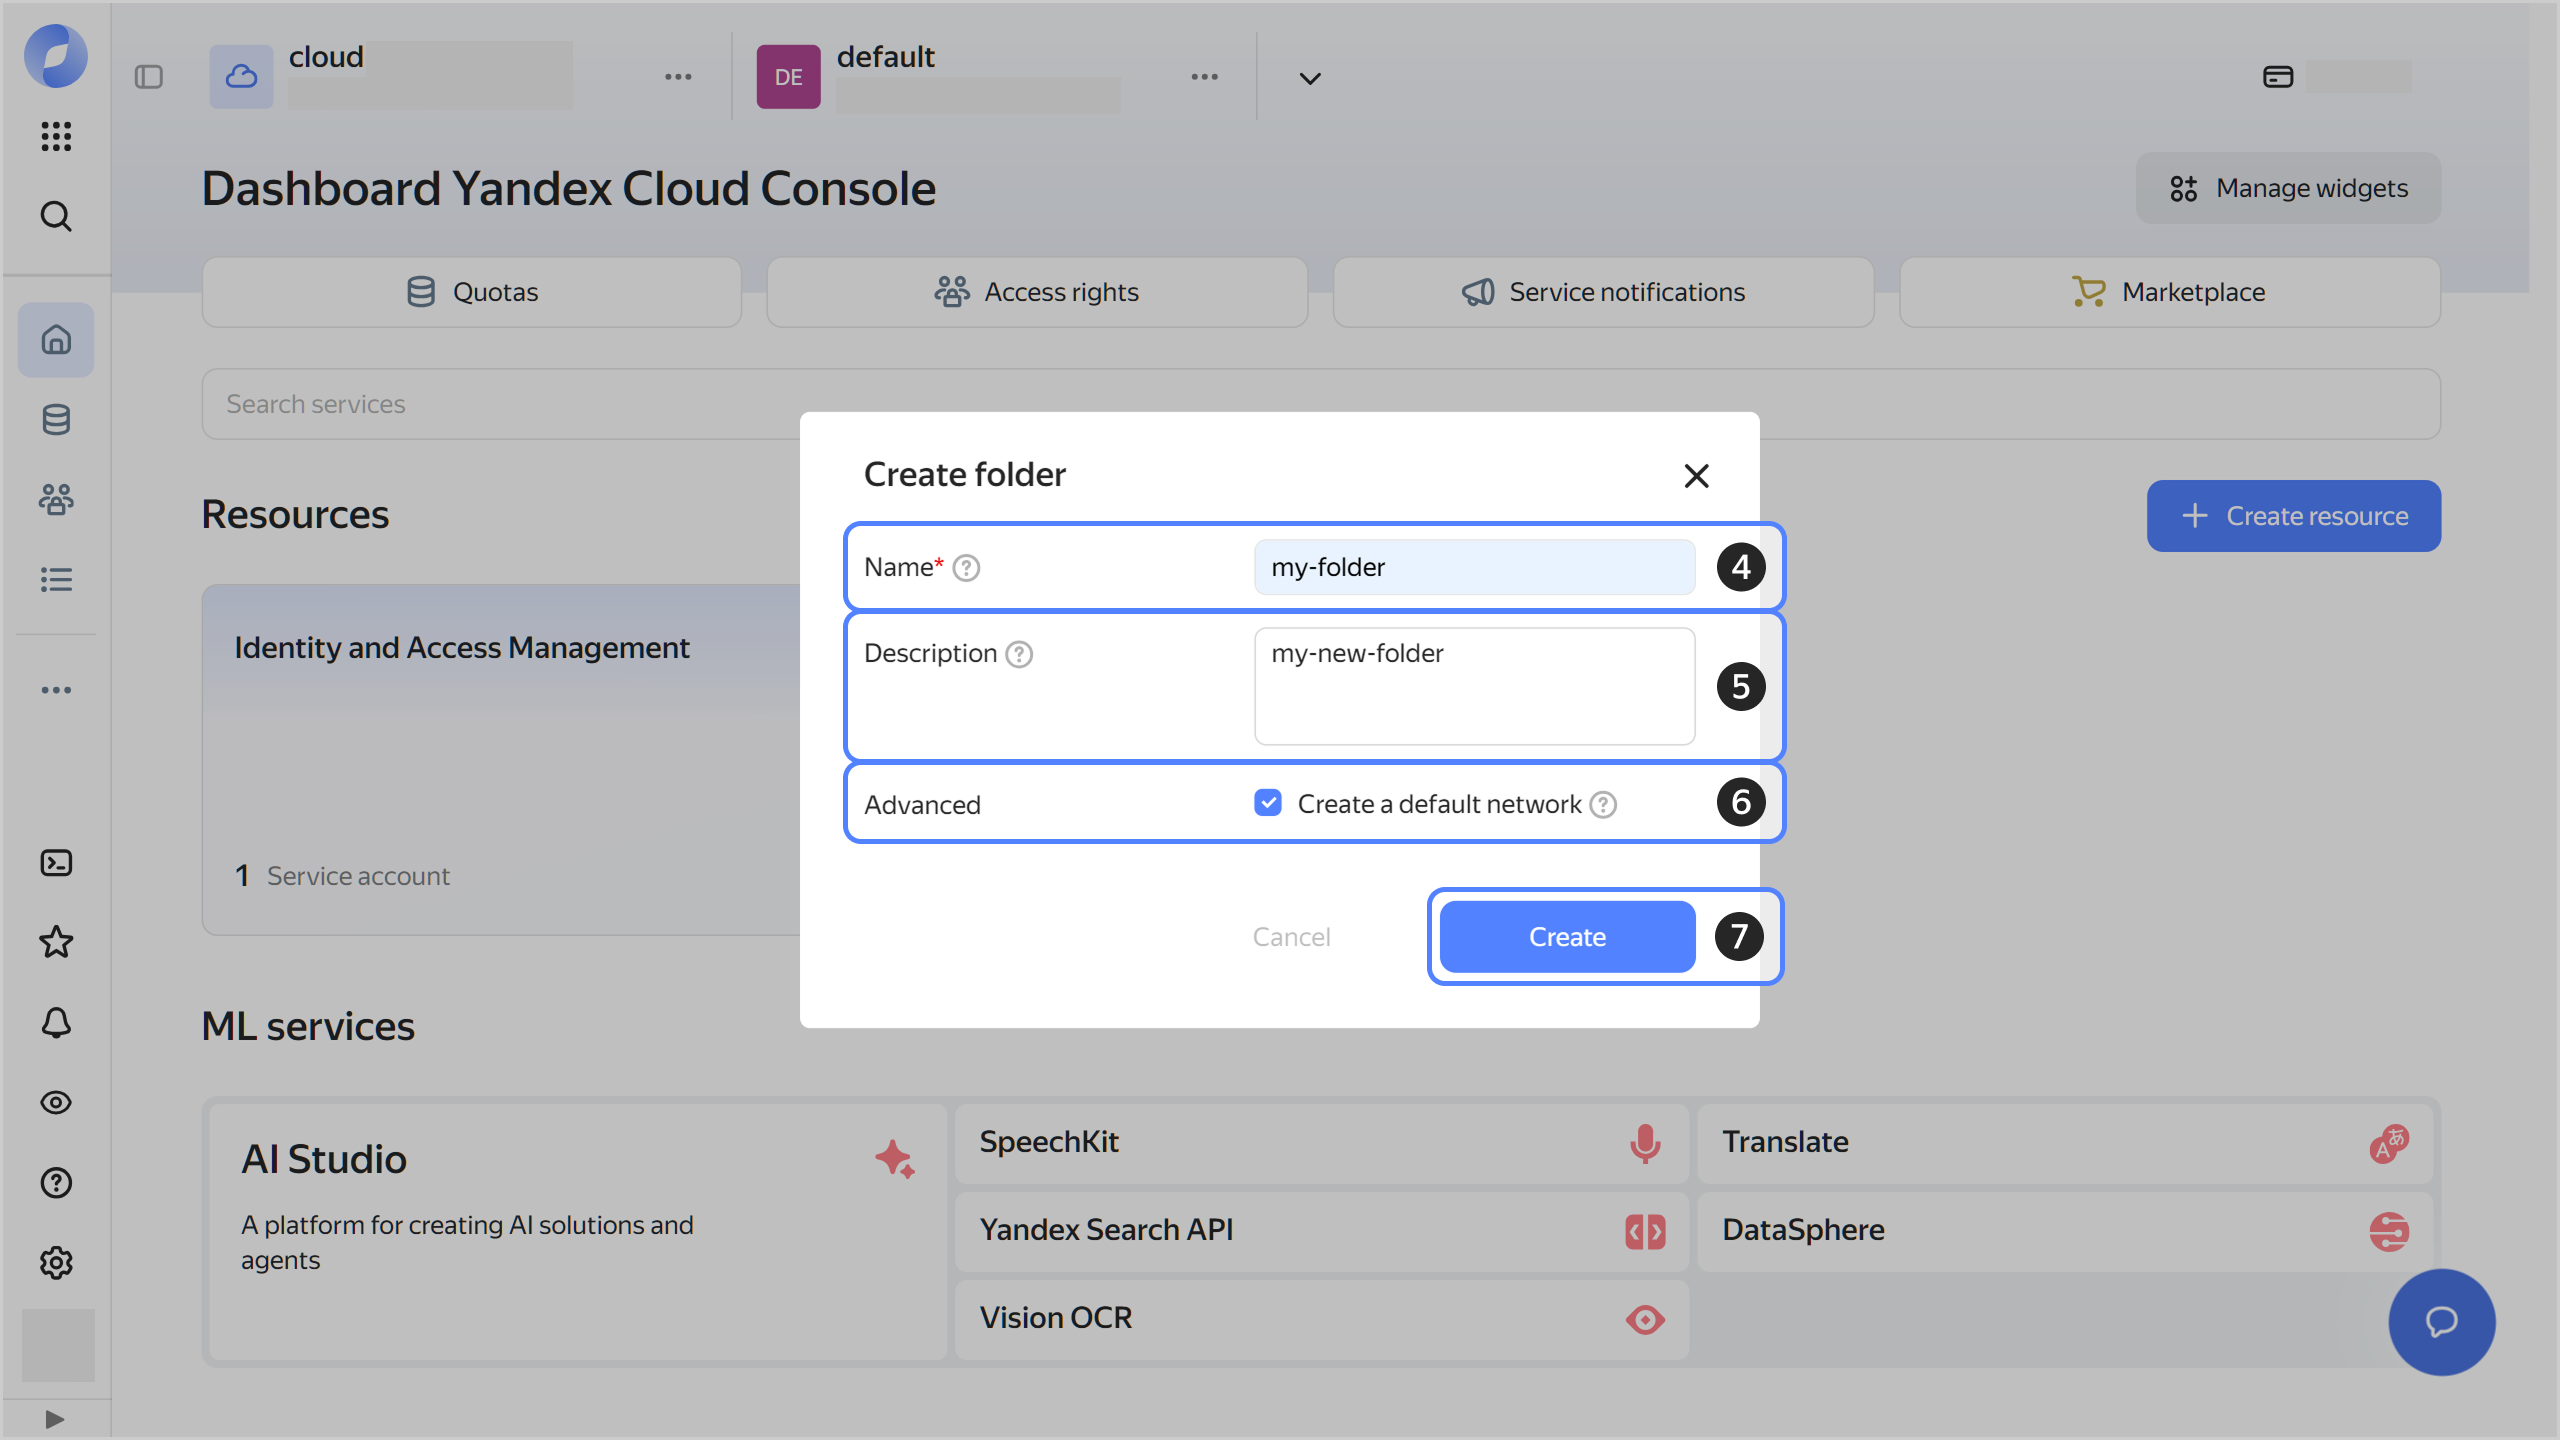
Give your folder a name. The naming requirements are as follows:
- Length: between 3 and 63 characters.
- It can only contain lowercase Latin letters, numbers, and hyphens.
- It must start with a letter and cannot end with a hyphen.
-
Optionally, specify the description for your folder.
-
Select Create a default network. This will create a network with subnets in each availability zone. Within this network, you will also have a default security group, within which all network traffic will be allowed.
-
Click Create.
-
-
Assign the vpc.user role and the managed-redis.editor role (or higher) to your Yandex Cloud account. These roles allow you to create a cluster.
Note
If you cannot manage roles, contact your cloud or organization administrator.
-
Specify the following settings:
-
Boot disk image:
Ubuntu 24.04from Marketplace. -
Public IP address:
Auto. -
Security groups: Leave this field empty.
The VM will be assigned the default security group with the
default-sgprefix. This security group enables SSH connections to the VM and allows any outgoing traffic.
Configure the other settings as needed.
-
-
Create a security group in the same network as the VM. This security group will be assigned to the new Valkey™ cluster.
In the security group, add a rule to allow non-sharded Valkey™ cluster connections. Configure the rule to allow incoming traffic from the default security group assigned to the VM.
Create a cluster
Create a non-sharded Valkey™ cluster without public access. You can only connect to such a cluster from a VM in the cluster network.
To create a cluster:
-
In the management console, select the folder where you want to create your Valkey™ cluster.
-
Navigate to Yandex Managed Service for Valkey™.
-
Click Create cluster.
-
Specify the following cluster settings:
-
Basic parameters:
- Cluster name: Cluster name. It must be unique within the folder.
- Cluster sharding: Keep this option disabled.
- Enable TLS support.
- Enable Use FQDN instead of IP addresses.
-
Network settings:
- Network: Specify the network with the previously created VM.
- Security groups: Specify the previously created security group for the cluster.
-
Hosts → Public access: Make sure to disable this option, i.e., set its value to
No, for all cluster hosts. -
DBMS settings → Password: User password.
The password must be from 8 to 128 characters long and match the
[a-zA-Z0-9@=+?*.,!&#$^<>_-]*regular expression.
-
-
Click Create cluster.
-
Wait until the cluster is ready: its status on the Yandex Managed Service for Valkey™ dashboard will change to Running and its state, to Alive. This may take a while.
To learn more about creating a cluster, see this guide.
Connect to the cluster
-
Connect over SSH to the virtual machine you created earlier.
-
Install
redis-cli:sudo apt update && sudo apt install --yes redis-tools -
Connect directly to the master host:
Connecting without SSLConnecting with SSLredis-cli -h c-<cluster_ID>.rw.mdb.yandexcloud.net \ -p 6379 \ -a <Valkey™_password>-
Get the SSL certificate:
mkdir -p ~/.redis && \
wget "https://storage.yandexcloud.net/cloud-certs/CA.pem" \
     --output-document ~/.redis/YandexInternalRootCA.crt && \
chmod 0655 ~/.redis/YandexInternalRootCA.crt
The certificate will be saved to the
~/.redis/YandexInternalRootCA.crtfile. -
Run this command:
redis-cli -h c-<cluster_ID>.rw.mdb.yandexcloud.net \
  -p 6380 \
  -a <Valkey™_password> \
  --tls \
  --cacert ~/.redis/YandexInternalRootCA.crt
You can get the cluster ID with the list of clusters in the folder.
To see code examples with the host FQDN filled in, open the cluster page in the management console and click Connect.
-
-
Once connected, send the
PINGcommand. Valkey™ should respond withPONG.
What's next
- Read about the service concepts.
- Learn more about creating a cluster and connecting to a cluster.
- Check out the questions and answers.