Integration with Container Registry

Yandex Container Registry offers storage and distribution of Docker images. By integrating it, you enable Managed Service for Kubernetes to run pods with applications from Docker images stored in the Container Registry. To use Container Registry, set up a Docker credential helper. It enables access to private registries using a service account.
To integrate Managed Service for Kubernetes with Container Registry:
- Create service accounts.
- Create security groups.
- Create the required Kubernetes resources.
- Create the required Container Registry resources.
- Connect to the Managed Service for Kubernetes cluster.
- Run the test app.
- Delete the resources you created.
Getting started
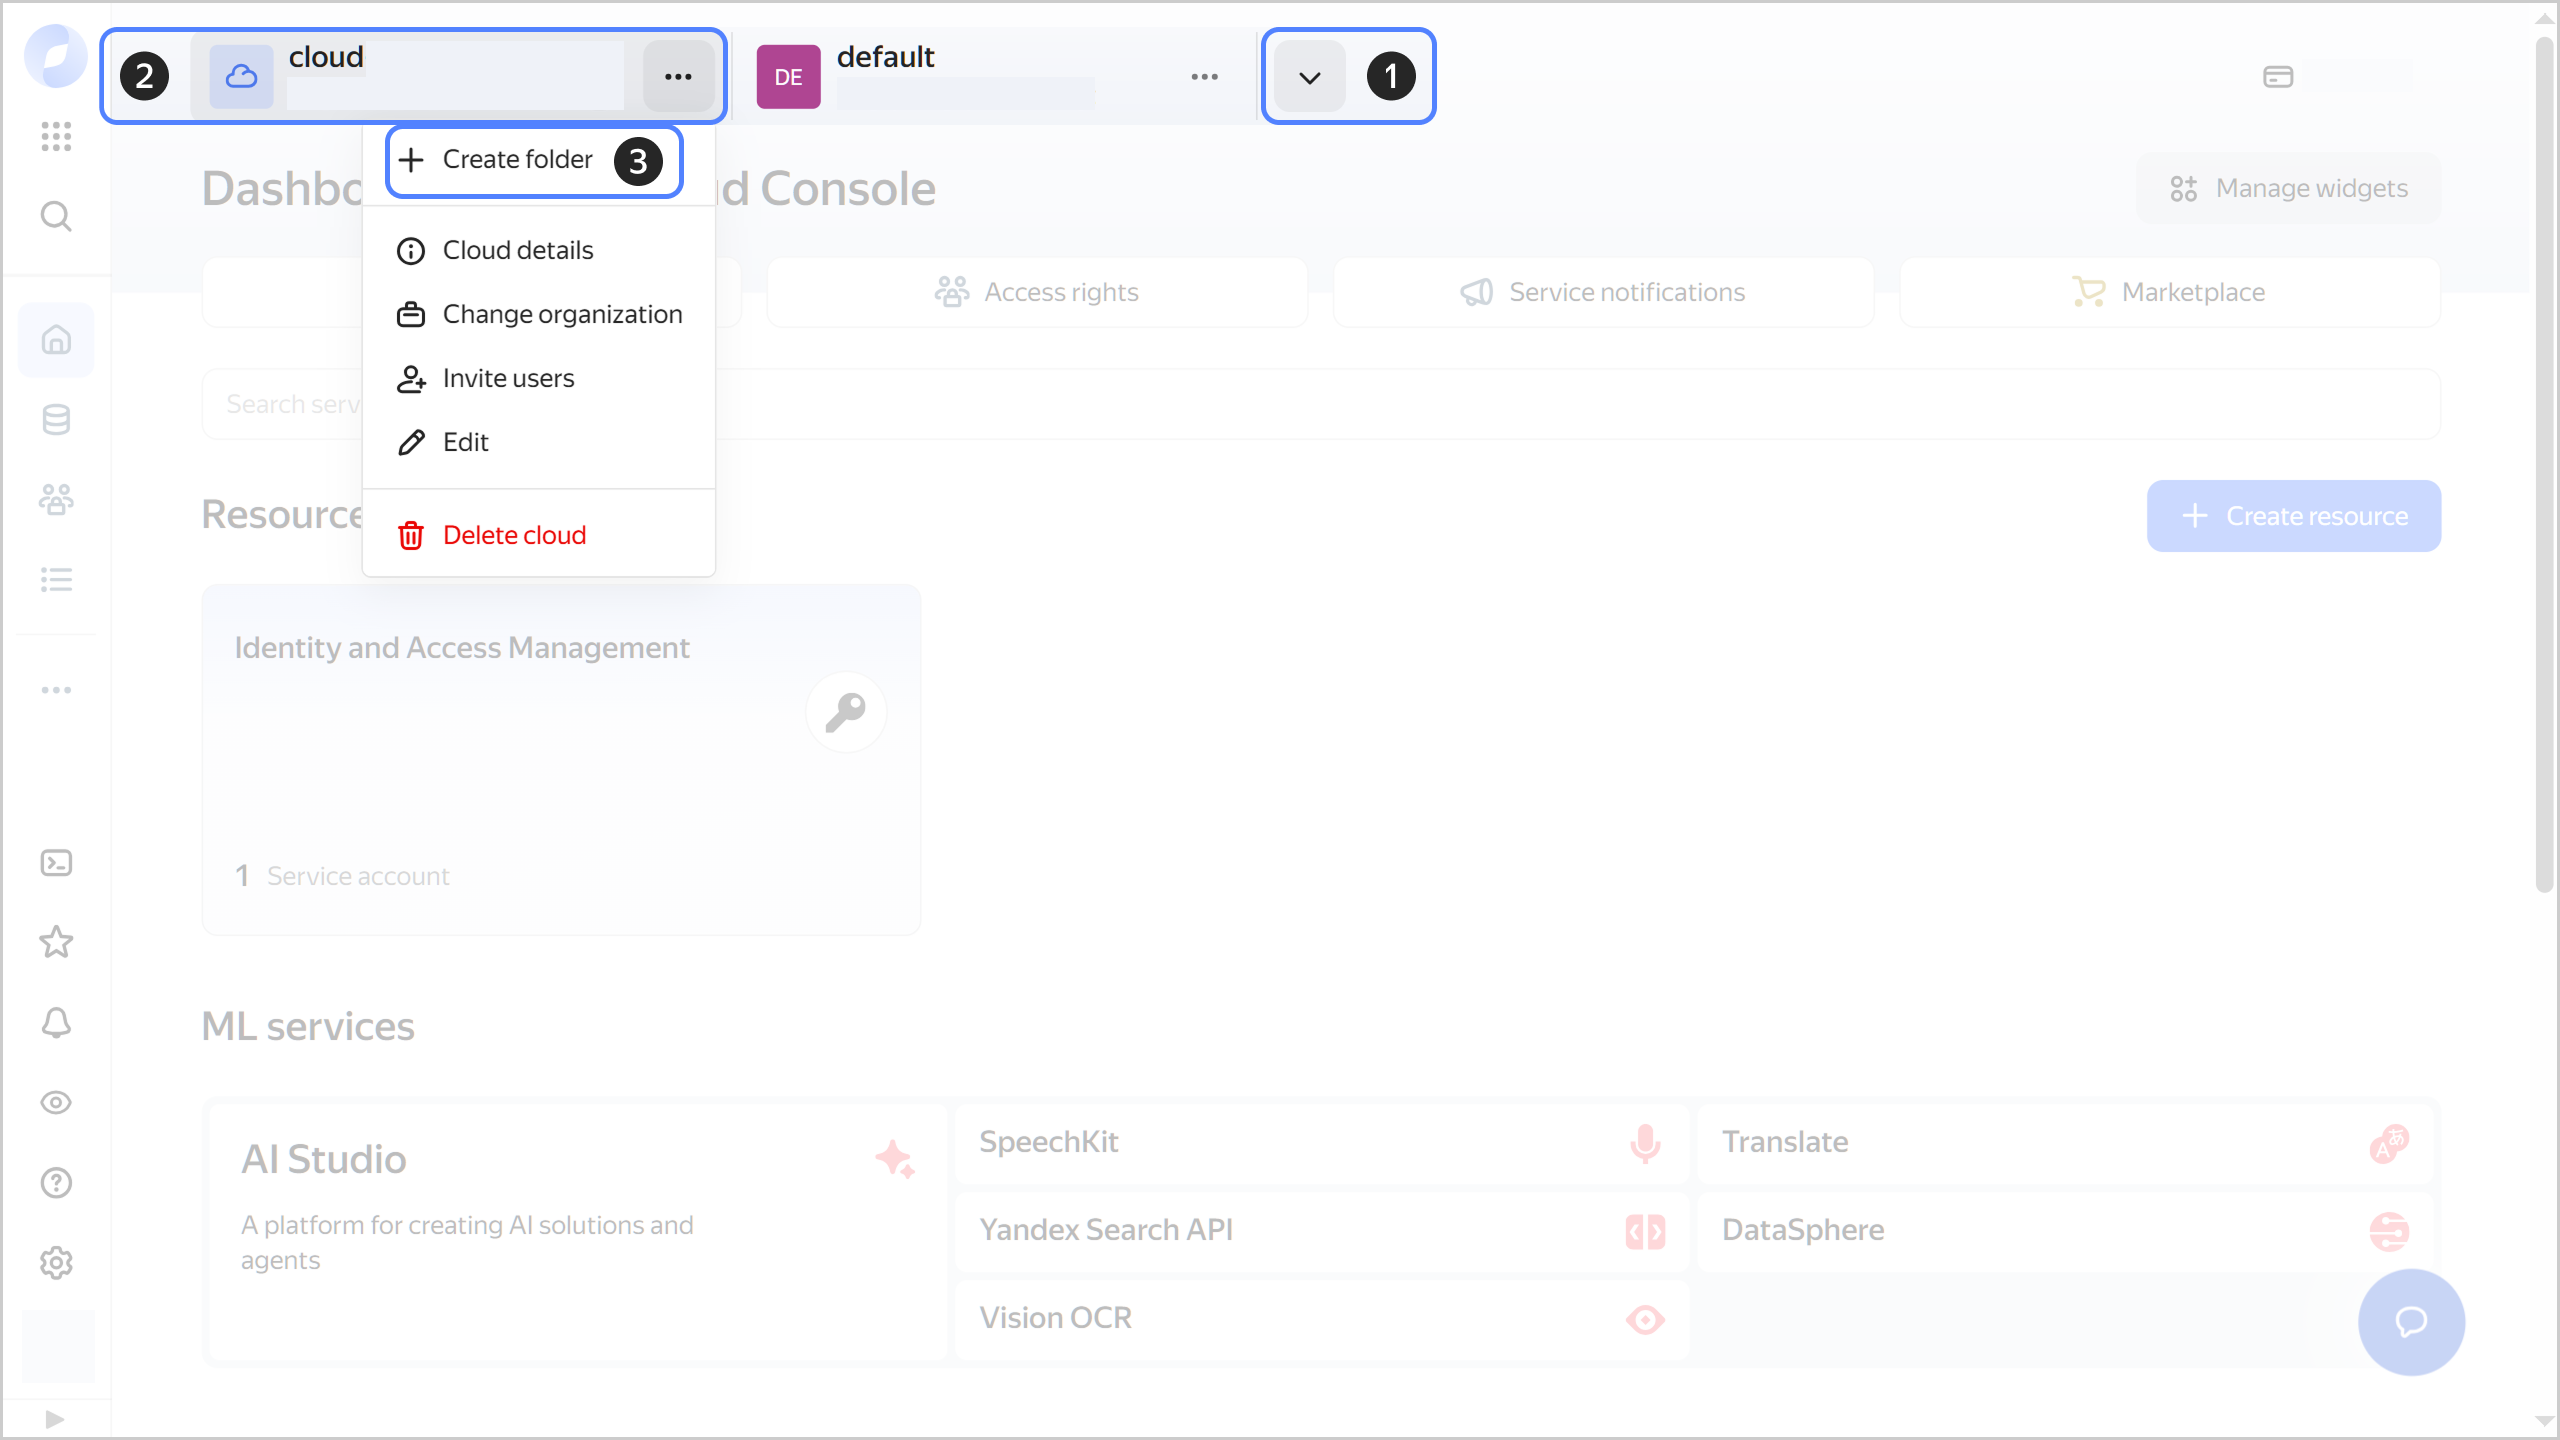
Go to the Yandex Cloud management console and select the folder where you want to perform the operations. If that folder does not exist, create it:
-
In the management console, in the top panel, click or and select the cloud.
-
To the right of the cloud name, click .
-
Select Create folder.
-
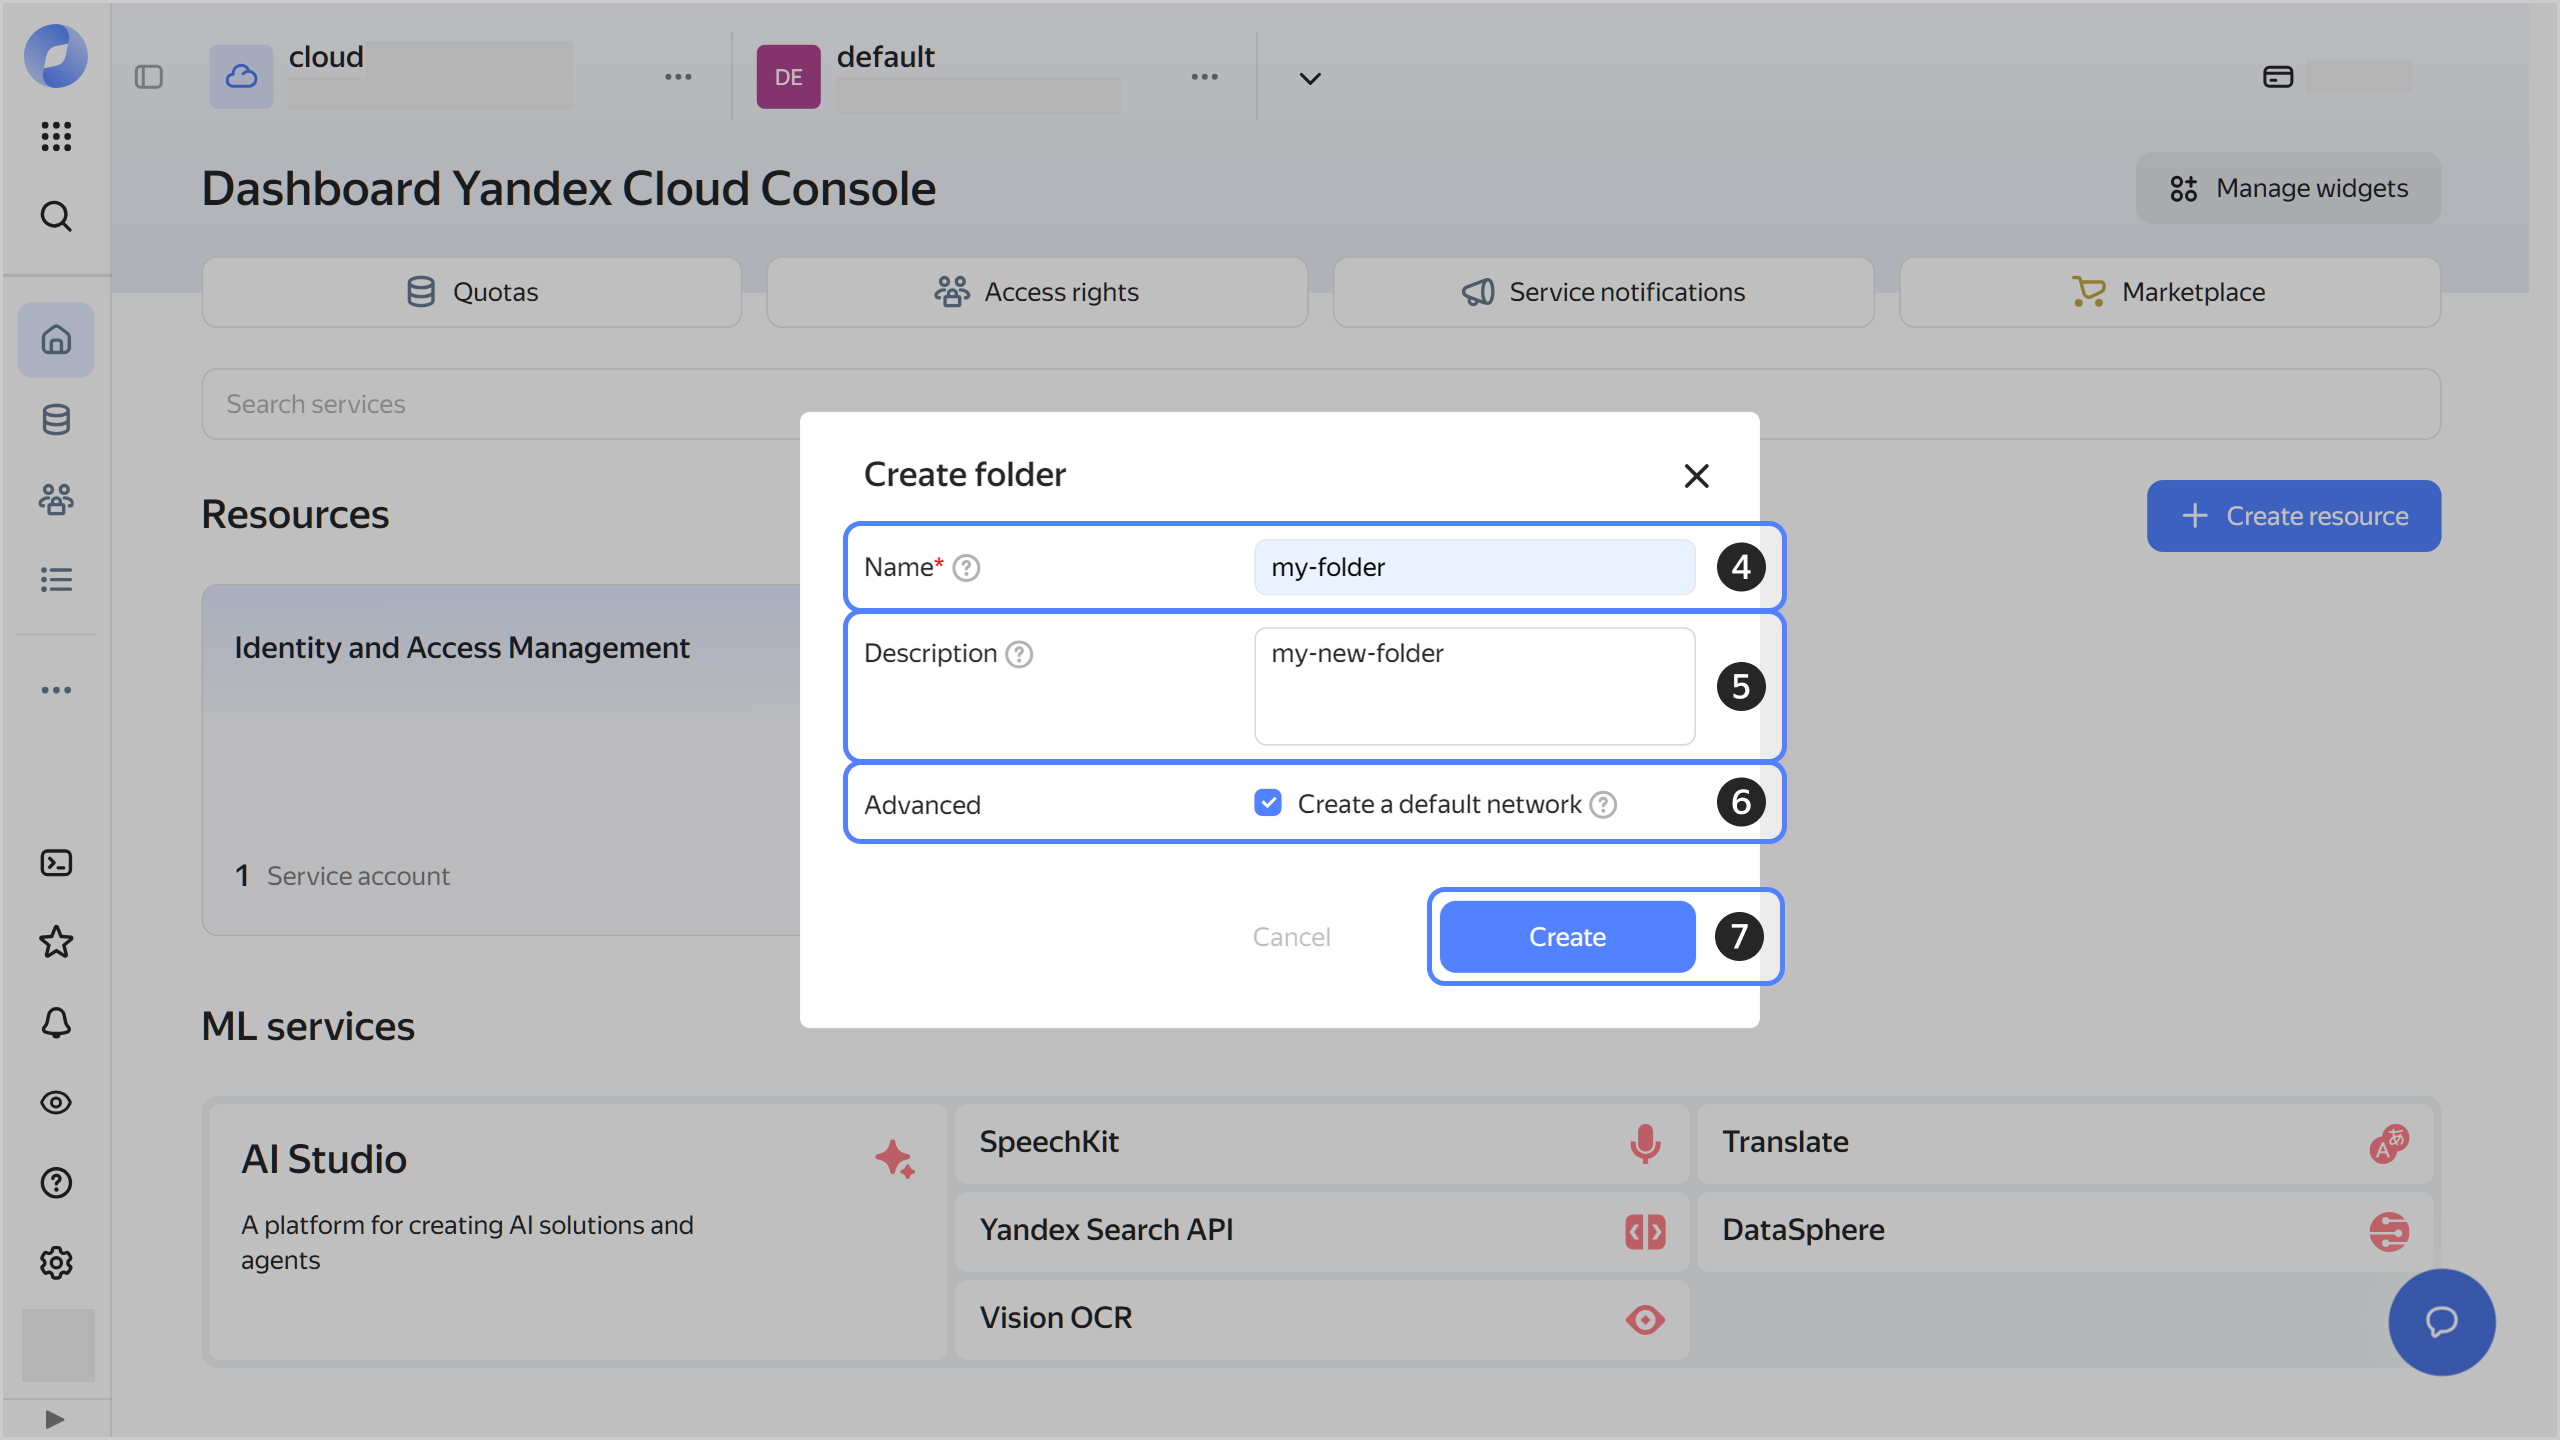
Give your folder a name. The naming requirements are as follows:
- Length: between 3 and 63 characters.
- It can only contain lowercase Latin letters, numbers, and hyphens.
- It must start with a letter and cannot end with a hyphen.
-
Optionally, specify the description for your folder.
-
Select Create a default network. This will create a network with subnets in each availability zone. Within this network, you will also have a default security group, within which all network traffic will be allowed.
-
Click Create.
If you do not have the Yandex Cloud CLI yet, install and initialize it.
-
View the description of the create folder command:
yc resource-manager folder create --help -
Create a new folder:
-
with a name and without a description:
yc resource-manager folder create \ --name new-folder- Length: between 3 and 63 characters.
- It can only contain lowercase Latin letters, numbers, and hyphens.
- It must start with a letter and cannot end with a hyphen.
-
with a name and description:
yc resource-manager folder create \
   --name new-folder \
   --description "my first folder with description"
-
Required paid resources
The support cost for this solution includes:
- Fee for a Managed Service for Kubernetes cluster: using the master and outbound traffic (see Managed Service for Kubernetes pricing).
- Fee for cluster nodes (VMs): using computing resources, OS, and storage (see Compute Cloud pricing).
- Fee for public IP addresses if assigned to cluster nodes (see Virtual Private Cloud pricing).
- Fee for Container Registry storage.
Create service accounts
Create these service accounts:
- Service account for resources with the
k8s.clusters.agentandvpc.publicAdminroles for the folder to host the new Managed Service for Kubernetes cluster. This service account will be used to create Managed Service for Kubernetes cluster resources. - Service account for Managed Service for Kubernetes nodes with the container-registry.images.puller role for the folder containing the Docker image registry. The Managed Service for Kubernetes nodes will use this account to pull the required Docker images from the registry.
Create a service account for resources
To create a service account that will be used to create the resources for the Managed Service for Kubernetes cluster:
-
Save the folder ID from your CLI profile configuration to a variable:
BashPowerShellFOLDER_ID=$(yc config get folder-id)$FOLDER_ID = yc config get folder-id -
Create a service account:
BashPowerShellyc iam service-account create --name k8s-res-sa-$FOLDER_IDyc iam service-account create --name k8s-res-sa-$FOLDER_ID -
Save the service account ID to a variable:
BashPowerShellRES_SA_ID=$(yc iam service-account get --name k8s-res-sa-${FOLDER_ID} --format json | jq .id -r)$RES_SA_ID = (yc iam service-account get --name k8s-res-sa-$FOLDER_ID --format json | ConvertFrom-Json).id -
Assign the k8s.clusters.agent role for the folder to the service account:
yc resource-manager folder add-access-binding \ --id $FOLDER_ID \ --role k8s.clusters.agent \ --subject serviceAccount:$RES_SA_ID -
Assign the vpc.publicAdmin role for the folder to the service account:
yc resource-manager folder add-access-binding \
  --id $FOLDER_ID \
  --role vpc.publicAdmin \
  --subject serviceAccount:$RES_SA_ID
Create a service account for cluster nodes
To create a service account the Managed Service for Kubernetes nodes will use to pull the required Docker images from the registry:
-
Save the folder ID from your CLI profile configuration to a variable:
BashPowerShellFOLDER_ID=$(yc config get folder-id)$FOLDER_ID = yc config get folder-id -
Create a service account:
BashPowerShellyc iam service-account create --name k8s-node-sa-$FOLDER_IDyc iam service-account create --name k8s-node-sa-$FOLDER_ID -
Save the service account ID to a variable:
BashPowerShellNODE_SA_ID=$(yc iam service-account get --name k8s-node-sa-${FOLDER_ID} --format json | jq .id -r)$NODE_SA_ID = (yc iam service-account get --name k8s-node-sa-$FOLDER_ID --format json | ConvertFrom-Json).id -
Assign the container-registry.images.puller role for the folder to the service account:
yc resource-manager folder add-access-binding \
  --id $FOLDER_ID \
  --role container-registry.images.puller \
  --subject serviceAccount:$NODE_SA_ID
Create security groups
Create security groups for the Managed Service for Kubernetes cluster and its node groups.
Warning
The configuration of security groups determines performance and availability of the cluster and the services and applications running in it.
Set up Kubernetes resources
Create a Managed Service for Kubernetes cluster
Tip
This example uses the basic cluster parameters. Once the cluster is created, you cannot change some of its settings, e.g., Container Network Interface you selected, secret encryption using Yandex Key Management Service, and a number of others. We recommend checking out our detailed guide on creating a Managed Service for Kubernetes cluster.
Create a Managed Service for Kubernetes cluster and specify the previously created service accounts in the --service-account-id and --node-service-account-id parameters, and security groups in the --security-group-ids parameter.
Run this command:
yc managed-kubernetes cluster create \
  --name k8s-demo \
  --network-name yc-auto-network \
  --zone ru-central1-a \
  --subnet-name yc-auto-subnet-0 \
  --public-ip \
  --service-account-id $RES_SA_ID \
  --node-service-account-id $NODE_SA_ID \
  --security-group-ids <security_group_IDs>
Run this command:
yc managed-kubernetes cluster create `
  --name k8s-demo `
  --network-name yc-auto-network `
  --zone ru-central1-a `
  --subnet-name yc-auto-subnet-0 `
  --public-ip `
  --service-account-id $RES_SA_ID `
  --node-service-account-id $NODE_SA_ID `
  --security-group-ids <security_group_IDs>
Create a Managed Service for Kubernetes node group
Warning
To access the Container Registry, a public IP address must be assigned to cluster nodes. Alternatively, a NAT gateway or NAT instance must be configured in the node subnet.
For more information, see Internet access for cluster worker nodes.
-
Make sure the Managed Service for Kubernetes cluster has been created successfully.
- In the management console, select the folder where you created the Managed Service for Kubernetes cluster.
- Navigate to Managed Service for Kubernetes.
- Make sure the Managed Service for Kubernetes cluster has been created successfully:
- The Status column should state
Running. - The State column should state
Healthy.
- The Status column should state
-
Create a Managed Service for Kubernetes node group and specify the previously created security groups in the
--network-interface security-group-idsparameter:BashPowerShellyc managed-kubernetes node-group create \ --name k8s-demo-ng \ --cluster-name k8s-demo \ --platform standard-v3 \ --cores 2 \ --memory 4 \ --core-fraction 50 \ --disk-type network-ssd \ --fixed-size 2 \ --network-interface subnets=yc-auto-subnet-0,ipv4-address=nat,security-group-ids=[<security_group_IDs>] \ --asyncyc managed-kubernetes node-group create ` --name k8s-demo-ng ` --cluster-name k8s-demo ` --platform standard-v3 ` --cores 2 ` --memory 4 ` --core-fraction 50 ` --disk-type network-ssd ` --fixed-size 2 ` --network-interface subnets=yc-auto-subnet-0,ipv4-address=nat,security-group-ids=[<security_group_IDs>] ` --async
Set up Container Registry resources
Create a registry
Create a container registry:
yc container registry create --name yc-auto-cr
Configure a Docker credential helper
To simplify authentication in Container Registry, configure a Docker credential helper. It enables you to use private Yandex Cloud registries without running the docker login command.
To configure a credential helper, run this command:
yc container registry configure-docker
Set up a Docker image
Build a Docker image and push it to the registry.
-
Create a Dockerfile named
hello.dockerfileand paste the following lines into it:FROM ubuntu:latest CMD echo "Hi, I'm inside" -
Build the Docker image.
-
Get the ID of the previously created registry and save it to a variable:
BashPowerShellREGISTRY_ID=$(yc container registry get --name yc-auto-cr --format json | jq .id -r)$REGISTRY_ID = (yc container registry get --name yc-auto-cr --format json | ConvertFrom-Json).id -
Build the Docker image:
docker build . -f hello.dockerfile -t cr.yandex/$REGISTRY_ID/ubuntu:hello -
Push the Docker image to the registry:
docker push cr.yandex/${REGISTRY_ID}/ubuntu:hello
-
-
Make sure the image is now in the registry:
yc container image listResult:
+----------------------+---------------------+-----------------------------+-------+-----------------+
|          ID          |       CREATED       |            NAME             | TAGS  | COMPRESSED SIZE |
+----------------------+---------------------+-----------------------------+-------+-----------------+
| crpa2mf008mp******** | 2019-11-20 11:52:17 | crp71hkgiolp********/ubuntu | hello | 27.5 MB         |
+----------------------+---------------------+-----------------------------+-------+-----------------+
Connect to the Managed Service for Kubernetes cluster
Install kubect and configure it to work with the new cluster.
Run the test app
Run the pod with the app from the Docker image and make sure no additional authentication in Container Registry was required to push the Docker image.
-
Run the pod with the app from the Docker image:
kubectl run --attach hello-ubuntu --image cr.yandex/${REGISTRY_ID}/ubuntu:hello -
Check the running pod and view its full name:
kubectl get poResult:
NAME READY STATUS RESTARTS AGE hello-ubuntu-5847fb9***-***** 0/1 Completed 3 61s -
Check the logs of the container running on that pod:
kubectl logs hello-ubuntu-5847fb9***-*****Result:
Hi, I'm insideThe pod pulled the Docker image with no additional authentication required on the Container Registry side.
Delete the resources you created
Some resources are not free of charge. Delete the resources you no longer need to avoid paying for them:
-
Delete the Managed Service for Kubernetes cluster:
yc managed-kubernetes cluster delete --name k8s-demo -
Delete the service accounts:
Warning
Do not delete the service account until you delete the Managed Service for Kubernetes cluster.
-
Delete the service account for resources:
yc iam service-account delete --id $RES_SA_ID -
Delete the service account for Managed Service for Kubernetes nodes:
yc iam service-account delete --id $NODE_SA_ID
-
-
Delete the Container Registry resources.
-
Get the name of the Docker image pushed to the registry:
BashPowerShellIMAGE_ID=$(yc container image list --format json | jq .[0].id -r)$IMAGE_ID = (yc container image list --format json | ConvertFrom-Json).id -
Delete the Docker image:
yc container image delete --id $IMAGE_ID -
Delete the registry:
yc container registry delete --name yc-auto-cr
-