Adding a user to an organization
Add a user to your organization and assign a relevant role for access to Yandex Cloud resources. Users need roles, for example, to create managed database clusters or keep track of current VM status.
You can add users with a Yandex account, federated users, and local users. New users will become members of the organization, and you will be able to assign roles to them. An organization user without roles assigned has no access to resources in that organization's clouds. To learn how to grant a role to a user, see Assigning roles.
To add users to an organization, you must be an administrator (organization-manager.admin role) or owner (organization-manager.organizations.owner role) of that organization, or have an administrator's role for the type of user accounts you want to add.
Note
To enable a user to access the management console, assign them a role for the cloud or organization. For added security, you can assign one of the least priveleged roles, such as resource-manager.clouds.member. However, you may also assign other roles if you know which permissions you want to grant to the invited users.
To grant these permissions to all the organization users at once, assign the role to the All users in organization X system group. When using the CLI or API, no additional roles are required.
Yandex account users
If your employees have Yandex accounts, e.g., login@yandex.com, they can use them to access Yandex Cloud services enabled in your organization.
You can invite a user to an organization via the management console or the Cloud Center interface. An invitation to join your organization will be sent to the user's email address.
Users with any of the following roles can invite new users with Yandex accounts to an organization and delete such invitations: organization-manager.passportUserAdmin, organization-manager.admin, or organization-manager.organizations.owner.
Send an invitation
-
Go to Yandex Identity Hub.
-
In the left-hand panel, select Users.
-
In the top-right corner of the screen, click Add user and select Invite users with a Yandex account from the drop-down list.
-
Enter the email addresses of the users you want to invite to the organization (e.g.,
login@yandex.com).You can send invitations to any email address. Invited users will be able to select the appropriate Yandex account once they accept the invitation.
-
Click Send invitation.
-
Log in to the management console with the cloud administrator account.
-
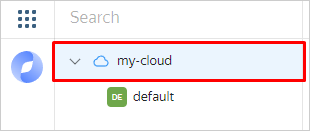
Select the appropriate cloud from the list on the left. Here is an example:
-
In the top-right corner, click and select Invite users.
-
Enter the email addresses of the users you want to invite to the organization (e.g.,
login@yandex.com).You can send invitations to any email address. Invited users will be able to select the appropriate Yandex account once they accept the invitation.
-
Click Send invitation.
The user will be able to log in to the organization upon accepting the invitation via the emailed link and selecting an account for log-in. To access the services enabled for the organization, the users you invited simply need to log in to their Yandex account.
You can delete or resend your invitation only via Identity Hub.
Delete the invitation
-
Go to Yandex Identity Hub.
-
In the left-hand panel, select Users.
-
Select the Invitations tab in the center of the screen.
-
In the row with the invitation, click and select Delete invitation.
-
In the window that opens, confirm the deletion.
Resend your invitation
-
Go to Yandex Identity Hub.
-
In the left-hand panel, select Users.
-
Select the Invitations tab in the center of the screen.
-
In the row with the invitation, click and select Resend.
-
In the window that opens, confirm resending the invitation.
Note
To better safeguard your resources from unauthorized access:
- Enable two-factor authentication for your Yandex account.
- Request users you add to your organization to enable two-factor authentication as well.
- In the organization security settings, enable the two-factor authentication requirement. This way, only users with two-factor authentication enabled will be able to access resources.
Federated users
If you did not enable the Automatically create users option when setting up the federation, you will have to add federated users to your organization manually.
To do this, you need to know the users’ name IDs returned by the identity provider (IdP) server together with the successful authentication response. This will usually be the user's email address. To find out what the server returns as the name ID, contact the administrator who configured authentication for your federation.
If the Automatically create users option is enabled, a federation will only add users logging in to a cloud for the first time. If a federated user has been deleted, they can only be added again manually.
You do not need to invite federated users to the organization; they are added automatically on their first login.
Users with any of the following roles can add or remove federated users from the organization: organization-manager.federations.userAdmin, organization-manager.federations.admin, organization-manager.admin, or organization-manager.organizations.owner.
Add federated users
-
Go to Yandex Identity Hub.
-
In the left-hand panel, select Users.
-
In the top-right corner, click Add user and select Add federated users from the drop-down list.
-
In the Federation field, select the identity federation you want to add users from.
-
In the Users field, list the name IDs of users, separating them with spaces or line breaks.
-
Click Add. This will give the users access to the organization.
If you do not have the Yandex Cloud CLI installed yet, install and initialize it.
By default, the CLI uses the folder specified when creating the profile. To change the default folder, use the yc config set folder-id <folder_ID> command. You can also set a different folder for any specific command using the --folder-name or --folder-id parameter.
-
View the description of the add user command:
yc organization-manager federation saml add-user-accounts --help -
Add users by listing their name IDs separated by a comma:
yc organization-manager federation saml add-user-accounts \
   --name <federation_name> \
   --name-ids <list_of_user_name_IDs>
With Terraform, you can quickly create a cloud infrastructure in Yandex Cloud and manage it using configuration files. These files store the infrastructure description written in HashiCorp Configuration Language (HCL). If you change the configuration files, Terraform automatically detects which part of your configuration is already deployed, and what should be added or removed.
Terraform is distributed under the Business Source License. The Yandex Cloud provider for Terraform is distributed under the MPL-2.0 license.
For more information about the provider resources, see the relevant documentation on the Terraform website or its mirror.
If you do not have Terraform yet, install it and configure the Yandex Cloud provider.
-
In the configuration file, describe the resources you want to create:
resource "yandex_organizationmanager_saml_federation_user_account" "some_account" {
  federation_id = "<federation_ID>"
  name_id       = "<user_name_ID>"
}
Where:
federation_id: ID of the federation to add the user to.name_id: Name ID of the user.
For more information about
yandex_organizationmanager_saml_federation_user_accountproperties, see this Terraform article. -
Create the resources:
-
In the terminal, go to the directory where you edited the configuration file.
-
Make sure the configuration file is correct using this command:
terraform validateIf the configuration is correct, you will get this message:
Success! The configuration is valid. -
Run this command:
terraform planYou will see a detailed list of resources. No changes will be made at this step. If the configuration contains any errors, Terraform will show them.
-
Apply the changes:
terraform apply -
Type
yesand press Enter to confirm the changes.
Terraform will create all the required resources. You can check the new resources in the management console or using this CLI command:
yc organization-manager federations saml \ --organization-id <organization_ID> list-user-accounts \ --id <federation_ID> -
Use the addUserAccounts REST API method for the Federation resource or the FederationService/AddUserAccounts gRPC API call and provide the following in the request:
- Federation ID in the
federationIdparameter. - List of user name IDs in the
nameIdsparameter.
Local users
You must add local users to your organization manually. Each user is assigned a unique username within the selected user pool.
Users with any of the following roles can add or remove local users from the organization: organization-manager.userpools.userAdmin, organization-manager.userpools.admin, organization-manager.admin, or organization-manager.organizations.owner.
Add local users
-
Log in to Yandex Identity Hub using an administrator or organization owner account.
-
In the left-hand panel, select User pools and select the user pool.
-
Go to the Users tab and click Add user.
-
In the Username field, enter the user login and select the domain from the list. The login must be unique for the current user pool.
If the domain is not on the list, create a new one.
-
In the Full name field, specify the user first and last name in any format.
-
Optionally, add the user’s email.
-
In the Password field, you can view the automatically generated user password and generate a new one.
The user must change this password on their first login to Yandex Cloud.
-
Enable Account is active if you need to activate the user immediately upon adding them. Activated users gain access to the organization resources.
-
Optionally, expand the Personal information section and specify the user's first name, last name, and phone number.
-
Click Add user.
If you do not have the Yandex Cloud CLI installed yet, install and initialize it.
By default, the CLI uses the folder specified when creating the profile. To change the default folder, use the yc config set folder-id <folder_ID> command. You can also set a different folder for any specific command using the --folder-name or --folder-id parameter.
-
See the description of the CLI command for adding a user to a pool:
yc organization-manager idp user create --help -
To get a list of pools in an organization, provide its ID in this command:
yc organization-manager idp userpool list \
  --organization-id <organization_ID>
Result:
+----------------------+--------------+-------------+----------------------+---------------------+ | ID | NAME | DESCRIPTION | ORGANIZATION ID | CREATED AT | +----------------------+--------------+-------------+----------------------+---------------------+ | ek0o6g0irskn******** | sample-pool1 | | bpf2c65rqcl8******** | 2025-05-17 10:01:04 | | ek03mf01jr4z******** | sample-pool2 | | bpf2c65rqcl8******** | 2025-06-28 16:30:23 | +----------------------+--------------+-------------+----------------------+---------------------+ -
To create a new user, run this command:
yc organization-manager idp user create \
  --userpool-id <pool_ID> \
  --username <user_login_and_domain> \
  --full-name <user_first_and_last_name> \
  --given-name <username> \
  --family-name <user_last_name> \
  --email <user_email> \
  --phone-number <user_phone_number> \
  --password <user_password>
Where:
--userpool-id: ID of the user pool you need to add the user to.--username: User login and domain inlogin@domainformat. The login must be unique for the current user pool.--full-name: User first and last name in any format.--given-name: Username. This is an optional parameter.--family-name: User last name. This is an optional parameter.--email: User email. This is an optional parameter.--phone-number: User phone number. This is an optional parameter.--password: Password. If no password is set, it will be generated automatically. The user must change this password on their first login to Yandex Cloud.