Creating an API Connector connection
With API Connector in Yandex DataLens, you can send HTTP requests to any API on the internet. You can use such a connection only in Editor as it is not supported in QL charts or dataset-based charts.
To create an API Connector connection, follow these steps:
-
Open the new connection creation page.
-
Under Files and services, select API Connector.
-
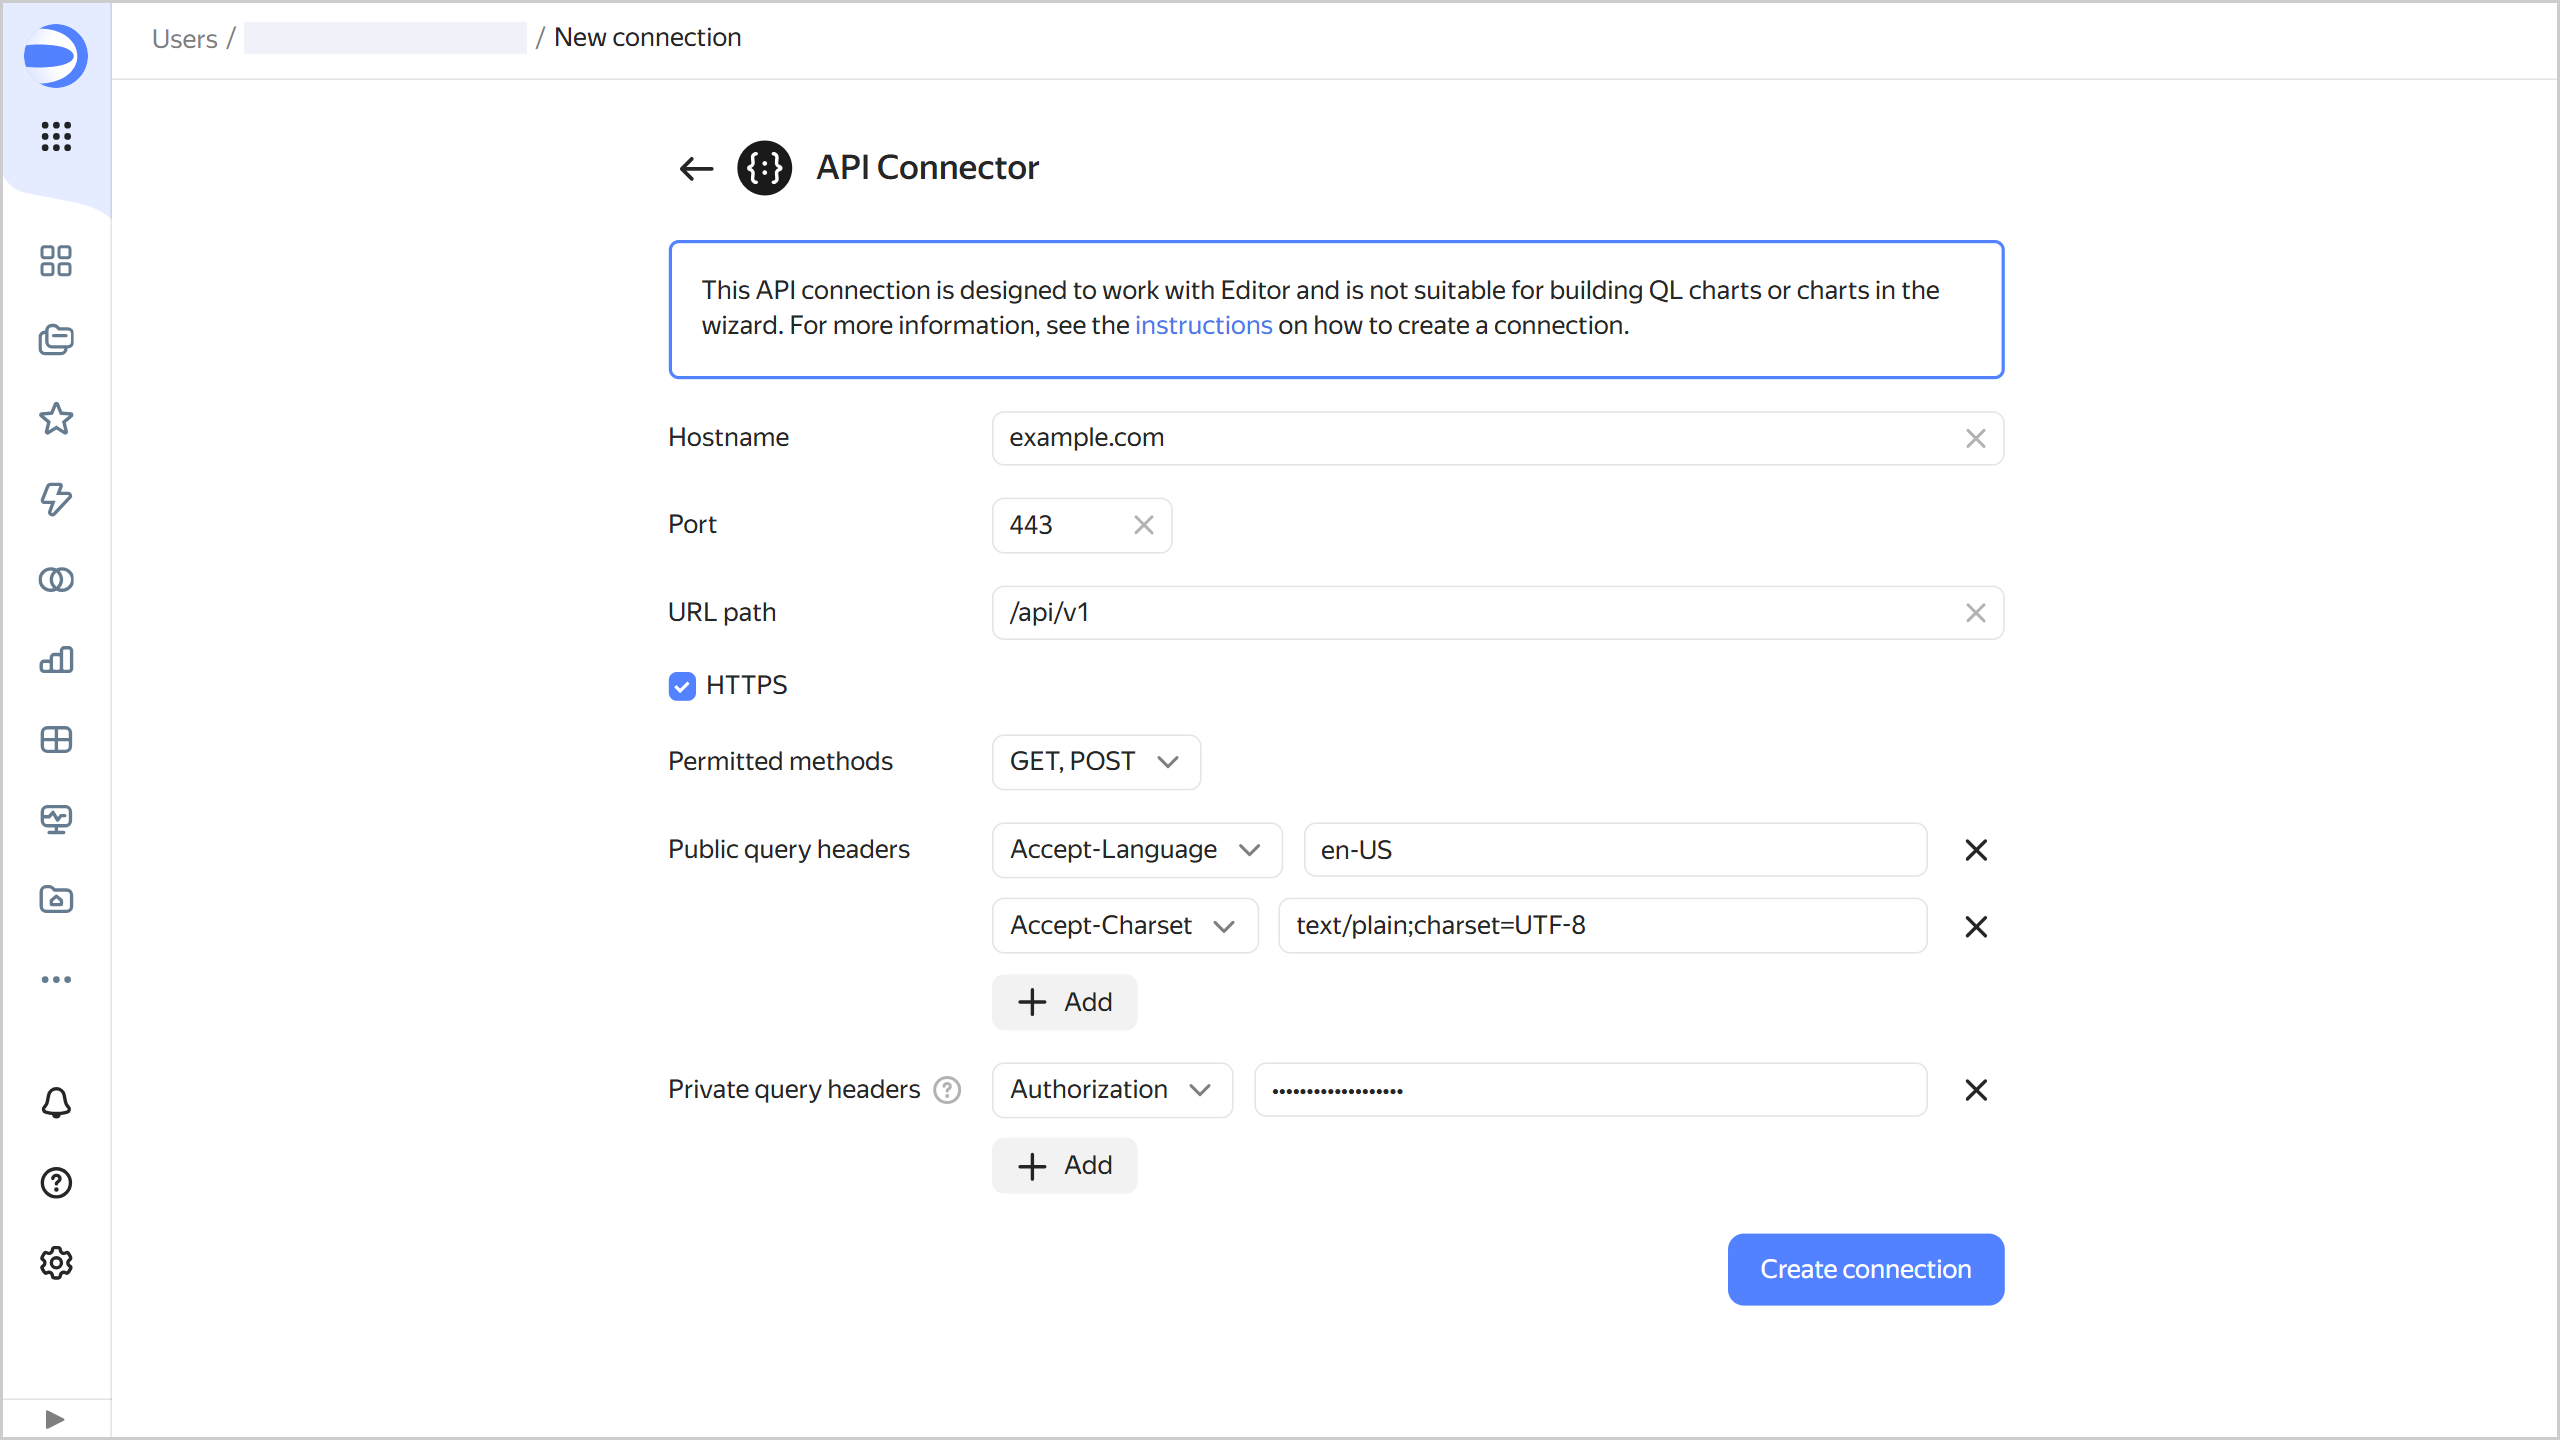
Configure the connection as follows:
-
Host name: Specify the path to the host you will send a request to.
-
Port: Specify the API connection port.
-
URL path: Optionally, specify the path to the API (part of the URL without a protocol, host name, or port).
-
HTTPS: Enable the secure connection option if your server supports HTTPS.
-
Allowed methods: Select a method to send an HTTP request to the API. The available methods are
GET,POST,PUT, andPATCH. -
Add public and private headers to your HTTP request as key-value pairs. To do this, click Add, select the header, and enter its value.
-
Public request headers do not contain sensitive data. You can view values of public headers at any time in the connection settings. The following public headers are available:
Accept-Charset: List of supported response encodings.Accept-Encoding: List of supported response contents encoding methods.Accept-Language: List of supported natural languages.Prefer: HTTP status code to send in the response.X-Org-ID: Yandex 360 for Business organization ID.X-Cloud-Org-ID: Cloud organization ID.
-
Private request headers are used for sensitive data. Their values are encrypted; you cannot view them in the connection settings, but you can replace them with new values. The following private headers are available:
Authorization: API authentication data.X-Api-Key: API key for authentication in ClickHouse®.X-ClickHouse-User: Username for authentication in ClickHouse®.X-ClickHouse-Key: User password for authentication in ClickHouse®.
-
-
-
Click Create connection.
-
Select a workbook to save your connection to or create a new one. If using legacy folder navigation, select a folder to save the connection to. Click Create.
-
Enter a name for the connection and click Create.
ClickHouse® is a registered trademark of ClickHouse, Inc.