Getting started with Container Registry

Use this guide to create your first registry and try your hand at managing Docker images.
Getting started
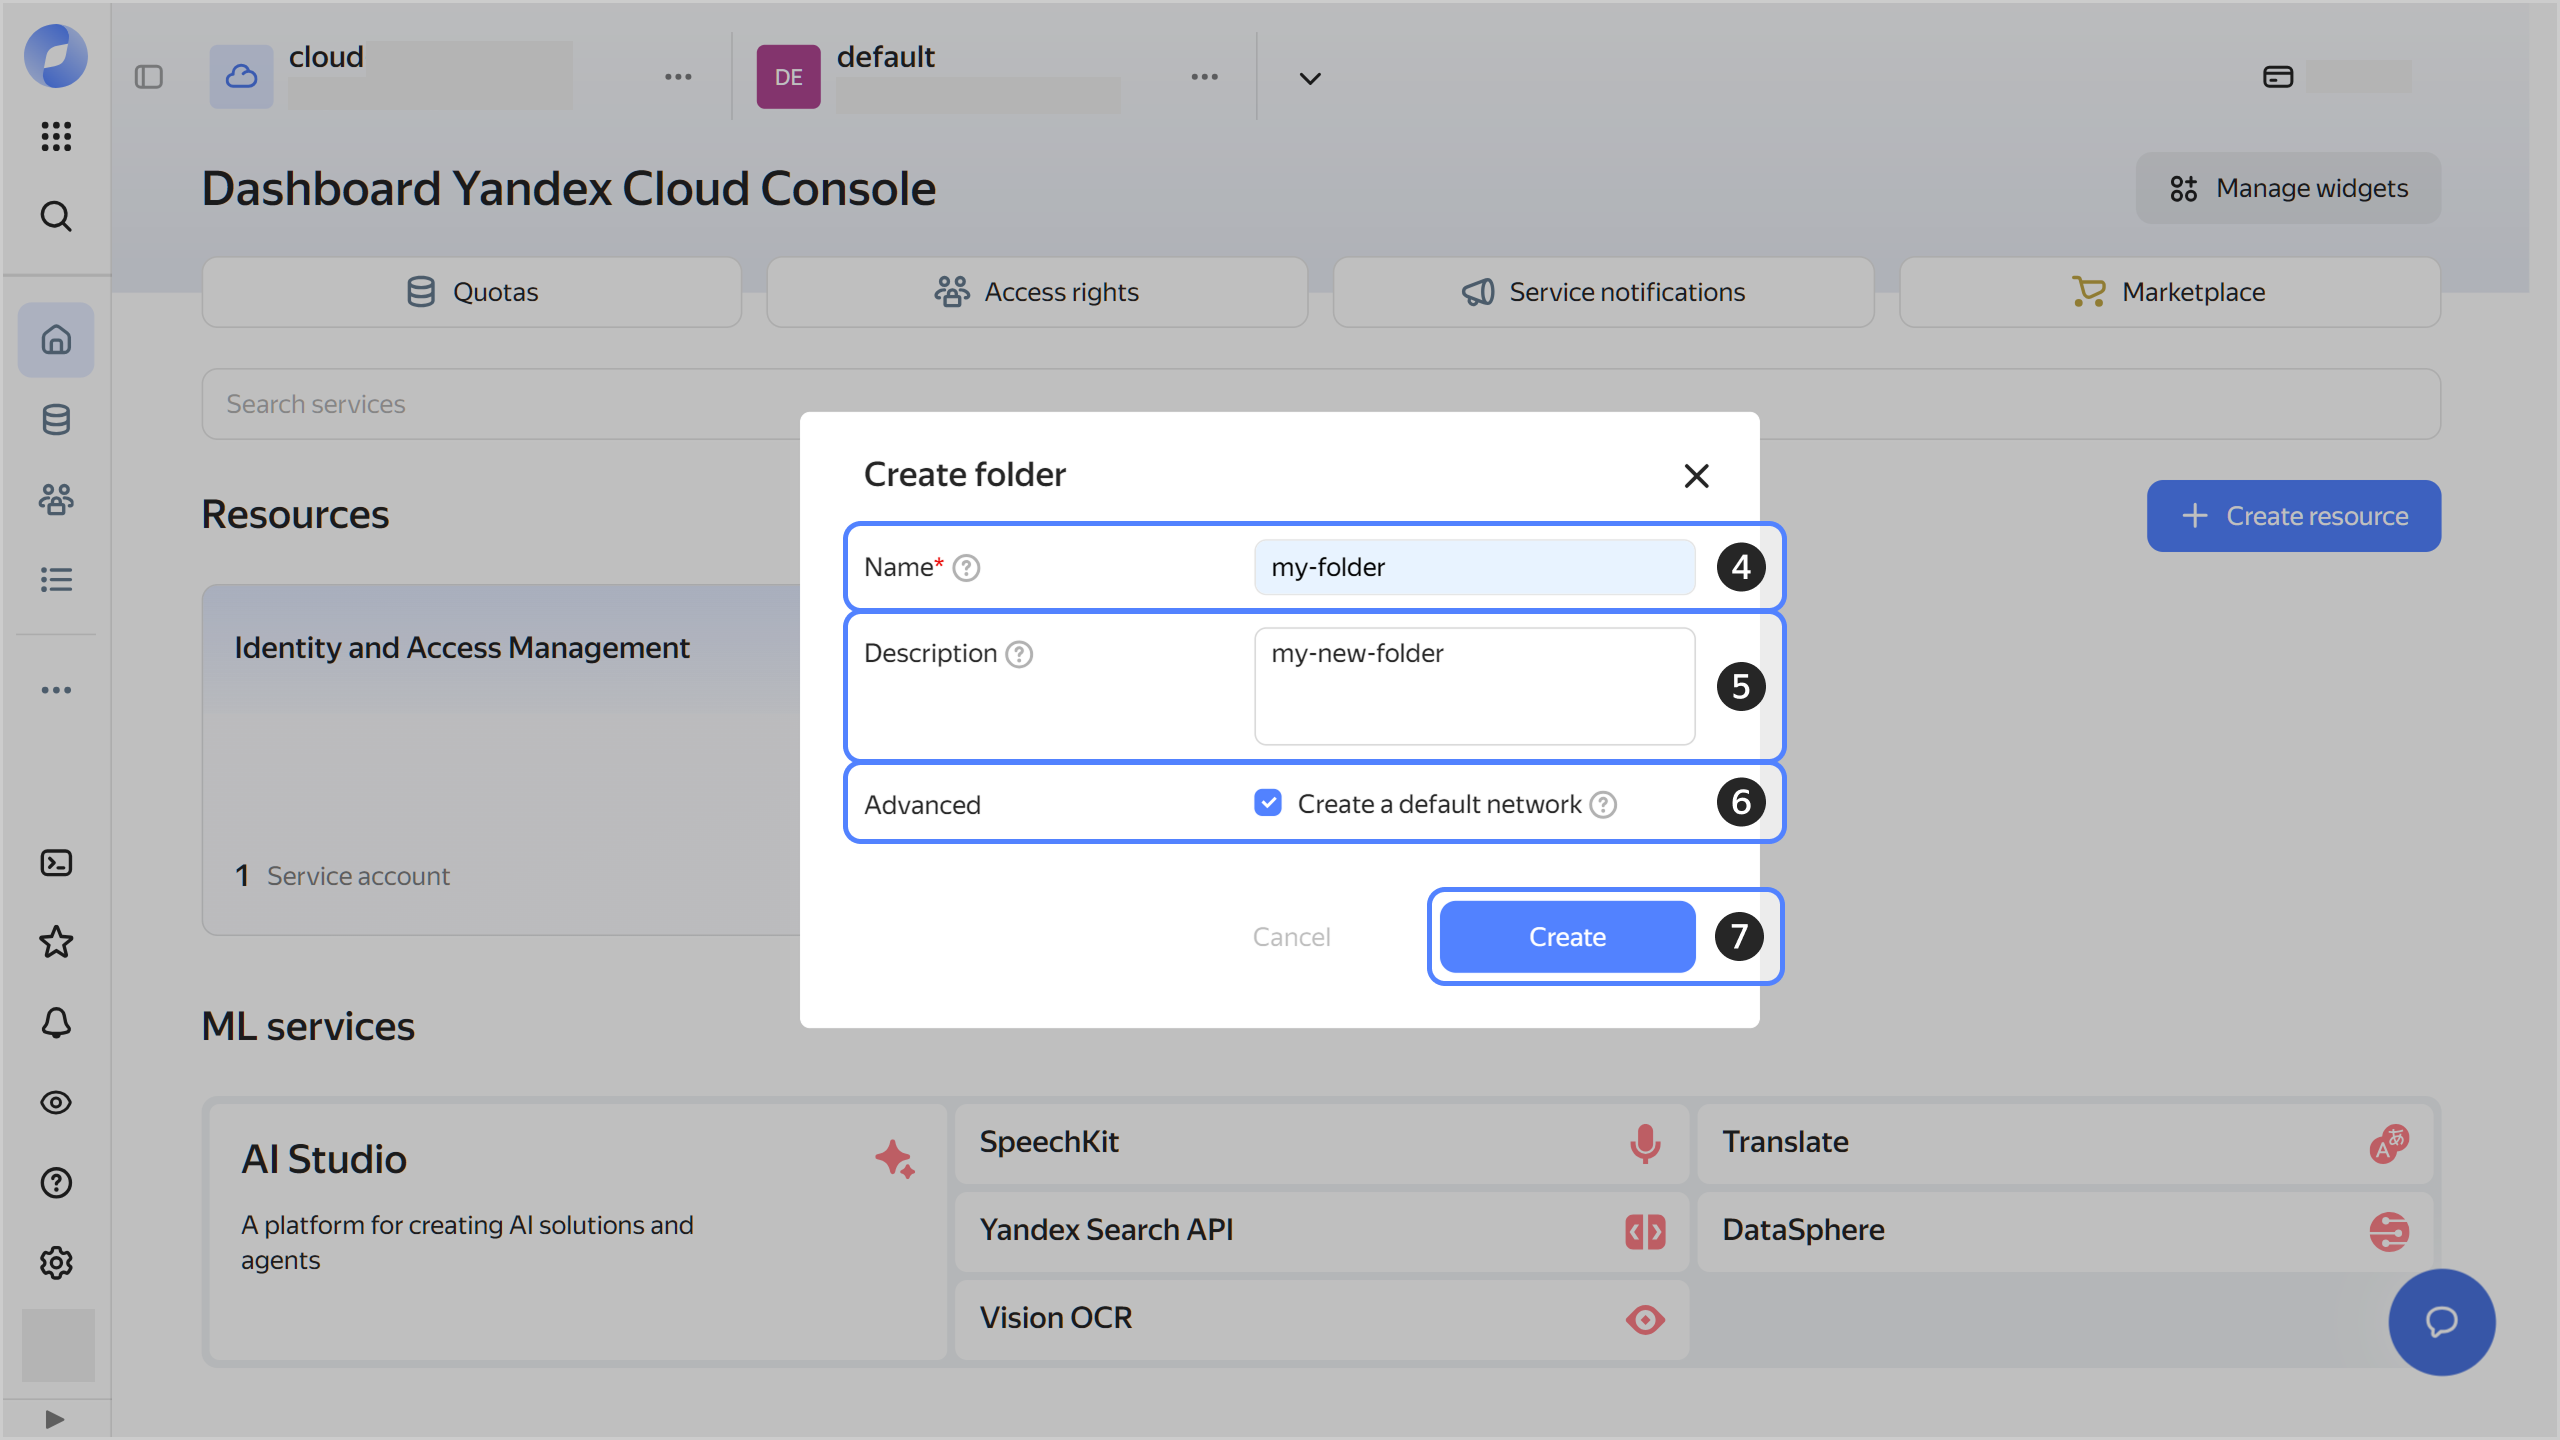
To create a registry, you will need a folder in Yandex Cloud. If you do not have any folders yet, create one before creating a registry:
-
In the management console, in the top panel, click or and select the cloud.
-
To the right of the cloud name, click .
-
Select Create folder.

-
Give your folder a name. The naming requirements are as follows:
- Length: between 3 and 63 characters.
- It can only contain lowercase Latin letters, numbers, and hyphens.
- It must start with a letter and cannot end with a hyphen.
-
Optionally, specify the description for your folder.
-
Select Create a default network. This will create a network with subnets in each availability zone. Within this network, you will also have a default security group, within which all network traffic will be allowed.
-
Click Create.
To work with Container Registry and Docker images, install the Yandex Cloud CLI and configure Docker.
Creating a registry and performing basic operations on Docker images
-
Create a registry in Container Registry:
yc container registry create --name my-first-registryResult:
..done
id: crpc9qeoft23********
folder_id: b1g0itj57rbj********
name: my-first-registry
status: ACTIVE
created_at: "2018-12-25T12:24:56.286Z"
You will use the received
IDto access the created registry later. -
Authenticate in Container Registry using Docker Credential helper:
-
Configure Docker to use
docker-credential-yc:yc container registry configure-dockerResult:
Credential helper is configured in '/home/<user>/.docker/config.json'During setup, information about the current user profile is saved.
-
Make sure that Docker is configured.
The following line must appear in the
/home/<user>/.docker/config.jsonconfiguration file:"cr.yandex": "yc"
-
-
Pull a Docker image from Docker Hub:
docker pull ubuntu -
Assign the pulled Docker image a tag in this format:
cr.yandex/<registry_ID>/<Docker_image_name>:<tag>:docker tag ubuntu \ cr.yandex/<registry_ID>/ubuntu:hello -
Push the Docker image to the repository Container Registry:
docker push \ cr.yandex/<registry_ID>/ubuntu:hello -
Run the Docker image:
docker run \
cr.yandex/<registry_ID>/ubuntu:hello