Configuring a secure GRE tunnel over IPsec
For secure communication between remote resources and data transmission over public communication channels, e.g., the internet, you can use secure connection technologies, such as the IPsec protocol. However, IPsec has significant limitations: it is only designed for IP packet transmission, does not support multicast delivery, and cannot be combined with other protocols within a single request.
IPsec can be boosted using the GRE protocol configured as GRE over IPsec. GRE encapsulates network packets in IP packets, enabling you to transmit any traffic over IPsec.
In this example, you will create a secure GRE-over-IPsec tunnel between two Cisco CSR 1000v virtual routers hosted in different virtual networks and availability zones in Yandex Cloud.
You will configure IPsec in NAT-T (NAT Traversal) mode, since Yandex Cloud employs NAT, while GRE does not support using ports. This mode enables the translation of router IP addresses over NAT when using a GRE-over-IPsec tunnel. This makes the tunnel configuration in our example suitable for both the Yandex Cloud infrastructure and remote resources placed behind the device that provides NAT.
To set up a secure tunnel between two virtual routers:
- Get your cloud ready.
- Create an SSH key pair.
- Create folders.
- Create two VMs with a Cisco Cloud Services Router.
- Configure IPSec protocols.
- Create tunnel interfaces.
- Configure routing.
- Test the tunnel.
If you no longer need the resources you created, delete them.
Getting started
Sign up for Yandex Cloud and create a billing account:
- Navigate to the management console and log in to Yandex Cloud or create a new account.
- On the Yandex Cloud Billing page, make sure you have a billing account linked and it has the
ACTIVEorTRIAL_ACTIVEstatus. If you do not have a billing account, create one and link a cloud to it.
If you have an active billing account, you can create or select a folder for your infrastructure on the cloud page.
Learn more about clouds and folders here.
Required paid resources
Alert
When using a Cisco CSR 1000v image without a license, the router throughput is limited to 100 Kbps. To remove this limitation, install a license.
The infrastructure support cost includes:
- Fee for disks and continuously running VMs (see Yandex Compute Cloud pricing).
- Fee for using an external IP address (see Yandex Virtual Private Cloud pricing).
Create an SSH key pair
To connect to a VM over SSH, you need a key pair: the public key resides on the VM, and the private one is kept by the user. This method is more secure than connecting with login and password.
Note
SSH connections using a login and password are disabled by default on public Linux images that are provided by Yandex Cloud.
Cisco Cloud Services Router (CSR) 1000v only supports keys generated using the RSA algorithm.
To create a key pair:
-
Open the terminal.
-
Use the
ssh-keygencommand to create a new key:ssh-keygen -t rsa -b 2048After you run the command, you will be asked to specify the names of files where the keys will be saved and enter the password for the private key. The default name is
id_rsa. Keys are created in the~/.sshdirectory.The public part of the key will be saved in the
<key_name>.pubfile.
-
Run
cmd.exeorpowershell.exe. -
Use the
ssh-keygencommand to create a new key:ssh-keygen -t rsa -b 2048After you run the command, you will be asked to specify the names of files where the keys will be saved and enter the password for the private key. The default name is
id_rsa. The keys are created inC:\Users\<username>\.ssh\orC:\Users\<username>\depending on the command-line interface.The public part of the key will be saved to a file named
<key name>.pub.
Create keys using the PuTTY app:
-
Download and install PuTTY.
-
Add the folder with PuTTY to the
PATHvariable:- Click Start and type Change system environment variables in the Windows search bar.
- Click Environment Variables... at the bottom right.
- In the window that opens, find the
PATHparameter and click Edit. - Add your folder path to the list.
- Click OK.
-
Launch the PuTTYgen app.
-
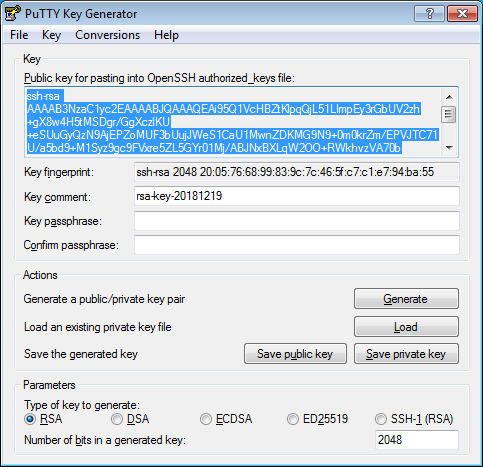
Select RSA for the type of pair to generate and set the length to 2048. Click Generate and move the cursor in the field above it until key creation is complete.
-
In Key passphrase, enter a strong password. Enter it again in the field below.
-
Click Save private key and save the private key. Do not share its key phrase with anyone.
-
Save the key to a text file. To do this, copy the public key from the text field to a text file named
id_rsa.pub. Please note that the key must be written as a single line (no returns or line breaks).
Warning
Save the private key in a secure location, as you will not be able to connect to the VM without it.
Create folders
To test tunneling between two different virtual networks, place Yandex Cloud resources in different folders. To create a new folder:
- In the management console, select a cloud and click → Create folder at the top right.
- Enter the folder name:
site-d. - Add a folder description if required.
- Select Create a default network.
- Click Create.
If you do not have the Yandex Cloud CLI yet, install and initialize it.
Create a folder:
yc resource-manager folder create \
--name site-d \
--description "Folder for site-d"
To create a folder, use the create REST API method for the Folder resource or the FolderService/Create gRPC API call.
If you do not have Terraform yet, install it and configure the Yandex Cloud provider.
To manage infrastructure using Terraform under a service account or user accounts (a Yandex account, a federated account, or a local user), authenticate using the appropriate method.
-
In the configuration file, describe the resources you want to create:
resource "yandex_resourcemanager_folder" "folder1" {
   cloud_id    = "<cloud_ID>"
   name        = "site-d"
   description = "Folder for site-d"
}
For more on the properties of the
yandex_resourcemanager_folderresource in Terraform, see this provider guide. -
Make sure the configuration files are correct.
-
In the command line, navigate to the directory where you created the configuration file.
-
Check the configuration using this command:
terraform validateIf the configuration is valid, you will get this message:
Success! The configuration is valid. -
Run this command:
terraform planIf the configuration is correct, the terminal will display a list of the resources and their settings. Otherwise, Terraform will show any detected errors.
-
-
Deploy the cloud resources.
-
If the configuration is correct, run this command:
terraform apply -
Confirm creating the resources: type
yesand press Enter.
This will create the folder in the specified cloud. You can check the new folder and its settings using the management console or this CLI command:
yc resource-manager cloud list -
Repeat these steps to create a second folder named site-b.
Create two VMs with Cisco Cloud Services Router
Create your first VM with Cisco Cloud Services Router
-
In the management console, select
site-d. -
Click Create resource and select Virtual machine instance.
-
Under Boot disk image, in the Product search field, enter
Cisco CSRand select a Cisco CSR public image. -
Under Location, select the
ru-central1-davailability zone. -
Under Computing resources, navigate to the
Customtab and specify the platform, number of vCPUs, and amount of RAM:- Platform:
Intel Ice Lake - vCPU:
2 - Guaranteed vCPU performance:
100% - RAM:
4 GB
- Platform:
-
Under Network settings:
- In the Subnet field, select the network and subnet to connect your VM to.
- In the Public IP address field, keep
Autoto assign the VM a random external IP address from the Yandex Cloud pool or select a static address from the list if you reserved one.
-
Under Access, select SSH key and specify the VM access credentials:
- In the Login field, enter a username. Do not use
rootor other reserved usernames. To perform operations requiring root privileges, use thesudocommand. -
In the SSH key field, select the SSH key saved in your organization user profile.
If there are no SSH keys in your profile or you want to add a new key:
-
Click Add key.
-
Enter a name for the SSH key.
-
Select one of the following:
-
Enter manually: Paste the contents of the public SSH key. You need to create an SSH key pair on your own. -
Load from file: Upload the public part of the SSH key. You need to create an SSH key pair on your own. -
Generate key: Automatically create an SSH key pair.When adding a new SSH key, an archive containing the key pair will be created and downloaded. In Linux or macOS-based operating systems, unpack the archive to the
/home/<user_name>/.sshdirectory. In Windows, unpack the archive to theC:\Users\<user_name>/.sshdirectory. You do not need additionally enter the public key in the management console.
-
-
Click Add.
The system will add the SSH key to your organization user profile. If the organization has disabled the ability for users to add SSH keys to their profiles, the added public SSH key will only be saved in the user profile inside the newly created resource.
-
- In the Login field, enter a username. Do not use
-
Under General information, specify the VM name:
cisco-router-d. -
Under Additional, enable
Serial console access. -
Click Create VM.
It may take a few minutes to create your VM. When the VM status changes to RUNNING, you can use the serial console.
Set the host name for the router
-
In the management console, select the folder containing your VM.
-
Navigate to Compute Cloud.
-
In the VM list, select
cisco-router-d. -
Go to the Serial console tab and click Connect.
-
Wait for the operating system to boot.
-
To switch to privileged mode, run this command in the serial console:
enable -
Enter configuration mode and set the host name for the router:
conf t
hostname cisco-router
The router name at the beginning of the command line should change to
cisco-router.
Create a user with administrator privileges
Create a user with administrator privileges and password authentication disabled:
In the serial console, run this command:
username test-user privilege 15
Prepare the key
If your public SSH key is longer than 72 characters, split it into chunks of 72 characters each:
-
In your computer terminal, run this command:
fold -bw 72 <public_key_file_path>This will output your public SSH key split into chunks of 72 characters each.
-
Save the key hash:
ssh-keygen -E md5 -lf <public_key_file_path>
Configure authentication using SSH keys
-
In the serial console, enable VM access over SSH:
conf t aaa new-model ip ssh server algorithm authentication publickey ip ssh pubkey-chain -
Create a user named
test-userand provide your public SSH key in the chunks into which you split it at the previous step:username test-user key-string <public_key_row> ... <public_key_row> exit exit exit exit -
Make sure the key has been added:
show run | beg ip sshResult:
ip ssh pubkey-chain
  username test-user
   key-hash ssh-rsa <key_hash> <username_associated_with_this_key>
!
!
...
Compare the SSH key hash on the router with the key hash on your computer.
-
In the serial console, enter the password that enables privileged mode:
cisco-router#configure terminal
cisco-router(config)#enable secret <password>
Check the SSH connection to the router
-
Log in to the router via SSH by running this command in your computer terminal:
ssh -i <private_key_file_path> test-user@<router_public_IP_address>If the configuration is correct, you will log in to the router as
test-user. If these actions produce no connection, make sure the router configuration is correct in the serial console, i.e., check whether you ran theaaa new-modelcommand, the key hashes are identical on your computer and the router, and password authorization is disabled for the test user. If still unable to locate the issue, repeat the previous steps. -
Switch to privileged mode. To do this, enter the
enablecommand and your password. If the configuration is correct, you can proceed to configuring the router.
Set up and configure a second VM with a Cisco Cloud Services Router
- In the
site-bfolder, create a VM namedcisco-router-bby following the above steps. Select ru-central1-b as its availability zone. - Set up the VM in the same way as the
cisco-router-dVM.
Configure the IPSec protocols
Warning
- The settings are the same on both VMs, except as specifically mentioned.
- You will configure the protocols in the terminal connected to the VM over SSH, in privileged mode.
-
Configure the global parameters for IKEv2:
conf t crypto logging ikev2 crypto ikev2 nat keepalive 900 crypto ikev2 dpd 10 2 periodic -
Configure an IKEv2
proposal:crypto ikev2 proposal MY_IKEV2_PROPOSAL encryption aes-cbc-256 integrity sha256 group 2 exit -
Configure an IKEv2
policy:crypto ikev2 policy MY_IKEV2_POLICY proposal MY_IKEV2_PROPOSAL exit -
Set a secret key:
Cisco-router-d VMCisco-router-b VMcrypto ikev2 keyring MY_IKEV2_KEYRING peer SiteB address cisco-router-b pre-shared-key <secret_key> exitcrypto ikev2 keyring MY_IKEV2_KEYRING peer SiteA address cisco-router-d pre-shared-key <secret_key> exitWhere:
<secret_key>: Encryption key that is at least 16 characters long, e.g.,MySecretKey12345. Use the same key on both VMs.
-
Create an IKEv2 profile:
Cisco-router-d VMCisco-router-b VMcrypto ikev2 profile MY_IKEV2_PROFILE match address local interface GigabitEthernet1 match identity remote address cisco-router-b authentication remote pre-share authentication local pre-share keyring local MY_IKEV2_KEYRING lifetime 28800 dpd 20 2 periodic exitcrypto ikev2 profile MY_IKEV2_PROFILE match address local interface GigabitEthernet1 match identity remote address cisco-router-d authentication remote pre-share authentication local pre-share keyring local MY_IKEV2_KEYRING lifetime 28800 dpd 20 2 periodic exitNote
For testing purposes, you can use the
0.0.0.0template rather than IP addresses to provide access to any IP.
You can also set up separate profiles for different peers. -
Add the IKEv2 profile to the IPsec profile:
crypto ipsec transform-set ESP_AES128_SHA256 esp-aes esp-sha-hmac
   mode tunnel
   exit
crypto ipsec profile MY_IPSEC_PROFILE
   set transform-set ESP_AES128_SHA256
   set ikev2-profile MY_IKEV2_PROFILE
   exit
exit
Create tunnel interfaces
Warning
- The settings are the same on both VMs, except as specifically mentioned.
- You will configure the protocols in the terminal connected to the VM over SSH, in privileged mode.
-
Configure the GRE tunnel:
Cisco-router-d VMCisco-router-b VMconf t int tu192 ip address 192.168.0.1 255.255.255.0 no ip redirects no ip proxy-arp ip mtu 1400 ip tcp adjust-mss 1360 tunnel source GigabitEthernet1 tunnel destination cisco-router-b tunnel mode ipsec ipv4 tunnel protection ipsec profile MY_IPSEC_PROFILEconf t int tu192 ip address 192.168.0.2 255.255.255.0 no ip redirects no ip proxy-arp ip mtu 1400 ip tcp adjust-mss 1360 tunnel source GigabitEthernet1 tunnel destination cisco-router-d tunnel mode ipsec ipv4 tunnel protection ipsec profile MY_IPSEC_PROFILE -
Check whether the tunnel is there:
Cisco-router-d VMCisco-router-b VMshow crypto ikev2 sa remote cisco-router-bshow crypto ikev2 sa remote cisco-router-dResult:
Tunnel-id Local                 Remote                fvrf/ivrf            Status
4         10.128.0.32/4500      51.250.***.***/4500   none/none            READY
      Encr: AES-CBC, keysize: 256, PRF: SHA256, Hash: SHA256, DH Grp:2, Auth sign: PSK, Auth verify: PSK
      Life/Active Time: 28800/23528 sec
You can also view tunnel logs by running these commands:
debug crypto ikev2
conf t
do sh log
Configure routing
Warning
- The settings are the same on both VMs, except as specifically mentioned.
- You will configure the protocols in the terminal connected to the VM over SSH, in privileged mode.
-
To make sure the requests get responses, configure a Loopback interface:
Cisco-router-d VMCisco-router-b VMconf t int lo10 ip address 10.1.1.1 255.255.255.255 exitconf t int lo10 ip address 10.1.1.2 255.255.255.255 exit -
To enable dynamic routing, configure the Border Gateway Protocol (BGP):
Cisco-router-d VMCisco-router-b VMrouter bgp 65001 bgp log-neighbor-changes neighbor 192.168.0.2 remote-as 65002 address-family ipv4 network 10.1.1.1 mask 255.255.255.255 neighbor 192.168.0.2 activate exit exit exitrouter bgp 65002 bgp log-neighbor-changes neighbor 192.168.0.1 remote-as 65001 address-family ipv4 network 10.1.1.2 mask 255.255.255.255 neighbor 192.168.0.1 activate exit exit exit
Test the GRE tunnel
Make sure this resulted in sending and returning the packets. To do this, run this command on the cisco-router-d VM:
ping 10.1.1.2 source lo10
Result:
Type escape sequence to abort.
Sending 5, 100-byte ICMP Echos to 10.1.1.2, timeout is 2 seconds:
Packet sent with a source address of 10.1.1.1
!!!!!
Success rate is 100 percent (5/5), round-trip min/avg/max = 10/10/11 ms
For GRE tunnel performance diagnostics, you can also run these commands:
show ip int brief
show ip bgp summary
show ip bgp
show ip route bgp
How to delete the resources you created
To stop paying for the resources you created: