Getting started with Yandex BareMetal
Lease your first physical server and connect to it. All the leased server's resources are exclusively yours, thus providing better performance than an equivalent virtual machine.
Getting started
Sign up for Yandex Cloud and create a billing account:
- Navigate to the management console and log in to Yandex Cloud or create a new account.
- On the Yandex Cloud Billing page, make sure you have a billing account linked and it has the
ACTIVEorTRIAL_ACTIVEstatus. If you do not have a billing account, create one and link a cloud to it.
If you have an active billing account, you can create or select a folder for your infrastructure on the cloud page.
Learn more about clouds and folders here.
Renting a server
-
In the management console, select the folder where you want to lease a server.
-
Navigate to BareMetal.
-
Click Lease server and, in the window that opens, select
Stock configurationsand a suitable configuration for your BareMetal server, e.g.,BA-i103-S-10G.To select the suitable server configuration, click the section with its name in the central part of the screen.
Note
To quickly find the right configuration, you can use the filter with the hardware characteristics of the configurations on the right side of the screen.
Tip
You can reduce the cost of renting a server in some configurations by ordering server assembly.
To use the discount, hover over Cheaper with assembly under the configuration at hand and click Go to assembly in the pop-up window.
When ordering a server with assembly, follow the steps below to configure the server properties. In this case, the server will not be available immediately, but only after the assembly is completed (within four calendar days), and at a lower price.
-
In the server configuration window that opens:
-
Under Configuration, Location, and Lease conditions, make sure the server configuration you have provided so far is adequate.
If not, click under Configuration to return to configuration setup.
-
In the Lease duration field, select the server lease period.
Tip
For initial testing, you can lease a server only for one day or one month. Should you need more time, your server lease will automatically renew for the same period.
-
In the Number of servers field, keep
1. -
Under Image, select
Marketplaceand an image runningUbuntu 24.04 LTS. -
Under Disk, click Configure disk layout to configure partitions for the server disks.
In the window that opens, leave the default disk partitioning settings or edit them, then click Save.
-
Under Network interfaces, in the Interface 1 section, select a private subnet in the availability zone you are renting the server in.
If the server’s availability zone does not have a private subnet yet, or you want to create a new private subnet, click Create and, in the window that opens, specify subnet settings as described in Creating a private subnet.
-
Under Network interfaces, set the Public address field to
From ephemeral subnetin the Interface 2 section. -
Under Access:
-
In the Password field, select one of the following options to create a root password:
-
To generate a new root password, select
New passwordand click Generate.Warning
This option requires you to maintain password security. Save the password you generated in a secure location. Yandex Cloud does not store it, and you will not be able to retrieve it once the server is deployed.
-
To use the root password saved in a Yandex Lockbox secret, select
Lockbox secret.In the Name, Version, and Key fields, select the secret containing your password, its version, and its key, respectively.
If you do not have a Yandex Lockbox secret, click Create to create it.
Choose the
Customsecret type to specify a custom password orGeneratedto generate password automatically.
-
-
In the Public SSH key field, select the SSH key saved in your organization user profile.
If there are no SSH keys in your profile or you want to add a new key:
-
Click Add key.
-
Enter a name for the SSH key.
-
Select one of the following:
-
Enter manually: Paste the contents of the public SSH key. You need to create an SSH key pair on your own. -
Load from file: Upload the public part of the SSH key. You need to create an SSH key pair on your own. -
Generate key: Automatically create an SSH key pair.When adding a new SSH key, an archive containing the key pair will be created and downloaded. In Linux or macOS-based operating systems, unpack the archive to the
/home/<user_name>/.sshdirectory. In Windows, unpack the archive to theC:\Users\<user_name>/.sshdirectory. You do not need additionally enter the public key in the management console.
-
-
Click Add.
The system will add the SSH key to your organization user profile. If the organization has disabled the ability for users to add SSH keys to their profiles, the added public SSH key will only be saved in the user profile inside the newly created resource.
-
-
-
Under Server information, enter the server Name:
bm-server. -
Click Lease server.
-
Connect to the server
- In the management console, select the folder containing your server.
- Navigate to BareMetal.
- Find the server you need in the list, click in its row, and select KVM console.
To establish a server connection, specify the server public IP address which you can get using the management console, in the Public IP address field under Network interfaces on the server page.
In the terminal, run this command:
ssh root@<server_public_IP_address>
If this is your first time connecting to the server, you will get this unknown host warning:
The authenticity of host '51.250.83.243 (51.250.83.243)' can't be established.
ED25519 key fingerprint is SHA256:6Mjv93NJDCaf/vu3NYwiLQK4tKI+4cfLtkd********.
This key is not known by any other names.
Are you sure you want to continue connecting (yes/no/[fingerprint])?
Type yes into the terminal and press Enter.
To establish a server connection, specify its public IP address which you can get using the management console, in the Public IP address field under Network interfaces on the server page.
Make sure the Windows account has read access to the key folder.
To connect to the server, run the following command in the command line:
ssh root@<server_public_IP_address>
If this is your first time connecting to the server, you will get this unknown host warning:
The authenticity of host '89.169.132.223 (89.169.132.223)' can't be established.
ECDSA key fingerprint is SHA256:DfjfFB+in0q0MGi0HnqLNMdHssLfm1yRanB********.
Are you sure you want to continue connecting (yes/no/[fingerprint])?
Type yes in the command line and press Enter.
To establish a server connection, specify the server public IP address which you can get using the management console, in the Public IP address field under Network interfaces on the server page.
Establish a connection using PuTTY:
- Run Pageant.
- Right-click the Pageant icon in the task bar.
- In the context menu, select Add key.
- Select a PuTTY-generated private key in
.ppkformat. Enter the password for this key, if it is set.
- Run PuTTY.
-
In the Host Name (or IP address) field, enter the public IP address of the server you want to connect to. Set the port to
22and the connection type to SSH.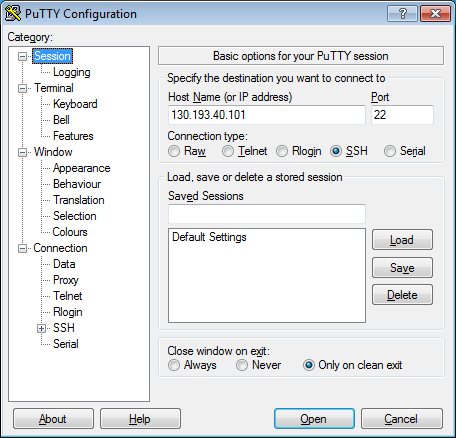
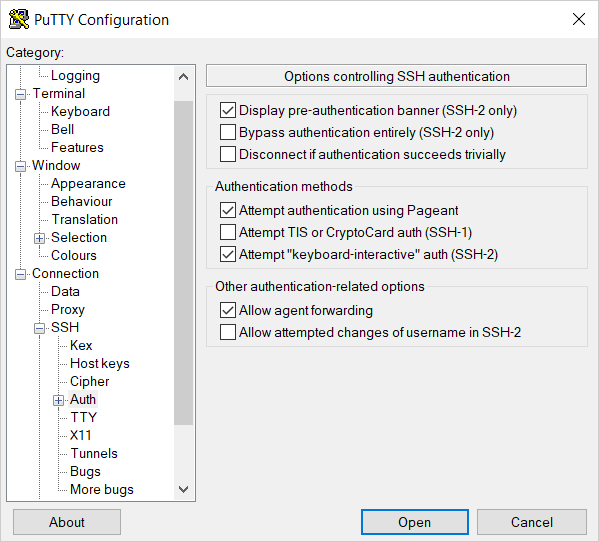
-
In the tree on the left, select Connection → SSH → Auth.
-
Enable Allow agent forwarding.
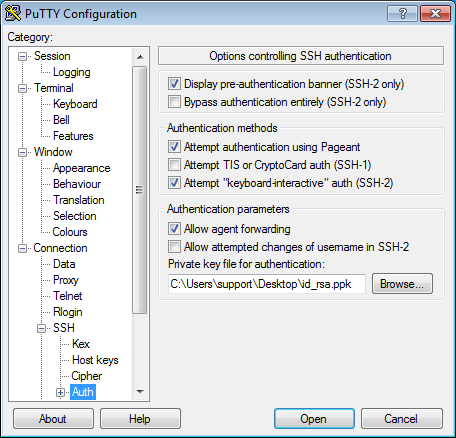
-
In the tree on the left, select Connection → SSH → Auth → Credentials.
-
In the Private key file for authentication field, select the private key file.
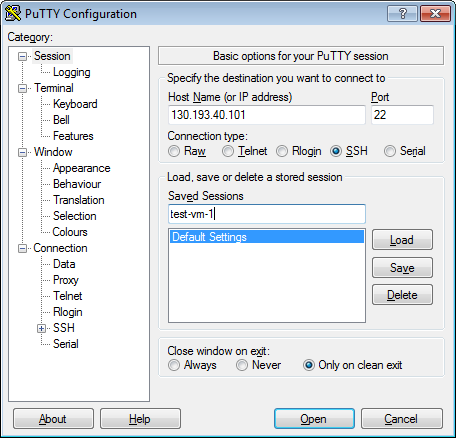
-
Go back to the Sessions menu. In the Saved sessions field, enter any name for the session and click Save. This will save the session settings under the specified name. You can use this session profile to connect with Pageant.
-
Click Open. If this is your first time connecting to the server, you may get this unknown host warning:
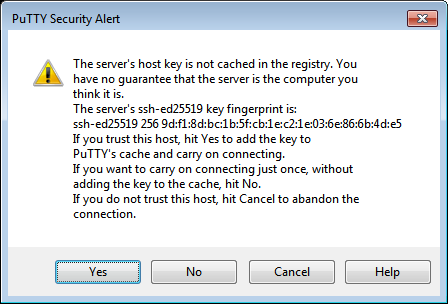
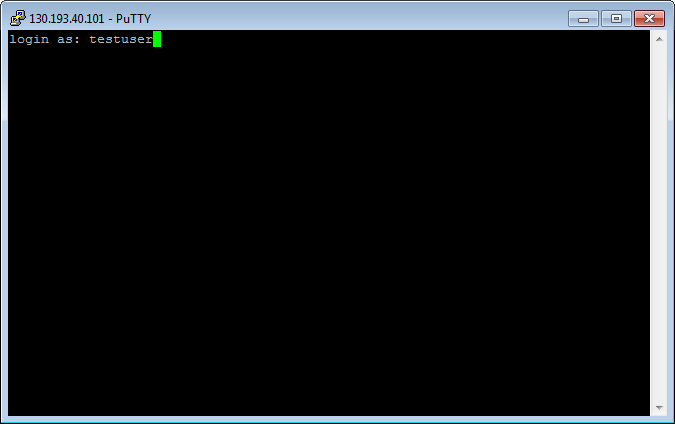
Click Accept. This will open a terminal window prompting you to enter the username to use for connection. Enter the
rootusername.If everything is configured correctly, a connection to the server will be established.
-
If you saved the session profile in PuTTY, you can use Pageant for future connections:
- Right-click the Pageant icon in the task bar.
- Select Saved sessions.
- In the saved sessions list, select the session you need.