Uploading audit logs to ArcSight SIEM

Create a trail to upload management event audit logs of resources in an individual folder to an Yandex Object Storage bucket with encryption enabled. Then configure continuous log delivery to ArcSight SIEM.
To complete the tutorial successfully, you must have an ArcSight instance installed.
The solution described in the tutorial follows the steps below:
- A trail uploads logs to an Object Storage bucket.
- A bucket is mounted via a FUSE interface to a folder on an intermediate VM.
- SmartConnector collects logs from the folder and delivers them to ArcSight for analysis.
For more information about the scripts for delivering audit logs to ArcSight, see Yandex Cloud Security Solution Library.
Note
Yandex Cloud Security Solution Library is a public repo on GitHub with a set of examples and recommendations on how to build a secure infrastructure in Yandex Cloud.
To configure delivery of audit log files to ArcSight:
- Get your cloud ready.
- Set up your environment.
- Assign roles to the service accounts.
- Create a trail.
- Mount your bucket.
- Connect ArcSight SmartConnector.
If you no longer need the resources you created, delete them.
Getting started
If you do not have the Yandex Cloud CLI yet, install and initialize it.
The folder used by default is the one specified when creating the CLI profile. To change the default folder, use the yc config set folder-id <folder_ID> command. You can also specify a different folder for any command using --folder-name or --folder-id. If you access a resource by its name, the search will be limited to the default folder. If you access a resource by its ID, the search will be global, i.e., through all folders based on access permissions.
Sign up for Yandex Cloud and create a billing account:
- Navigate to the management console and log in to Yandex Cloud or create a new account.
- On the Yandex Cloud Billing page, make sure you have a billing account linked and it has the
ACTIVEorTRIAL_ACTIVEstatus. If you do not have a billing account, create one and link a cloud to it.
If you have an active billing account, you can create or select a folder for your infrastructure on the cloud page.
Learn more about clouds and folders here.
Required paid resources
The infrastructure support cost includes:
- Fee for using VM instances (see Compute Cloud pricing).
- Fee for storing data in a bucket (see Object Storage pricing).
- Fee for data operations (see Object Storage pricing).
- Fee for using KMS keys (see Key Management Service pricing).
Set up your environment
Prepare an intermediate VM
You can use a VM that has access to an ArcSight instance or create a new one:
- Create a VM from a Linux image based on Ubuntu 20.04.
- Connect to the VM over SSH.
Create a bucket for audit logs
- In the management console, select the folder where you want to create a bucket, e.g.,
example-folder. - Navigate to Object Storage.
- Click Create bucket.
- On the bucket creation page:
-
Enter a name for the bucket by following the naming conventions.
-
Limit the maximum bucket size, if required.
If the value is
0, the size is not limited. It is similar to the enabled No limit option. -
Select the
With authorizationaccess type. -
Select the default storage class.
-
Click Create bucket.
-
Create an encryption key in Key Management Service
- In the management console, navigate to
example-folder. - Navigate to Key Management Service.
- Click Create key and specify:
- Name:
arcsight-kms. - Encryption algorithm:
AES-256. - Keep the default values for all other parameters.
- Name:
- Click Create.
Enable bucket encryption
- In the management console, go to the bucket created earlier.
- In the left-hand panel, select Security.
- Open the Encryption tab.
- In the KMS Key field, select
arcsight-kms. - Click Save.
Create service accounts
You need to create two accounts: one for a trail and one for a bucket.
Create a service account named sa-arcsight:
-
In the management console, navigate to
example-folder. -
Navigate to Identity and Access Management.
-
Click Create service account.
-
Enter a name for the service account according to the naming requirements:
- Length: between 3 and 63 characters.
- It can only contain lowercase Latin letters, numbers, and hyphens.
- It must start with a letter and cannot end with a hyphen.
For example,
sa-arcsight. -
Click Create.
Similarly, create a service account named sa-arcsight-bucket.
Create a static key
You will need the key ID and secret key when mounting the bucket.
-
In the management console, navigate to
example-folder. -
Navigate to Identity and Access Management.
-
In the left-hand panel, select Service accounts.
-
In the list that opens, select
sa-arcsight-bucket. -
Click Create new key in the top panel.
-
Select Create static access key.
-
Enter a description for the key and click Create.
-
Save the ID and the secret key.
Alert
After you close this dialog, the key value will no longer be available.
-
Create an access key for the
sa-arcsight-bucketservice account:yc iam access-key create --service-account-name sa-arcsight-bucketResult:
access_key: id: aje*******k2u service_account_id: aje*******usm created_at: "2022-09-22T14:37:51Z" key_id: 0n8*******0YQ secret: JyT*******zMP1 -
Save the ID (
key_id) and secret key (secret). This is the only time you can copy this key as it will not be shown again.
Assign roles to the service accounts
Assign the audit-trails.viewer, storage.uploader, and kms.keys.encrypterDecrypter roles to the sa-arcsight service account:
-
audit-trails.viewerrole for the folder:yc resource-manager folder add-access-binding \ --role audit-trails.viewer \ --id <folder_ID> \ --service-account-id <service_account_ID>Where:
--role: Role being assigned.--id:example-folderID.--service-account-id:sa-arcsightservice account ID.
For more information about the
yc resource-manager folder add-access-bindingcommand, see the CLI reference. -
Assign the
storage.uploaderrole for the folder the bucket is in:yc resource-manager folder add-access-binding \ --role storage.uploader \ --id <folder_ID> \ --service-account-id <service_account_ID>Where:
--role: Role being assigned.--id:example-folderID.--service-account-id:sa-arcsightservice account ID.
-
kms.keys.encrypterDecrypterrole for thearcsight-kmsencryption key:yc kms symmetric-key add-access-binding \ --role kms.keys.encrypterDecrypter \ --id <key_ID> \ --service-account-id <service_account_ID>Where:
--role: Role being assigned.--id: ID of thearcsight-kmsKMS key.--service-account-id:sa-arcsightservice account ID.
Assign the storage.viewer and kms.keys.encrypterDecrypter roles to the sa-arcsight-bucket service account:
-
storage.viewerrole for the folder:yc resource-manager folder add-access-binding \ --id <folder_ID> \ --role storage.viewer \ --service-account-id <service_account_ID>Where:
--id:example-folderID.--role: Role being assigned.--service-account-id:sa-arcsight-bucketservice account ID.
-
kms.keys.encrypterDecrypterrole for thearcsight-kmsencryption key:yc kms symmetric-key add-access-binding \ --role kms.keys.encrypterDecrypter \ --id <key_ID> \ --service-account-id <service_account_ID>Where:
--role: Role being assigned.--id: ID of thearcsight-kmsKMS key.--service-account-id:sa-arcsight-bucketservice account ID.
Create a trail
-
In the management console, navigate to
example-folder. -
Navigate to Audit Trails.
-
Click Create trail and specify:
- Name: Name of the trail you want to create, e.g.,
arcsight-trail. - Description: Trail description (optional).
- Name: Name of the trail you want to create, e.g.,
-
Under Destination, configure the destination object:
- Destination:
Object Storage. - Bucket: Bucket name.
- Object prefix: Optional parameter used in the full name of the audit log file.
Note
Use a prefix to store audit logs and third-party data in the same bucket. Do not use the same prefix for logs and other bucket objects because that may cause logs and third-party objects to overwrite each other.
- Encryption key: Specify the
arcsight-kmsencryption key used to encrypt the bucket.
- Destination:
-
Under Service account, select
sa-arcsight. -
Under Collecting management events, configure the collection of management event audit logs:
- Collecting events: Select
Enabled. - Resource: Select
Folder. - Folder: Automatically populated field containing the name of the current folder.
- Collecting events: Select
-
Under Collecting data events, select
Disabledin the Collecting events field. -
Click Create.
Warning
The solution will delete the logs from the bucket after they are exported to ArcSight. If you need to keep the logs in the bucket, create a separate bucket and trail.
Mount a bucket
A bucket is mounted on an intermediate VM where ArcSight SmartConnector is installed.
To mount the bucket, create a file with the static access key of the sa-arcsight-bucket service account.
-
On the intermediate VM, create a file with the static access key:
echo <access_key_ID>:<secret_access_key> > ${HOME}/.passwd-s3fs chmod 600 ${HOME}/.passwd-s3fs -
Install s3fs:
sudo apt install s3fs -
Create a directory to mount the bucket to, e.g.,
mybucketin your home directory:sudo mkdir ${HOME}/mybucket -
Mount the bucket:
s3fs <bucket_name> ${HOME}/mybucket -o passwd_file=${HOME}/.passwd-s3fs -o url=https://storage.yandexcloud.net -o use_path_request_style -
Check that the bucket was mounted:
ls ${HOME}/mybucket
Install and configure ArcSight SmartConnector
Note
To complete this stage of the tutorial, you need an ArcSight SmartConnector distribution and access to an ArcSight instance.
-
On the intermediate VM, install
ArcSight SmartConnector:- When installing it, select ArcSight FlexConnector JSON Folder Follower and specify the path to the
mybucketfolder. - Specify JSON configuration filename prefix:
yc.
- When installing it, select ArcSight FlexConnector JSON Folder Follower and specify the path to the
-
Download the
arcsight_contentfiles. -
Copy the
yc.jsonparser.propertiesfile from theflexfolder to the folder with this address:<agent_installation_folder>/current/user/agent/flexagent. -
Copy the
map.0.propertiesfile from theflexfolder to the folder with this address:<agent_installation_folder>/current/user/agent/map. -
Edit the
<agent_installation_folder>/current/user/agent.propertiesfile:agents[0].mode=DeleteFile agents[0].proccessfoldersrecursively=true -
Start the connector and make sure that events are received by ArcSight:
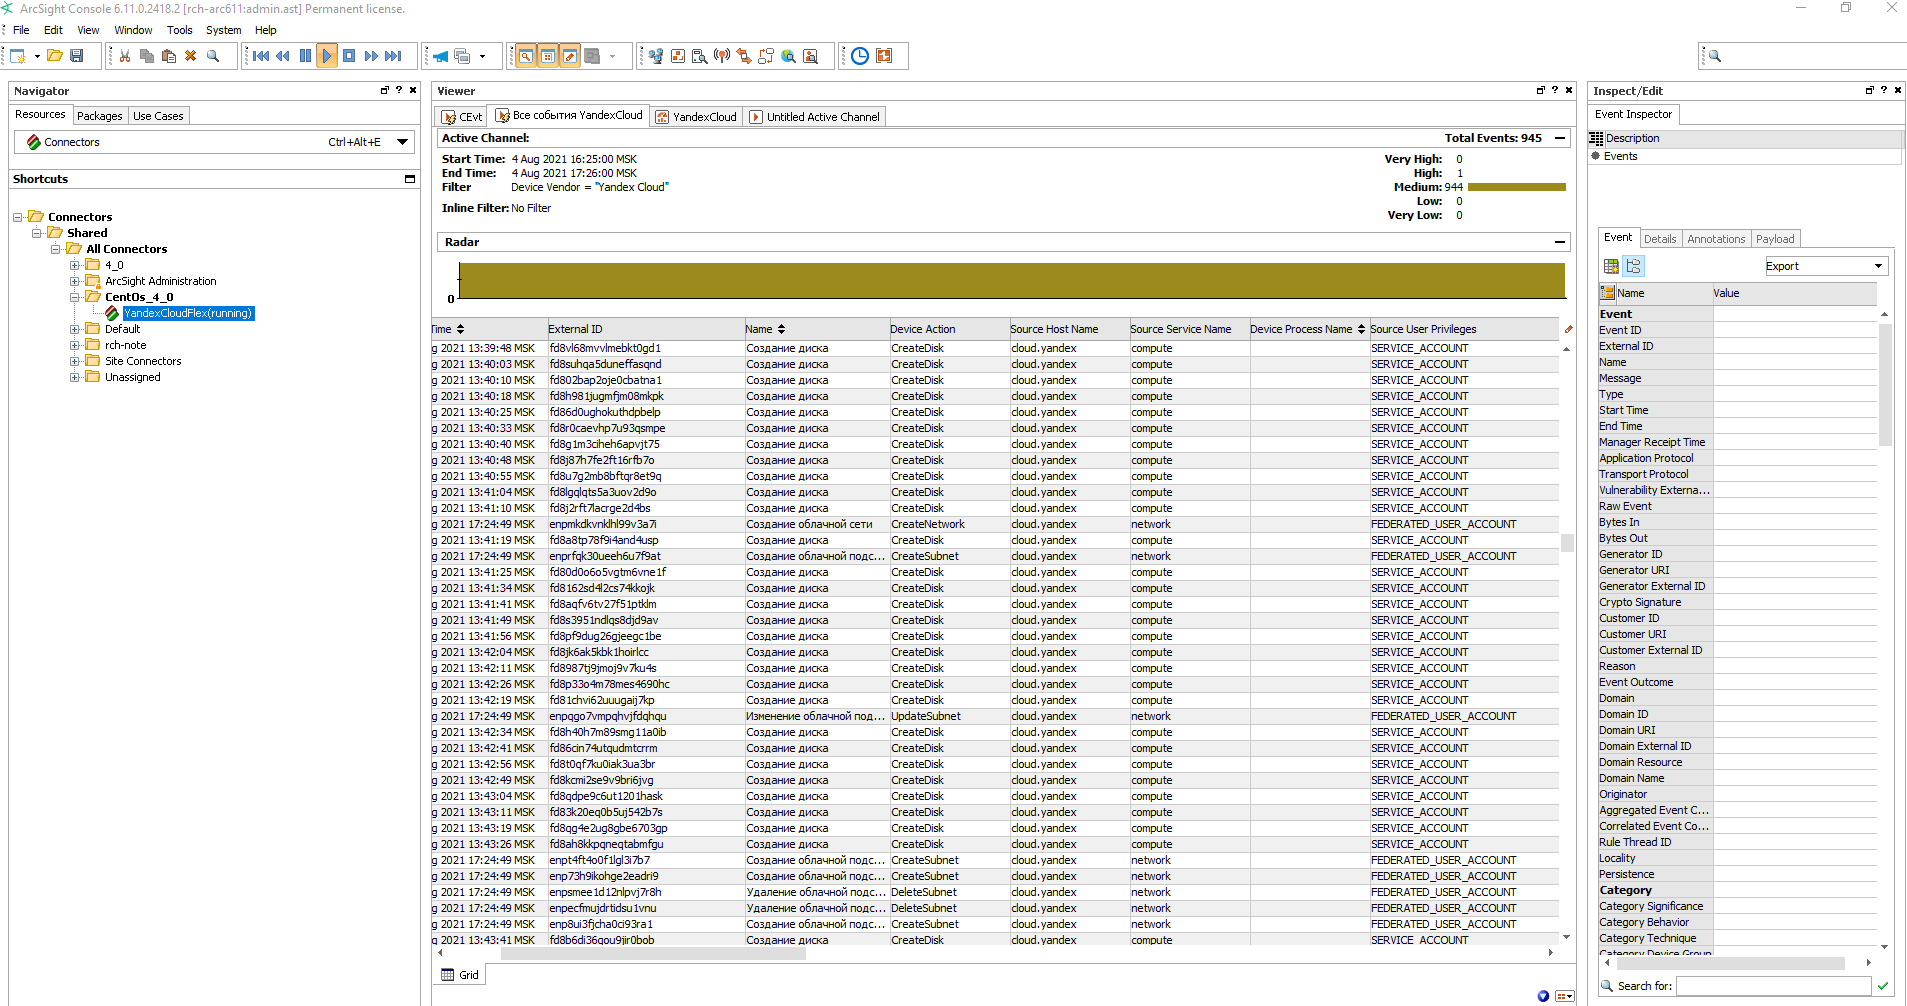
How to delete the resources you created
Some resources are not free of charge. Delete the resources you no longer need to avoid paying for them: